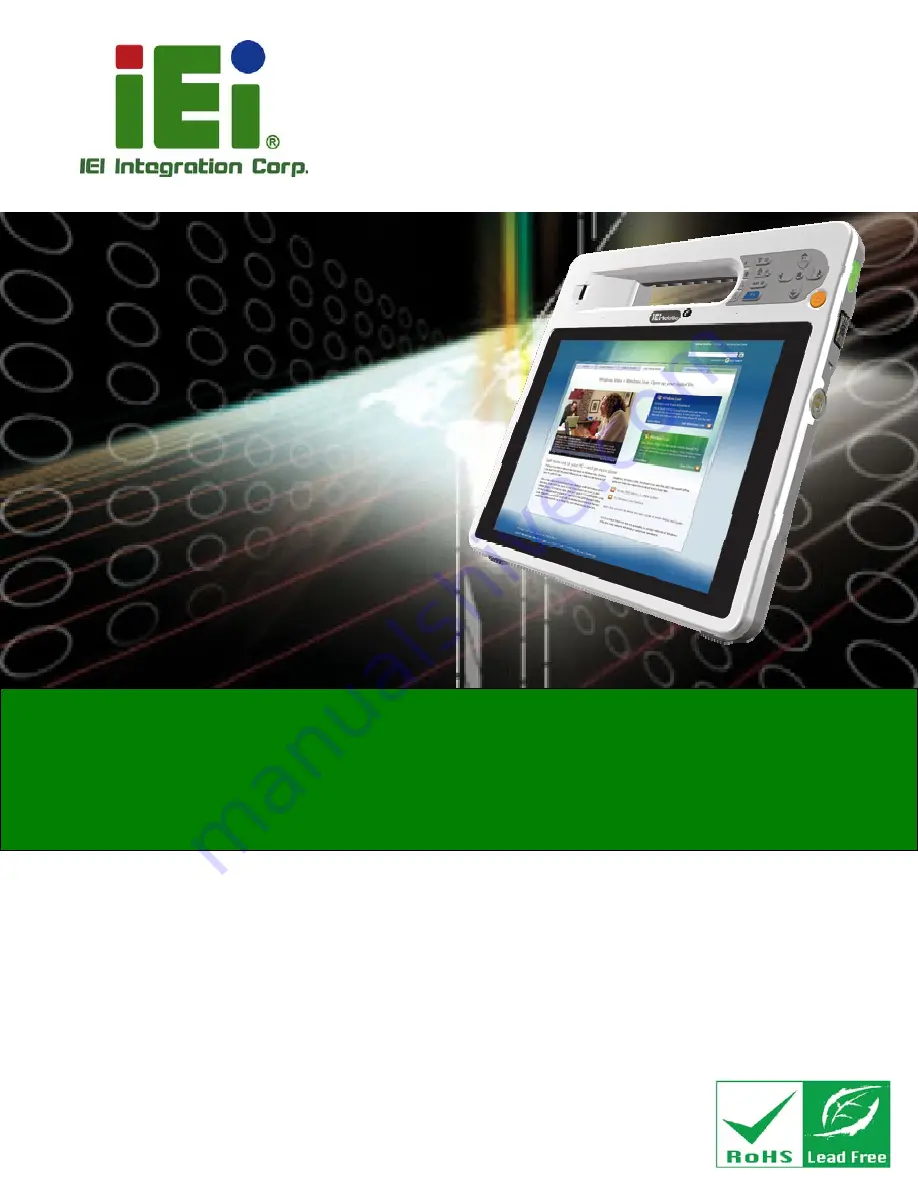
background image


ICEFIRE2-T10 Mobile Clinic Assistant 

Page i

User Manual 

10.4” Mobile Clinic Assistant with Intel® Atom

™

 N2800 CPU,

  4 GB DDR3 SDRAM, 802.11b/g/n Wireless, Bluetooth, 

  GbE LAN, USB, Barcode Scanner, Fingerprint Reader 

RoHS Compliant, IP 64 Compliant Front Panel 


Rev. 1.11 – February 4, 2015 

MODEL: 

ICEFIRE2-T10 

Summary of Contents for ICEFIRE2-T10

Page 1: ...er Manual 10 4 Mobile Clinic Assistant with Intel Atom N2800 CPU 4 GB DDR3 SDRAM 802 11b g n Wireless Bluetooth GbE LAN USB Barcode Scanner Fingerprint Reader RoHS Compliant IP 64 Compliant Front Pane...

Page 2: ...n Changes February 4 2015 1 11 Updated the front panel protection level to IP 64 Modified Section 2 2 Packing List August 21 2014 1 10 Updated for R11 version Updated touchscreen specifications Modifi...

Page 3: ...f the possibility of such damages This document contains proprietary information protected by copyright All rights are reserved No part of this manual may be reproduced by any mechanical electronic or...

Page 4: ...2 1 UNPACK THE ICEFIRE2 T10 13 2 2 PACKING LIST 14 3 HARDWARE INSTALLATION 17 3 1 BATTERY INSTALLATION 18 3 1 1 Charge the Battery 20 3 1 1 1 Through the ICEFIRE2 T10 20 3 1 1 2 Through Optional Dock...

Page 5: ...EL CHIPSET DRIVER 49 4 3 INTEL GRAPHICS DRIVER 51 4 4 REALTEK LAN DRIVER 52 4 5 AUDIO DRIVER 54 4 6 BARCODE SCANNER DRIVER 55 4 7 FINGERPRINT READER DRIVER 57 4 8 BLUETOOTH DRIVER 58 4 9 WIRELESS LAN...

Page 6: ...6 3 7 H W Monitor 92 6 3 8 Serial Port Console Redirection 93 6 3 9 IEI Feature 93 6 4 CHIPSET 94 6 4 1 Host Bridge Configuration 95 6 4 1 1 Intel IGD Configuration 96 6 4 2 South Bridge Configuration...

Page 7: ...6 8 2 15 Keyboard Connector LPT_DB1 117 8 2 16 Keypad Connector KEYPAD1 117 8 2 17 LED Torch Connector LEDPWR1 117 8 2 18 LVDS Connector CN2 118 8 2 19 Microphone Connector AMIC1 118 8 2 20 Power Inpu...

Page 8: ...nic Assistant Page viii C TERMINOLOGY 130 D WATCHDOG TIMER 134 E HAZARDOUS MATERIALS DISCLOSURE 137 E 1 HAZARDOUS MATERIALS DISCLOSURE TABLE FOR IPB PRODUCTS CERTIFIED AS ROHS COMPLIANT UNDER 2002 95...

Page 9: ...sert Batteries to Docking Station 22 Figure 3 7 SIM Card Slot Location 23 Figure 3 8 SIM Card Installation 23 Figure 3 9 Release the Stand 25 Figure 3 10 Lock the Stand 25 Figure 3 11 Secure the Holde...

Page 10: ...mbologies 45 Figure 3 40 Operating Settings 45 Figure 3 41 Scanning Triggering 46 Figure 3 42 Beeps Green Indicator LED 46 Figure 4 1 Chipset Driver Location 50 Figure 4 2 Intel Chipset Device Softwar...

Page 11: ...ocation 68 Figure 4 27 ICEFIRE Control Center Drivers 68 Figure 5 1 Control Center 70 Figure 5 2 Function Indicator Off 71 Figure 5 3 Function Indicator On 71 Figure 5 4 Module Status 72 Figure 5 5 Ca...

Page 12: ...nouts 113 Table 8 7 Front Camera Connector CAMARA2 Pinouts 113 Table 8 8 Camera Shutter Connector CAMSW1 Pinouts 114 Table 8 9 Debug Connector DBG_PORT1 Pinouts 114 Table 8 10 Digitizer Sensor Connect...

Page 13: ...xiii Table 8 23 RFID Connector RFID1 Pinouts 119 Table 8 24 Speaker Connector SPK1 Pinouts 120 Table 8 25 SPI Flash Connector SPI1 Pinouts 120 Table 8 26 SPI Flash Connector SPI2 Pinouts 120 Table 8 2...

Page 14: ...iguration 89 BIOS Menu 8 Super IO Configuration 90 BIOS Menu 9 Serial Port 1 Configuration Menu 91 BIOS Menu 10 Hardware Health Configuration 92 BIOS Menu 11 Serial Port Console Redirection 93 BIOS Me...

Page 15: ...ICEFIRE2 T10 Mobile Clinic Assistant Page 1 Chapter 1 1 Introduction...

Page 16: ...Embedded Standard 7 P operating system Wireless networking is enabled through an 802 11b g n wireless adapter A Bluetooth 3 0 EDR Class 2 module provides a connection to Bluetooth devices An optional...

Page 17: ...eless connection One Key Recovery IP 64 compliant front panel protection Windows Embedded Standard 7 P OS RoHS compliant 1 3 Model Variations There are three models of the ICEFIRE2 T10 series All of t...

Page 18: ...he ICEFIRE2 T10 has a 10 4 TFT XGA LCD that supports dual mode input digitizer and capacitive touch The ICEFIRE2 T10 detects and switches the input mode automatically The digitizer input mode is the p...

Page 19: ...h on off button to enable or disable Bluetooth connection o SAS Secure Attention Sequence button CTRL ALT DEL o Camera shutter button to take a picture Function Key Press the function key and a key to...

Page 20: ...reen light blinking Wi Fi is enabled o Bluetooth LED Blue light shows Bluetooth is enabled o Battery 1 status LED Orange light shows the Battery 1 is being charged o Battery 2 status LED Orange light...

Page 21: ...nectors button and readers as shown in 476Figure 1 5 Figure 1 5 Side Panels CAUTION DO NOT shine the light from the LED torch and the barcode scanner in eyes 1 7 Top Panel The top panel has three butt...

Page 22: ...tions The technical specifications for the ICEFIRE2 T10 systems are listed in the table below System ICEFIRE2 T10 CPU 1 86 GHz Intel Atom N2800 Chipset Intel NM10 Memory On board 4 0 GB 1333 MHz DDR3...

Page 23: ...Touch Screen Capacitive type supports multi touch and gesture Communication LAN 1 x 10 100 1000 Mbps RJ 45 Wireless LAN 802 11b g n Bluetooth Bluetooth 3 0 EDR Class 2 Optional GPS Yes HU model only O...

Page 24: ...x USB 3 0 1 x Ethernet RJ 45 port 1 x RFID on off switch 1 x Barcode scanner on off switch 1 x LED torch on off switch 1 x Power button with LED Front Panel Buttons and LED Indicators 1 x Five way nav...

Page 25: ...ICEFIRE2 T10 Mobile Clinic Assistant Page 11 1 10 Dimensions Figure 1 8 Dimensions units in mm...

Page 26: ...ICEFIRE2 T10 Mobile Clinic Assistant Page 12 Chapter 2 2 Unpacking...

Page 27: ...istband or similar device The installation steps below should be followed in order Step 1 Unpack the ICEFIRE2 T10 Step 2 Check all the required parts are included Step 3 Install and charge the battery...

Page 28: ...l parts box from the main box S t e p 0 2 2 Packing List The ICEFIRE2 T10 is shipped with the following components Quantity Item Image 1 ICEFIRE2 T10 mobile clinic assistant 1 Power cable 1 Digitizer...

Page 29: ...P N 7B000 000552 RS 1 One Key Recovery CD P N IEI 7B000 000478 RS Table 2 1 Packing List These optional items are also available Item Image Docking station with non Medical grade power adapter P N ICE...

Page 30: ...ICEFIRE2 T10 Mobile Clinic Assistant Page 16 Item Image Smart card reader P N ICEFIRE T10A SCR01 R10 Carrying bag P N 7Z000 ICEFIRET10APOUCH RS Table 2 2 Optional Items...

Page 31: ...ICEFIRE2 T10 Mobile Clinic Assistant Page 17 Chapter 3 3 Hardware Installation...

Page 32: ...nstallation This section covers the installation of the battery pack Step 1 Make sure the battery latches are released If not unlock them by sliding latches to the top Figure 3 1 Release Battery Latch...

Page 33: ...tant Page 19 Figure 3 2 Battery Installation Step 3 Lock the battery by sliding the battery latches down to the battery Figure 3 3 Lock the Battery Step 4 To view the battery capacity push the battery...

Page 34: ...tem 3 1 1 Charge the Battery The battery packs can be charged through the ICEFIRE2 T10 or the optional docking station 3 1 1 1 Through the ICEFIRE2 T10 To charge the battery packs through the ICEFIRE2...

Page 35: ...ndicators on the battery 476Figure 3 4 or via the Windows 7 power management screen 76Figure 3 5 Figure 3 5 Windows 7 Power Management Screen 3 1 1 2 Through Optional Docking Station To charge the bat...

Page 36: ...ocking station starts to charge the batteries 3 2 SIM Card Installation Optional The ICEFIRE2 T10 HU model is preinstalled a HSUPA module To be able to use the 3G network connection a SIM card must be...

Page 37: ...3 8 SIM Card Installation 3 2 1 Supported Frequency Range 6Table 3 1 lists the frequency range supported by the optional Gobi3000 WWLAN datacard Radio Mode Band UL Frequency MHz DL Frequency MHz WCDMA...

Page 38: ...ev A BC15 1710 1755 2110 2155 Narrowband GPS L1 1575 42 Table 3 1 Supported Frequency Range 3 3 Mounting the System Optional The following installation options are available Docking Station Wall mount...

Page 39: ...ure 3 9 Release the Stand Step 2 Move the stand downward Slide the two latches again to lock the stand into place Figure 3 10 Lock the Stand Step 3 Secure the holder onto the top of the docking statio...

Page 40: ...Page 26 Figure 3 11 Secure the Holder Step 4 Insert the ICEFIRE2 T10 into the docking station Snap the holder into place to secure the ICEFIRE2 T10 from being damaged Figure 3 12 Figure 3 12 Place the...

Page 41: ...ion securely Figure 3 13 VESA Mounting Retention Screw Holes Docking Station 3 4 I O Connectors 3 4 1 LAN Connection The RJ 45 connectors enable connection to an external network To connect a LAN cabl...

Page 42: ...0 3 4 2 USB Device Connection There is one USB 3 0 connector located on the right side of the ICEFIRE2 T10 To connect a USB device please follow the instructions below Step 1 Located the USB connecto...

Page 43: ...evice connector into the on board connector Step 0 3 4 2 1 Smart Card Reader Installation Optional To install the optional smart card reader please follow the steps below Step 1 Locate the USB port on...

Page 44: ...ICEFIRE2 T10 refer to Section 763 6 Step 4 Right click Computer from the start menu and select Manage Figure 3 17 Smart Card Reader Setting 1 Step 5 The Computer Management window appears Select Serv...

Page 45: ...rt Card Reader Setting 2 Step 6 Right click Smart Card and select Properties Figure 3 19 Smart Card Reader Setting 3 Step 7 The Smart Card Properties window appears Change the Startup type to Automati...

Page 46: ...ICEFIRE2 T10 Mobile Clinic Assistant Page 32 Figure 3 20 Smart Card Reader Setting 4...

Page 47: ...5 1 Serial Device Connection The ICEFIRE2 T10 Docking Station has a male DB 9 serial device connector on the bottom panel The serial device connector is for connecting a RS 232 serial device Follow t...

Page 48: ...nnector to the external interface by tightening the two retention screws on either side of the connector Step 0 3 5 1 1 RS 232 Serial Port Pinouts Following are the RS 232 serial port pinouts Pin Desc...

Page 49: ...15 connector is shown in 476Figure 3 21 Step 2 Align the VGA connector Align the male DB 15 connector on the VGA screen cable with the female DB 15 connector on the external peripheral interface Step...

Page 50: ...able are required for operation of the ICEFIRE2 T10 Step 1 Connect the power adapter to the ICEFIRE2 T10 Step 2 Connect the power cable to the included power adapter Step 3 Connect the power cable to...

Page 51: ...urns off 3 7 Using RFID Reader There is a RFID reader on the side panel 6Figure 1 5 To enable the RFID reader follow the steps below Step 1 Push the RFID reader button on the top panel to turn on the...

Page 52: ...ICEFIRE2 T10 Mobile Clinic Assistant Page 38 Figure 3 27 IRFR 100 Icon Step 3 The IRFR 100 window appears 6Figure 3 28 Figure 3 28 IRFR Screen...

Page 53: ...Select the Find tags tab and click the Run button to enable the RFID reader 6Figure 3 29 Figure 3 29 IRFR Find Tags Step 5 Use the RFID reader to read a RFID card then the card number will be shown in...

Page 54: ...rcode scanner follow the steps below Step 1 Push the barcode scanner button on the top panel to turn on the barcode scanner The LED of the barcode scanner on the side panel lights on Figure 3 31 Barco...

Page 55: ...om the drop down menu 6Figure 3 33 Figure 3 33 EasySet Communication Step 4 The Communication Interface window appears 6Figure 3 34 Select RS serial or USB Virtual Com interface and click OK Figure 3...

Page 56: ...ed to the EasySet click Communication again and see if the original option Connect has been changed to Disconnect Figure 3 36 Communication Disconnect Step 7 To read the barcode information scanned by...

Page 57: ...arcode parameters can be modified through EasySet To be able to modify the parameters please make sure to connect the EasySet with the barcode scanner refer to Section 63 8 Follow the steps below to m...

Page 58: ...at that can be read by the barcode scanner EA15 In the default setting only the PDF417 format of 2 D barcodes is enabled If other formats are needed the user must enable them here Take Aztec as an exa...

Page 59: ...s Step 3 Use the Operating settings section to configure barcode triggering modes decoding security and beeps etc Figure 3 40 Operating Settings Step 4 In the Scanning Triggering section of operating...

Page 60: ...Assistant Page 46 Figure 3 41 Scanning Triggering Step 5 In the Beeps green indicator LED section of operating settings the user can configure the beep sound of the barcode scanner Step 0 Figure 3 42...

Page 61: ...ICEFIRE2 T10 Mobile Clinic Assistant Page 47 NOTE If no beep sound please check if the rtkhdaud dat file is in C windows system32 drivers...

Page 62: ...ICEFIRE2 T10 Mobile Clinic Assistant Page 48 Chapter 4 4 Driver Installation...

Page 63: ...The following drivers can be installed on the system Chipset driver Graphics driver LAN driver Audio driver Barcode scanner driver Fingerprint reader driver Bluetooth driver Wireless LAN driver HSUPA...

Page 64: ...Location Step 2 Double click the setup file in the folder The Intel Chipset Device Software welcome screen appears 6Figure 4 2 Figure 4 2 Intel Chipset Device Software Step 3 Follow the step by step...

Page 65: ...install the graphics driver please follow the steps below Step 1 Select 2 Graphics from the list in 476Figure 4 3 Figure 4 3 Graphics Driver Location Step 2 Double click the setup file in the folder T...

Page 66: ...Media Accelerator Driver Step 3 Follow the step by step instruction of the installation wizard to install the graphics driver 4 4 Realtek LAN Driver To install the Realtek LAN driver please follow th...

Page 67: ...bile Clinic Assistant Page 53 Figure 4 5 Realtek LAN Driver Location Step 2 Double click the setup file in the folder The InstallShield Wizard screen appears 476Figure 4 6 Figure 4 6 Realtek LAN Insta...

Page 68: ...l the LAN driver 4 5 Audio Driver To install the driver for the speaker and the microphone please follow the steps below Step 1 Select 4 Audio from the list in 476Figure 4 7 Figure 4 7 Speaker and Mic...

Page 69: ...ver InstallShield Wizard Step 3 Follow the step by step instruction of the installation wizard to install the HD Audio driver 4 6 Barcode Scanner Driver To install the barcode scanner driver please fo...

Page 70: ...anner Driver Location Step 2 Double click the setup file in the folder The InstallShield Wizard screen appears Figure 4 10 Barcode Driver InstallShield Wizard Step 3 Follow the step by step instructio...

Page 71: ...der driver please follow the steps below Step 1 Select 6 FINGER PRINT from the list in 576Figure 4 11 Figure 4 11 Fingerprint Reader Driver Location Step 2 Double click the setup file in the folder Th...

Page 72: ...r To install the Bluetooth driver please follow the steps below Step 1 Turn on the Bluetooth by pushing the Bluetooth on off button on the front panel Step 2 Select 7 Wireless LAN Bluetooth from the l...

Page 73: ...rd Step 4 Follow the step by step instruction of the installation wizard to install the Bluetooth driver 4 9 Wireless LAN Driver To install the wireless LAN driver please follow the steps below Step 1...

Page 74: ...ICEFIRE2 T10 Mobile Clinic Assistant Page 60 Figure 4 15 Wireless LAN Driver Location Step 2 Double click the setup file in the folder The InstallShield Wizard screen appears...

Page 75: ...p instruction of the installation wizard to install the Wireless LAN driver 4 10 3G Module Driver There one driver and watcher program need to be installed for the 3G module To install the 3G driver a...

Page 76: ...e Clinic Assistant Page 62 Figure 4 17 3G Module Driver Location Step 2 Double click the setup file in the folder Follow the step by step instruction of the installation wizard to install the module d...

Page 77: ...Select Watcher_GobiAnywhere_B2964 folder from the 8 3G Module folder as shown in 476Figure 4 19 Figure 4 19 3G Module Watcher Location Step 4 Double click the setup file in the folder Follow the step...

Page 78: ...bile Clinic Assistant Page 64 Figure 4 20 3G Module Program InstallShield Wizard 4 11 USB 3 0 Driver To install the USB 3 0 driver please follow the steps below Step 1 Select 9 USB 3 0 from the list i...

Page 79: ...on Step 2 Right click the setup file in the folder and select Run as administrator Figure 4 22 Barcode Driver InstallShield Wizard Step 3 The InstallShield Wizard screen appears Follow the step by ste...

Page 80: ...follow the steps below Step 1 Select 10 RFID from the list in 476Figure 4 23 Figure 4 23 RFID Driver Location Step 2 Double click the RFID Driver setup file in the folder to install the RFID driver 4...

Page 81: ...program to the desktop Use the IRFR 100 to configure and read RFID Refer to Section 63 7 for detailed instruction Figure 4 25 RFID Program Location 4 13 ICEFIRE Control Center To install the ICEFIRE C...

Page 82: ...The ICEFIRE Controlcenter folder contains tthree drivers shown in 6Figure 4 27 Follow the step by step instruction of the installation wizard to install these driver programs by order listed below 1...

Page 83: ...ICEFIRE2 T10 Mobile Clinic Assistant Page 69 Chapter 5 5 ICEFIRE Control Center...

Page 84: ...ontrol center puts many tasks and common settings in a single window To launch Control Center click the icon on the desktop The Control Center interface is shown below Figure 5 1 Control Center 5 2 Fe...

Page 85: ...ample the following section describes how to turn on or turn off the Bluetooth The indicator in 6Figure 5 2 shows Bluetooth is off Click the indicator to switch on Bluetooth Figure 5 2 Function Indica...

Page 86: ...ebcams on the front panel and the rear panel The file path to save the pictures taken by the webcams can also be configured through the Control Center Step 1 Click the Camera Settings button on the co...

Page 87: ...RE2 T10 is more frequent than using a mouse and keyboard The user should calibrate the digitizer and touch for the first time using the system and whenever the touch point does not align properly To c...

Page 88: ...le Clinic Assistant Page 74 Figure 5 8 Tablet PC Settings Step 3 Select an input type to calibrate Figure 5 9 Calibrate Pen or Touch Input Screens Step 4 Follow the instructions in the calibration pro...

Page 89: ...keys on the front panel are disabled when the Control Center is launched by the user To configure the front panel buttons follow the steps below Step 1 Launch the Control Center In the Button Actions...

Page 90: ...st Step 4 Once settings are completed click the Done button to save the settings Other actions are described in the table below Step 0 Action Description Open Process Execute process specified by user...

Page 91: ...RFID Execute RFID reading Enable Flashlight Execute flashlight LED torch Windows Key Action Execute windows key actions see Section 865 6 2 Table 5 1 Action Description 5 6 1 Action Open Process If O...

Page 92: ...d the user has to select any one of windows key from Key Selection list 86Figure 5 13 Figure 5 13 Action Windows Key Action NOTE After changing the settings please click the Done button to perform all...

Page 93: ...ICEFIRE2 T10 Mobile Clinic Assistant Page 79 Chapter 6 6 BIOS Setup...

Page 94: ...activated in one of two ways 1 Press the DELETE key as soon as the system is turned on or 2 Press the DELETE key when the Press DELETE to enter SETUP message appears on the screen 0 If the message dis...

Page 95: ...key Load optimized defaults F4 key Save changes and Exit BIOS Table 6 1 BIOS Navigation Keys 6 1 3 Getting Help When F1 is pressed a small help window describing the appropriate keys to use and the po...

Page 96: ...5 14 2012 18 25 30 iWDD Vendor ICP iWDD Version VOTGER10 bin System Date Tue 07 04 2011 System Time 14 20 27 Access Level Administrator Set the Time Use Tab to switch between Time elements Select Scre...

Page 97: ...ues in the sections below may cause the system to malfunction Make sure that the settings made are compatible with the hardware Aptio Setup Utility Copyright C 2011 American Megatrends Inc Main Advanc...

Page 98: ...General Help F2 Previous Values F3 Optimized Defaults F4 Save Exit ESC Exit Version 2 14 1219 Copyright C 2011 American Megatrends Inc BIOS Menu 3 ACPI Configuration ACPI Sleep State S1 CPU Stop Clock...

Page 99: ...wake on alarm event When enabled System will wake on the dat hr min sec specified Select Screen Select Item EnterSelect F1 General Help F2 Previous Values F3 Optimized Defaults F4 Save ESC Exit Versi...

Page 100: ...amic Time option to specify the time the system should be roused from a suspended state Disabled DEFAULT The real time clock RTC cannot generate a wake event Enabled If selected the following option a...

Page 101: ...Megatrends Inc BIOS Menu 5 CPU Configuration The CPU Configuration menu 586BIOS Menu 5 lists the following CPU details Processor Type Lists the brand name of the CPU being used EMT64 Indicates if the...

Page 102: ...nds Inc Advanced SATA Port0 Inno Disk Corp 8 0GB Configure SATA as AHCI 1 IDE Mode 2 AHCI Mode 3 RAID Mode Select Screen Select Item EnterSelect F1 General Help F2 Previous Values F3 Optimized Default...

Page 103: ...l Help F2 Previous Values F3 Optimized Defaults F4 Save ESC Exit Version 2 14 1219 Copyright C 2011 American Megatrends Inc BIOS Menu 7 USB Configuration USB Devices The USB Devices Enabled field list...

Page 104: ...tions for the serial ports Aptio Setup Utility Copyright C 2011 American Megatrends Inc Advanced IT8519 Serial Ports Configuration Super IO Chip IT8519 Serial Port 1 Configuration Serial Port 2 Config...

Page 105: ...Previous Values F3 Optimized Defaults F4 Save ESC Exit Version 2 14 1219 Copyright C 2011 American Megatrends Inc BIOS Menu 9 Serial Port 1 Configuration Menu 6 3 6 1 1 Serial Port 1 Configuration Se...

Page 106: ...he interrupt address is IRQ3 4 6 3 7 H W Monitor The H W Monitor menu 586BIOS Menu 10 shows the operating temperature Aptio Setup Utility Copyright C 2011 American Megatrends Inc Advanced H W Monitor...

Page 107: ...OM1 Console Redirection Disabled Console Redirection Settings Console Redirection Enable or Disable Select Screen Select Item EnterSelect F1 General Help F2 Previous Values F3 Optimized Defaults F4 Sa...

Page 108: ...3 Optimized Defaults F4 Save ESC Exit Version 2 14 1219 Copyright C 2011 American Megatrends Inc BIOS Menu 12 IEI Feature Auto Recovery Function Disabled Use the Auto Recovery Function BIOS option to...

Page 109: ...nc BIOS Menu 13 Chipset 6 4 1 Host Bridge Configuration Use the Host Bridge Configuration menu 86BIOS Menu 14 to configure the Northbridge chipset Aptio Setup Utility Copyright C 2011 American Megatre...

Page 110: ...no effect if external graphics present Select Screen Select Item EnterSelect F1 General Help F2 Previous Values F3 Optimized Defaults F4 Save ESC Exit Version 2 14 1219 Copyright C 2011 American Mega...

Page 111: ...on No LVDS BIOS does not enable LVDS Int LVDS DEFAULT BIOS enables LVDS Driven by integrated encoder SDVO LVDS BIOS enables LVDS driver by SDVO encoder eDP Port A LFP driven by Int DisplayPort encoder...

Page 112: ...lts F4 Save ESC Exit Version 2 14 1219 Copyright C 2011 American Megatrends Inc BIOS Menu 16 South Bridge Chipset Configuration 3G Function Enabled Use the 3G Function option to enable or disable the...

Page 113: ...rce BIOS Boot Option Priorities Boot Option 1 SATA PM InnoDisk Hard Drive BBS Priorities Enables Disables Quiet Boot option Select Screen Select Item EnterSelect F1 General Help F2 Previous Values F3...

Page 114: ...Disabled Normal POST messages displayed Enabled DEFAULT OEM Logo displayed instead of POST messages Launch PXE OpROM Disabled Use the Launch PXE OpROM option to enable or disable boot option for legac...

Page 115: ...the User s password is set then this is a power on password and must be entered to boot or enter Setup In Setup the User will have Administrator rights Administrator Password User Password Set Setup...

Page 116: ...e Changes and Reset Use the Save Changes and Reset option to save the changes made to the BIOS options and to exit the BIOS configuration setup program Discard Changes and Reset Use the Discard Change...

Page 117: ...ICEFIRE2 T10 Mobile Clinic Assistant Page 103 Chapter 7 7 System Maintenance...

Page 118: ...Dry climates are especially susceptible to ESD It is therefore critical that whenever the ICEFIRE2 T10 is accessed internally or any other electrical component is handled the following anti static pr...

Page 119: ...ment In the case of motherboard failure please contact an IEI sales representative reseller or system vendor The motherboard is accessible after opening the rear cover 7 5 mSATA Module Replacement The...

Page 120: ...ile Clinic Assistant Page 106 Figure 7 1 mSATA Access Panel Retention Screws Step 4 Locate the mSATA module Remove the two retention screws to release the mSATA module Figure 7 2 mSATA Module Retentio...

Page 121: ...igure 7 3 mSATA Module Removal Step 6 Install a new mSATA module by inserting the card into the slot at an angle Step 7 Push the mSATA module down and secure it to the motherboard using two previously...

Page 122: ...ICEFIRE2 T10 Mobile Clinic Assistant Page 108 Chapter 8 8 Interface Connectors...

Page 123: ...f peripheral interface connectors and configuration jumpers The connector locations are shown in Figure 8 1 and Figure 8 2 The Pin 1 locations of the on board connectors are also indicated in the diag...

Page 124: ...ist of the peripheral interface connectors on the ICEFIRE2 T10 motherboard Pinouts of these connectors can be found in the following sections Connector Type Label Barcode connector 16 pin FPC BARCODE1...

Page 125: ...h connector 2 pin wafer LEDPWR1 LVDS connector 30 pin crimp CN2 Microphone connector 4 pin wafer AMIC1 mSATA connector Full size PCIe Mini card slot M SATA1 PCIe Mini card slot Half size PCIe Mini car...

Page 126: ...8 Pull high to 3 3V 9 NC 10 RTS 2 11 BAR_BUZ 12 DETECT0 13 GND 14 GND 15 GND 16 GND Table 8 2 Barcode Connector BARCODE1 Pinouts 8 2 2 Battery Connector BAT1 PIN NO DESCRIPTION 1 VBATT 2 GND Table 8...

Page 127: ...5 GND 6 KSO15 Table 8 5 Button Connector BTN1 Pinouts 8 2 5 Rear Camera Connector CAMARE1 PIN NO DESCRIPTION 1 GND 2 CAMERA_TRI 3 USB_PP4 4 USB_PN4 5 VCC3 Table 8 6 Rear Camera Connector CAMARE1 Pinou...

Page 128: ...G_PORT1 PIN NO DESCRIPTION PIN NO DESCRIPTION 1 GND 7 LAD2 2 LPC_CLK33M 8 LAD3 3 BUF_PLTRST 9 NC 4 LFRAME 10 GND 5 LAD0 11 VCC3 6 LAD1 12 GND Table 8 9 Debug Connector DBG_PORT1 Pinouts 8 2 9 Digitize...

Page 129: ...1 4 GND 19 NDTR1 5 USB3 _GL850_C 20 NRI1 6 USB3 _GL850_C 21 GND 7 GND 22 VSY 8 NDSR1 23 HSY 9 NRX1 24 5VDDCDA 10 NDCD1 25 5VDDCLK 11 NRTS1 26 GND 12 VIN_DOCK 27 BLUE 13 VIN_DOCK 28 GREEN 14 VIN_DOCK 2...

Page 130: ...e 8 13 Fan Connector FAN2 Pinouts 8 2 13 Fingerprint Reader Connector FINPRT1 PIN NO DESCRIPTION 1 NC 2 VCC3 3 USB_PN2 4 USB_PP2 5 GND 6 GND Table 8 14 Fingerprint Reader Connector FINPRT1 Pinouts 8 2...

Page 131: ...I3 8 KSO6 18 GND 9 KSO7 19 GND 10 KSO8 20 GND Table 8 16 Keyboard Connector LPT_DB1 Pinouts 8 2 16 Keypad Connector KEYPAD1 PIN NO DESCRIPTION PIN NO DESCRIPTION 1 GND 7 KSI1 2 LED_WF 8 KSI0 3 LED_BLT...

Page 132: ...N0 10 LVDS_DP0 11 GND 12 LVDS_DN1 13 LVDS_DP1 14 GND 15 LVDS_DN2 16 LVDS_DP2 17 GND 18 LVDS_CLKN 19 LVDS_CLKP 20 GND 21 EXTLD 22 EXTLD 23 EXTLD 24 EXTLD 25 LVDS_DN3 26 LVDS_DP3 27 GND 28 GND 29 PANEL_...

Page 133: ...8 21 Power Input Connector PW1 Pinouts 8 2 21 Power Button Connector PWRBTN1 PIN NO DESCRIPTION 1 EC_PWRBTN 2 GND 3 POWERLED 4 VCC3DUAL 5 GND Table 8 22 Power Button Connector PWRBTN1 Pinouts 8 2 22...

Page 134: ...ector SPK1 Pinouts 8 2 24 SPI Flash Connector SPI1 PIN NO DESCRIPTION 1 V3 3_SPI 2 FSCE _R 3 FMISO_R 4 FSCK_R 5 FMOSI_R 6 GND Table 8 25 SPI Flash Connector SPI1 Pinouts 8 2 25 SPI Flash Connector SPI...

Page 135: ...ICEFIRE2 T10 Mobile Clinic Assistant Page 121 8 2 26 Touch Panel Connector TOUCH1 PIN NO DESCRIPTION 1 PDCT_ECI 2 GND 3 USB_PP6 4 USB_PN6 5 TH_POWER Table 8 27 Touch Panel Connector TOUCH1 Pinouts...

Page 136: ...ICEFIRE2 T10 Mobile Clinic Assistant Page 122 Appendix A A Safety Precautions...

Page 137: ...nected whenever the ICEFIRE2 T10 is being installed moved or modified Do not apply voltage levels that exceed the specified voltage range Doing so may cause fire and or an electrical shock Electric sh...

Page 138: ...ed the following anti static precautions are strictly adhered to Wear an anti static wristband Wearing a simple anti static wristband can help to prevent ESD from damaging any electrical component Sel...

Page 139: ...lectrical and electronic products carrying the mark left must be disposed of separately from normal household waste This includes monitors and electrical accessories such as signal cables or power cor...

Page 140: ...only be cleaned using a product specifically designed for the purpose In such case the product will be explicitly mentioned in the cleaning tips Below is a list of items to use when cleaning the ICEFI...

Page 141: ...ICEFIRE2 T10 Mobile Clinic Assistant Page 127 Appendix B B BIOS Options...

Page 142: ...Change Settings Auto 91 PC Health Status 92 Console Redirection Disabled 93 Auto Recovery Function Disabled 94 IGFX Boot Type VBIOS Default 96 LCD Panel Type 1024x768 18BIT 96 Active LFP Int LVDS 97...

Page 143: ...ICEFIRE2 T10 Mobile Clinic Assistant Page 129 Save as User Defaults 102 Restore User Defaults 102...

Page 144: ...ICEFIRE2 T10 Mobile Clinic Assistant Page 130 Appendix C C Terminology...

Page 145: ...esents a binary 0 while a high amplitude signal represents a binary 1 BIOS The Basic Input Output System BIOS is firmware that is first run when the computer is turned on and can be configured by the...

Page 146: ...l SpeedStep Technology EIST allows users to modify the power consumption levels and processor performance through application software The application software changes the bus to core frequency ratio...

Page 147: ...data transfers between storage devices and the computer chipsets The SATA bus has transfer speeds up to 1 5 Gbps and the SATA II bus has data transfer speeds of up to 3 0 Gbps S M A R T Self Monitori...

Page 148: ...ICEFIRE2 T10 Mobile Clinic Assistant Page 134 Appendix D D Watchdog Timer...

Page 149: ...tate A BIOS function call INT 15H is used to control the Watchdog Timer INT 15H AH 6FH Sub function AL 2 Sets the Watchdog Timer s period BL Time out value Its unit second is dependent on the item Wat...

Page 150: ...se the system resets Example program INITIAL TIMER PERIOD COUNTER W_LOOP MOV AX 6F02H setting the time out value MOV BL 30 time out value is 48 seconds INT 15H ADD THE APPLICATION PROGRAM HERE CMP EXI...

Page 151: ...ICEFIRE2 T10 Mobile Clinic Assistant Page 137 Appendix E E Hazardous Materials Disclosure...

Page 152: ...ges the presences of small quantities of certain materials in the product and is applicable to China RoHS only A label will be placed on each product to indicate the estimated Environmentally Friendly...

Page 153: ...Circuit Board O O O O O O Metal Fasteners O O O O O O Cable Assembly O O O O O O Fan Assembly O O O O O O Power Supply Assemblies O O O O O O Battery O O O O O O O This toxic or hazardous substance i...

Page 154: ...RE2 T10 Mobile Clinic Assistant Page 140 RoHS RoHS Pb Hg Cd CR VI PBB PBDE O O O O O O O O O O O O O O O O O O O O O O O O O O O O O O O O O O O O O O O O O O O O O O O O O SJ T11363 2006 X SJ T11363...

Reviews: