Icy Box IB-DK2108M-C, Manual
The Icy Box IB-DK2108M-C user manual is available for free download at manualshive.com. This comprehensive manual provides step-by-step instructions for setting up and using the IB-DK2108M-C, ensuring you get the most out of this high-quality product. Access the manual now and enhance your user experience.
Share
Download


Reviews:
No comments
Related manuals for IB-DK2108M-C

LB 3200
Brand: jbc Pages: 19

CAPRICORN II PLUS
Brand: Columbia Weather Systems Pages: 59

XC-0430
Brand: DigiTech Pages: 7

SBS-WS-200
Brand: Steinberg Systems Pages: 47

T612
Brand: Altec Lansing Pages: 8
VSN800
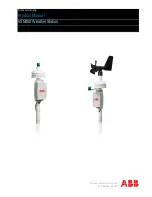
Brand: ABB Pages: 16

WS-1
Brand: ABB Pages: 28
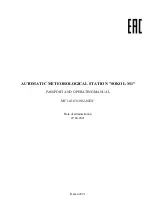
SOKOL-M1
Brand: 3scort Pages: 50

BTM630
Brand: Philips Pages: 35

XW-NAS5
Brand: Pioneer Pages: 80

X-DS301-K
Brand: Pioneer Pages: 116

TR-525 Series
Brand: Texas Electronics Pages: 20

DOKKi CPN-6
Brand: JNC Pages: 3

iP9
Brand: iHome Pages: 13

IP39
Brand: iHome Pages: 12

iP99
Brand: iHome Pages: 14

iP88
Brand: iHome Pages: 14

iH15
Brand: iHome Pages: 8


