background image


Touch Panel Monitor User Manual

version 1.1.0,


Last Revised: December 2015   

                        Page: 1   

Copyright ©  2012 ICP DAS Co., Ltd. All Rights Reserved.   

 E-mail: [email protected] 


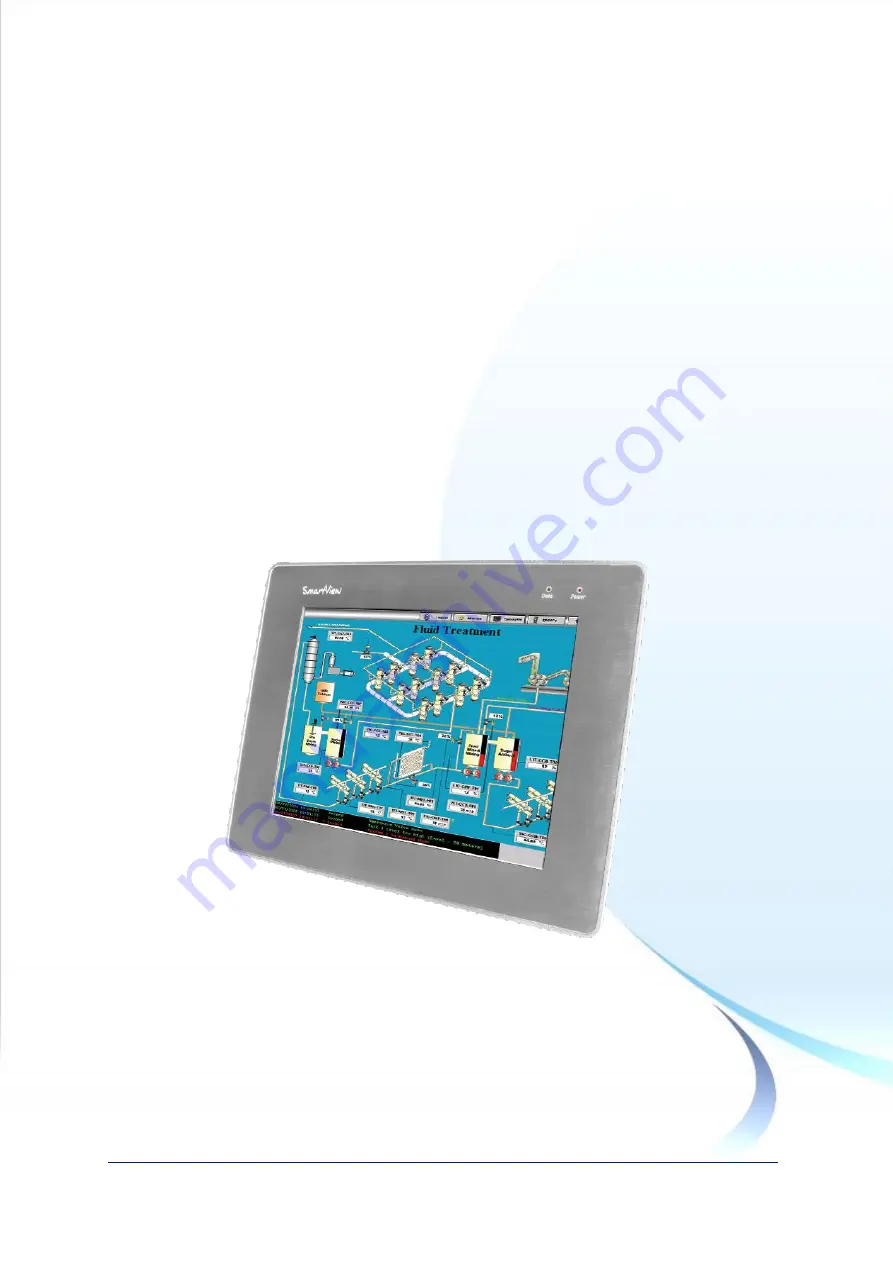
TPM-4100/TP-4100/TP-2070/

TP-3080/TP-5120/TP-6150/ 

TP-7170    Touch Panel 

Monitor User Manual 


Summary of Contents for SmartView TP-2070

Page 1: ...ser Manual version 1 1 0 Last Revised December 2015 Page 1 Copyright 2012 ICP DAS Co Ltd All Rights Reserved E mail service icpdas com TPM 4100 TP 4100 TP 2070 TP 3080 TP 5120 TP 6150 TP 7170 Touch Panel Monitor User Manual ...

Page 2: ...S reserves the right to change this manual at any time without notice The information furnished by ICP DAS is believed to be accurate and reliable However no responsibility is assumed by ICP DAS for its use nor for any infringements of patents or other rights of third parties resulting from its use Copyright Copyright 2012 by ICP DAS Co Ltd All rights are reserved Trademarks Names are used for ide...

Page 3: ...ows CE 5 0 40 2 1 1 USB Touch Driver 41 2 1 1 1 Installation for WinPAC 8000 and WinPAC 5000 42 2 1 1 2 Configuration for WinPAC 8000 and WinPAC 5000 44 2 1 1 3 Uninstalling the WinPAC 8000 and WinPAC 5000 46 2 1 1 4 Other Windows CE5 0 Devices 47 2 1 2 Serial Touch Driver 48 2 1 2 1 Installation for WinPAC 8000 and WinPAC 5000 49 2 1 2 2 Configuration for WinPAC 8000 and WinPAC 5000 52 2 1 2 3 Un...

Page 4: ...nstallation for WinPAC 5000 CE775 2 3 1 2 Configuration for WinPAC 5000 CE7 77 2 3 1 3 Uninstalling the WinPAC 5000 CE779 2 3 1 4 Other Windows CE7 0 Devices 80 2 3 2 Serial Touch Driver 81 2 3 2 1 Installation for WinPAC 5000 CE782 2 3 2 2 Configuration for WinPAC 5000 CE7 84 2 3 2 3 Uninstalling theWinPAC 5000 CE788 2 3 2 4 Other Windows CE7 0 Devices 89 2 4 Windows XP Embedded 90 2 4 1 Universa...

Page 5: ...5 Page 5 Copyright 2012 ICP DAS Co Ltd All Rights Reserved E mail service icpdas com Appendix A Tips 115 A 1 Don t install USB and serial touch driver simultaneously in a device 115 A 2 Don t plug USB cable when using serial touch driver116 Appendix B Revision History 117 ...

Page 6: ... 0 Last Revised December 2015 Page 6 Copyright 2012 ICP DAS Co Ltd All Rights Reserved E mail service icpdas com 1 Introduction This chapter provides an overview of the TPM 4100 TP 4100 TP 2070 TP 3080 T P 5120 TP 6150 TP 7170 and its components ...

Page 7: ... bezel resolution and a wide operating temperature range The TPM 4100 TP 4100 TP 2070 TP 3080 TP 5120 TP 6150 TP 7170 is also guaranteed to integrate with ICP DAS PAC control systems such as WP 8000 series LinPAC 8000 series and the XP 8000 series Package List The shipping package includes the following items 1 TFT LCD Monitor 1 VGA cable 1 RS 232 cable 1 USB cable 4 Mounting clamps 4 Mounting Scr...

Page 8: ... 4 TP 5120 12 1 TP 6150 15 1024 x 768 TP 7170 17 1280 x1024 Full function OSD control keys for optimizing the display Driver Support for Windows 2K XP Vista 7 XP Embedded WinCE 5 0 6 0 Linux Wide operating temperature range Mode name Operating temperature TP 2070 20 70 C TP 3080 TPM 4100 TP 4100 TP 5120 TP 6150 TP 7170 Aluminum front bezel design that is ideal for rugged applications LED backlight...

Page 9: ... ratio 500 1 Viewing angle H V 140 120 Backlight life hrs 20 000 Touchscreen function Combo RS 232 USB interface Input signal VGA analog RGB MMI Man Machine Interface OSD control Functions Brightness Contrast Clock Phase Horizontal Position Vertical Position and Sharpness Power switch Yes LED indicators Power Display signal is detected Power Input range 12 48 VDC Power consumption 5 W Mechanical C...

Page 10: ... function Combo RS 232 USB interface Input signal VGA analog RGB MMI Man Machine Interface OSD control Functions Brightness Contrast Clock Phase Horizontal Position Vertical Position and Sharpness LED indicators Power Display signal is detected Power Input range 12 48 VDC Power consumption 7 W Mechanical Casing Plastic Dimensions W x L x H 249 mm x 207 mm x 65 mm Installation Panel Mounting VESA 7...

Page 11: ...tion Combo RS 232 USB interface Input signal VGA analog RGB MMI Man Machine Interface OSD control Functions Brightness Contrast Clock Phase Horizontal Position Vertical Position and Sharpness Power switch Yes LED indicators Power Display signal is detected Power Input range 12 48 VDC Power consumption 8 5 W Mechanical Material Aluminum Plastic Dimensions W x L x H 293 mm x 231 mm x 53 mm 291 mm x ...

Page 12: ... function Combo RS 232 USB interface Input signal VGA analog RGB MMI Man Machine Interface OSD control Functions Brightness Contrast Clock Phase Horizontal Position Vertical Position and Sharpness LED indicators Power Display signal is detected Power Input range 12 48 VDC Power consumption 13 W Mechanical Casing Plastic Dimensions W x L x H 323 mm x 254 mm x 65 mm Installation Panel Mounting VESA ...

Page 13: ...een function Combo RS 232 USB interface Input signal VGA analog RGB MMI Man Machine Interface OSD control Functions Brightness Contrast Phase Horizontal Position Vertical Position and sharpness LED indicators Power Display signal is detected Power Input range 12 48 VDC Power consumption 14 4 W Mechanical Material Plastic Dimensions W x L x H 381 mm x 305 mm x 65 mm Installation Panel Mounting VESA...

Page 14: ...reen function Combo RS 232 USB interface Input signal VGA analog RGB MMI Man Machine Interface OSD control Functions Brightness Contrast Phase Horizontal Position Vertical Position and sharpness LED indicators Power Display signal is detected Power Input range 12 48 VDC Power consumption 22 W Mechanical Material Plastic Dimensions W x L x H 413 mm x 359 mm x 70 mm Installation Panel Mounting VESA ...

Page 15: ...Touch Panel Monitor User Manual version 1 1 0 Last Revised December 2015 Page 15 Copyright 2012 ICP DAS Co Ltd All Rights Reserved E mail service icpdas com 1 3 Dimension TP 2070 Unit mm ...

Page 16: ...Touch Panel Monitor User Manual version 1 1 0 Last Revised December 2015 Page 16 Copyright 2012 ICP DAS Co Ltd All Rights Reserved E mail service icpdas com ...

Page 17: ...Touch Panel Monitor User Manual version 1 1 0 Last Revised December 2015 Page 17 Copyright 2012 ICP DAS Co Ltd All Rights Reserved E mail service icpdas com TP 3080 Unit mm ...

Page 18: ...Touch Panel Monitor User Manual version 1 1 0 Last Revised December 2015 Page 18 Copyright 2012 ICP DAS Co Ltd All Rights Reserved E mail service icpdas com ...

Page 19: ...Touch Panel Monitor User Manual version 1 1 0 Last Revised December 2015 Page 19 Copyright 2012 ICP DAS Co Ltd All Rights Reserved E mail service icpdas com TP 5120 Unit mm ...

Page 20: ...Touch Panel Monitor User Manual version 1 1 0 Last Revised December 2015 Page 20 Copyright 2012 ICP DAS Co Ltd All Rights Reserved E mail service icpdas com ...

Page 21: ...Touch Panel Monitor User Manual version 1 1 0 Last Revised December 2015 Page 21 Copyright 2012 ICP DAS Co Ltd All Rights Reserved E mail service icpdas com TPM 4100 Unit mm ...

Page 22: ...Touch Panel Monitor User Manual version 1 1 0 Last Revised December 2015 Page 22 Copyright 2012 ICP DAS Co Ltd All Rights Reserved E mail service icpdas com ...

Page 23: ...Touch Panel Monitor User Manual version 1 1 0 Last Revised December 2015 Page 23 Copyright 2012 ICP DAS Co Ltd All Rights Reserved E mail service icpdas com TP 4100 Unit mm ...

Page 24: ...Touch Panel Monitor User Manual version 1 1 0 Last Revised December 2015 Page 24 Copyright 2012 ICP DAS Co Ltd All Rights Reserved E mail service icpdas com ...

Page 25: ...Touch Panel Monitor User Manual version 1 1 0 Last Revised December 2015 Page 25 Copyright 2012 ICP DAS Co Ltd All Rights Reserved E mail service icpdas com TP 6150 Unit mm ...

Page 26: ...Touch Panel Monitor User Manual version 1 1 0 Last Revised December 2015 Page 26 Copyright 2012 ICP DAS Co Ltd All Rights Reserved E mail service icpdas com ...

Page 27: ...Touch Panel Monitor User Manual version 1 1 0 Last Revised December 2015 Page 27 Copyright 2012 ICP DAS Co Ltd All Rights Reserved E mail service icpdas com TP 7170 Unit mm ...

Page 28: ...Touch Panel Monitor User Manual version 1 1 0 Last Revised December 2015 Page 28 Copyright 2012 ICP DAS Co Ltd All Rights Reserved E mail service icpdas com ...

Page 29: ...anel Monitor User Manual version 1 1 0 Last Revised December 2015 Page 29 Copyright 2012 ICP DAS Co Ltd All Rights Reserved E mail service icpdas com 1 4 I O interfaces TP 2070 TP 3080 TP 5120 TP 6150 TP 7170 ...

Page 30: ...Touch Panel Monitor User Manual version 1 1 0 Last Revised December 2015 Page 30 Copyright 2012 ICP DAS Co Ltd All Rights Reserved E mail service icpdas com TPM 4100 TP 4100 ...

Page 31: ...ated below The Model of the CD Model represents TPM 4100_TP 4100 TP 2070 TP 6150 etc For example CD TPM 4100_TP 4100 or CD TP 2070 Win_XP_7 Touch Driver for Windows 2K XP 2003 2008 Vista 7 Touch Driver for the XP 8000 series Touch Driver for the WP 8000 and WP 5000 series Documents Touch_Panel_User_Manual_vXXX pdf V5 0 WP 8000 and WP 5000 device XP 8000 CE6 device Touch Driver for the XP 8000 CE6 ...

Page 32: ... following OSD menu OSD Menu Functions Control Description Contrast Adjusts the contrast of the monitor Brightness Adjusts the brightness of the monitor Image setting Auto config Press to adjust automatically Phase Increase or decrease phase value Clock Increase or decrease pixel clock value Control Function 1 Adjust V Position H Position Clock and Clock and Clock Phase 2 Turns OSD main menu on or...

Page 33: ...upport 8 languages OSD H Move the OSD position horizontally on the screen When the button is pressed the OSD control menu will move to the right side of the screen Likewise when the button is pressed the OSD control menu will move to the left side OSD V Move the OSD position vertically on the screen When the button is pressed the OSD control menu will move to the top side of the screen Likewise wh...

Page 34: ...splay signal PWR Power LED When the LED is red it indicates that the power is on When the LED is not illuminated it indicates that either the power is off or the power supply is not connected Display Modes__ 3 Shift the icon to the left side or shift it down 4 Shift the icon to the right side or shift it up 5 1 Enter the OSD menu 2 Enter the adjustment item 6 Executing auto adjustment The Data and...

Page 35: ...710 and upward WP 8x3x 1024 x 768 60 70 75 TP 6150 60 75 800 x 600 60 72 75 TP 6150 60 72 640 x 480 56 60 62 70 72 75 TP 6150 72 WP 5x4x 800 x 600 55 8 56 6 640 x 480 Don t care TP 2070 Supported by the WP 5x4x OS version 1300 and upward XP 8x4x Atom 1280 x 720 Don t care 1024 x 768 Don t care 800 x 600 Don t care XP 8x4x Atom CE6 1024 x 768 60 70 75 85 800 x 600 60 70 75 85 640 x 480 60 70 75 85 ...

Page 36: ...vice icpdas com 800 x 600 60 70 75 640 x 480 60 70 75 The following display modes are supported for other devices Resolution Horiz Sync Vert Sync 640 x 480 31 4 KHz 50 Hz 31 4 KHz 59 9 Hz 37 5 KHz 75 Hz 720 x 400 31 4 KHz 70 Hz 800 x 600 35 1 KHz 56 2 Hz 37 8 KHz 60 3 Hz 46 9 KHz 75 Hz 1024 x 768 48 3 KHz 60 Hz 56 4 KHz 70 Hz 60 0 KHz 75 Hz ...

Page 37: ...ber 2015 Page 37 Copyright 2012 ICP DAS Co Ltd All Rights Reserved E mail service icpdas com 1 6 2 Panel Mounting Insert the mounting brackets Screw the mounting bracket to the unit Eight locations are available for attaching four mounting clamps to secure the unit ...

Page 38: ...l version 1 1 0 Last Revised December 2015 Page 38 Copyright 2012 ICP DAS Co Ltd All Rights Reserved E mail service icpdas com Refer to Sec 1 3 for default information regarding the dimensions of the panel Panel thickness up to 6 mm ...

Page 39: ...evised December 2015 Page 39 Copyright 2012 ICP DAS Co Ltd All Rights Reserved E mail service icpdas com 2 Touch Driver Setup This chapter provides a overview that describes the steps required for installing uninstalling and configuring the touch driver ...

Page 40: ... Copyright 2012 ICP DAS Co Ltd All Rights Reserved E mail service icpdas com 2 1 Windows CE 5 0 This section describes how to install calibrate and uninstall the touch driver for the WP 8000 series and WP 5000 series and gives details of how to obtain drivers for other CE5 devices ...

Page 41: ... for WP 8000 series modules and WP 5000 series modules of ICP DAS PAC controllers and the second is for other Windows CE5 0 systems WP 8000 series WP 8131 WP 8431 WP 8831 WP 8141 WP 8441 WP 8841 WP 8137 WP 8437 WP 8837 WP 8147 WP 8447 WP 8847 WP 8139 WP 8431 WP 8839 WP 8141 WP 8441 WP 8849 WP 8136 WP 8431 WP 8836 WP 8141 WP 8441 WP 8846 WP 5000 series WP 5141 WP 5441 OD WP 5149 WP 5449 OD WP 5147 ...

Page 42: ...AB driver file can be obtained from name Driver path TP 2070 TP 3080 TP 5120 TPM 4100_TP 4100 TP 6150 TP 7170 CD name Driver WinCE V5 0 WP 8000 and WP 5000 device For example CD TP 6150 Driver WinCE V5 0 WP 8000 and WP 5000 device Or go to the System_Disk External_device_driver folder on the WinPAC 2 Double click the PenMount_USB_TOUCH_Vyyyymmdd CAB file 3 Show one of two dialogs below Just click ...

Page 43: ...r Manual version 1 1 0 Last Revised December 2015 Page 43 Copyright 2012 ICP DAS Co Ltd All Rights Reserved E mail service icpdas com Tips 1 Appendix A A 1 Don t install USB and serial touch driver simultaneously in a device ...

Page 44: ...om 2 1 1 2 Configuration for WinPAC 8000 and WinPAC 5000 Calibration 1 From the Start menu click Programs USB_TOUCH PenMount Calibration 2 Follow the instructions on the screen to begin calibration 3 Once calibration has been completed from the Start menu click Programs Open the WinPAC Utility and then click the Save and Reboot option from the File menu ...

Page 45: ...e Start menu click Programs USB_TOUCH PenMount RightButton 2 Show a screen below Left picture Click the mouse Turn into right picture 3 Click any object Click My device to test if the function of RightButton works If the screen below shows the function of RightButton works 4 The operation of the right mouse button can be simulated by repeating Step 2 and Step 3 for any object Click the mouse Becom...

Page 46: ... to uninstall the PenMount USB touch driver 1 From the Start menu click Programs USB_TOUCH PenMount Uninstall 2 A warning pop up will be displayed asking you to confirm the uninstall request Click the Yes button to uninstall the driver 3 Once the uninstallation process is complete a dialog will displayed requesting that you reboot the system Click the Yes button to reboot the WinPAC immediately or...

Page 47: ...2 ICP DAS Co Ltd All Rights Reserved E mail service icpdas com 2 1 1 4 Other Windows CE5 0 Devices The driver for using with other windows CE5 0 devices can be obtained from the PenMount website to download the latest driver We are use PenMount 6000 chip PenMount website http www salt com tw en ...

Page 48: ...t is for WP 8000 series modules and WP 5000 series modules of ICPDAS PAC controllers and the second is for other Windows CE5 0 systems WP 8000 series WP 8131 WP 8431 WP 8831 WP 8141 WP 8441 WP 8841 WP 8137 WP 8437 WP 8837 WP 8147 WP 8447 WP 8847 WP 8139 WP 8431 WP 8839 WP 8141 WP 8441 WP 8849 WP 8136 WP 8431 WP 8836 WP 8141 WP 8441 WP 8846 WP 5000 series WP 5141 WP 5441 OD WP 5149 WP 5449 OD WP 51...

Page 49: ... can directly use this cable to connect the monitor with COM4 of WinPAC 8000 to use serial touch driver to do a touch operation by serial way If the user wants to use other com port please note the position of TX and RX of COM port About the pin assignment please refer to the user manual of the WinPAC 8000 1 Copy the driver from the CD ROM to the WinPAC The PenMount_Serial_TOUCH_Vyyyymmdd PM6000R ...

Page 50: ...5 0 WP 8000 and WP 5000 device For example CD TP 6150 Driver WinCE V5 0 WP 8000 and WP 5000 device Or go to the System_Disk External_device_driver folder on the WinPAC 2 Double click the PenMount_Serial_TOUCH_Vyyyymmdd PM6000R CAB file 3 Show one of two dialogs below Just click OK button to continue installation 4 From the Start menu click Programs Open the WinPAC Utility and then click the Save a...

Page 51: ...d December 2015 Page 51 Copyright 2012 ICP DAS Co Ltd All Rights Reserved E mail service icpdas com Tips 1 Appendix A A 1 Don t install USB and serial touch driver simultaneously in a device 2 Appendix A A 2 Don t plug USB cable when using serial touch driver ...

Page 52: ...m 2 1 2 2 Configuration for WinPAC 8000 and WinPAC 5000 Calibration 1 From the Start menu click Programs Serial_TOUCH PenMount Calibration 2 Follow the instruction on the screen to begin calibration 3 Once calibration has been completed from the Start menu click Programs Open the WinPAC Utility and then click the Save and Reboot option from the File menu ...

Page 53: ...COM Port you wish to use as default and click the Set button to save the changes 3 From the Start menu click Programs Open the WinPAC Utility and then click the Save and Reboot option from the File menu 4 Disconnect the cable from the current COM Port and reconnect it to the specified COM Port Simulating the Right Mouse Button For details of how to configure right mouse button simulation please re...

Page 54: ... uninstall the PenMount serial touch driver 1 From the Start menu click Programs Serial_TOUCH PenMount Uninstall 2 A warning pop up will be displayed asking you to confirm the uninstall request Click the Yes button to uninstall the driver 3 Once the uninstallation process is complete a dialog will displayed requesting that you reboot the system Click the Yes button to reboot the WinPAC immediately...

Page 55: ...2 ICP DAS Co Ltd All Rights Reserved E mail service icpdas com 2 1 2 4 Other Windows CE5 0 Devices The driver for using with other windows CE5 0 devices can be obtained from the PenMount website to download the latest driver We are use PenMount 6000 chip PenMount website http www salt com tw en ...

Page 56: ... Page 56 Copyright 2012 ICP DAS Co Ltd All Rights Reserved E mail service icpdas com 2 2 Windows CE 6 0 This section describes how to install calibrate and uninstall the touch driver for the XP 8000 CE6 series and gives details of how to obtain drivers for other CE6 devices ...

Page 57: ...es modules of ICP DAS PAC controllers and and the second is for other Windows CE6 0 systems XP 8000 CE6 series 1 Using the ATOM CPU XP 8141 Atom CE6 XP 8341 Atom CE6 XP 8741 Atom CE6 XP 8147 Atom CE6 XP 8347 Atom CE6 XP 8747 Atom CE6 XP 8149 Atom CE6 XP 8349 Atom CE6 XP 8749 Atom CE6 2 Using the LX800 CPU XP 8041 CE6 XP 8341 CE6 XP 8741 CE6 XP 8047 CE6 XP 8347 CE6 XP 8747 CE6 XP 8049 CE6 XP 8349 C...

Page 58: ... 7170 CD name Driver WinCE V6 0 XP 8000 CE6 device For example CD TP 2070 Driver WinCE V6 0 XP 8000 CE6 device Or go to the System_Disk External_device_driver folder on the XP 8000 CE6 2 Double click the PenMount_USB_TOUCH_Vxx_yyyymmdd_XPAC_CE6 CAB file Tips Warnings The driver cab file can only be used once If you attempt to use it to install driver a second time a warning dialog with a message s...

Page 59: ...erved E mail service icpdas com 4 Once the installation has been completed a dialog will be displayed advising that the system needs to be rebooted Click the OK button to reboot the XP 8000 CE6 Or Using the LX800 CPU Using the ATOM CPU Tips 1 Appendix A A 1 Don t install USB and serial touch driver simultaneously in a device ...

Page 60: ... 1 2 Configuration for XP 8000 CE6 Calibration 1 From the Start menu click Programs USB_TOUCH PenMount Calibration 2 Following the instructions on the screen to begin calibration Simulating the Right Mouse Button For details of how to simulate right mouse button functions please refer to the process described in Simulating the Right Mouse Button in Sec 2 1 1 2 ...

Page 61: ...8000 CE6 The following procedure describes how to uninstall the PenMount USB touch driver 1 From the Start menu click Settings Control Panel 2 Double click the Remove Programs icon and select ICPDAS USB PenMount from the Programs panel in the Remove Programs dialog box and then click the Remove button When the warning pop up click Yes button to permanently uninstall the driver 1 2 3 4 ...

Page 62: ...ight 2012 ICP DAS Co Ltd All Rights Reserved E mail service icpdas com 3 Once the uninstallation process is complete a dialog will be displayed requesting that you reboot the system Click the Yes button to reboot immediately or click the No button if you intend to reboot at a later time ...

Page 63: ...2 ICP DAS Co Ltd All Rights Reserved E mail service icpdas com 2 2 1 4 Other Windows CE6 0 Devices The driver for using with other windows CE6 0 devices can be obtained from the PenMount website to download the latest driver We are use PenMount 6000 chip PenMount website http www salt com tw en ...

Page 64: ...0 CE6 series modules of ICPDAS PAC controllers and the second is for other Windows CE6 0 systems XP 8000 CE6 series 1 Using ATOM CPU XP 8141 Atom CE6 XP 8341 Atom CE6 XP 8741 Atom CE6 XP 8147 Atom CE6 XP 8347 Atom CE6 XP 8747 Atom CE6 XP 8149 Atom CE6 XP 8349 Atom CE6 XP 8749 Atom CE6 2 Using LX800 CPU XP 8041 CE6 XP 8341 CE6 XP 8741 CE6 XP 8047 CE6 XP 8347 CE6 XP 8747 CE6 XP 8049 CE6 XP 8349 CE6 ...

Page 65: ...There is a RS 232 cable in the shipping package Sec 1 The user can directly use this cable to connect the monitor with COM5 of XP 8000 CE6 to use serial touch driver to do a touch operation by serial way If the user wants to use other com port please note the position of TX and RX of COM port About the pin assignment please refer to the user manual of the XP 8000 CE6 1 Copy the driver from the CD ...

Page 66: ...me Driver WinCE V6 0 XP 8000 CE6 device For example CD TP 2070 Driver WinCE V6 0 XP 8000 CE6 device Or go to the System_Disk External_device_driver folder on the XP 8000 CE6 2 Double click the PenMount_Serial_TOUCH_Vxx_yyyymmdd_XPAC_CE6 PM6000R CAB file Tips Warnings The driver cab file can only be used once If you attempt to use it to install driver a second time a warning dialog with a message s...

Page 67: ...service icpdas com 4 Once the installation has been completed a dialog will be displayed advising that the system needs to be rebooted Click the OK button to reboot the XP 8000 CE6 Tips 1 Appendix A A 1 Don t install USB and serial touch driver simultaneously in a device 2 Appendix A A 2 Don t plug USB cable when using serial touch driver ...

Page 68: ...ing the ATOM CPU the screen will look like this If you are using the LX800 CPU the screen will look like this 2 2 2 2 Configuration for XP 8000 CE6 Calibration 1 From the Start menu click Programs Serial_TOUCH PenMount Calibration 2 Follow the instruction on the screen to begin calibration You will be presented with one of two screens depending on the CPU you are using ...

Page 69: ...Programs Serial_TOUCH PenMount SetCOM 2 Just choose the COM port Click Set button Click Yes button to reboot the system The baudrate for the touch monitor is 19200 bps so please don t modify the baudrate of touch driver Simulating Right Mouse Button For details of how to configure right mouse button simulation please refer to the process describes in Simulating the Right Mouse Button in Sec 2 1 1 ...

Page 70: ...0 CE6 The following procedure describes how to uninstall the PenMount serial touch driver 1 From the Start menu click Settings Control Panel 2 Double click the Remove Programs icon and select ICPDAS Serial PenMount from the Programs panel in the Remove Programs dialog box and then click the Remove button When the warning pop up click Yes button to permanently uninstall the driver 1 2 3 4 ...

Page 71: ...pyright 2012 ICP DAS Co Ltd All Rights Reserved E mail service icpdas com 3 Once the uninstallation process is complete a dialog will be displayed requesting that you reboot the system Click the Yes button to reboot immediately or click the No button if you intend to reboot at a later ...

Page 72: ...2 ICP DAS Co Ltd All Rights Reserved E mail service icpdas com 2 2 2 4 Other Windows CE 6 0 Device The driver for using with other windows CE6 0 devices can be obtained from the PenMount website to download the latest driver We are use PenMount 6000 chip PenMount website http www salt com tw en ...

Page 73: ... Page 73 Copyright 2012 ICP DAS Co Ltd All Rights Reserved E mail service icpdas com 2 3 Windows CE 7 0 This section describes how to install calibrate and uninstall the touch driver for the WP 5000 CE7 series and gives details of how to obtain drivers for other CE7 devices ...

Page 74: ...2012 ICP DAS Co Ltd All Rights Reserved E mail service icpdas com 2 3 1 USB Touch Driver Two USB touch drivers are available The first is for WP 5000 CE7 series modules of ICP DAS PAC controllers and and the second is for other Windows CE7 0 systems WP 5000 CE7 series WP 5231 CE7 WP 5238 CE7 ...

Page 75: ...mdd CAB driver file can be obtained from name Driver path TP 2070 TP 3080 TP 5120 TPM 4100_TP 4100 TP 6150 TP 7170 CD name Driver WinCE V7 0 WP 5000 CE7 device For example CD TP 6150 Driver WinCE V7 0 WP 5000 CE7 device Or go to the System_Disk External_device_driver folder on the WinPAC 2 Double click the PenMount_USB_TOUCH_Vyyyymmdd CAB file 3 Show one of two dialogs below Just click the OK butt...

Page 76: ...sed December 2015 Page 76 Copyright 2012 ICP DAS Co Ltd All Rights Reserved E mail service icpdas com b If HIVE Registry is Manual Save To Flash click Save and Reboot Tips 1 Appendix A A 1 Don t install USB and serial touch driver simultaneously in a device ...

Page 77: ...nPAC 5000 CE7 Calibration 1 Go to System_Disk Drivers USB_TOUCH PenMount BIN and double click calibrate exe 2 Follow the instructions on the screen to begin calibration 3 Once calibration has been completed from the Start menu click Programs Open the PAC Utility a If HIVE Registry is Auto Save Flash Default click reboot b If HIVE Registry is Manual Save To Flash click Save and Reboot ...

Page 78: ...Disk Drivers USB_TOUCH PenMount BIN and double click rbutton exe 2 Show a screen below Left picture Click the mouse Turn into right picture 3 Click any object Click My device to test if the function of RightButton works If the screen below shows the function of RightButton works 4 The operation of the right mouse button can be simulated by repeating Step 2 and Step 3 for any object Click the mouse...

Page 79: ...Mount USB touch driver 1 Go to System_Disk Drivers USB_TOUCH PenMount BIN and double click Uninstall_USB_Penmount exe 2 A warning pop up will be displayed asking you to confirm the uninstall request Click the Yes button to uninstall the driver 3 Once the uninstallation process is complete a dialog will displayed requesting that you reboot the system Click the Yes button to reboot the WinPAC immedi...

Page 80: ...12 ICP DAS Co Ltd All Rights Reserved E mail service icpdas com 2 3 1 4 Other Windows CE7 0 Devices The driver for use with other windows CE7 0 devices can be obtained from the PenMount website to download the latest driver We are use PenMount 6000 chip PenMount website http www salt com tw en ...

Page 81: ...2012 ICP DAS Co Ltd All Rights Reserved E mail service icpdas com 2 3 2 Serial Touch Driver Two serial touch drivers are available The first is for WP 5000 CE7 series modules of ICPDAS PAC controllers and the second is for other Windows CE7 0 systems WP 5000 CE7 series WP 5231 CE7 WP 5238 CE7 ...

Page 82: ...lease refer to the user manual of the WinPAC 5000 CE7 1 Copy the driver from the CD ROM to the WinPAC The PenMount_Serial_TOUCH_Vyyyymmdd PM6000R CAB driver file can be obtained from name Driver path TP 2070 TP 3080 TP 5120 TPM 4100_TP 4100 TP 6150 TP 7170 CD name Driver WinCE V7 0 WP 5000 CE7 device For example CD TP 6150 Driver WinCE V7 0 WP 5000 CE7 device Or go to the System_Disk External_devi...

Page 83: ...ck OK button to continue installation 4 From the Start menu click Programs Open the PAC Utility a If HIVE Registry is Auto Save Flash Default click reboot b If HIVE Registry is Manual Save To Flash click Save and Reboot Or Click OK button Tips 1 Appendix A A 1 Don t install USB and serial touch driver simultaneously in a device 2 Appendix A A 2 Don t plug USB cable when using serial touch driver ...

Page 84: ...com 2 3 2 2 Configuration for WinPAC 5000 CE7 Calibration 1 Go to System_Disk Drivers Serial_TOUCH PenMount BIN and double click calibrate exe 2 Follow the instruction on the screen to begin calibration 3 Once calibration has been completed from the Start menu click Programs Open the PAC Utility a If HIVE Registry is Auto Save Flash Default click reboot ...

Page 85: ...s Manual Save To Flash click Save and Reboot Changing the COM Port 1 Go to System_Disk Drivers Serial_TOUCH PenMount BIN and double click SetCOM 2 In the pop up dialog select the COM Port you wish to use as default and click the Set button to save the changes 3 From the Start menu click Programs Open the WinPAC Utility a If HIVE Registry is Auto Save Flash Default click reboot ...

Page 86: ...t the cable from the current COM Port and reconnect it to the specified COM Port Simulating the Right Mouse Button 1 Go to System_Disk Drivers Serial_TOUCH PenMount BIN and double click rbutton exe 2 Show a screen below Left picture Click the mouse Turn into right picture 3 Click any object Click My device to test if the function of RightButton works If the screen below shows the function of Right...

Page 87: ...l version 1 1 0 Last Revised December 2015 Page 87 Copyright 2012 ICP DAS Co Ltd All Rights Reserved E mail service icpdas com 4 The operation of the right mouse button can be simulated by repeating Step 2 and Step 3 for any object ...

Page 88: ... serial touch driver 1 Go to System_Disk Drivers Serial_TOUCH PenMount BIN and double click Uninstall_Serial_Penmount exe 2 A warning pop up will be displayed asking you to confirm the uninstall request Click the Yes button to uninstall the driver 3 Once the uninstallation process is complete a dialog will displayed requesting that you reboot the system Click the Yes button to reboot the WinPAC im...

Page 89: ...2 ICP DAS Co Ltd All Rights Reserved E mail service icpdas com 2 3 2 4 Other Windows CE7 0 Devices The driver for using with other windows CE7 0 devices can be obtained from the PenMount website to download the latest driver We are use PenMount 6000 chip PenMount website http www salt com tw en ...

Page 90: ...ouch driver for XP embedded is a universal driver USB and Serial both use the same driver 2 4 1 Universal Driver Two universal touch drivers are available The first is for XP 8000 series modules of ICP DAS PAC controller and the second is for other Windows XP embedded system XP 8000 series 1 Using ATOM CPU XP 8141 Atom XP 8341 Atom XP 8741 Atom 2 Using LX800 CPU XP 8041 XP 8341 XP 8741 ...

Page 91: ...Sec 1 The user can directly use this cable to connect the monitor with COM5 of XP 8000 to use universal touch driver to do a touch operation by serial way If the user wants to use other com port please note the position of TX and RX of COM port About the pin assignment please refer to the user manual of the XP 8000 1 Copy the driver from the CD ROM to the XP 8000 The PenMount Windows Universal Dri...

Page 92: ...DAS Co Ltd All Rights Reserved E mail service icpdas com TPM 4100_TP 4100 TP 5120 TP 6150 TP 7170 For example CD TP 2070 Driver Win_XP_Embedded XP 8000 device 2 Executing XPAC Utility to disable EWF on desktop 3 Double click Setup exe in the driver s folder 4 Click Next button to continue installation ...

Page 93: ...User Manual version 1 1 0 Last Revised December 2015 Page 93 Copyright 2012 ICP DAS Co Ltd All Rights Reserved E mail service icpdas com 5 Click I Agree button 6 Click Install button to install driver to destination folder ...

Page 94: ...ght 2012 ICP DAS Co Ltd All Rights Reserved E mail service icpdas com Tips Warnings If a screen appears that shows Found New Hardware Wizard Do not use this hardware wizard Press Cancel If a screen appears that shows Hardware Installation Please press Continue Anyway 7 Click Finish button ...

Page 95: ...USB or serial cable to XP 8000 USB and serial can not be used simultaneously If the USB or serial touch doesn t work please follow the steps below a From the Start menu click Programs PenMount Universal Driver PenMount Control Panel b Device tab click Refresh button to search USB or serial touch screen monitor if search is successful PenMount 6000 USB or PenMount 6000 RS232 will show ...

Page 96: ...st Revised December 2015 Page 96 Copyright 2012 ICP DAS Co Ltd All Rights Reserved E mail service icpdas com c If search is successful USB or serial touch driver has been installed 10 Executing XPAC Utility to enable EWF on desktop 11 Restart XP 8000 ...

Page 97: ...nitor User Manual version 1 1 0 Last Revised December 2015 Page 97 Copyright 2012 ICP DAS Co Ltd All Rights Reserved E mail service icpdas com Tips 1 Appendix A A 2 Don t plug USB cable when using serial touch driver ...

Page 98: ... 2 Configuration for XP 8000 Calibration 1 From the Start menu click Programs PenMount Universal Driver PenMount Control Panel 2 Check if the pattern PenMount 6000 USB or PenMount 6000 RS232 shows If yes select a device and click Configure button If no refer to Sec 2 4 1 1 3 Click Standard Calibration to calibrate USB touch driver Serial touch driver Or 1 1 2 2 ...

Page 99: ... Last Revised December 2015 Page 99 Copyright 2012 ICP DAS Co Ltd All Rights Reserved E mail service icpdas com 4 Executing XPAC Utility to disable EWF to save setting on desktop 5 Restart XP 8000 6 Executing XPAC Utility to enable EWF on desktop ...

Page 100: ... Change the COM Port For serial touch driver Method1 The touch driver will detect all com port to find what com port connects to serial touch screen monitor automatically when XP 8000 reboots every time Method2 Please refer to the Step 9 of Sec 2 4 1 1 to detect again Simulating Right Mouse Button 1 From the Start menu click Programs PenMount Universal Driver PenMount Control Panel 2 Click Right B...

Page 101: ...l service icpdas com 3 Show a screen below Left picture Click the mouse Turn into right picture 4 Click any object Click My computer to test if the Right Button Icon function work If the screen below shows the Right Button Icon function works 5 You can simulate the operation of right mouse button to repeat step3 and step4 for any object ...

Page 102: ...ed E mail service icpdas com 2 4 1 3 Uninstall for XP 8000 The following procedure describes how to uninstall the PenMount universal touch driver 1 Executing XPAC Utility to disable EWF to start to save setting 2 From the Start menu click Programs PenMount Universal Driver Uninstall 3 Click Yes button 4 Click Yes button to reboot ...

Page 103: ...r User Manual version 1 1 0 Last Revised December 2015 Page 103 Copyright 2012 ICP DAS Co Ltd All Rights Reserved E mail service icpdas com 5 After reboot executing XPAC Utility to enable EWF on desktop 6 Restart XP 8000 ...

Page 104: ... DAS Co Ltd All Rights Reserved E mail service icpdas com 2 4 1 4 Other Windows XP Embedded Devices The driver for using with other windows XP Embedded devices can be obtained from the PenMount website to download the latest driver We are use PenMount 6000 chip PenMount website http www salt com tw en ...

Page 105: ... Ltd All Rights Reserved E mail service icpdas com 2 5 Windows XP 7 The touch driver for 2k XP 2003 2008 Vista 7 is a universal driver USB and Serial both use the same driver 2 5 1 Universal Driver This section describes how to install calibrate and uninstall the universal driver for 2k XP 2003 2008 Vista 7 ...

Page 106: ...enMount universal touch driver 1 Copy the driver from the CD ROM to your device The touch driver can be obtained from name Driver path TP 2070 TP 3080 TPM 4100_TP 4100 TP 5120 TP 6150 TP 7170 CD name Driver Win_XP_7 For example CD TP 2070 Driver Win_XP_7 2 Connect USB or serial cable to your device USB and serial can not be used simultaneously 3 Executing Setup exe 4 Click Next button to continue ...

Page 107: ...or User Manual version 1 1 0 Last Revised December 2015 Page 107 Copyright 2012 ICP DAS Co Ltd All Rights Reserved E mail service icpdas com 6 Click Install button to install driver 7 Click Finish to finish installation ...

Page 108: ...service icpdas com Tips Warnings When the system first detects a touch monitor a screen appears that shows Unknown Device Do not use this hardware wizard Press Cancel 8 If the USB or serial touch doesn t work following the steps below a From the Start menu click All Programs PenMount Windows Universal Driver Utility PenMount Control Panel ...

Page 109: ...Ltd All Rights Reserved E mail service icpdas com b Device tab click Refresh button to search USB or serial touch screen monitor if search is successful PenMount 6000 USB or PenMount 6000 RS232 will show c If search is successful the USB or serial touch driver has been installed 1 2 USB touch Serial touch 1 2 ...

Page 110: ...itor User Manual version 1 1 0 Last Revised December 2015 Page 110 Copyright 2012 ICP DAS Co Ltd All Rights Reserved E mail service icpdas com Tips 1 Appendix A A 2 Don t plug USB cable when using serial touch driver ...

Page 111: ...5 1 2 Configuring Calibration 1 From the Start menu click All Programs PenMount Windows Universal Driver Utility PenMount Control Panel 2 Check if the pattern PenMount 6000 USB or PenMount 6000 RS232 shows If yes select a device and click Configure button If no refer to Sec 2 5 1 1 3 Click Standard Calibration to calibrate USB touch driver Serial touch driver ...

Page 112: ...r Method1 The touch driver will detect all com port to find what com port connects to serial touch screen monitor automatically when PC reboots every time Method2 Please refer to the Step 8 of Sec 2 5 1 1 to detect again Simulating Right Mouse Button For details of how to configure right mouse button simulation please refer to the process describes in Simulating the Right Mouse Button in Sec 2 4 1...

Page 113: ...P DAS Co Ltd All Rights Reserved E mail service icpdas com 2 5 1 3 Uninstall The following procedure describes how to uninstall the PenMount universal touch driver 1 XP Start All Programs PenMount Windows Universal Driver Uninstall Win7 Control Panel Programs Programs and Features 2 Click Next button ...

Page 114: ...Panel Monitor User Manual version 1 1 0 Last Revised December 2015 Page 114 Copyright 2012 ICP DAS Co Ltd All Rights Reserved E mail service icpdas com 3 Click Uninstall button 4 Click Finish button to reboot ...

Page 115: ...1 Don t install USB and serial touch driver simultaneously in a device Platform WP 8000 WP 5000 XP 8000 CE6 series contorller If USB and serial touch drivers are installed at the same time in a device USB and serial touch drivers will conflict Please install only one touch driver in a device every time We suggest this installation below Please don t do this installation below ...

Page 116: ... The OS uses wrong USB driver and the driver conflicts with serial touch driver There are still other USB drivers in OS although USB touch driver is not installed Solution Remove USB cable and restart the device Platform XP 8000 series controller windows XP 2008 7 PC Problem Both USB and RS 232 cables are plugged Effect Only USB touch can work or the touch operation works incorrectly Reason The to...

Page 117: ... 2013 Add related description of TP 3070 1 0 5 October 2013 Add related description of TP 6150 TPM 6150 1 0 6 December 2013 Modify the model name TP 3070 to TP 2070 1 0 7 June 2014 1 Delete related description of TPM 6150 2 Add related description of TP 3080 TP 5120 TP 7170 3 There are two kinds of OSD menu TP 4100 TPM 4100 TP 2070 use the same OSD menu TP 3080 TP 5120 TP 6150 TP 7170 use the othe...

Page 118: ... mail service icpdas com 1 0 8 July 2014 Add A 1 and A 2 of Appendix A 1 0 9 January 2015 Modify LED characters Data to RUN Power to PWR See the section 1 6 1 System Configuration 1 1 0 April 2015 1 Add weight specification for TP 4100 TPM 4100 2 Add new Section 2 3 Windows CE 7 0 3 Modify Sec 2 1 1 4 2 1 2 4 2 2 1 4 2 2 2 4 2 4 1 4 ...

Reviews: