


Reviews:
No comments
Related manuals for SCRUB 80 D
Scrubmaster B260 R
Brand: HAKO Pages: 106

Scrubmaster B175 R
Brand: HAKO Pages: 102
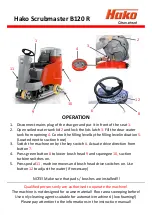
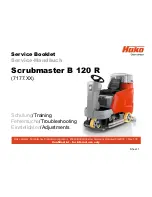
Scrubmaster B 120 R
Brand: HAKO Pages: 2
Scrubmaster B 120 R
Brand: HAKO Pages: 99

Scrubmaster B 120 R
Brand: HAKO Pages: 88

COMFORT ENERGY
Brand: ROBLIN Pages: 32

HydroBot Series
Brand: Intellibot Robotics Pages: 40

C110 55B
Brand: Clemas & Co Pages: 32

10052480
Brand: Windsor Pages: 125

Ace 20BA
Brand: Triple S Pages: 38

BC 265
Brand: BlueChimney Pages: 47

T2161XBIN
Brand: THOR Pages: 12

HJA2182
Brand: Lamona Pages: 16

Fang 17
Brand: Parish Pages: 56

HJA2180-1
Brand: Lamona Pages: 17

FilterBox 12M
Brand: Nederman Pages: 26

85U
Brand: HAL Extraction Pages: 22

B 260
Brand: Kärcher Pages: 12


