background image


XMP-2200/2300/2400 User’s Manual 


Notes about model variants


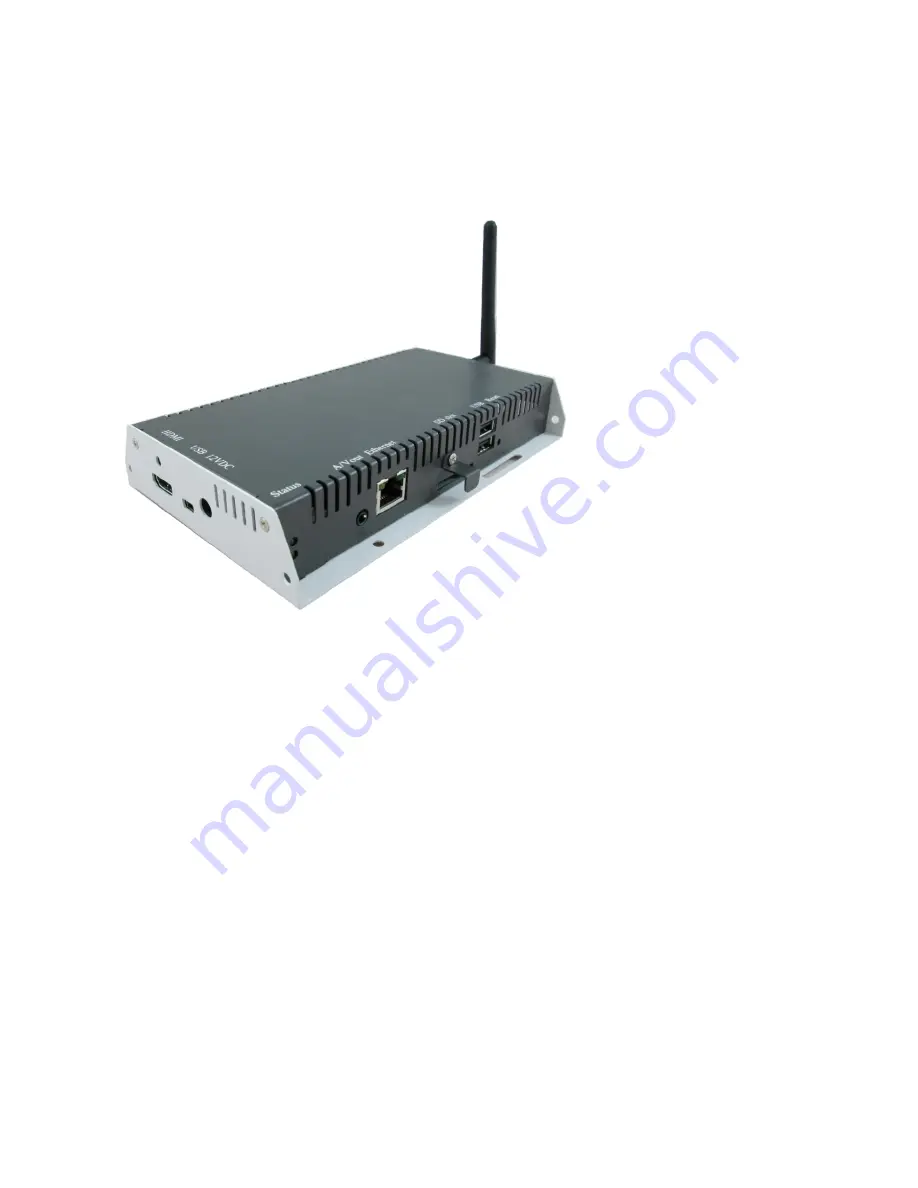
The XMP-2300 and XMP-2400 models are based on XMP-2200 with the following differences: 

XMP-2200 

Ethernet only 
1 AV-out


XMP-2300 

Ethernet  + Wi-Fi 
1 AV-out


XMP-2400 

Ethernet  + Wi-Fi 
1 AV-out + 1 AV-in 
 + 1 Component-in


Wireless operations apply to XMP-2300 and XMP-2400.  
AV inputs apply to XMP-2400 only. 
All other aspects of operation are identical for each model.


Summary of Contents for XMP-2200

Page 1: ...XMP 2200 with the following differences XMP 2200 Ethernet only 1 AV out XMP 2300 Ethernet Wi Fi 1 AV out XMP 2400 Ethernet Wi Fi 1 AV out 1 AV in 1 Component in Wireless operations apply to XMP 2300...

Page 2: ...8 2 7 Content configuration AppStart 8 2 8 Content configuration FailSafe 9 2 9 Content configuration EasyPlay 9 2 10 Display settings 12 2 11 Sound settings 14 2 12 System configuration Time Server 1...

Page 3: ...Formats Standards profiles S1 to S12 and E1 to E8 Multiple 3 rd party software solution compatibility Industry leading W3C SMIL support for developers XMP 2300 2400 Built in wireless b g n network XM...

Page 4: ...12V DC for power adapter Power and Status LED indicator 3 5mm composite AV output Ethernet port for network content update SD card slot with SD card cover USB ports for USB content update and configur...

Page 5: ...t configuring the player If you have already set content into the player contents will play back automatically after 15 seconds after boot up To enter the menu system at any time during playback plug...

Page 6: ...already set content services previously Auto playback can be canceled by click on the button while it s counting down User is able to enter Advanced Setting menu by clicking the Advanced button 2 3 Co...

Page 7: ...uthentication you will be asked to provide the password for access Fig 2 3 4 Wired connection To use the wired Ethernet connection connect an Ethernet cable and disable the Wireless LAN interface firs...

Page 8: ...ace For DHCP environment configuration is finished in this step Fig 2 3 5 Static IP manually assign network IP address 4 Click the Ethernet to make static IP configuration Fig 2 3 6 2 4 Time zone sett...

Page 9: ...rom available options Fig 2 4 2 2 5 Content settings 1 Click the Set content button configuration menu will be launched Fig 2 5 1 2 Input the content source URL and click Connect button player will st...

Page 10: ...of the content source normally Blue Local The device plays the contents from the USB drive or SD card Gray Disconnected The device is in the disconnection state Fig 2 6 2 2 7 Content configuration Ap...

Page 11: ...2 9 Content configuration EasyPlay The feature EasyPlay allows the player to play the media contents from the USB flash drive or SD card directly When EasyPlay is enabled the player will play the con...

Page 12: ...utton after the folders are selected Fig 2 9 2 Configure Movie Mode 6 Click on Movie for choosing movies Click on the button as marked in red below and select the movie directory from the USB drive 7...

Page 13: ...EasyPlay schedule for each time slots Type the scheduled time in the dialogue boxes marked in blue below by using the pop up keyboard or the USB keyboard Fig 2 9 4 4 The On times assigned in the time...

Page 14: ...pecifications for the best matching setting If you are connecting to composite input only monitor such as legacy CRT TV output resolution need must change to Composite NTSC or Composite PAL from here...

Page 15: ...iguration menu will be launched Fig 2 6 1 2 Click the Display sound button and then click on Display The Display Settings page will be launched Fig 2 10 1 3 Click on the Screen orientation marked in r...

Page 16: ...splay sound button and then click on Sound The Sound Settings page will be launched Fig 2 11 1 3 Click on Volumes the Volumes settings page will be launched Drag the blue dots to adjust the volumes fo...

Page 17: ...as marked in red below to enable disable the time server function 4 Click on Set to save the setting Fig 2 12 1 2 13 System configuration Scheduled reboot The feature Scheduled Reboot allows the playe...

Page 18: ...performing the firmware update 1 Download the latest firmware and copy it to the root directory of a USB drive from http support iadea com 2 Plug in the power cord into the device 3 Plug in a USB mous...

Page 19: ...0 seconds or until the status LED flashes 4 RELEASE reset button and wait for system to initialize Using a USB mouse System reset will re initialize the system clear passwords and return settings to t...

Page 20: ...save allows the player to power off automatically while idle in the Basic settings page without any action for 10 minutes 1 Click the Advanced button advanced configuration menu will be launched Fig 2...

Page 21: ...s and SMIL s non proprietary nature means that your investments are never obsolete 5 1 Introduction Using SMIL pronounced smile the language created by W3C for multimedia communications the media play...

Page 22: ...Kbps Dynamic content W3C HTML5 HTML CSS JavaScript W3C SMIL 3 0 instructions sub set Physical I O connectors HDMI 1 3a 3 5mm AV out RJ45 Ethernet USB 2 0 As XMP 2200 plus Wi Fi antenna port As XMP 220...

Page 23: ...r display Flash or Microsoft PowerPoint presentations The player features limited PowerPoint support but not Flash support While PCs can play many formats with varying degrees of success RISC based me...

Page 24: ...ng No IAdea media players play files from local storage and do not support real time video streaming over the network This delivers an optimum viewing experience free of playback quality issues such a...

Page 25: ...the unit was originally supplied and does not cover damage malfunction or failure resulting from use of incorrect voltages unauthorized installation accident misuse neglect build up of dirt or dust ab...

Reviews: