background image

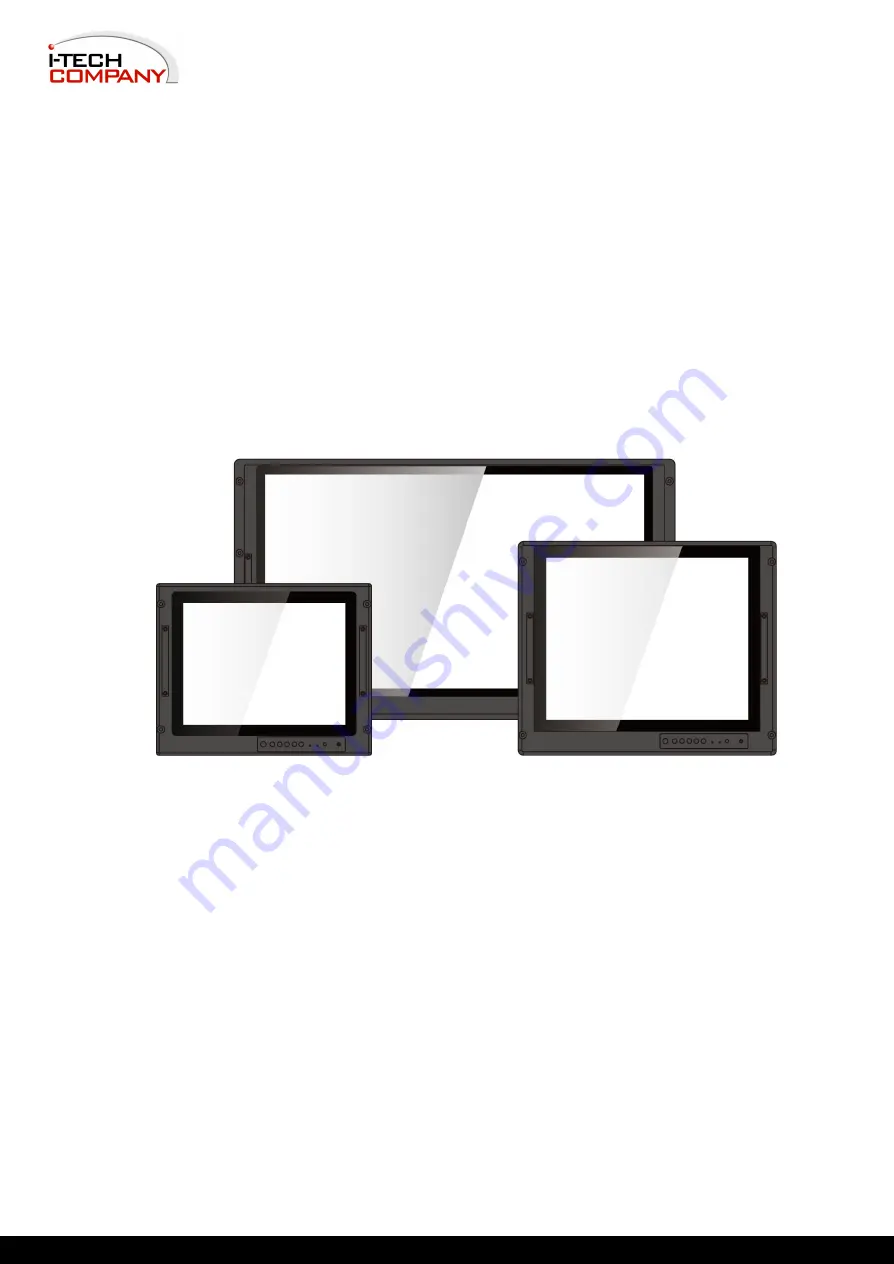
15~32” P-Cap Rack Mount 

Military Display


Model No.

WMRM1500-PCAP 

WMRM1700-PCAP


WMRM1900-PCAP


WMRMW2400-PCAP


WMRMW3200-PCAP


User Manual 

i-Tech Company LLC

EMAIL: [email protected]  WEB: www.iTechLCD.com 

Modified Date:  05-12-2022 

Summary of Contents for WMRM1500-PCAP

Page 1: ...p Rack Mount Military Display Model No WMRM1500 PCAP WMRM1700 PCAP WMRM1900 PCAP WMRMW2400 PCAP WMRMW3200 PCAP User Manual i Tech Company LLC EMAIL info itechlcd com WEB www iTechLCD com Modified Date 05 12 2022 ...

Page 2: ...ount 19 2 2 2 VESA Mount 20 2 2 Powering On 21 2 2 1 Connecting to AC Input Power Source Default 22 2 2 2 Connecting to DC Input Power Source Optional 23 2 3 Connecting Other Devices 24 2 3 1 VGA Connector 24 2 3 2 BNC Connector 25 2 3 3 DVI D Connector 25 2 3 4 HDMI Connector 26 CHAPTER 3 OPERATING THE DEVICE 28 3 1 Navigating the OSD Menu 28 3 2 OSD Menu in VGA Mode 29 3 3 OSD Menu in DVI Mode 3...

Page 3: ...fringement unless otherwise specified Applications that are described in this manual are for illustration purposes only We make no representation or guarantee that such application will be suitable for the specified use without further testing or modification Warranty Our warranty guarantees that each of its products will be free from material and workmanship defects for a period of one year from ...

Page 4: ...Federal Communications Commission Radio Frequency Interface Statement This device complies with part 15 FCC rules Operation is subject to the following two conditions This device may not cause harmful interference This device must accept any interference received including interference that may cause undesired operation This equipment has been tested and found to comply with the limits for a class...

Page 5: ...uncil directions Electromagnetic Compatibility Directive 2014 30 EU EN55024 2010 A1 2015 o IEC61000 4 2 2009 o IEC61000 4 3 2006 A1 2007 A2 2010 o IEC61000 4 4 2012 o IEC61000 4 5 2014 o IEC61000 4 6 2014 o IEC61000 4 8 2010 o IEC61000 4 11 2004 EN55032 2012 AC 2013 EN61000 3 2 2014 EN61000 3 3 2013 Low Voltage Directive 2014 35 EU EN 60950 1 2006 A11 2009 A1 2010 A12 2011 A2 2013 ...

Page 6: ...ardware and explains how to avoid the potential problem Unealerted attention indique un dommage possible à l équipement et explique comment éviter le problem potentiel WARNING AVERTISSEMENT An Electrical Shock Warning indicates the potential harm from electrical hazards and how to avoid the potential problem Un Avertissement de Choc Électriqueindique le potentiel de chocssur des emplacements élect...

Page 7: ...serious damage to the appliance Use only a cart or stand recommended by the manufacturer or sold with the monitor If you mount the monitor on a wall or shelf use a mounting kit approved by the manufacturer and follows the kit instructions The monitor should be operated with an USB cable with Mini USB B type connector on monitor end and standard USB A type connector on the other end to PC or USB si...

Page 8: ...ntation set provides information for specific user needs and includes 15 32 P Cap Rack Mount Display User Manual contains detailed description on how to use the display its components and features NOTE Some pictures in this guide are samples and can differ from actual product Document Revision History Version Date Note 1 0 5 Mar 2018 New document release ...

Page 9: ...TRODUCTION This chapter gives you product overview describes features and hardware specification You will find all accessories that come with the display device in the packing list Mechanical dimensions and drawings included in this chapter ...

Page 10: ... these Displays meet the most demanding requirements Suitable for Army Headquarters and being connected to mobile devices on the field Display can provide up to date information for immediate commands 1 1 Product Features P Cap Rack Mount Military Display features 15 32 Projected Capacitive P Cap multitouch screen Compliant with military standard MIL STD 810G F Anti corrosion housing Flush and rac...

Page 11: ...sing or damaged contact us immediately Standard package includes Display User Manual Hardcopy Power Cord MIL DTL 38999 1 2m VGA Cable 2m DVI Cable 2m VGA to 5 BNC Shielding Cable 2m Not supplied for 32 model The package may include the following optional items based on your order 1 x Touch Driver CD 1 x Touch RS 232 Shielding Cable 2 meter 1 x RS 232 Remote Control Shielding Cable 2 meter 1 x HDMI...

Page 12: ...nsions of this user manual to check mechanical drawing and I O position Component Function 1 Power input connector AC in 220V 10 50 3 Hz 2 BNC connectors Transmits analog and serial digital interface video signals or composite video 3 VGA connector The 15 pin VGA connector transmits video from video source to display 4 RS232 Optional For touch interface 5 DVI D connector Transmits uncompressed dig...

Page 13: ... adjusts brightness of the display screen or allows user to exit the OSD menu 5 Menu Allows user to enter the main menu 6 Day Night Tap this button to enter DAY MODE Tap this button to enter NIGHT MODE to increase visibility in low light conditions 7 Power LED Lights up green when the display turns on signalizes that display functions normally Lights up orange when display is suspended 8 Lock LED ...

Page 14: ...User Manual Chapter 1 Introduction 14 1 5 Dimensions 15 inch Display WMRM1500 PCAP Unit mm Dimensions 402 x 321 x 70 17 inch Display WMRM1700 PCAP Unit mm Dimensions 482 x 399 3 x 79 6 ...

Page 15: ...User Manual Chapter 1 Introduction 15 19 inch Display WMRM1900 PCAP Unit mm Dimensions 482 6 x 399 3 x 76 9 24 inch Display WMRMW2400 PCAP Unit mm Dimensions 635 2 x 430 9 x 66 ...

Page 16: ...User Manual Chapter 1 Introduction 16 32 inch Display WMRMW3200 PCAP Unit mm Dimensions 825 x 486 x 88 5 ...

Page 17: ...al Chapter 2 Installation 17 INSTALLATION This chapter provides hardware installation instructions and mounting guide for all available mounting options Pay attention to cautions and warning to avoid any damages ...

Page 18: ...e sure the wires are perpendicular at the intersection point Keep the wires separated according to interface The rule of thumb is that wiring that shares similar electrical characteristics may be bundled together Do not bundle input wiring with output wiring Keep them separate When necessary it is strongly advised that you label wiring to all devices in the system Do not run signal or communicatio...

Page 19: ...specific dimensions of the device 2 Cut a hole on a sub frame or panel according to the cutout dimensions 3 Install the device properly onto the cutout area of the sub frame or panel with the sides of the front bezel 4 Fix the device from the outside to the fixture with four M6 truss head screws Console Rack Mount Installation Size Cutout Dimensions W x D Screw Size 15 358 6 x 300 2 mm M4 truss he...

Page 20: ...xture ex swing arm with four M4 VESA screws 3 Place the device on VESA bracket 4 Follow instructions supplied with your mounting kit 5 Connect cables power on the display VESA Mount Installation Notice that VESA stand and mounting kit are not provided by iTech Size VESA Plate Screw Size 15 75 x 75 mm M4 VESA D 5 mm 4 pcs 17 100 x 100 mm M6 VESA D 6 mm 4 pcs 19 100 x 100 mm M6 VESA D 6 mm 4 pcs 24 ...

Page 21: ...installation regulations require it If you do not use a grounded outlet while using the device you may notice an electrical tingling sensation when the palms of your hands touch the device Ce produit doit être mis à la terre Utiliser seulement un cordon d alimentation avec mise à la terre Si les règlements locaux le requiert installer des câbles de mise à la terre supplémentaires Si vous n utilise...

Page 22: ...of the power connector CN1 in to a working AC outlet Note Power cords vary in appearance by region and country Connector Pinouts WARNING AVERTISSEMENT Serious injury due to shock is possible if unit is wired incorrectly or connected to voltage exceeding the input voltage range Des blessures graves en raison du choc est possible si l unité est mal câblé ou connecté à la tension maximale de la plage...

Page 23: ...lock plug firmly to the DC IN Jack 3 Connect the other end of the DC power cable wires with lug terminals that are labeled and to the terminals of the 9 36V DC Power Source Ensure that the power connections maintain the proper polarity WARNING AVERTISSEMENT Make sure that the polarization of the power lines is correct and complete including earth ground Assurez vous que la polarisation des lignes ...

Page 24: ...ng the connectors Assurez vous que l alimentation est coupée lors de la connexion et la déconnexion des connecteurs 2 3 1 VGA Connector Plug one end of the 15 pin signal cable to the video signal connector at the rear of the PC system and the other end to the Display Secure the connectors with the screws on the cable connector at both ends NOTE For the optimal results select display native resolut...

Page 25: ... one end of the DVI signal cable to the video signal connector DVI D digital only at the rear of the PC system and the other end to the Display DVI D Cable DVI D Connector Pin Assignments Pin Signal Name Pin Signal Name 1 DVI_RX2 2 DVI_RX2 3 GND 4 NC 5 NC 6 DVI SCL 7 DVI SDA 8 NC 9 DVI_RX1 10 DVI_RX1 11 GND 12 NC 13 NC 14 5V 15 DVI_CON_CABLE 16 DVI_CON_HP 17 DVI_RX0 18 DVI_RX0 19 GND 20 NC 21 NC 2...

Page 26: ...em and plug the other end to the monitor HDMI Cable HDMI Connector Pin Assignment and Signal Names Pin Signal Name Pin Signal Name 1 HDMI_RX2 2 GND 3 HDMI_RX2 4 HDMI_RX1 5 GND 6 HDMI_RX1 7 HDMI_RX0 8 GND 9 HDMI_RX0 10 HDMI_RXC 11 GND 12 HDMI_RXC 13 HDMI_CON_CEC 14 NC 15 HDMI_CON_SCL 16 HDMI_CON_SDA 17 GND 18 5V_HDMI 19 HDMI_CON_HP ...

Page 27: ...User Manual Chapter 3 Operating the Device 27 OPERATING THE DEVICE This chapter provides detailed information on how to operate the display ...

Page 28: ...nu on the screen Select the menu you want to adjust Press the button Shift the item selections up or down until it is desired and then press the button again to enter the menu item Adjust item settings Press the button Adjust the value of setting Once you adjust the value of setting the value will be stored automatically Exit the OSD menu Select the EXIT OSD item or press the Exit Key directly Ret...

Page 29: ... WHITE BALANCE RECALL YES NO COLOR USER RED GREEN BLUE 9300K 6500K ADC BRIGHTNESS OSD EXIT YES NO GAMMA GAMMA 0 GAMMA 1 GAMMA 2 GAMMA 3 Description of items in the navigation menu BRICONTRAST Press to increase or to decrease the brightness or contrast BRIGHTNESS Use to adjust the screen s brightness CONTRAST Use to adjust the screen s contrast POSITION You can adjust the screen s position by horiz...

Page 30: ...e white color field from the default color temperature settings Also you can fine tune the color temperature by USER option if necessary USER Choose RED GREEN BLUE to set value of color temperature brightness to suit your own preference 9300K Use to set value of monitor for the CIE coordinate 9300 color temperature 6500K Use to set value of monitor for the CIE coordinate 6500 color temperature ADC...

Page 31: ...pter 3 Operating the Device 31 RECALL You can recall the factory default setting by selecting YES Select NO to return the main menu OSD EXIT You can exit the OSD menu by selecting YES Select NO to return the main menu ...

Page 32: ...de RECALL YES NO COLOR USER RED GREEN BLUE OSD EXIT YES NO Description of items at the navigation menu BRICONTRAST Press to increase or to decrease the brightness or contrast BRIGHTNESS Use to adjust the screen s brightness CONTRAST Use to adjust the screen s contrast COLOR You can fine tune the color temperature by USER option if necessary USER Choose RED GREEN BLUE to set value of color temperat...

Page 33: ...ing volume and mute VOLUME ADJUST Use to adjust the volume of speaker SPEAK ON OFF Use to make the speaker work or mute RECALL You can recall the factory default setting by selecting YES Select NO to return the main menu OSD EXIT You can exit the OSD menu by selecting YES Select NO to return the main menu ...

Page 34: ...User Manual Appendix A Technical Specifications 34 TECHNICAL SPECIFICATIONS This section includes technical specifications Appendix ...

Page 35: ...D 1 x RS232 Touch Interface Optional 1 x D Sub 15 pin 5 x BNCs R G B H V 1 x DVI D 1 x RS232 Touch Interface Optional 1 x D Sub 15 pin 1 x DVI D 1 x HDMI Environmental Considerations Operating Temperature 20 C to 60 C 20 C to 60 C 20 C to 60 C 0 C to 50 C wide temp by request 0 C to 50 C wide temp by request Operating Humidity 95 RH 3 95 RH 3 95 RH 3 95 RH 3 95 RH 3 Shock MIL STD 810F G Method 516...

Page 36: ...User Manual Appendix B Military Grade Compliance 36 MILITARY GRADE COMPLIANCE This section includes description of military grade compliance Appendix ...

Page 37: ...00KHz 100 66dB 500KHz 10MHz 66dB RE101 Radiated Emissions 30Hz 100kHz 30 100k 180 110 dBpT RE102 Radiated Emissions 10kHz 18GHz 2MHz 18G Hz 44 89 dB Military Grade Environmental Compliance Environmental MIL STD 810F G Compliance Thermal Shock 33 C to 63 C Method 503 5 Procedure I B Humidity 30 C to 60 C 95 2 RH Method 507 5 Low Pressure Operating 15 000 ft Method 500 5 Procedure II Storage 15 000 ...

Page 38: ...User Manual Appendix C Maintenance 38 MAINTENANCE This section includes supported frequency range of available video inputs Appendix ...

Page 39: ... permanent staining or discoloration may occur Cleaning the Casing Use the following procedure to clean the equipment CAUTION ATTENTION Always turn off the device and disconnect other peripherals before cleaning and maintenance procedures Toujours éteindre l appareil et débrancher tous les périphériques avant que les procédures de nettoyage et d entretien Before Cleaning Make sure the device is tu...

Page 40: ......

Reviews: