background image

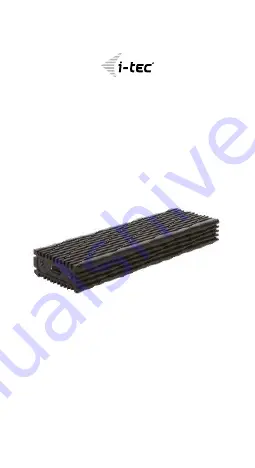
MySafe USB-C M.2 NVMe SSD External Case

For M.2 M-Key NVMe SSD discs

P/N: C31MYSAFENVME

User guide • Gebrauchsanweisung • Mode d’emploi 

Manual de instrucciones • Manuale • Uživatelská příručka   

Instrukcje obsługi • Užívateľská príručka

Vartotojo vadovas • Handleiding  
Summary of Contents for MySafe C31MYSAFENVME

Page 1: ...External Case For M 2 M Key NVMe SSD discs P N C31MYSAFENVME User guide Gebrauchsanweisung Mode d emploi Manual de instrucciones Manuale Uživatelská příručka Instrukcje obsługi Užívateľská príručka Vartotojo vadovas Handleiding ...

Page 2: ...fr sous l onglet Manuels pilotes Si vous avezdesproblèmes veuillezcontacternotreéquipesupport à support itecproduct com ES Por favor lea atentamente todo el manual El manual detallado está disponible en nuestro sitio web www i tec cz es bajo la pestaña Manuales y controladores de este producto Si tiene algún problema póngase en contacto con nuestro equipo de soporte en support itecproduct com IT L...

Page 3: ... V prípade problémov sa môžete obrátiť na našu technickú podporu support itecproduct com LTPrašomeįdėmiaiperskaitytivisąvadovą Išsamųvadovągalite rasti mūsų svetainėje www i tec cz en šio produkto skyrelyje Manuals drivers Iškilus problemoms galite susisiekti su mūsų technine pagalba support itecproduct com NL Wij vragen u vriendelijk om de volledige handleiding zorgvuldig door te lezen Een gedeta...

Page 4: ...ČESKY 4 ...

Page 5: ...M 2 NVMe SSD External Case ENGLISH 06 08 DEUTSCH 09 11 FRANÇAIS 12 14 ESPAÑOL 15 17 ITALIANO 18 20 ČESKY 21 23 POLSKI 24 26 SLOVENSKY 27 29 LIETUVOS 30 32 NEDERLANDS 33 35 WEEE 36 37 Declaration of Conformity 38 39 FCC 40 ...

Page 6: ...s of screws on the connector side of the case and take off the cover 2 Take out the motherboard 3 Insert M 2 disc so that the slot in the disc corresponds to the slot on the M 2 connector After that screw up the M 2 disc on the opposite side to the motherboard Insert the motherboard together with the M 2 disc back and screw up the pair of the screws 4 Connect a USB cable to the case Now the device...

Page 7: ...itialized click on the left field by the right button and select Initialize disc 6 Click with the right button on the area of the disc and select New simple bunch click on Next 7 Leave the maximum bunch size and click on Next 8 Select Assign a letter of the unit and click on Next 9 Select Format the bunch with the following setting leave the initial settings Click on Next and Finish 10 HDD will be...

Page 8: ...al Case ENGLISH ground Check functionality when the cover is broken Send the device back if it does not work in accordance with the user manual FREQUENTLY ASKED QUESTIONS Available on our website www i tec cz en on the FAQ tab of this product ...

Page 9: ...STALLATION DER M 2 FESTPLATTE Befolgen Sie die nachfolgenden Anweisungen 1 Schrauben Sie die 2 Schrauben an der Konnektorseite des Gehäuses aus und nehmen Sie den Deckel ab 2 Nehmen Sie die Grundplatte heraus 3 Legen Sie die M 2 Festplatte so ein dass der Ausschnitt an der Festplatte dem Ausschnitt am M 2 Konnektor entspricht Dann schrauben Sie die M 2 Festplatte auf der anderen Seite zur Grundpla...

Page 10: ...n Maustaste auf Mein Computer 2 Wählen Sie Bearbeiten 3 Klicken Sie auf Festplattenverwaltung 4 Wählen Sie die Festplatte bei der nicht zugeordnet beziehungsweise nicht initialisiert und die Kapazität der eingelegten Festplatte entspricht es wird um ein paar Reihen weniger angezeigt 5 Wenn die Festplatte nicht initialisiert ist klicken Sie mit der rechter Maustaste im linken Feld und wählen Sie Fe...

Page 11: ...es rutscht und auf den Boden fällt Bewahren Sie das Handbuch zur späteren Verwendung auf In Zusammenarbeit mit der Serviceabteilung Überprüfen Sie die Funktionalität nachdem das Gerät ins Wasser oder auf den Boden gefallen ist Überprüfen Sie die Funktionalität bei Beschädigung der Abdeckung Reklamieren Sie Geräte die nicht so funktionieren wie im Handbuchs beschrieben HÄUFIG GESTELLTE FRAGEN Verfü...

Page 12: ...pilotes dans le système Port USB C libre INSTALLATION MATERIEL DU DISQUE M 2 Veuillez suivre ces étapes 1 Dévissez les 2 vis situées du côté connecteur du cadre et retirez le couvercle 2 Retirez la carte primaire 3 Insérez le disque M 2 de sorte que la découpe du disque corresponde à la découpe du connecteur M 2 Ensuite vissez sur le côté opposé le disque M 2 à la carte primaire Remettez le disque...

Page 13: ...MATER UN NOUVEAU DISQUE DUR 1 Faites un clic droit sur Poste de travail 2 Sélectionnez Gérer 3 Cliquez sur Gestion des disques 4 Sélectionnez le disque dur qui est signalé comme Non attribué ou Non initialisé et où est indiqué la capacité du disque inséré indication parfois moindre 5 Si le disque n est pas initialisé faites un clic droit dans le champ gauche et sélectionnez Initialiser le disque 6...

Page 14: ...e d instructions et mode d emploi pour son éventuelle utilisation postérieure Veuillez collaborer s il vous plaît avec le Département de Service Pour vérifier le bon et correct fonctionnement du dispositif après une tombée à l eau ou à terre Pour vérifier le bon et correct fonctionnement quand le couvercle montre une rupture Pour procéder à une réclamation du dispositif qui ne fonctionne pas confo...

Page 15: ...a Puerto USB C gratuito INSTALACIÓN HARDWARE DEL DISCO M 2 Sigua estos pasos 1 Desatornille los 2 tornillos en el lado del conector de la carcasa y retire la cubierta 2 Retire la placa del base 3 Inserte el disco M 2 de modo que el corte en el disco corresponda con el puerto en el conector M 2 Luego atornille el disco M 2 del otro lado de la placa base Inserte el disco M 2 hacia atrás y atornille ...

Page 16: ...r 3 Haga clic en Administración de discos 4 Seleccione la unidad de disco duro que dice Sin asignar o Sin inicializar y la capacidad del disco insertado se muestra algunas veces menos que el disco tiene 5 Si el disco no está inicializado haga clic derecho en el cuadro de la izquierda y seleccione Inicializar disco 6 Haga clic derecho en el área del disco y seleccione Nuevo volumen simple haga clic...

Page 17: ...lanas evite que pueda deslizarse y caer al suelo Conserve el manual para un eventual uso en el futuro En colaboración con el departamento de servicio técnico Verifique el funcionamiento tras una caída al agua o al suelo Compruebe el funcionamiento en caso de que la cubierta esté agrietada Formule una reclamación del dispositivo según lo indicado en el manual PREGUNTAS FRECUENTES disponible en nues...

Page 18: ...atica degli strumenti dal sistema Una porta USB C libera INSTALLAZIONE HARDWARE DEL DISCO M 2 Procedere secondo le seguenti istruzioni 1 Svitare 2 viti posizionate sul lato dei connettori e togliere il coperchio 2 Estrarre la scheda madre 3 Inserire il disco M 2 facendo combaciare il profilo del disco con il profilo del connettore M 2 Dopodiché avvitare il lato opposto del disco M 2 alla scheda ma...

Page 19: ...Cliccare sulla voce Gestione computer 3 Cliccare sulla voce Gestione dischi 4 Selezionare il disco rigido che riporta la scritta Non formattato o eventualmente Non inizializzato assieme all informazione sulla sua capacità può essere visualizzato il valore molto inferiore 5 Qualora il disco non sia ancora inizializzato cliccare con il pulsante destro del mouse sul campo sinistro e scegliere la voce...

Page 20: ...itare la caduta per terra a causa del suo scivolamento Conservare gli strumenti e anche il Libretto d uso In collaborazione con il Centro di assistenza tecnica controllare il funzionamento del dispositivo dopo la sua caduta per terra o nell acqua verificare il funzionamento del dispositivo in caso di rottura dell involucro sporgere il reclamo se il dispositivo non funziona secondo il Libretto d us...

Page 21: ...ujících pokynů 1 Vyšroubujte 2 šroubky na konektorové straně rámečku a sejměte kryt 2 Vyjměte základní desku 3 Vložte M 2 disk tak aby výřez v disku odpovídal výřezu na M 2 konektoru Poté M 2 disk na opačné straně přišroubujte k základní desce Tu vložte i s M 2 diskem zpět a zašroubujte dvojici šroubků 4 Připojte USB kabel k rámečku Nyní je zařízení připraveno k použití SOFTWAROVÁ INSTALACE Window...

Page 22: ...iřazeno případně Neinicializováno a udaná kapacita vloženého disku zobrazeno bývá o několik řádů míň 5 Pokud není disk inicializován klikněte v levém poli pravým tlačítkem a zvolte Inicializovat disk 6 Pravým tlačítkem klikněte na oblast disku a zvolte Nový jednoduchý svazek klikněte na Další 7 Velikost svazku ponechejte na maximu a klikněte na Další 8 Zvolte Přiřadit písmeno jednotky a klikněte n...

Page 23: ...ujete se tím sklouznutí a pádu na zem Uschovejte manuál pro pozdější možné použití V součinnosti se servisním oddělením Ověřte funkčnost po pádu do vody nebo na zem Ověřte funkčnost při prasknutí krytu Reklamujte zařízení nefungující dle manuálu ČASTO KLADENÉ OTÁZKY K dispozici na našem webu www i tec cz v záložce FAQ u tohoto produktu ...

Page 24: ...0 xoraznowsze automatyczna instalacja sterowników z system Wolny port USB C INSTALACJA DYSKU M 2 Postępuj w poniższej instrukcji 1 Odkręć 2 śrubki z obudowy po stronie ze złączami i zdejmij przykrywkę 2 Wyjmij płytę główną 3 Umieść dysk M 2 aby złącze dysku pasowało do złącza M 2 Przykręć dysk do płyty głównej poprzeciwnej stronie Umieść płytę główną razem z dyskiem M 2 w obudowie i przykręć śrubk...

Page 25: ...FORMATOWANIE NOWEGO DYSKU 1 Kliknij prawym przyciskiem myszy Komputer 2 Wybierz Zarządzaj 3 Kliknij na Zarządzanie dyskami 4 Wybierz zaznaczony dysk Nieprzypisany lub Niezainicjowany z odpowiednią pojemnością pokazywana wartość jest nieznacznie niższa 5 Umieszczony dysk nie jest zainicjowany kliknij prawym przyciskiem myszy w lewym obszarze i wybierz Zainicjuj dysk 6 Kliknij prawym przyciskiem mys...

Page 26: ...lu uniknięcia upadku Zachować instrukcję do ewentualnego późniejszego użycia We współpracy z działem serwisu Sprawdzić funkcjonalność po upadku do wody lub na twarda powierzchnię Sprawdzić funkcjonalność gdy obudowa uległa uszkodzeniu Odesłać urządzenie gdy nie pracuje zgodnie z instrukcją CZĘSTO ZADAWANE PYTANIA dostępne na naszych stronach www i tec cz pl w zakładce FAQ przy niniejszym produkcie...

Page 27: ...1 Odskrutkujte 2 skrutky na konektorovej strane rámčeku a zložte kryt 2 Vyberte základnú dosku 3 Vložte M 2 disk tak aby výrez v disku zodpovedal výrezu na M 2 konektore Potom M 2 disk na opačnej strane priskrutkujte k základnej doske Tú vložte i s M 2 diskom späť a zaskrutkujte dvojicu skrutiek 4 Pripojte USB kábel k rámčeku Teraz je zariadenie pripravené na použitie SOFTWAROVÁ INŠTALÁCIA Windows...

Page 28: ...vedené Nepriradené prípadne Neinicializované a udaná kapacita vloženého disku zobrazená býva o niečo nižšia 5 Pokiaľ nie je disk inicializovaný kliknite v ľavom poli pravým tlačidlom a zvoľte Inicializovať disk 6 Pravým tlačidlom kliknite na oblasť disku a zvoľte Nový jednoduchý zväzok kliknite na Ďalší 7 Veľkosť zväzku ponechajte na maxime a kliknite na Ďalší 8 Zvoľte Priradiť písmeno jednotky a ...

Page 29: ...ujete sa tým skĺznutiu a pádu na zem Uschovajte manuál pre neskoršie možné použitie V súčinnosti so servisným oddelením Overte funkčnosť po páde do vody alebo na zem Overte funkčnosť pri prasknutí krytu Reklamujte zariadenie nefungujúce podľa manuálu ČASTO KLADENÉ OTÁZKY k dispozícii na našom webe www i tec cz v záložke FAQ pri tomto produkte ...

Page 30: ...adovaukitės toliau pateiktais nurodymais 1 Atsukite 2 varžtus rėmelio jungties pusėje ir nuimkite dangtį 2 Išimkite pagrindinę plokštę 3 Įdėkite diską M 2 taip kad išpjova diske atitiktų jungties M 2 išpjovai Po to diską M 2 kitoje pusėje priveržkite varžtais prie pagrindinės plokštės Plokštę su M 2 disku įdėkite atgal į vietą ir priveržkite du varžtus 4 Prie rėmelio prijunkite USB kabelį Įrenginy...

Page 31: ...a arba Neinicijuota ir yra nurodyta disko galia įprastai rodoma keliomis eilutėmis mažiau 5 Jeigu diskas nėra inicijuotas paspauskite kairiajame lauke dešiniuoju mygtuku ir pasirinkite Inicijuoti diską 6 dešiniuoju mygtuku paspauskite ties disku ir pasirinkite Naujas paprastas tomas paspauskite ties Kita 7 Palikite tomo dydį ant Maksimalaus ir paspauskite ties Kitas 8 Pasirinkite Priskirti bloko r...

Page 32: ...site slydimo ir kritimo ant žemės Vadovą saugokite vėlesniam naudojimui Bendradarbiaudami su servisu Patikrinkite veikimą po įkritimo į vandenį arba nukritimo ant žemės Įskilus dangčiui patikrinkite veikimą Jeigu įrenginys neveikia pateikite pretenzijas vadovaudamiesi įrenginio vadovu DAŽNAI UŽDUODAMI KLAUSIMAI rasite mūsų svetainėje www i tec cz lt skiltyje FAQ prie šio produkto ...

Page 33: ...ort HARDWARE INSTALLATIE M 2 SCHIJF Zet achtereenvolgens de volgende stappen 1 Draai de 2 schroeven aan de connectorzijde van het frame los en verwijder de behuizing 2 Neem de grondplaat uit 3 Plaats de M 2 schijf zo dat de uitsparing in de schijf overeenkomt met de uitsparing op de M 2 connector Schroef vervolgens de M 2 schijf aan de andere kant tegen de grondplaat Plaat die samen met de M 2 sch...

Page 34: ...E HDD 1 Klik met de rechtermuisknop op Deze computer 2 Kies Beheer 3 Klik op Schijfbeheer 4 Selecteer de HDD met de tekst Niet toegewezen of Niet geïnitialiseerd en de getoonde capaciteit van de geplaatste schijf enkele regels daaronder weergegeven 5 Als de schijf niet is geïnitialiseerd klikt u met de rechtermuisknop in het linkervak en selecteert u Schijf initialiseren 6 Klik met de rechtermuisk...

Page 35: ...d u voorkomt op die manier dat het product wegglijdt en op de grond valt Bewaar de drivers en de handleiding voor event later gebruik In samenwerking met de serviceafdeling Controleer de functionaliteit na het vallen van het product in water of op de grond Controleer de functionaliteit als het product barsten vertoont Reclameer dit product als het niet werkt in overeenstemming met de handleiding V...

Page 36: ...vie utile dudit dispositif vous vous voyez dans l obligation d assurer que le dispositif se trouve déposé en un respectif centre de collecte dûment établi à cette fin et non en d autres centres de ramassage qui soient destinés à déposer de courants déchets municipaux non triés De cette manière on contribue considérablement à une amélioration en matière d environnement où nous vivons tous Seulement...

Page 37: ...eniu životného prostredia nás všetkých Iba pre Európsku úniu POLSKI To urządzenie oznakowane jest specjalnym symbolem odzysku Pookresie użytkowania trzeba je zwrócic do odpowiedniego punktu zbiörki i nie wolno umiestczać go razem z nieposortowanymi odpadami Takie dzialanie przyniese korzyść dla środowiska Tylko w Unii Europejskiej LIETUVIU Šis gaminys yra pažymetas specialiu atlieku tvarkymo ženkl...

Page 38: ...immung La détermination Determinación Determinazione Určení Určenie Opcje Ustatymas Doel Product is determined for using in PC as equipment Das Produkt ist für Austattung und als Zubehör von Computern bestimmt Le produit est déterminé pour une utilisation sur PC comme équipement El producto se determina para usar en PC como equipo Destinato per essere usato come attrezzatura informatica o come acc...

Page 39: ...é dans des conditions d application standard y es seguridad bajo condiciones de aplicación estándar ed è sicuro in condizioni d uso normali a je bezpečný za podmínek obvyklého použití a je bezpečný za podmienok obvyklého použitia oraz jest produktem bezpiecznym przy standardowym wykorzystywaniu ir naudojant įprastomis sąlygomis yra saugus en is veilig onder de omstandigheden van normaal gebruik Ad...

Page 40: ...equipment has been tested and found to comply within the limits of a Class B digital device pursuant to Part 15 of the FCC Rules These limits are designed to provide reasonable protection against harmful interference in a res idential installation ...

Reviews: