background image

IMPORTANT

Keep in store for 
future reference!

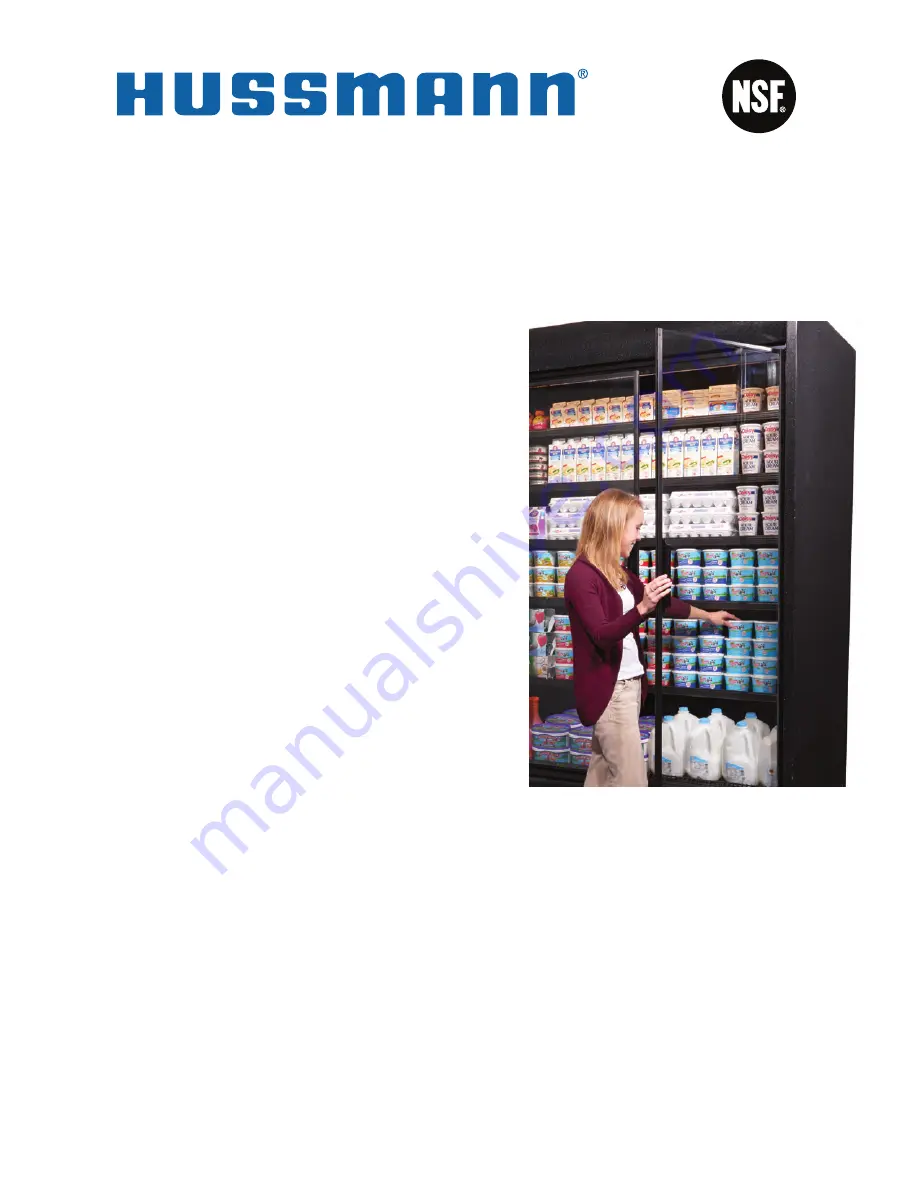
EcoVision EZ Door Upgrade

for Impact Medium Temperature Merchandisers

Spanish 3005584

French 3005586

Installation &  

Operation Manual

P/N 0558756_C

Impact 

Series

May 2018

®

®

MANUAL- I/O IMPACT ECOVISION EZ

Summary of Contents for EcoVision EZ Door Upgrade

Page 1: ...re for future reference EcoVision EZ Door Upgrade for Impact Medium Temperature Merchandisers Spanish 3005584 French 3005586 Installation Operation Manual P N 0558756_C Impact Series May 2018 MANUAL I O IMPACT ECOVISION EZ ...

Page 2: ...E YOU BEGIN Read these instructions completely and carefully PERSONAL PROTECTION EQUIPMENT PPE Personal Protection Equipment PPE is required whenever servicing this equipment Always wear safety glasses gloves protective boots or shoes long pants and a long sleeve shirt when handling glass ...

Page 3: ...on Joined Together 12 Installing Mullions 13 Installing Plate Assembly 14 Installing EcoVision EZ Door s and Top Bushings 15 Adjusting Doors 16 Replace Panels Bumpers Canopy Fascia etc 18 OPERATION Start Up Stocking 19 Installing Stability Bracket Kits for Narrow Excel Cases 20 Technical Guideline for Case and Refrigeration System Adjustments 21 Cases 21 Line Ups 21 Refrigeration System Dx System ...

Page 4: ...w Driver Phillips Screw Driver ANSI Z535 5 DEFINITIONS DANGER Indicate s a hazardous situation which if not avoided will result in death or serious injury WARNING Indicate s a hazardous situation which if not avoided could result in death or serious injury CAUTION Indicate s a hazardous situation which if not avoided could result in minor or moderate injury NOTICE Not related to personal injury In...

Page 5: ...y be installed without the need to remove product from the merchan disers Check with the store manager and let them know how long a door lineup will take to complete The average time to install each door is about 10 minutes Note Narrow Impact cases require additional brackets when outfitting with doors See Page 9 for bracket installation details Water Misters and Light Rails may not be used with g...

Page 6: ...e preparation and display the temperature of the product must be controlled to maximize product life CASE LEVELING Merchandisers must be installed level to ensure proper operation of the refrigeration system and to ensure proper drainage of defrost water In order for the gravity hinge self closing doors to close properly the merchandisers must be leveled correctly Do not attempt to install the doo...

Page 7: ...ove Rail Extrusion Screws Figure 4 1 Remove Front Rail Impact Rail Extrusion Removed Remove Bumper Figure 3 1 Remove Panel and Bumper Color Panel Figure 4 2 Remove Front Rail Remove Rail Extrusion Screws 4 Remove the 1 4 in screws from the Impact front rail extrusion A Remove rail extrusion and discard New rail extrusion will be installed later The Case s are now ready to be outfitted with EcoVisi...

Page 8: ...2 X 1 2 HX HD THREAD CUT TYPE F SCREW HEX WASHER HEAD 10X24X1 2 THREAD CUTTING E BUSHING GRAVITY TOP PIN F BUMPER SQUARE G SCREW 10 16 X 1 HIGH LOW THREAD Gravity Hinge Clip Tag Remove tag after door is installed on case Discrete handle doors shown Adhesive Bumper 1 per 2 doors MULLION END Needed for all door kits PLATE HINGE SUPPORT INNER BOTTOM MULLION CTR SUPPORT CANOPY SUPPORT LIGHT CHANNEL LI...

Page 9: ...ort B Insert insulation with notched side toward the outside of the case 3 per 12 ft case 2 per 8 ft case as shown in Figure 5 1 and 5 2 C Install inner bottom rail support and attach it to the front supports using 8 x 3 8 in screws 6 Attach the outer bottom rail support to the front of the case with 8 18 x 1 2 in screws Figure 5 1 Insulation Inner Bottom Rail Support Inner Bottom Rail Support Ins...

Page 10: ...t of the case as shown in Fig 6 1a 6 2a B Make sure the rail is properly seated and there are no gaps between the extrusion and the inner bottom rail support Fig 6 2a C Make sure extrusion is level D Fasten 8 screws as shown in Fig 6 2a Space approximately every 12 inches Attention No Gap Between Parts No Gap Figure 6 1a Bottom Rail Extrusion Figure 6 2a Level ...

Page 11: ...sion EZ Door Upgrade 7 The design of the Impact Door kits will work on Pre 04 1996 cases and Post 04 1996 Impact cases The difference in the Canopy is shown below Impact Canopy 4 96 to Current No Retrofit Impact Canopy Pre 4 96 No Retrofit Flange Direction Flange Direction ...

Page 12: ...e of the Retainer Fig 8a 2 Attention No Gap Between Parts Step 8a is for standard width cases Step 8b is for Narrow Width Cases Canopy Assembly Figure 8a 1 Figure 8a 2 Install screws as shown by arrows Gussets Light Channel Retainer 10 24 x 1 2 Fascia Retainer 8 18 x 3 8 Canopy Support 8 32 x 1 2 Install screws as shown by arrows ...

Page 13: ... the inside of the retainer Attach the canopy Support Extension to the top of the case as shown in Fig 8B 2 to fasten both pieces together Canopy Support Extension Narrow Width Canopy Assembly Figure 8b 1 8 32 x 1 2 Install screws as shown by arrows Figure 8b 2 Gussets Light Channel Retainer Fascia Retainer Narrow Cases Canopy Support Narrow Cases ...

Page 14: ... 12 inch parts as shown in Fig 9 1 using 8 Screw 10 Insert the Tabs on the Canopy Channel Assembly into Light Channel Retainer as shown in Fig 10 1 and 10 2 and fasten with 8 screws as shown by arrow Light Channel Retainer Canopy Channel Retainer Light Channel Attachment Figure 9 1 Figure 10 1 Figure 10 2 8 18 x 1 2 ...

Page 15: ...he mullions easier to install Removing ALL canopy nuts could cause case parts to become loose and fall causing serious personal injury Do not leave merchandisers unsupported or unattended until all parts are properly secured Figure 13 1 9 16 in screws Front top of Case Do not loosen or remove Rear top of Case Remove Screws Figure 11 1 It may not be necessary to perform this step for some lineups S...

Page 16: ...n toward the inside of the case and engage the lower flange into bottom extrusion Straighten mullion and engage top into canopy sup port as shown in Fig 14 1 15 Angle the door retainer into the front side outside the case of bottom rail extrusion Squeeze retainer until it snaps into bottom extrusion as shown in Fig 15 1 and 15 2 Figure 15 2 Figure 14 1 Figure 15 1 2 1 Squeeze Retainer 1 2 ...

Page 17: ... and Nuts for the end mullions are pre installed from the factory A Remove the nut and washer from the end mullion and insert bolt through end mullion and end mullion of a joining case and insert between mullions as shown in Fig 14 1 Figure 16 1 DO NOT USE DO NOT USE Bolt Location Bolt Location End Mullion Case 2 End Mullion Case 1 DO NOT USE Nut 1 4 20 Lockwasher Lockwasher Nut 1 4 20 Bolt 1 4 20...

Page 18: ...e and an R on the right side A Insert one screw into the center hole and only the center hole Do not tighten com pletely This will allow for leveling of the doors later Move plate in 1 4 inch from end Figure 17 2 Figure 17 1 Figure 18 1 NOTE End mullions may be used on the left or the right side of merchandiser If LEDs are installed mullions with LEDs are marked L left R right C center Bottom Rail...

Page 19: ...RS ARE INSTALLED Remove the tag from the door pulling the C Clip from the gravity hinge Figure 19 1 Remove the clip by pulling the tag and the door will close Seating factory supplied door Downward pressure should fully seat the door If not the door must be opened or closed slightly to align the cross feature The cross will align when the door is opened slightly The door will not seat if not align...

Page 20: ... Hinge Plate To correct shift the bottom plate to the right To correct shift the bottom plate to the left STEP 1 EcoVision Door Alignment Modular Bottom Hinge Plate Door Trim Level each door as shown below Check for level here To Correct Shift the Bottom Plate to the Right To Correct Shift the Bottom Plate to the Left HUSSMANN_GDF_2 1 SHEET SIZE D THIRD ANGLE PROJECTION UNLESS OTHERWISE SPECIFIED ...

Page 21: ...th level placed on door to check for gravity door closing and hold open function Do not place level on top of door Check level with case filled with product Do not put level on top of case O U T S I D E o f D o o r 2 f t L e v e l s h o w n x Acceptable Level Bubble Range 20a C Open door and place level on outside of door Repeat and check bubble level for all doors Level should be placed verticall...

Page 22: ...place lower front panels bumpers canopy fascia and deck pans A Reinstall all 9 16 inch nuts and tighten to canopy Figure 21 1 Replace Canopy Fascia Bumper Figure 21 2 Deck Pans Failure to reinstall canopy nuts could cause case parts to become loose and fall causing serious personal injury ...

Page 23: ...all times to provide proper refrigeration and air curtain performance See next page for directions for installing optional stability kits for narrow Excel cases 12 in 305 mm 125 lb 56 7 kg 14 in 357 mm 125 lb 56 7 kg 16 in 406 mm 200 lb 90 7 kg 18 in 457 mm 200 lb 90 7 kg 20 in 508 mm 250 lb 113 4 kg 22 in 559 mm 250 lb 113 4 kg 24 in 610 mm 250 lb 113 4 kg Heavy Duty Beverage Shelf 16 in 406 mm 3...

Page 24: ...stalled Slide nut under canopy support and align with hole Place unistrut over hole Place bolt through washer and unistrut and connect to nut and tighten B For anchoring case to wall Mount unistrut to the store wall supports then connect the existing anti tip brackets to unistrut Supply brackets and wood screws and washers are used to mount unistrut to wall Figure 24 1 D5X with 9 in Case to Case G...

Page 25: ...rmance of the case The superheat setting on the valve may require changing to achieve optimal per formance of the case The change is likely due to the large decrease in case load the existing valve may not have enough range in its operation to accommo date the smaller load For non adjustable valves add a stem kit If you have a non ad justable Danfoss valve it must be changed to a valve with superh...

Page 26: ...e should be consid ered if the load was reduced by more than one compressor capacity Adjusting the compressor output by means of un loaders variable fre quency drives or digital technology may be acceptable alternate solutions NOTE Pay particular attention to affected circuits that are fed by a satellite compressor or conventional unit That compressor may now be grossly oversized Gas Defrost If th...

Page 27: ...ts TXVs may need to be resized HEATING VENTILATION AIR CONDITIONING SYSTEM HVAC In some instances the HVAC system is sized based on an assumption that a portion of the refrigeration capacity will be used to reduce the temperature and humidity in the store This is called case credits This reduction in AC load is calculated based on the spillover of the chilled air from these cases by adding doors t...

Page 28: ...e gap of the contour end without the expensive of replacing the con tour end with a new rectangular end Interior and exterior panels are fastened to the existing ends and a piece of foam is placed between them Then the panels are pop riveted to the existing panel and a new piece of end trim is placed on it Below is an exploded view of the end filler kit parts and the contour end panel End Fillers ...

Page 29: ... as shown in Fig 2 2 B Get insulation and hold it up to end Trace outline of End and cut insulation to fit opening The profile should now look like a rectangular end as shown in Fig 2 3 C Temporily attach exterior end filler panel with two 8 screws insert foam cutout repeat for interior end filler panel The end filler panels will hold the insulation in place as shown in Fig 2 4 Apply Gasket Figure...

Page 30: ...ers drill 1 8 in holes through the end into foam A Insert stainless steel rivets into holes and fasten end filler to existing end Remove tem porary 8 screws and install stainless steel pop rivets B Drill 1 8 in holes in side of trim piece near center of end filler panel C Install stainless steel pop rivets into both sides of trim D Verify no sharp edges on stainless steel pop rivets Figure 3 1 Fig...

Page 31: ... information or other support contact your Hussmann representative Please include the model and serial number of the product Hussmann Corporation Corporate Headquarters Bridgeton Missouri U S A 63044 2483 01 October 2012 ...

Page 32: ...Hussmann Corporation 12999 St Charles Rock Road Bridgeton MO 63044 2483 www hussmann com ...

Reviews: