


1
Issue: 02
Part Number: 31500DAE
Date: 2020-03-23
SmartLi-80Ah Quick Guide
Copyright © Huawei Technologies Co., Ltd. 2020. All rights reserved.
1
Overview
Model
Capacity
Weight
Dimensions (H x W x D)
Configuration type
SmartLi-512V-80AH-
F-01
80 Ah
< 800 kg
2000 mm x 600 mm x
850 mm
With an LCD
(master cabinet)
SmartLi-512V-80AH-
S-01
Without an LCD
(slave cabinet)
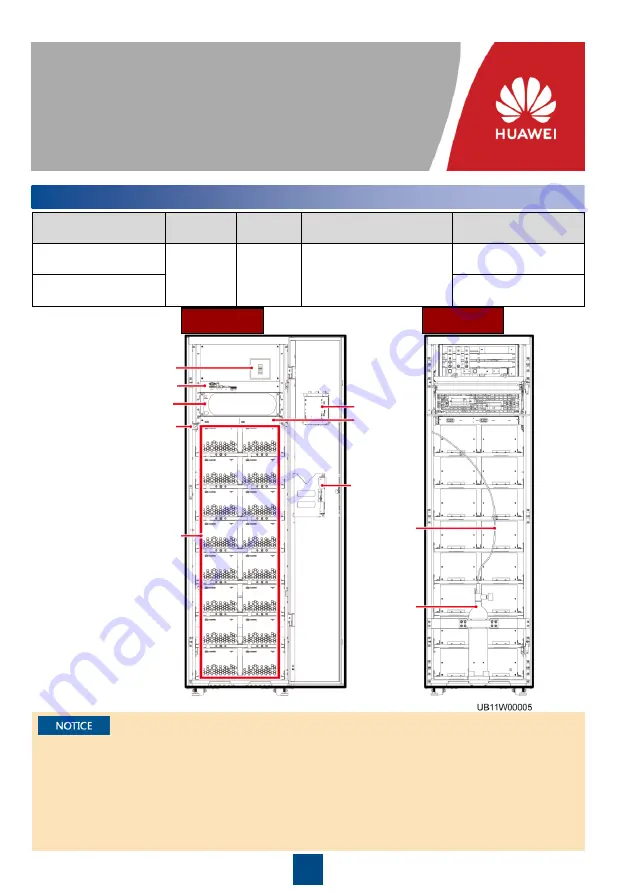
Front View
Rear View
End pressure gauge
Battery circuit breaker
Monitoring interface unit
Battery monitor unit
Battery module
MDU
Auxiliary
wrench
Fire-trace
tube
Fire
cylinder
Fuse
1. Before installation, read the user manual carefully to get familiar with product information and
safety precautions.
2. Use insulated tools during installation and operation.
3. Only Huawei engineers or engineers certified by Huawei are allowed to install, commission, and
maintain the battery cabinet. Otherwise, personal injury or equipment damage may occur, and
the resulting battery cabinet faults are beyond the warranty scope of Huawei.
4. This document describes how to install a single battery cabinet. For details about how to install
parallel systems, contact Huawei technical support.


