HP 4510s - ProBook - Celeron 1.8 GHz, User Manual
The HP 4510s ProBook, powered by a speedy 1.8 GHz Celeron processor, is an exceptional laptop for users seeking reliability and efficiency. Unlock the full potential of this device by accessing its comprehensive User Manual. Download it for free from our website and navigate your ProBook effortlessly.
Share
Download


Reviews:
No comments
Related manuals for 4510s - ProBook - Celeron 1.8 GHz

Toughbook CF-74CCB02BM
Brand: Panasonic Pages: 36

Ultra Portable PC
Brand: Vega Pages: 23

Joybook Lite U101 Series
Brand: BenQ Pages: 67

4200 San Marino
Brand: EUROCOM Pages: 281

ATLAS 14.1" N370
Brand: Kogan Pages: 16

Ferrari 4000
Brand: Acer Pages: 64

Ferrari 4000
Brand: Acer Pages: 64

T30II
Brand: ECS Pages: 98

Latitude 5300
Brand: Dell Pages: 123

Latitude 5414
Brand: Dell Pages: 106

P1610 - LifeBook - Core Solo 1.2 GHz
Brand: Fujitsu Pages: 128

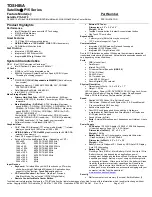
Satellite P205
Brand: Toshiba Pages: 4

Satellite P10-792
Brand: Toshiba Pages: 2

Satellite P15-S409
Brand: Toshiba Pages: 9
Satellite P15-S479
Brand: Toshiba Pages: 9

Satellite P100-ST1071
Brand: Toshiba Pages: 8

Satellite M70-340
Brand: Toshiba Pages: 2

Satellite P100-ST9012
Brand: Toshiba Pages: 8


