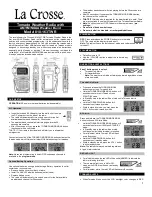
Honeywell
Wireless Thermo-Hygrometer
(TM005X)
USER MANUAL
2
TABLE OF CONTENTS
INTRODUCTION 3
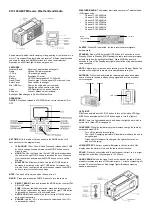
PRODUCT OVERVIEW
4
REMOTE SENSOR
7
BEFORE YOU BEGIN
8
BATTERY INSTALLATION
9
LOW BATTERY WARNING
10
GETTING STARTED
10
COMFORT LEVEL INDICATORS
11
MAXIMUM AND MINIMUM MEMORY
12
AUTO-SCANNING 12
LOST COMMUNICATION
13
TRANSMISSION COLLISION
14
PRECAUTIONS 14
SPECIFICATIONS 16
FCC STATEMENT
17
DECLARATION OF CONFORMITY
18
STANDARD WARRANTY INFORMATION
19