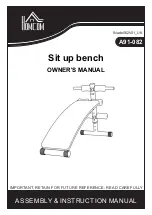
HOMCOM A91-082, Owner'S Manual
The HOMCOM A91-082 Owner's Manual is an indispensable resource for users of this innovative product. It provides clear instructions and helpful tips to ensure a seamless experience. Download the detailed manual for free from our website manualshive.com, and discover how to fully maximize the potential of your HOMCOM A91-082.
Share
Download


Reviews:
No comments
Related manuals for A91-082

SK
Brand: Qlight Pages: 4

BS
Brand: Wacker Neuson Pages: 34

ZA top SM315.100A
Brand: ZIEHL-ABEGG Pages: 76

Narkomed GS
Brand: Dräger Medical Pages: 204

LAMARCK LFSe
Brand: Sammode Pages: 12

SLKN 01
Brand: Sanela Pages: 5
Edge 520
Brand: Garmin Pages: 26

SCB3
Brand: DeLaval Pages: 26

E-Boxx EV Simulator
Brand: Walther Pages: 12

GE cirrent Tetra Rigid Light Bar
Brand: Daintree Pages: 9

3930
Brand: Samson Pages: 20

Nursing Kelly VitalSlim
Brand: laerdal Pages: 100

Thermal Cycler Dice Real Time System III
Brand: Takara Bio Pages: 54

15548BB8
Brand: OttLite Pages: 2

HAY MACHINE II
Brand: H&S Pages: 35

IN 468
Brand: Insportline Pages: 8
DRAGONFLY Ice Fishing Kit
Brand: Raymarine Pages: 44

51363
Brand: SHOWTEC Pages: 32


