Hobbies & Helis Quick 50 Pro, Assembly & Parts Listing
Introducing the QuickWorldWide Quick 50 Pro! Make assembly and maintenance a breeze with our comprehensive manual. Download it for free from manualshive.com and unlock step-by-step instructions and valuable tips. Maximize your product's performance with this essential manual, ensuring smooth operation and hassle-free maintenance.
Share
Download


Reviews:
No comments
Related manuals for Quick 50 Pro

20481
Brand: L. G. B. Pages: 38

Kaos
Brand: Old School Model Works Pages: 24

F-22 bomb bay
Brand: Eduard Pages: 4

Vac-U-Soling Lower Hull Kit
Brand: Vac-U-Boat Pages: 30

ME-109F
Brand: BigPlanes Pages: 9

Corvus Racer 540 120CC
Brand: Goldwing RC Pages: 60

22868
Brand: Trix Pages: 60

60-153
Brand: Radio Shack Pages: 2

G2579 The Incredibles
Brand: Fisher-Price Pages: 10

BR 234
Brand: Trix Pages: 20

mini Black Brant II
Brand: Madcow Rocketry Pages: 3

XII
Brand: Xray Pages: 28

A-1 SKY RAIDER
Brand: H-KING Pages: 14
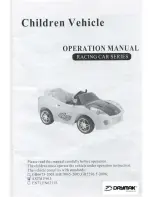
KL-106
Brand: Daymak Pages: 12

Doubledare Dueling Coaster
Brand: K'Nex Pages: 44

ULTIMATE 20-300 ARF-QB
Brand: AeroWorks Pages: 94

419R
Brand: Lionel Pages: 12

Walker Rallye
Brand: ABC Design Pages: 9


