IMPORTANT SAFEGUARDS
- 1 -
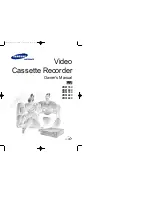
Video Deck
VT-FX602S
Owner's Manual
Your Complete Guide
to Videocassette Viewing
and Recording
Using these quality features:
Hi-Fi System
Rotary 4-head Record/Playback System
Bilingual on-screen menu display selectable in English or Spanish
Infrared remote control
Real time tape counter
181 channel capability PLL frequency synthesizer tuner with direct
station call
Auto power on and off system
Auto counter reset
Auto rewind when the end of a tape is reached
Direct Button Operation
2 Step Picture Search Operation
Still
Digital Auto Tracking (DTR)
Auto Repeat
Rental Play Mode
Three different tape speeds (SP/LP/SLP)
IRT (Instant Recording Timer)
1 Year, 7 events (including Daily and Weekly Timer Recording)
Auto Return
Time Search / Blank Search / Index Search / Edit Search
Just-In-Time Recording
Remaining Tape Running Time Display
Slow Motion
Jog and Shuttle
Auto Clock Setting
QR15338 ©Hitachi, Ltd. 1996
Printed in Hong Kong