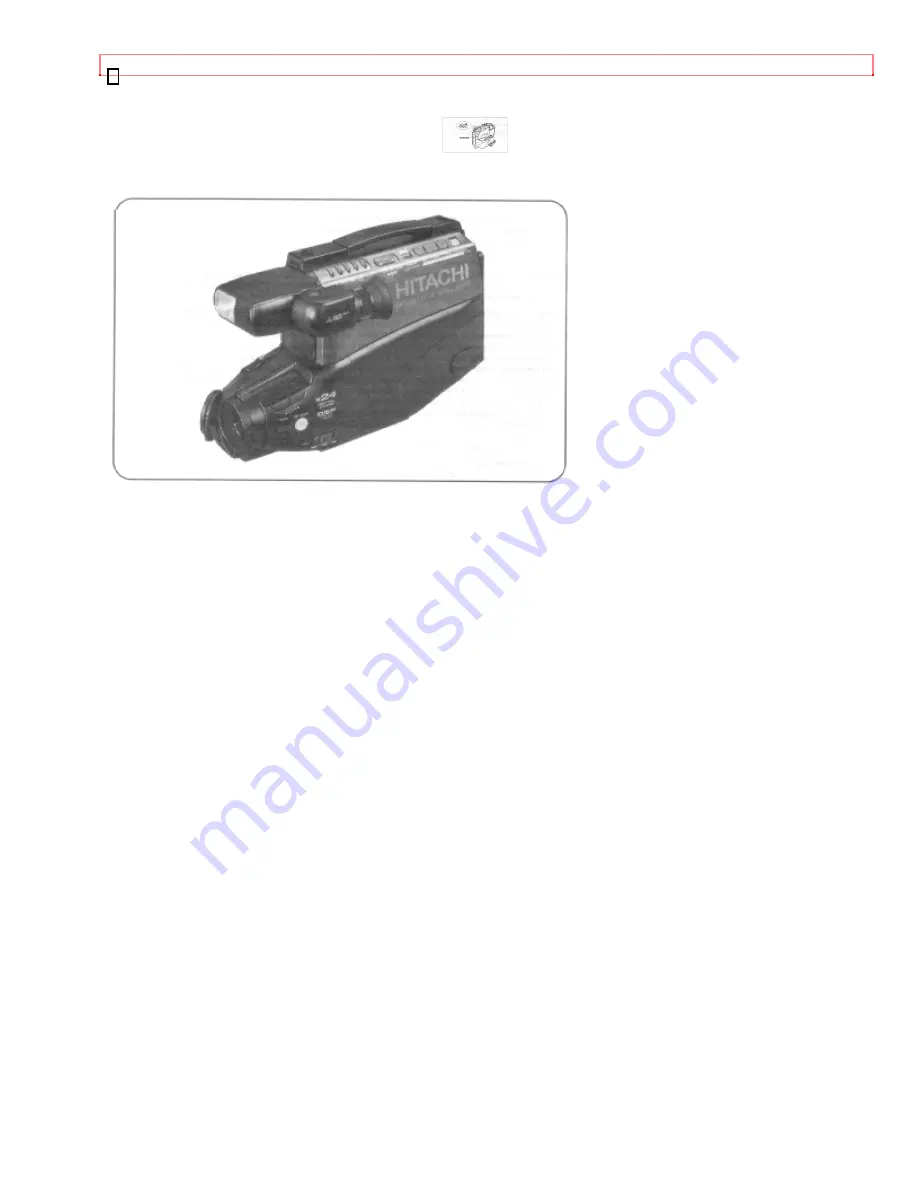
background image

TABLE OF CONTENTS 


1

1

HITACHI 

Instruction Manual 


       Video Camera/Recorder 


VM-3700A 


Hitachi Home Electronics (America), Inc. 


HITACHI (HSC) CANADA 

INC. 

3890 Steve Reynolds Blvd., Norcross, GA 30093 


3300 Trans Canada Hwy., 

Pointe Claire, 
Tel. 

404-279-5600 

      Quebec, 

H9R1B1, 

CANADA 

         Tel. 

514-697-9150 

HITACHI SALES CORPORATION OF HAWAII, INC. 

3219 Koapaka Street, Honolulu, HI 96819 
Tel. 808-836-3621 

QR10511 

©Hitachi, 

Ltd. 

1994 

      Printed 

in 

Japan 

KS-M(N) 
 

Summary of Contents for VM-3700A - Camcorder

Page 1: ...ica Inc HITACHI HSC CANADA INC 3890 Steve Reynolds Blvd Norcross GA 30093 3300 Trans Canada Hwy Pointe Claire Tel 404 279 5600 Quebec H9R1B1 CANADA Tel 514 697 9150 HITACHI SALES CORPORATION OF HAWAII INC 3219 Koapaka Street Honolulu HI 96819 Tel 808 836 3621 P QR10511 Hitachi Ltd 1994 Printed in Japan KS M N ...

Page 2: ... A SAMPLE RECORDING 22 IDENTIFICATION AND OPERATION OF CONTROLS 26 DATE TIME Setting pg 20 31 To correct date time information after starting the date time 32 To correct date time information during programming 32 AUTOMATIC DATE RECORDING 33 PROGRAM AE Auto Exposure 34 AUTO FOCUS 35 The auto focus will not work under the following conditions 35 MANUAL FOCUS 37 POWER ZOOM 38 DIGITAL ZOOM 39 INSTANT...

Page 3: ... THE PICTURE PLAYED BACK ON YOUR TV 60 STILL 62 FORWARD AND REVERSE SEARCH 63 MEMORY 64 CAMERA RECORDER TO VCR DUBBING 65 FLYING ERASE HEAD 66 USING THE BUILT IN CAMERA LIGHT 67 To replace the lamp of camera light 68 EYEPIECE ADJUSTMENT 69 VIEWFINDER BRIGHT COLOR AND TINT CONTROLS 70 HOW TO ATTACH THE SHOULDER STRAP 71 TROUBLESHOOTING 72 CLEANING THE INSIDE OF THE ELECTRONIC VIEWFINDER 74 HEAD CLE...

Page 4: ...tandard entitled Digital Apparatus ICES 003 of the Department of Communications Warning This device complies with Part 15 of the FCC rules Operation is subject to the following two conditions 1 This device may not cause harmful interference and 2 this device must accept any interference received including interference that may cause undesired operation Note This equipment has been tested and found...

Page 5: ...ld void the user s authority to operate the equipment Caution Avoid operating your camcorder immediately after moving it from a cold area to a warm humid area Give the camcorder 2 to 3 hours to acclimate to the surroundings before inserting a video cassette When moved from a cold area to a warm humid area moisture may condense on the head drum inside the machine This moisture could cause the tape ...

Page 6: ...r in the picture Your camera recorder is functioning properly but the solid state pickup device CCD usually causes this as an inherent characteristic Try to avoid shooting an excessive bright object directly Be sure not to leave it in a place where the temperature exceeds 120º F 49º C or the pickup device may be damaged Dangerous includes Inside a car with the windows closed and in direct sunshine...

Page 7: ... Time and date Titler Index signal Audio video dub Audio dub Built in camera light This video camera recorder with this marking incorporates high quality picture technology and is compatible with any video cassette recorder bearing the mark ACCESSORIES Check to make sure you have the following components and accessories besides the camera recorder unit itself before disposing of the packing materi...

Page 8: ...ug having one blade wider than the other This plug will fit into the power outlet only one way This is a safety feature If you are unable to insert the plug fully into the outlet try reversing the plug If the plug should still fail to fit contact your electrician to replace your obsolete outlet To prevent electric shock do not use this polarized plug with an extension cord receptacle or other outl...

Page 9: ... should never be placed near or over a radiator or heat register This video product should not be placed in a built in installation such as a bookcase or rack unless proper ventilation is provided or the video product manufacturer s instructions have been followed 9 Attachments Do not use attachments unless recommended by the video product manufacturer as they may cause hazards Caution Maintain el...

Page 10: ...na discharge unit connection to grounding electrodes and requirements for the grounding electrode See example below EXAMPLE OF ANTENNA GROUNDING 13 Power Lines An outside antenna system should not be located in the vicinity of overhead power lines or other electric light or power circuits or where it can fall into such power lines or circuits When installing an outside antenna system extreme care ...

Page 11: ...t in damage and will often require extensive work by a qualified technician to restore the video product to its normal operation e If the video product has been dropped or the cabinet has been damaged f When the video product exhibits a distinct change in performance this indicates a need for service 19 Replacement Parts When replacement parts are required have the service technician verify that t...

Page 12: ...d is located so that it will not be stepped on tripped over or otherwise subjected to damage or stress 9 Do not operate charger with damaged cord or plug replace them immediately 10 An extension cord should not be used unless absolutely necessary Use of improper extension cord could result in a risk of fire and electric shock If extension cord must be used make sure A That the pins on plug of exte...

Page 13: ...nder is provided to call the CATV system installer s attention to Article 820 40 of the NEC that provides guidelines for proper grounding and in particular specifies that the cable ground shall be connected to the grounding system of the building as close to the point of cable entry as practical ...

Page 14: ...n shooting pictures 1 Turn the viewfinder 2 Turn the eyepiece You can adjust the position and angle of the viewfinder so you can see through it easily Cautions Do not force the viewfinder to rotate completely around This will damage the viewfinder and or camcorder When pulling the viewfinder out or returning it to its original position hold the viewfinder by the swivel selection Do not hold the di...

Page 15: ...ELECTRONIC VIEWFINDER 15 ...

Page 16: ...d hold Battery release lever then slide the battery to the upside and remove WHEN USING WITH THE AC ADAPTER CHARGER Provided 1 Plug the AC adaptor charger power cord into AC electrical outlet 2 Connect one end of the DC cord provided to the DC IN 9 6V of the camera recorder Connect the other end of the DC cord to the DC OUTPUT of the AC adaptor charger NOTES The AC adaptor charger cannot charge th...

Page 17: ...using the AC adaptor charger to power the camera recorder the battery level indicator may display This indicator is used for battery operation and has no meaning when using the AC adaptor charger to power the camera recorder ...

Page 18: ... the DC IN 9 6V jack of the camera recorder 2 Connect the other end of the car battery cord to the car s cigarette lighter socket NOTES The car battery cord is designed to be used only with automobiles having a 12 volt negative ground system To prevent fire or shock hazard or damage to your camera recorder please use only the specified car battery cord ...

Page 19: ...d battery NOTE When the camera recorder is turned on the battery level indicator is displayed in the viewfinder indicating the condition of camera recording battery When the battery is fully charged is displayed After several minutes the symbol will change to When the battery is very near empty the symbol will change to and start blinking You should find an alternative power source or recharge the...

Page 20: ... with that of AC adaptor charger and push the battery flush with the AC adaptor charger and slide it in the direction of arrow NOTE You must remove the DC cord from the AC adaptor charger to charge the battery If the DC cord is connected CHARGE light will not light 3 The CHARGE light will be lit while the battery is accepting a charge and will go out when the battery is fully charged ...

Page 21: ...e the operation time will gradually decrease When operation time becomes too short to be useful it is time to replace the battery 8 If CHARGE and POWER lights on the AC adaptor charger start flashing remove the battery and then reattach it If after several attempts both lights continue to flash this means your battery cannot take a charge and must be replaced with a new one The CHARGE light will n...

Page 22: ...ll the way until it is latched by the cassette holder 3 Press the cassette holder The holder will latch in the operating position 4 Press and hold the small button on POWER switch and then slide it to the CAM position The POWER indicator will light and the camera recorder will enter record pause mode automatically NOTES If the erase prevention tab on the cassette is removed the TAPE indication in ...

Page 23: ...while the camera recorder is in the record pause stand by mode NOTES The TAPE END indication starts flashing in the viewfinder when there is about five minutes recording time left on the cassette If the record pause mode continues for more than 5 minutes the camera recorder s power is automatically turned off To turn on again press REC PAUSE button The camera recorder enters record pause stand by ...

Page 24: ... you connect the camera recorder to your TV you can see the picture played back on your TV Refer to VIEWING THE PICTURE PLAYED BACK ON YOUR TV on page 34 10 After playing press STOP EJECT button 11 Slide the POWER switch to OFF position to turn off the camera recorder Press STOP EJECT button to remove the cassette 12 Always remove the power source from the camera recorder after use ...

Page 25: ...MAKING A SAMPLE RECORDING 25 NOTE If you have a cassette tape that has already been partially recorded on and you want to record the remaining blank section see QUICK EDIT on page 26 ...

Page 26: ...Button Press these buttons simultaneously to select manual or automatic focus For manual focusing press the or button to bring the subject into focus When using manual focus FOCUS appears in the viewfinder Lens with Lens Cap F1 8 5 60 mm 12 1 power zoom lens features auto focus and auto iris functions FADE Button During recording you can add a professional touch to your recordings by fading in and...

Page 27: ...IO and VIDEO jacks can be used as output jacks and when the switch is set to IN they can be used as input jacks RF DC OUT Jack Connect the RF converter unit optional to this jack AUDIO VIDEO Jacks These can be used as input or output jacks depending on the position of AV OUT IN switch When using these jacks as outputs connect the audio video cord provided to these jacks and to the audio and video ...

Page 28: ... the last few seconds of the recorded segment in the record pause mode See INSTANT REVIEW on page 26 DISPLAY Button If this button is pressed M appears beside the tape counter in the viewfinder and the tape s position is stored in memory If the camera recorder is connected to a TV monitor receiver the same display as that in the viewfinder appears on the screen when the M is displayed See DISPLAY ...

Page 29: ...ring record operation F FWD Button Press this button during stop or rewind mode and fast forwarding starts appears in the viewfinder Press the button during playback of tape and the tape is played back in the forward direction approximately 3 times faster than the normal speed to confirm the recorded content Press PLAY button to return to normal playback mode or press STOP EJECT button to stop tap...

Page 30: ...n is used to control the camera recorder When the POWER switch is set to the CAM position pressing this button starts the tape to begin recording REC appears in the viewfinder When this button is pressed again appears instead of REC and the tape stops and the camera recorder enters the record pause stand by mode NOTE This button may be also used to display a still picture during the playback mode ...

Page 31: ...rectly before you start recording NOTES The backup battery should be charged every two months If it is not charged periodically it will be over discharged and its life will be shortened A cassette cannot be loaded or ejected when setting the date and time 1 Press and hold the small button on POWER switch and then slide it to CAM position 2 Press DATE TIME button Date and time appear in the viewfin...

Page 32: ...ommended that you press DATE TIME button to match the time signal 9 Press DATE TIME button after setting the clock The display will change as follows each time the button is pressed NOTE The date time graphics will be recorded whenever they appear in the viewfinder To correct date time information after starting the date time 1 Press and hold DATE TIME button and then press STOP EJECT button The m...

Page 33: ...eplaced When is displayed again after being switched to the date display When the recording is for less than 10 seconds If the date changes while recording continues over 10 seconds the date is recorded for 10 seconds when recording is restarted after the camera recorder has been set to the standby mode Press DATE TIME button until and the date appear in the viewfinder before you begin to record T...

Page 34: ...ogram AE automatically selects the shutter speed 1 60 1 100 1 120 1 180 1 250 1 350 1 500 1 750 1 1000 1 1500 1 2000 or 1 4000 second that is optimum for the brightness of the subject The iris is also adjusted automatically in response to the shutter speed ...

Page 35: ... W side about 1 2 inches 3cm from the lens surface to infinity The auto focus will not work under the following conditions 1 Objects not in the center of the viewfinder 2 Objects at far and near positions at the same time 3 Objects lit by a spotlight or neon signs etc 4 Objects behind glass with water droplets or dust on it 5 Objects with almost no difference in brightness such as a white wall ...

Page 36: ...AUTO FOCUS 36 6 Objects moving rapidly 7 Dark objects ...

Page 37: ...o your subject If you don t use the T control to zoom to the picture you want the picture may fall out of focus when actual recording starts 3 Pressing the FOCUS control AUTO MAN far or near button until the subject is in focus 4 Use the power zoom W control to zoom back to the picture you desire NOTE To return to auto focus press the FOCUS control AUTO MAN buttons and FOCUS disappears from the vi...

Page 38: ...switch on the T side and the picture gradually becomes telescopic The zooming speed is slow when the power zoom switch is pressed lightly and the zooming speed is fast when the switch is pressed strongly When power zoom switch is operated the zoom position is displayed in the viewfinder in 10 steps for several seconds ...

Page 39: ...ewfinder Press and hold the power zoom T control until you find the picture you want You control the zoom with the power zoom T and W controls When ZOOM is not displayed in the viewfinder normal zoom functions resume NOTE When the digital zoom is used the more the image is magnified the rougher the picture becomes Also even a slight shaking of the camcorder is conspicuous ...

Page 40: ...ls Press the INST ZOOM button I ZOOM appears in the viewfinder and the picture is magnified 1 5 times NOTES To return to the original zoom position press the INST ZOOM button so that I ZOOM disappears from the viewfinder When the instant zoom is used the more the image is magnified the rougher the picture becomes Also even slight shaking of the camcorder is conspicuous ...

Page 41: ... 3 cm from the lens tip Press and hold W side of power zoom switch An object is auto focused NOTES Determine the size of the object by moving the camera backward and forward Be careful as the lighting may tend to be insufficient when shooting in the above conditions ...

Page 42: ...he center to a black screen appears in the upper left corner of the viewfinder Zoom fade Fades in while zooming from a white screen or fades out while zooming to a white screen appears in the upper left corner of the viewfinder Fading In 1 Use the FADE button to select a fade option before recording 2 Press the REC PAUSE button to start recording fade then begins automatically Fading Out 1 While r...

Page 43: ...FADE IN FADE OUT 43 NOTE When fading out be sure to wait until the PAUSE indicator is visible in the viewfinder before attempting to pit the camcorder into the record mode again ...

Page 44: ...m See your VCR s instruction manual for index playback instructions INDEX signals are recorded when the following operations are performed When power is turned on about 4 hours after it is switched off and then recording is started When power is turned on after the date is changed to the next day with the power off and then recording is started NOTE INDEX is displayed in the viewfinder and when an...

Page 45: ...or find a particular spot on your tape to begin your editing or recording new material Quick edit is used while the camera recorder is in the record pause stand by mode By holding down the F FWD REW or PLAY button you can visually search or play your tape Releasing the buttons F FWD REW or PLAY immediately stops the tape at that position ...

Page 46: ...nds of the recorded scene is played back in the reverse direction and then played back in the forward direction 2 When the tape reaches the end of the scene you have just recorded the camera recorder returns to the record pause stand by mode Recording starts again when the REC PAUSE button is pressed again ...

Page 47: ... time the DISPLAY button is pressed the display in the viewfinder switches as follows When the linear time tape counter with memory is displayed in the viewfinder the same display appears on the screen of the connected TV monitor receiver ...

Page 48: ...ours minutes and seconds Load a cassette into the camera recorder and perform recording or playback the counter indicates the elapsed time NOTES The linear time counter does not operate when nothing is recorded on the tape Counter changes to 0 00 00 when cassette is ejected ...

Page 49: ... know how long you can record on the loaded tape Insert a cassette in the camera recorder and start recording or playback 10 seconds later the remaining tape will be displayed When the cassette is ejected the display will disappear is displayed for 10 seconds after the tape starts to run NOTE When the remaining recording tape time becomes less than about five minutes TAPE END flashes in the viewfi...

Page 50: ...ette cannot be loaded or ejected when creating a title Creating a title 1 Attach a power source to the camera recorder and slide POWER switch to either CAM or VIDEO position 2 Press TITLE button The flashing cursor will appear in the viewfinder 3 Press SHIFT button repeatedly to move the flashing cursor to the place you want to begin your title 4 Select the first character for your title by pressi...

Page 51: ...button and create the title on another page 8 After creating the title press TITLE button to remove the title graphics from the viewfinder Now title graphics is stored in memory NOTE As long as the correct current time can be displayed the title is held in memory Correcting errors during title storage 1 Press Shift button repeatedly until the character to be corrected will flash 2 Press either or ...

Page 52: ...prepare your titles in advance then by pressing TITLE button superimpose the title over the scene as it s being recorded You cannot go back and record titles over existing video without erasing the previously recorded material Recording titles on another VCR while playing a tape back with the camcorder 1 Connect the camera recorder and VCR See page 31 2 Select the title you wish to record from pag...

Page 53: ...OTE Power source must be connected to the camera recorder 4 Set AV OUT IN switch to IN position 5 Press and hold the small button on POWER switch and then slide it to CAM position The POWER indicator will light 6 Turn on your TV or VCR and tune it to the channel you wish to record 7 Press REC PAUSE button to start recording You are now recording the TV program 8 Press REC PAUSE button to stop reco...

Page 54: ...RECORDING TV PROGRAMS 54 ...

Page 55: ...ecorded tape Be sure that the record safety tab is not missing 2 Place POWER switch to VIDEO position 3 Play the tape and press REC PAUSE button where you want to dub audio The camera recorder enters the still play mode 4 Press DUBBING AUDIO VIDEO and PLAY buttons at the same time A DUB appears in the viewfinder NOTE If DUBBING AUDIO VIDEO and PLAY buttons are pressed twice audio and video dubbing...

Page 56: ...AUDIO DUBBING 56 ...

Page 57: ... and picture from a video source set AV OUT IN switch to IN position When dubbing the sound and picture from the camera set AV OUT IN switch to OUT and do not connect AUDIO and VIDEO jacks 1 Insert a recorded tape Be sure that the record safety tab is not missing 2 Place POWER switch in VIDEO position 3 Press PLAY button and then REW or F FWD button to search to the approximate position of the tap...

Page 58: ...LAY button and when the exact position to start dubbing is reached press REC PAUSE button 9 Press DUBBING AUDIO VIDEO and PLAY buttons simultaneously twice AV DUB is displayed in the viewfinder and at the same time the picture to be dubbed appears 10 Press the REC PAUSE button Dubbing will start and will stop when the counter reads 0 00 00 ...

Page 59: ...AUTOMATIC REWIND 59 AUTOMATIC REWIND When the tape reaches its end during playback it automatically rewinds to the beginning and stops ...

Page 60: ...andard speed SP A tape recorded in long play LP or extra long play EP cannot be played back on this camcorder Example 1 If your TV has VIDEO IN and AUDIO IN jacks 1 Connect the video audio cord provided to AUDIO IN and VIDEO IN of your TV 2 Connect the other end of the video audio cord to AUDIO and VIDEO of your camera recorder 3 Turn on TV 4 Set AV OUT IN switch to OUT position 5 Press STOP EJECT...

Page 61: ...adaptor on to the IN FROM ANT terminal 3 Connect the 75 Ohm coaxial cable with antenna adaptor to OUT TO TV on the RF converter unit 4 Connect the other end to the VHF antenna terminal on the TV as illustrated 5 Connect the connector cable from RF converter unit to RF DC OUT AUDIO and VIDEO jacks on the camcorder 6 Turn on the TV and set to channel 3 unless channel 3 is one of the TV stations in y...

Page 62: ...TILL When REC PAUSE button is pressed during playback a still picture can be seen To start again press REC PAUSE button and playback will be resumed NOTE There will be some noise interference in the still picture ...

Page 63: ...yed back at a speed about 3 times faster than normal playback speed and you can easily locate a certain spot on the tape Press PLAY button to return to normal playback mode or press STOP EJECT button to stop tape movement NOTE There will be some noise interference in the forward or reverse search pictures while visually scanning ...

Page 64: ...rn to the same point several times in a row 1 Press DISPLAY button The indicator M appears beside the linear time counter 2 Start playing or recording a tape 3 At the point you want playback to start press RESET button to reset the counter to 0 00 00M 4 Continue to play back or record 5 Press STOP EJECT button 6 Press REW button The tape will be rewound to the preselected point at approximately 0 ...

Page 65: ...video audio cord provided to AUDIO and VIDEO of your camera recorder 2 Connect the other ends to AUDIO IN VIDEO IN of your VCR as shown in the diagram above 3 Set AV OUT IN switch to OUT position 4 Play the tape on the camera recorder and record it on the VCR NOTE If you connect the VHF OUT TO TV connector of VCR to the TV ANT connector as illustrated and set VCR TV selector of the VCR to VCR mode...

Page 66: ...FLYING ERASE HEAD 66 FLYING ERASE HEAD A rotating erase head which eliminates glitches and rainbow noise that occurs at the joints between recorded segments ...

Page 67: ...ry falls to about a half 1 Make sure that a fully charged battery pack or AC adaptor charger is attached 2 Set the POWER switch to CAM and then set the LIGHT switch to AUTO when required NOTE When the LIGHT switch is set on ON the camera light will turn on whenever you make a recording CAUTION Turn the camera light on only when you need it otherwise the operating time of the battery pack is shorte...

Page 68: ...highly inflammable materials When storing the camera light in the camera case following use be sure to allow it sufficient time to fully cool down before placing it in the case Replace only with the specified lamp optional to reduce the risk of fire To replace the lamp of camera light To remove the front case press and hold the tab then remove the front case To replace the front case pass the lamp...

Page 69: ...EYEPIECE ADJUSTMENT 69 EYEPIECE ADJUSTMENT To use the electronic viewfinder without eyeglasses on adjust the diopter control for optimum focus adjustment ...

Page 70: ...r brightness can be adjusted by turning the BRIGHT control This does not affect the picture actually recorded by the camera recorder COLOR and TINT Controls The small COLOR and TINT controls are set at the factory and should require no adjustment If they ever require adjustment use a plastic screwdriver Make the adjustments with caution to prevent damaging the miniature controls ...

Page 71: ...HOW TO ATTACH THE SHOULDER STRAP 71 HOW TO ATTACH THE SHOULDER STRAP Attach the shoulder strap provided as illustrated ...

Page 72: ...mpartment indicated by arrow on cassette Cassette window must be toward outside CAMERA RECORDING Symptom Check Point Correction Picture does not appear in the viewfinder Remove the lens cap Set POWER switch to CAM position The camera recorder can not go into the recording The cassette has had the erase mode even when REC PAUSE button is pressed prevention tab removed Stick a piece of cellophane ta...

Page 73: ...he camera recorder and TV or VCR Set AV OUT IN switch to IN position BATTERY CONDITION Symptom Check Point Correction The indication in the electronic viewfinder Try another battery or charge flashes to indicate battery is discharged the battery NO OPERATION IS ACCEPTED Symptom Check Point Correction Power is turned on but no button operations are Remove the power source accepted and after about o...

Page 74: ... TRACKING control power zoom switch When you see the playback picture on your TV adjust fine tuning knob on television set to obtain best picture The pre recorded tape is EP or LP recording This camera recorder is for use in SP recording only Picture bends at the top of the TV screen TV receiver is older type It needs to be modified to work properly with camera recorder Tape is damaged Try another...

Page 75: ... Rotate and remove eye cup 2 Clean the picture tube face and lens To prevent scratching use a soft non abrasive cloth swab or lens cleaning paper 3 Align the reference mark and rotate the eye cup in the direction of arrow ...

Page 76: ...is does not mean that the recorded program has been erased Dirt accumulated on the head after long periods of use causes this problem In this case head cleaning requiring highly technical care is necessary Consult your nearest dealer or VCR service center before using a head cleaning tape ...

Page 77: ...ance other than head cleaning will be required during the warranty period of most users unless the video camera recorder is heavily used or seldom used Normal maintenance is the responsibility of the user although defective parts are covered during the warranty period Consult your VCR service center to determine recommendations for normal maintenance based upon your location use patterns and machi...

Page 78: ... record playback heads plus a flying erase head Video signal EIA standard NTSC color Tape speed 33 35 mm sec Video input 1 0 Vp p 75 ohm Video output 1 0 Vp p 75 ohm Audio input 7 8 dBs 316 mVrms more than 47 kohm Audio output 7 8 dBs 316 mVrms less than 1 kohm Fast forward rewind time Less than 6 minutes with T 120 cassette Camera Section Scanning 525 lines 60 fields 30 frames Required minimum il...

Page 79: ...y will provide you with convenient and expedient assistance Our service Hotline operator will direct you to the Hitachi Authorized Service Facility nearest you Just present proof of purchase and or delivery receipts to the Hitachi Authorized Service Facility and service will be rendered in accordance with the terms of the limited warranty as stated on your warranty card or operating guide Should y...

Page 80: ...replace the lamp If you want to place an order for these items you can 1 Call the toll free number 1 800 HITACHI 2 Mail to HITACHI with attached form see page 47 HOW TO ORDER USA only In Canada Please use Canadian order form in French version of this manual page 47 BY PHONE To place your order by phone have your VISA MASTER CARD or AMERICAN EXPRESS card ready and call this toll free number anytime...

Page 81: ...e Mention as current model Warranty 90 days labor 1 year parts VM3700A 12x1 optical zoom 24x1 digital zoom 1 lux 46 mm lens diameter 270k pixels color viewfinder Shutter Speeds 60 100 120 180 250 350 750 1000 1500 2000 4000 of a second Uses TTL Through The Lens focusing system ...

Reviews: