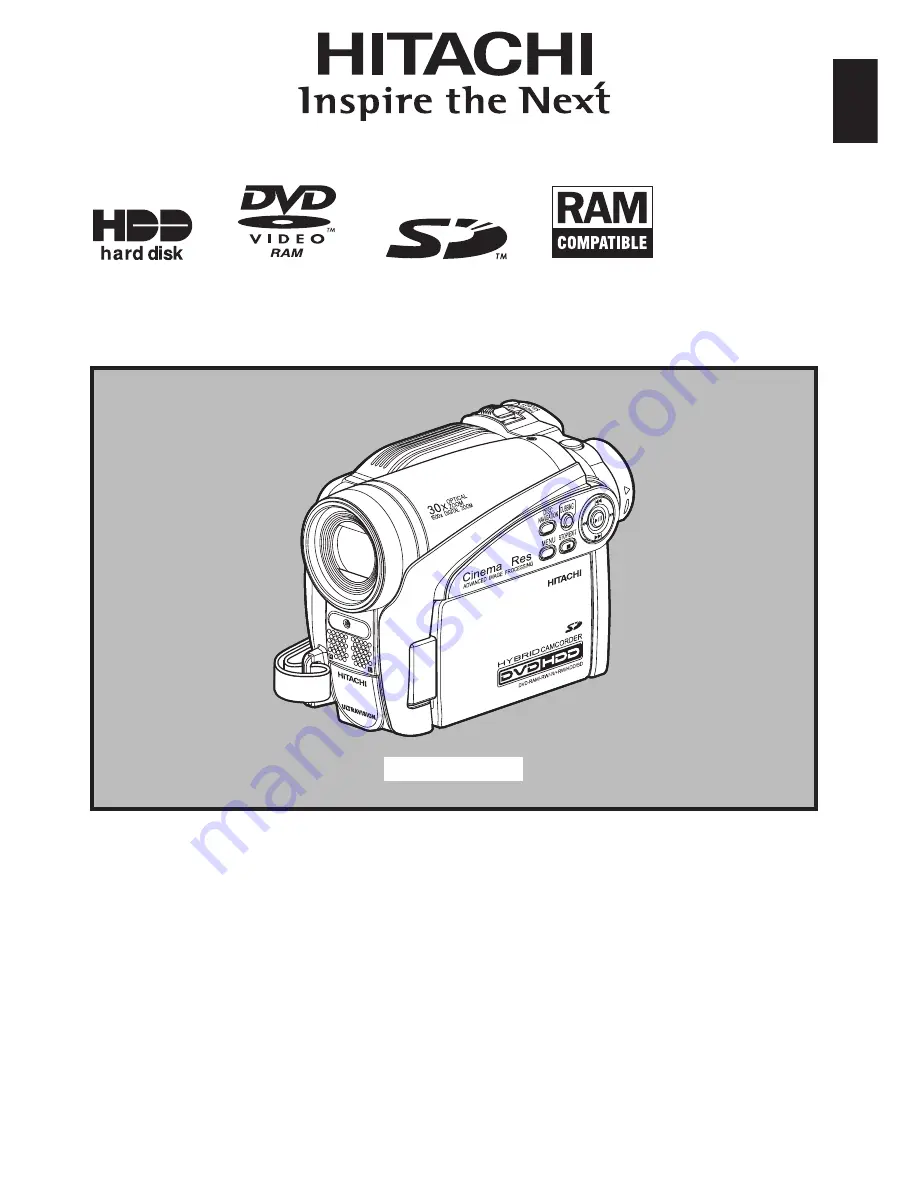
background image

DZ-HS500A

Instruction manual

To obtain the best performance and ensure years of
trouble-free use, please read this entire instruction 
manual.

Mode d’emploi

Des performances optimales et un fonctionnement 
à long terme seront assurés en appliquant les 
présentes instructions après avoir entièrement lu 
ce mode d’emploi.

Manual de instrucciones

Para obtener el mejor funcionamiento y asegurar
muchos años de utilización exenta de problemas,
lea todo este manual de instrucciones.

English

DZ-HS500A

Summary of Contents for DZHS500A - UltraVision Camcorder - 680 KP

Page 1: ...d emploi Des performances optimales et un fonctionnement à long terme seront assurés en appliquant les présentes instructions après avoir entièrement lu ce mode d emploi Manual de instrucciones Para obtener el mejor funcionamiento y asegurar muchos años de utilización exenta de problemas lea todo este manual de instrucciones English DZ HS500A ...

Page 2: ...ED ACCESSORIES ONLY WARNING TO PREVENT FIRE OR SHOCK HAZARD BE SURE TO USE THE SPECIFIED AC ADAPTER CHARGER DZ ACS3 CAUTION RISK OF ELECTRIC SHOCK DO NOT OPEN This symbol warns the user that uninsulated voltage within the unit may have sufficient magnitude to cause electric shock Therefore it is dangerous to make any kind of contact with any inside part of this unit This symbol alerts the user tha...

Page 3: ...on Note This equipment has been tested and found to comply with the limits for a Class B digital device pursuant to Part 15 of the FCC Rules These limits are designed to provide reasonable protection against harmful interference in a residential installation This equipment generates uses and can radiate radio frequency energy and if not installed and used in accordance with the instructions may ca...

Page 4: ...articularly at plugs convenience receptacles and the point where they exit from the apparatus 10 Only use attachments accessories specified by the manufacturer 11 Use only with the cart stand tripod bracket or table specified by the manufacturer or sold with the apparatus When a cart is used use caution when moving the cart apparatus combination to avoid injury from tip over 12 Unplug this apparat...

Page 5: ... the HDD This DVD video camera recorder cannot be used at high altitude Note that the DVD video camera recorder cannot be used in a place where the atmospheric pressure is low such as 3 000 meters or more above sea level Do not place this DVD video camera recorder near a magnet or magnetic field If you so recording playback or dubbing may not be possible Cautions When Using Handle the liquid cryst...

Page 6: ...video camera recorder AC adapter charger and battery will be slightly warm but this does not indicate a fault Screen on connected TV Never leave the Disc Navigation screen still image or camera image displayed on your TV to which the DVD video camera recorder is connected Doing so could result in displayed image retention or phosphor degradation of TV screen Be careful of ambient temperature If th...

Page 7: ...mera recorder in the usual way Using 8 cm CD lens cleaner could cause this DVD video camera recorder to be faulty If you have to clean the lens use a Hitachi Maxell cleaner that is exclusively for 8 cm DVD discs Be careful of moisture condensation When you move the DVD video camera recorder between places where the difference in temperatures is great such as entering a lodge from a ski slope or go...

Page 8: ...in When using a DVD turn it on with the DVD loaded The HDD DVD will be restored see page 138 Do not wipe the DVD video camera recorder case with benzene or thinner The coating of case could peel off or the case surface could deteriorate When using a chemical cleaning cloth follow the instructions Also read the instructions attached with optional accessories For optional accessories observe the cau...

Page 9: ...tense vibrations This could cause malfunctions Detach the battery from the DVD video camera recorder and store it in a cool place Leaving the battery attached or storing it at high temperature could shorten its life Suggestions and Restrictions Make a trial recording Always make a trial recording before doing actual recording to make sure that recording is normal The data that have not been stored...

Page 10: ...t is warped the following phenomena may occur Block noise in playback image Momentary stop of playback image Sound interrupted during playback or abnormal sound Blue thumbnail display Fig 1 Disc cannot correctly be recognized Disc cannot be initialized Delay between video and audio Even if disc is normal the above phenomena may occasionally occur While the ACCESS PC indicator is lit do not subject...

Page 11: ... DVD video camera recorder battery and set the date time The section on Basic Techniques explains the basic operation of this DVD video camera recorder recording of movies still images external input and playback of recorded images The section on Disc Navigation explains editing with Disc Navigation Refer to this section when dubbing from HDD to disc finalizing a DVD RW DVD R RW and initializing a...

Page 12: ... or return the menu screen to the preceding one The expression press the C button will be used in this text 1 2 and 3 marks beside headings Some functions of this DVD video camera recorder are unavailable with HDD disc card used Refer to the marks at right above each function to identify whether the HDD disc card is compatible with the function Refer to these marks and identify the functions and o...

Page 13: ...rding New recording will not overwrite any previously recorded data You can immediately play back desired recorded scenes p 69 You do not need to rewind unlike recorders using tape You can select any scene you want and immediately play it back using Disc Navigation function Use Disc Navigation to create your original movie p 98 You can delete unnecessary scenes move any scenes etc and create your ...

Page 14: ...and Off 31 Viewing Images 32 VIEWING IMAGE ON LCD MONITOR SCREEN 32 VIEWING SUBJECT THROUGH VIEWFINDER 32 Setting Date and Time 33 CHANGING DISPLAY FORMAT OF DATE AND TIME 33 Initial Settings 34 SWITCHING OPERATING SOUND ON OR OFF BEEP 34 TURNING DVD VIDEO CAMERA RECORDER OFF AUTOMATICALLY POWER SAVE 34 CHANGING DISPLAY LANGUAGE LANGUAGE 34 RESETTING MENU SETTINGS TO DEFAULTS RESET 35 TURNING RECO...

Page 15: ...THEM SCENE SELECT DUBBING 84 TURNING OFF DUBBED MARK FROM THUMBNAIL MARK OFF 84 Scene 85 DELETING SCENES EDIT DELETE 85 DIVIDING MOVIES EDIT DIVIDE 86 COMBINING MULTIPLE SCENES EDIT COMBINE 87 ARRANGING ORDER OF SCENES EDIT MOVE 87 DIRECTING SCENES EFFECTIVELY EFFECT FADE 88 PLAYING BACK BY SKIPPING SCENES EFFECT SKIP 89 CHANGING IMAGES FOR THUMBNAILS EFFECT THUMBNAIL 90 COPYING STILLS ON DVD RAM ...

Page 16: ... 123 USING DISC IN DVD DRIVE BUILT INTO PC 125 BEFORE TERMINATING PC CONNECTION UNPLUGGING PC CONNECTION CABLE CHANGING OVER POWER SWITCH 126 Using ImageMixer 3 for Windows 127 VIEWING IMAGES RECORDED ON HDD DISC USING PC 127 CREATING DVD VIDEO USING IMAGES RECORDED ON HDD DISC 128 Using ImageMixer 3 Mac Edition for DVDCAM 131 VIEWING IMAGES RECORDED ON HDD DISC USING MACINTOSH 131 IMPORTING IMAGE...

Page 17: ...der and AC adapter charger Power cable Connect between household AC outlet and AC adapter charger AV S input output cable Used when viewing the picture played back on the DVD video camera recorder on TV screen or input or output video from to another video device Shoulder strap Attach to the DVD video camera recorder to hang it from shoulder Lens cap and lens cap string Attach the lens cap when no...

Page 18: ... etc during recording 3 Recording indicator p 35 41 65 The red indicator will light during recording 4 Optical 30 zoom lens p 51 5 Zoom lever p 51 53 69 To adjust the zoom or volume 6 PC connection terminal TO PC p 123 7 AV inout output jack p 112 115 8 Wide screen color liquid crystal display inside p 32 8 7 4 5 Inside the cover 6 1 2 3 ...

Page 19: ...to a PC 13 PHOTO SELECT button p 42 75 93 14 DISC EJECT button p 38 Press down and release this button to open the cover of DVD insertion block 15 DVD insertion block p 38 16 BATTERY EJECT button p 28 Press this button when removing the battery 17 Battery attachment platform p 28 18 Record button REC p 41 19 LOCK switch p 41 It is recommended that you set the LOCK switch to L to the upper position...

Page 20: ...n p 44 68 74 Press this button to display the details of image being played back or camera setting status or switch the display off 32 CARD ACCESS indicator p 8 42 33 QUICK MENU button p 49 To display only the functions that you frequently use simple menus 34 FINALIZE button p 108 Press this button to finalize the recorded DVD RW DVD R RW 35 Card insertion block p 40 36 BLC backlight compensation ...

Page 21: ...CHANGING SETTING OF DEMONSTRATION on page 35 if you wish to view the demonstration immediately or change the setting to Off Setting Up the DVD Video Camera Recorder HOLDING DVD VIDEO CAMERA RECORDER Insert your right hand from the bottom of DVD video camera recorder up to the base of your thumb Put your hand in a position where you can easily operate the REC button and the Zoom lever Adjust the le...

Page 22: ...p of DVD video camera recorder 3 Push the both sides of cap inward and attach it over the lens Note Always keep the lens cap on when not using the DVD video camera recorder to protect the lens When recording attach the lens cap to the hand strap by hooking the tab inside the cap onto strap for comfortable shooting Shorter end Longer end Push and fit ...

Page 23: ...4 4 To initialize and reuse p 105 To additionally record on finalized disc p 109 5 5 To edit copied video on PC p 118 6 6 6 7 6 7 6 7 6 7 To playback video on PC p 118 6 6 6 7 6 7 6 7 6 7 Functions available Not available 1 Playable on devices that conform to either 8 cm DVD RAM 8 cm DVD RW VR mode or 8cm RW 2 Must be finalized Cannot be played on some DVD players or DVD recorders 3 Some DVD devic...

Page 24: ... R recorded on a DVD video camera recorder other than DZ HS500A and not finalized the Disc Navigation screen will automatically start and no recording can be done on the disc nor can it be finalized Do not insert a DVD RW DVD R that was recorded by a DVD recorder manufactured by a company other than Hitachi and which has not been finalized in this DVD video camera recorder Doing so will make the d...

Page 25: ...sure prevention switch is locked no recording deletion or editing will be possible on the card Only playback will be possible CAUTIONS FOR DISC AND CARD It is recommended that you create a backup file for valuable data on hard disk of PC Do not do the following or the data on disc or card may be damaged or lost Do not remove the disc or card or turn DVD video camera recorder off during reading or ...

Page 26: ...er DZ ACS3 to power the DVD video camera recorder Using other AC adapter chargers could cause electric shock or result in fire 1 Connect the power cable to AC adapter charger 2 Plug the power cable into AC outlet 3 Plug one end of DC power cord into the DC output jack on AC adapter charger 4 Attach the other end of DC power cord to the battery attachment platform on DVD video camera recorder Use t...

Page 27: ...AC outlet unplug it from the AC outlet wait a few moments and then plug it into the AC outlet again If the CHARGE indicator still does not light the AC adapter charger may be faulty Unplug it from the AC outlet and consult your dealer The AC adapter charger can be used around the world An AC plug adapter is required in some foreign countries If you need one purchase it from your local electronics ...

Page 28: ...k is heard Note Make sure that the battery is in the correct orientation Make sure that the battery is securely attached Incomplete attachment could cause the battery to fall resulting in damage REMOVING BATTERY After using the DVD video camera recorder remove the battery from it 1 While holding down the BATTERY EJECT button slide the battery upward to remove it Note For safety be sure to turn the...

Page 29: ... recording and recording pause are repeated at short intervals etc Note that the battery discharges faster in cold places Note See Troubleshooting on page 145 when charging is not possible The charge time will vary depending on the battery remaining level During and after charging and when the DVD video camera recorder is being used the battery will be warm but this does not indicate a fault A bat...

Page 30: ...ra recorder and use it up then remove the battery and store it in a cool place again Battery life The battery life varies greatly depending on the ambient environment and how often the DVD video camera recorder is used If the usable time of DVD video camera recorder with a fully charged battery is noticeably short the battery is probably dead Purchase a new one Power save and discharge of battery ...

Page 31: ...It will take some time for the DVD video camera recorder to display the Disc Navigation screen after power is turned on When the DVD video camera recorder is turned on the self diagnosis function will work and a message may appear In this case refer to Trouble Messages on page 138 and take corrective action When turning the DVD video camera recorder off or changing over the power switch between HD...

Page 32: ...to Troubleshooting on page 145 If LCD monitor lights white refer to page 58 Be sure to open the LCD monitor approximately 90º before changing its vertical angle Do not record for a prolonged time with the LCD monitor turned approximately 180º in close contact with the DVD video camera recorder body Doing this could cause the DVD video camera recorder and LCD monitor to become hot VIEWING SUBJECT T...

Page 33: ...e press the A button The screen for verifying the set date will appear 5 If the displayed date and time are correct press the d button to choose YES and then press the A button The date and time will be set and the DVD video camera recorder will enter the recording pause status Choosing NO will restore the menu screen CHANGING DISPLAY FORMAT OF DATE AND TIME You can select one of three date displa...

Page 34: ...ctivated by the power save function set the power switch to OFF and then set it to HDD DVD or SD The Power Save setting will not appear in the on screen information display If the sleep restart standby status continues for 30 minutes the DVD video camera recorder will automatically turn off regardless of the Power Save setting CHANGING DISPLAY LANGUAGE LANGUAGE You can change the language used to ...

Page 35: ... of the recording indicator will not be recorded Even if Record LED Off is specified the recording indicator will light while the self timer is counting down CHANGING SETTING OF DEMONSTRATION Choose the desired option using the screen on the right and then press the A button Note If Auto is specified the demonstration will not start if a battery is connected Pressing the C STOP EXIT or DISC NAVIGA...

Page 36: ...tness adjustment bar will appear on the screen 2 Use the d c buttons for adjustment Press d The screen becomes dimmer Press c The screen becomes brighter 3 Press the A button to end the setting Note To stop the setting midway press the MENU button The brightness setting will be stored in memory even after the DVD video camera recorder is turned off HDD HDD LCD Br i gh t n e s s EVF Br i gh t n e s...

Page 37: ...nitor screen or viewfinder is changed the brightness or density of the recorded image itself will not change ALWAYS DISPLAYING IMAGE IN VIEWFINDER 1 Press the MENU button use the f e d c A buttons to choose EVF Display on the LCD EVF Setup menu screen 2 Choose On and press the A button Auto If the LCD monitor is open no image will appear in the viewfinder On Images will always appear in the viewfi...

Page 38: ...le pushing down the center portion of turntable pick up the disc holding its edge to remove it Note that the recording surface of disc must face the inside of DVD video camera recorder When using a single sided disc the recording surface is the side without label Never touch the disc recording surface or pickup lens Touching the pickup lens could cause a fault Use the disc cleaning cloth provided ...

Page 39: ...lock gently Using force could cause a fault When using double sided disc Recording is possible on both sides of double sided disc However when recording or playback on one side is finished recording or playback will not move automatically to the other side Remove the disc once from the DVD video camera recorder turn over the disc and insert it again for continued use The recording surfaces of doub...

Page 40: ...nserting Card Insert card with its terminal inward until it locks Removing Card Push the center of card edge The card will come out so that it can be held by fingers 5 Close the cover of card insertion block Note Always close the cover of card insertion block Placing the DVD video camera recorder on a desk etc with cover open could damage the cover ...

Page 41: ...itch in the HDD position from accidentally moving to DVD position When using a DVD RW VF mode DVD R videos of different qualities VIDEO Modes or 16 9 On and Off cannot be recorded or dubbed on the same disc see page 80 While the ACCESS PC indicator is lit or blinking do not turn the DVD video camera recorder off and take care not to subject it to any vibration Doing so could cause an error in the ...

Page 42: ... recording Note If you wish to record without locating a subject at the center of screen first locate the subject at the center of screen press the PHOTO SELECT button halfway down determine the composition to be recorded and then press the PHOTO SELECT button all the way down If you press the PHOTO SELECT button all the way down at one stroke without pressing it half way recording will be possibl...

Page 43: ...ore the DVD video camera recorder to recording pause from the sleep restart standby status The following operation will release the sleep restart standby status Press down the DISC EJECT button Change over the power switch HDD DVD Note If you press the REC or PHOTO SELECT button while in the sleep restart standby status the sleep restart status will be released but recording of a video or photo wi...

Page 44: ... an example for explanation It is different from the actual display e 2 Program AE j 3 White balance n 4 EIS m 5 Backlight compensation 6 16 9 mode 1 Recording mode 11 Zoom 12 Exposure correction 13 Manual Focus 14 HDD DVD Card type 15 Movie recording quality p 7 Microphone filter 8 Self timer 9 External Input 10 Recording status Movie recording time 17 Remaining space on HDD DVD Card 18 Remaining...

Page 45: ...rnal input still frame Card No display Auto b Sports c Portrait d Spotlight e Sand Snow f Low Light No display Auto h Set i Outdoor j Indoor1 k Indoor2 No display EIS OFF n EIS ON No display Backlight compensation OFF m Backlight compensation ON No display 16 9 mode OFF 16 9 mode ON No display Microphone filter OFF p Microphone filter ON No display Self timer OFF q Self timer ON countdown is from ...

Page 46: ...itized No display HDD Protection On HDD Protection Off REM XX MIN 4 Remaining recordable minutes during movie recording REM XX 5 Number of remaining recordable still images during still recording REM XX Scene Will appear when the remaining number of recordable scenes 999 scenes max 6 is 50 or less If the number is down to 10 or less the display will be in purple w full charge x y z low remaining c...

Page 47: ...n be checked on Disc Navigation screen during playback see INFORMATION DISPLAY DURING RECORDING on page 44 Display when recording an image of yourself When recording with the LCD screen facing the same direction as the lens the operating status will appear The battery remaining level will appear only when the remaining level is very low and the display will blink No warning message see page 44 wil...

Page 48: ... Low Light the monitor screen will light white see page 58 Screen display symbol Description Status in which recording is not possible on HDD An attempt to record a photo on HDD was made N An attempt to record a still is being made with a DVD RAM DVD RW DVD R RW used An unusable disc is loaded R An attempt to record movie on a card was made An unusable card is loaded X HDD disc is write protected ...

Page 49: ...nu screen will disappear when it is left for approx one minute without any operation On Au t o P r og r am AE Wh i t e Ba l D i g Zoom M IC F i l t e r E I S ENTER RETURN 1 2 0 x O f f Au t o Came r a Fun c t i ons Se t up A A V I DEO Mode F I NE I n p u t Sou r c e CAMERA ENTER RETURN Rec o r d F u n c t i o n s Se t up 1 6 9 On OSD Ou t pu t On HDD P r o t ec t i o n On On Au t o P r og r am AE ...

Page 50: ...th external input 4 Displayed in SD status and input selection is set to external signal 5 Displayed in SD status 6 Displayed only when input selection is set to camera 7 Displayed only in HDD status On Au t o P r og r am AE Wh i t e Ba l D i g Zoom M IC F i l t e r E I S ENTER RETURN 1 2 0 x O f f Au t o A A Came r a Fun c t i ons Se t up V I DEO Mode F I NE I n p u t Sou r c e CAMERA ENTER RETUR...

Page 51: ...ng photo the digital zoom will be up to 120 When a subject is zoomed it may be momentarily out of focus When digital zoom is engaged the image quality will be rougher MACRO RECORDING Use the macro function when recording a small object from close up position You can shoot the subject as close as approximately 13 16 2 cm from the lens surface magnifying the image to fill the screen 1 Aim the DVD vi...

Page 52: ... thread of step up ring Note With DZ TL1 tele conversion lens the focusing range at T telephoto control side is between approx 16 feet 5 m and infinite When a conversion lens is attached note that the four corners of screen will be slightly dim if you zoom in on a subject on the W control side wide angle side When replacing the lens take care not to drop the DVD video camera recorder If a generall...

Page 53: ...ton during recording Manual Focus icon will appear on the screen 2 Press the zoom lever to T control side to zoom in on subject 3 Use the d c buttons to adjust the focus while viewing the image in the viewfinder or on the LCD screen Note Pressing FOCUS will alternate between manual focus and auto focus With auto focus no indication will appear on the screen Be sure to zoom in on your subject befor...

Page 54: ...not in the center of screen Objects that are far and near at the same time Objects with little variation in brightness such as white wall Objects moving rapidly Dark objects Objects lit by neon sign spotlight etc which glares or emits strong light Object behind glass with water droplets dirt on it Night view ...

Page 55: ...indication will appear on the screen The exposure setting will return to Auto when the DVD video camera recorder is turned off 1 2 3 Compensating for Backlight 1 Press the BLC button during recording The backlight correction icon will appear Note Pressing the BLC button will alternate between backlight setting between on and off The backlight setting will automatically return to off when the DVD v...

Page 56: ...UTO button FULL AUTO will be displayed on the screen of DVD video camera recorder for several seconds The following settings will reset to defaults HDD HDD Function When setting full auto Reference page Focus Auto 53 Backlight compensation Off 55 Exposure Auto 55 Program AE Auto 57 White balance Auto 58 EIS On 60 MIC Filter Off 60 ...

Page 57: ...d off When recording in a dark area an after image will appear when filming a moving subject or if camera shake occurs it is therefore recommended that you use a tripod in such cases If the Sports mode is used under a fluorescent light the image may flicker In this case use the Auto mode for recording Auto The camera recorder automatically judges the subject and surrounding environment for optimum...

Page 58: ...t allows you to record a subject up to 3 2 feet 1 m even in a dark place An after image will appear when filming a moving subject or if camera shake occurs it is recommended that you use a tripod If a subject cannot be focused properly manually adjust the focus see page 53 ADJUSTING COLOR WHITE BALANCE This DVD video camera recorder automatically adjusts the color of subject Change the white balan...

Page 59: ...anually focus the object referring to Manually Focusing Subject see page 53 2 Press the MENU button use the f e d c buttons to choose White Bal Set on the Camera Functions Setup menu screen and then press the A button 3 Hold A button pressed until the h indicator changes from blinking to a steady light When the h indicator lights the white balance setting will be complete 4 Press the C button to e...

Page 60: ... camera shake may not be entirely corrected even if EIS On is specified Firmly hold the DVD video camera recorder with both hands EIS may not operate correctly when the tele or wide conversion lens is used RECORDING SUBJECT USING LARGE MAGNIFICATION DIGITAL ZOOM See page 51 for setting on digital zoom REDUCING WIND NOISE DURING RECORDING MIC FILTER When recording sound from the microphone built in...

Page 61: ...ing When using a DVD RW VF mode DVD R RW You cannot specify the combination of VIDEO Mode STD and 16 9 On p 80 If you specify 16 9 On and try to switch the VIDEO Mode to STD from XTRA or FINE the screen will automatically switch to the 4 3 aspect ratio display The movie quality setting is effective only during movie recording The setting will not be displayed during recording of stills Block like ...

Page 62: ...viewfinder when the wide screen mode is on and off 1 Press the MENU button use the f e d c buttons to choose 16 9 on the Record Functions Setup menu screen and then press the A button 2 Choose On and then press the A button 3 Press the MENU button to end the setting When viewing playback on an ordinary TV screen later specify 16 9 Off Recording with 16 9 On specified will be played back on an ordi...

Page 63: ... 9 specified will be played back with the setting used during recording regardless of the 16 9 setting then being used The 16 9 setting is not compatible with ID 1 ID 2 If you connect this DVD vide camera recorder to the S1 or S2 terminal of TV the TV will automatically switch to the wide screen mode See TV instruction manual for details When using a video selector the TV may not automatically be ...

Page 64: ...order you must first switch the setting on the DVD video camera recorder Refer to the explanation starting from page 115 on how to connect the DVD video camera recorder to other devices or record images input from them 1 Press the MENU button use the f e d c A buttons to choose Input Source on the Record Functions Setup menu screen and then press the A button 2 Choose LINE and then press the A but...

Page 65: ...ion as with ordinary cameras 1 Press the MENU button use the f e d c A buttons to choose Self Timer on the Record Functions Setup menu screen and then press the A button 2 Select On and then press the A button The self timer will be set 3 Press the MENU button to end the setting 4 Press the PHOTO SELECT button The recording indicator at the front of DVD video camera recorder will blink The self ti...

Page 66: ... screen display output functions only when the input selection is set to camera It cannot be set during external input DROP DETECTION HDD PROTECTION The default setting is On Specify HDD Protection Off if you plan to use the HDD built in this DVD video camera recorder in a weightless condition such as skydiving to prevent stop in recording or playback Specifying On in such status will activate the...

Page 67: ... not appear when a DVD RAM DVD RW DVD R RW or card is used but the operation is the same 1 Set the power switch properly 2 Press the DISC NAVIGATION button The Disc Navigation screen shown on page 68 will appear 3 Press the DISC NAVIGATION button again Disc Navigation will be terminated and the DVD video camera recorder will enter the recording pause status You can also press the C button to end D...

Page 68: ...er is connected Doing so could damage the TV screen possibly by burning 1 Scene Video movie One scene refers to images recorded from one press of REC button until recording is stopped by pressing the REC button again Photo still One scene refers to a single photo recording by pressing the PHOTO SELECT button 2 Icon displayed on a photo recorded on a DVD RAM using a Hitachi DVD video camera recorde...

Page 69: ... the volume When playback ends The DVD video camera recorder will enter the playback pause status at the last image of last scene Pressing the C or DISC NAVIGATION button will restore the Disc Navigation screen When the playback pause status continues for as long as 5 minutes the Disc Navigation screen will automatically be restored Playing back photos A photo on DVD RAM will be displayed for appr...

Page 70: ...type of image data Image data recorded on another DVD video camera recorder or DVD recorder may not be played on this DVD video camera recorder Depending on the amount of data to be played back it may take some time for the playback image to appear Do not operate the power switch or remove the card while the ACCESS PC or CARD ACCESS indicator is lit or blinking Doing so may damage the card or the ...

Page 71: ... Hold down c Scenes will be visually scanned forward Hold down d Scenes will be visually scanned backward Release the d or c button when you find the desired image Normal playback will start from that point Note If the temperature inside the DVD video camera recorder rises normal skip or search playback may not be possible Turn the DVD video camera recorder off wait for a few moments and then turn...

Page 72: ...recorder to the playback pause status at the last image If the temperature inside the DVD video camera recorder rises normal skip or search playback may not be possible Turn the DVD video camera recorder off wait for a few moments and then turn it on again 13 PLAYING BACK STILLS Press the f or e button during playback to quickly play back stills in sequence Press e once To display stills one by on...

Page 73: ...fied point If multiple scenes are selected using the Disc Navigation function or PHOTO SELECT button choosing Top will jump to the beginning of selected scenes p 105 When multiple scenes are selected the total time of selected scenes will appear in the total recording time display With card the number of stills will appear at the TOP CURRENT END and GO TO indicators The cursor may not move at same...

Page 74: ...M No display Playback information display Recording date time 006 06 00 00 16 Recording mode Scene No Repeat play 4 Program No or Play List No 2 Program or Play List 1 Counter HDD Disc type 3 Playback operation 5 003 100 0003 Recording mode Scene No File name Lock 4 Playback operation 5 Slide Show 4 1 Program or Play List 2 Number of program or play list being played back not displayed when all pr...

Page 75: ...d and then selected Note You can know the status of scenes from the colors of cursor and bargraph Pressing the A button after selecting scenes will play back only the selected scenes from the beginning of each To cancel a selected scene select the scene to be canceled and then press the PHOTO SELECT button To cancel all selected scenes press the C button You can also select scenes in reverse from ...

Page 76: ... to card 91 Scene lock You can lock any scene so that it will not be deleted by mistake Essential scenes are thereby protected and recording another still is possible 92 Scene information display You can display information on one scene or multiple scenes such as image quality recording time etc 94 Changing title You can change the title of play list or program 96 104 Creation of play list You can...

Page 77: ...mbine p 87 Select p 93 Move 1 p 87 103 1 Will appear when a play list is displayed Detail p 94 Fade p 88 Skip p 89 Thumbnail p 90 Execute p 83 Mark Off p 84 Start Current p 93 Current End p 93 All p 93 Play list Select p 99 Go To Top p 105 Play p 99 End p 105 Create p 98 Edit p 100 103 HDD Setting Format HDD p 105 Title Delete p 104 p 104 Protect HDD Capacity p 106 p 106 Update Control Info p 107 ...

Page 78: ...urrent p 93 Current End p 93 All p 93 Play list Select p 99 Go To Top p 105 Play p 99 End p 105 Create p 98 Edit p 100 103 DVD Setting Finalize DVD 5 p 108 Title p 104 Format DVD p 105 Delete p 104 Protect DVD p 106 Capacity p 106 Program Select p 95 Update Control Info p 107 Play p 96 Title p 96 5 DVD RW VR mode only Others Category 4 p 110 All p 110 Repeat Play p 111 VIDEO p 110 TV type p 111 PH...

Page 79: ... 108 Play p 96 Unfinalize DVD 6 p 109 Format DVD 6 p 105 Capacity p 106 Go To Top p 105 6 DVD RW VF mode RW only End p 105 Others Repeat Play p 111 On p 111 Off p 111 TV type p 111 16 9 p 111 4 3 p 111 Scene Delete p 85 Lock p 92 Select p 93 Start Current p 93 Detail p 94 Current End p 93 All p 93 Go To Top p 105 Slide Show Start p 111 End p 105 Card Format Card p 105 Capacity p 106 ...

Page 80: ...y on HDD Disc Navigation screen To dub the scenes in a different order create a play list on which scenes are registered in the desired order of dubbing see page 98 and then execute dubbing Before You Begin Set the power switch to HDD Prepare a recordable disc The recording time for a scene that can be dubbed on one disc is approx 30 minutes in FINE mode If the HDD contains a scene exceeding the l...

Page 81: ...f data or direct or indirect damage when dubbing is not performed normally due to a fault in this DVD video camera recorder FIRST TIME NEW DUBBING This option allows you to dub scenes without dubbed marks among those recorded on HDD to a DVD beginning with the first scene without dubbed mark If those scenes cannot be included on one DVD the capacity of scenes will be calculated and the scenes will...

Page 82: ...e Scene Dubbing Execute and then press the A button 2 From the Dubbing Menu screen choose Date and press the A button If no DVD is loaded in this DVD video camera recorder a message will appear Press the DISC EJECT button and then load a DVD 3 From the Select Date screen select the date on which scenes are to be dubbed and then press the A button If you have changed the title of program see page 9...

Page 83: ...order a message will appear Press the DISC EJECT button and then load a DVD 3 The screen for verification will appear Choose YES and press the A button Pressing the f button at this time will allow you to check the scenes to be dubbed to a DVD that is loaded in the DVD video camera recorder The scenes to be dubbed will be encircled by a red cursor To return to the verification screen press the C S...

Page 84: ...After dividing the scene execute dubbing again 4 Press the DUBBING button The screen for verifying dubbing will appear Instead of pressing the DUBBING button you can press the MENU button choose Edit and then Enter The same screen will appear Choosing YES will start dubbing To cancel dubbing choose NO or press C STOP EXIT 5 When dubbing is finished check the Delete Scene screen Choosing YES will d...

Page 85: ... selected scene press the A button If you want to change the scene to be deleted you can change it on this screen 6 The screen for verifying deletion will appear Choose YES and then press the A button Choose NO to cancel deletion After Yes or No setting the Delete Scene screen will be restored Repeat steps 5 and 6 to delete other scenes 7 Press the C button to quit Note To delete an unwanted part ...

Page 86: ...will appear Search and frame advance are useful when designating division points Combining scenes that were divided will restore the original scene see page 87 If a special effect has been added to the original scene the IN effect will be added to the first half of scene and the OUT effect to the latter half The division point may drift before or after the designated point by approximately 0 5 sec...

Page 87: ...images appearing on the verification screen are those of the first and last scenes to be combined Choose NO to cancel combination After Yes or No setting the Combine Scenes screen will be restored The thumbnail of the first scene will appear in the combined scene Repeat steps 3 and 6 to combine other scenes 7 Press the C button to quit Note You can also select multiple scenes after step 1 Press th...

Page 88: ...o cancel setting choose Cancel If you choose Enter and press the A button the Fade screen will be restored after a message appears Repeat steps 5 and 6 to add fade to other scenes 7 Press the C button to quit The and or icon s will appear in the scenes for which fade in and or fade out have been set Note If a disc on which fade has been set on scene with this DVD video camera recorder is played on...

Page 89: ... setting the Set Skip screen will be restored Repeat step 5 to set skipping of other scenes 6 Press the C button to quit A skip icon will appear in the thumbnail of any scene for which skipping has been set Releasing Skip Perform the same procedure as setting skip The skip icon will disappear and skipping of the scene will be released Note If you press the MENU button before pressing the A button ...

Page 90: ...s the thumbnail of the scene appears press the PHOTO SELECT button 7 The screen for verifying switching of thumbnail will appear Choose YES and then press the A button Choose NO to cancel switching of thumbnail After Yes or No setting the Change Thumbnail screen will be restored Repeat steps 5 7 to change the other scenes 8 Press the C button to quit Note If you press the MENU button before pressi...

Page 91: ...cancel copy After Yes or No setting the Copy to card screen will be restored Repeat steps 6 and 7 to copy other stills to card 8 Press the C button to quit Note No movie can be copied If you press the MENU button before pressing the A button in step 6 the submenu screen will appear p 86 See Category p 110 to check the stills recorded on DVD RAM You can also select multiple scenes p 75 Even if all ...

Page 92: ...ected scene press the A button If you want to change the scene to be locked you can change it on this screen After setting the Lock Set screen will be restored Repeat step 6 to lock another scene 7 Press the C button to quit The lock icon T will appear on any scene for which lock has been set To unlock the scene Select the locked scene and then use the procedure shown on the left to unlock the sce...

Page 93: ...een 5 Choose Start Current Current End or All and then press the A button Deselecting selected scenes Deselecting scenes one by one While you are displaying the All Programs screen on which scenes have been selected place the cursor on the scene to be deleted and then press the PHOTO SELECT button Note Up to 999 scenes can be selected Deselecting all the selected scenes at once While you are displ...

Page 94: ...th DVD RAM DVD RW DVD R finalized RW recorded on another device 4 Will not appear if the loaded card does not comply with DCF 5 Number of pixels on still in horizontal direction This may not appear with a JPEG file that does not conform to this DVD video camera recorder De t a i l Sc e n e N o 0 0 7 V IDEO F I NE 1m i n13 s e c Da t e 12 1 2007 8 00 00AM S k i p O f f Fa d e I N None OUT None D u ...

Page 95: ...ress the A button The Disc Navigation screen of the selected program will appear Note Pressing the C button on the Select Program screen will restore the Disc Navigation screen If a disc recorded on another device is loaded in this DVD video camera recorder the program may not be a collection of recordings on the same date If you change the video quality or switch the wide mode with a RW multiple ...

Page 96: ...Use the f e d c buttons to select a letter and then press the A button The selected letter will be entered Repeat this procedure inputting letters one by one to create a title Up to 20 characters can be input 6 After entering the title choose Enter and then press the A button 7 The screen for verifying the change in title will appear Choose YES and then press the A button Choose NO to cancel chang...

Page 97: ...n will be restored Double byte characters set on other devices may be displayed blank on this DVD video camera recorder Titles set on this DVD video camera recorder may not be visible on other devices Characters available for entering title You can choose the title input mode capital letter small letter or symbol To change the input mode in step 5 press the DISPLAY button or use the PHOTO SELECT b...

Page 98: ...ou want press the A button If you want to change any of scenes you are registering you can also use this screen see pages 75 and 93 6 When creation of a play list is complete the created play list will appear on the Disc Navigation screen Note Only the data on scenes is recorded on play list If you create or delete play lists the original scenes in programs will not be erased Editing scenes on pla...

Page 99: ...fade etc use the same procedure for setting on program or scenes Perform these settings referring to the following reference pages 1 PLAYING BACK A PLAY LIST PLAY 1 Press the DISC NAVIGATION button 2 Press the MENU button 3 Use the f e d c A buttons to choose Play on the PlayList menu screen and then press the A button 4 Use the Start Playlist screen to select the play list to be played back and t...

Page 100: ...creen for verifying exit will appear Choose Yes and then end editing Note The mark shows the position where the scene is to be added Each time the DISPLAY button is pressed the operation guide the recording date time of the selected scene video quality screen aspect ratio and the recording length when using HDD will appear see page 68 Pressing the C button in the middle of adding scenes will displ...

Page 101: ...ress the MENU button 2 Display the editing screen of the play list to be edited Perform steps 3 4 on page 100 3 In the lower row of the play list place the green mark at the position where you wish to insert a scene 4 Place the cursor on the scene to be added from the upper row You can also select multiple scenes p 75 5 Press the MENU button 6 Choose Add and then press the A button Repeat steps 3 ...

Page 102: ...e play list itself will also be deleted 1 SELECTING SCENES USING SUBMENU FOR EDITING EDITING PLAY LIST You can specify the range of scenes when adding or deleting consecutive multiple scenes to from play list This Select menu item is useful when selecting consecutive multiple scenes in items for adding or deleting scenes 1 Press the DISC NAVIGATION button and then press the MENU button 2 Display t...

Page 103: ...press the A button If you want to change the scene selected in step 4 you can do it on this screen 8 Move the mark to the position where you wish to move the scene and then press the A button 9 The screen for verifying move will appear Choose YES and then press the A button Choose NO to cancel move After Yes or No setting the scene select screen will be restored Repeat steps 7 9 to move another sc...

Page 104: ...e procedure 1 DELETING PLAY LIST DELETE 1 Press the DISC NAVIGATION button 2 Press the MENU button 3 Use the f e d c A buttons to choose Delete on the PlayList menu screen and then press the A button 4 Use the Delete Playlist screen to select the play list you wish to delete and then press the A button 5 The screen for verifying deletion will appear Choose YES and then press the A button Choose NO...

Page 105: ...n much less time than using the scene delete function Initialization will delete all the recorded contents on HDD disc or card Be careful not to delete data by mistake It may not be possible to initialize a disc with many scratches or dirt Such a disc cannot be used p 10 This DVD video camera recorder may not recognize some discs or cards that have been initialized on PC or a device other than thi...

Page 106: ...c protection has been engaged on another device it may not be releasable on this DVD video camera recorder Use the original device that protected the disc to release the protection 1 2 3 VERIFYING REMAINING FREE SPACE ON DISC OR CARD CAPACITY 1 Press the DISC NAVIGATION button 2 Press the MENU button 3 Use the f e d c A buttons to choose Capacity on the HDD Setting DVD Setting or Card menu screen ...

Page 107: ... data completely When discarding or transferring this DVD video camera recorder be sure to delete any personal data on the HDD in order to prevent it from leaking out 1 Press the DISC NAVIGATION button and then the MENU button 2 Use the f e d c buttons to choose HDD Setting Full Format and then press the A button The HDD Full Format screen will appear 3 Choose YES and then press the A button The H...

Page 108: ...in the DVD video camera recorder has already been finalized you cannot choose Finalize DVD The time required to finalize disc that appears on the Finalize DVD screen is only for reference The shorter the recording time on disc the longer it will take to finalize it The second and later finalization will be faster with a disc which has previously been finalized Using FINALIZE button to finalize a d...

Page 109: ...NAVIGATION button 2 Press the MENU button 3 Use the f e d c A buttons to choose Unfinalize DVD on the DVD Setting menu screen and then press the A button The screen for verifying unfinalization will appear 4 Choose YES and then press the A button The message showing that the disc is being unfinalized will appear and the disc will then be unfinalized Note A finalized DVD RW VR mode can be recorded ...

Page 110: ...OR STILLS INDEPENDENTLY CATEGORY If you insert a DVD RAM that includes photos recorded on a DVD video camera recorder other than DZ HS500A the scenes on the disc will be displayed in the order of recording regardless of whether they are movies or stills Scenes recorded on this DVD video camera recorder will be displayed in the order of recording regardless of whether they are movies or stills You ...

Page 111: ...ith a disc recorded in wide mode to a TV with 4 3 display only and play it back vertically long images will appear You can specify TV type 4 3 to display 4 3 images on the TV 1 Press the DISC NAVIGATION button 2 Press the MENU button 3 Use the f e d c A buttons to choose TV type on the Others menu screen and then press the A button 4 Choose 4 3 and then press the A button 3 SLIDE SHOW CONTINUOUS P...

Page 112: ...g this may cause howling from the TV speakers Insert the AV S input output cable plugs into jacks straight Obliquely inserting them could damage the jacks If your TV has an S VIDEO input jack you can connect the S VIDEO plug to it HDD HDD To AV input output jack AV S input output cable provided To video audio input jacks Red Yellow White To S VIDEO input jack S VIDEO VIDEO AUDIO L R VIDEO AUDIO L ...

Page 113: ...rform playback recording or editing on Disc Navigation while checking on TV screen Note Adjust the volume of sound on TV Information during recording and playback will appear on the TV screen You can also switch off the display during recording Refer to SETTING ON SCREEN DISPLAY OUTPUT ON OR OFF OSD OUTPUT on page 66 When copy guarded disc is played back no image will appear on TV screen If you us...

Page 114: ...DVD recorder player and play it back See the instruction manual for DVD recorder player Note Do not insert a DVD RW VF mode DVD R that has not been finalized into any DVD recorder The disc may be unusable Do not insert a DVD RW VF mode DVD R RW recorded on another DVD recorder and not finalized in this DVD video camera recorder Doing so will make the disc unusable A recorded RW is automatically fi...

Page 115: ...onnecting this DVD video camera recorder to another device be sure to turn both devices off Insert a recordable disc 1 or card 2 into this DVD video camera recorder see pages 24 and 25 1 No photo can be recorded 2 Only photos can be recorded No video can be recorded If you operate the DVD video camera recorder connected to another device always power the camera recorder from AC outlet using the AC...

Page 116: ...ng of most images is prohibited by the copy guard signal to protect the copyright except for images recorded on camcorders for personal enjoyment COPY PROTECTED appears in these images They cannot be recorded on this DVD video camera recorder Typical copyright protected images include those of DVD video LD recorded video tapes some parts of digital satellite broadcasts etc If a video signal that c...

Page 117: ...ected device The DVD video camera recorder will start playback and the recorded device will record dub it Note Using S VIDEO will enable you to record clearer images Reduce the volume of external input sound heard from the built in speaker The loud volume may cause noise to enter the recorded image It is recommended that you use Disc Navigation to create a play list including the scenes to be dubb...

Page 118: ...DVD RW DVD R by importing the images recorded on the DVD video camera recorder into Macintosh The following are available on the provided software Note Finalize the DVD RW DVD R recorded on the DVD video camera recorder before using it on PC You cannot create a DVD VR DVD RAM DVD RW on the Macintosh software Since the audio format of the MPEG file imported into Macintosh using ImageMixer 3 Mac Edi...

Page 119: ...e with DirectX 9 0c or higher Sound Sound Blaster or its equivalent Other Environment where DirectX 9 0c can operate normally When using Macintosh OS Mac OS X v10 3 9 v10 4 2 v10 4 8 The provided software cannot be used on Mac OS X Server CPU PowerPC G4 1 GHz or higher PowerPC G5 Intel Core Memory At least 256 MB 512 MB or more is recommended HDD Free space needed for installation Approx 30 MB To ...

Page 120: ...k the setup exe icon in it Extension exe may not appear depending on the PC used 3 Choose the language to be installed Choose the language used with ImageMixer 3 and then click Next 4 The ImageMixer 3 installation screen will appear Click Next 5 Checking license agreement Carefully read the license agreement If you accept the contents choose I accept the terms of the license agreement and then cli...

Page 121: ...s installed Easy CD Creator 5 may not operate normally The screen shown below will appear after you click Install If you are using Easy CD Creator 5 click Yes and do not install ImageMixer 3 9 After installation is finished the screen for prompting restart will appear Click Finish to restart the PC After restart remove the CD ROM from the PC Installing the software is now complete Note After insta...

Page 122: ...ead the license agreement If you agree with the contents choose Continue If you accept the license agreement click I agree With the provided software for Macintosh the language used with OS will automatically be installed 5 Choose the installation destination and type of installation and click Continue Then click Install Follow the instructions on screen for operation Installation will start 6 Aft...

Page 123: ...wfinder When using Windows the DVD video camera recorder can be connected to a USB1 1 port of PC However since the data transfer speed is lower than when connecting to a USB2 0 port lost frames may occur or the process may take more time Read Cautions when connecting DVD video camera recorder to PC on page 136 The power switch of this DVD video camera recorder has three modes HDD mode when it is s...

Page 124: ... Double click this icon The contents of card can be checked The shape of icon and drive name will depend on the software environment used Handling photos Photos are recorded on a SD memory card in this DVD video camera recorder in JPEG format Use the application that conforms to the JPEG images The following shows how to import photos into PC Macintosh Insert an SD memory card with photos recorded...

Page 125: ...rag the removal drive icon displayed on desktop and place it in Trash Box After making sure that the icon disappears from desktop remove the SD memory card from the card insertion slot of this DVD video camera recorder USING DISC IN DVD DRIVE BUILT INTO PC If you have a PC with the drive conforming to the disc used and the application software you can directly insert the disc into the drive to use...

Page 126: ...he PC used 3 A message showing that hardware removal is possible will appear Unplug the PC connection cable When using Macintosh When removing the DVD video camera recorder from PC choose the drive icon of DVD video camera recorder HDD disc or card and choose Eject in the File menu Click If hardware removal results in error terminate Windows once and then unplug the PC connection cable When using ...

Page 127: ...08 1 Connect this DVD video camera recorder to the USB port of PC To view images recorded on a disc first insert the disc you wish to play back into the DVD video camera recorder and then connect the DVD video camera recorder to the USB port of PC 2 Start ImageMixer 3 When ImageMixer 3 starts up the launcher shown below will appear Click Playback Import Movie 3 Choose the camcorder on the library ...

Page 128: ...er to the USB port of PC To save images recorded on a disc first insert the disc you wish to save into the DVD video camera recorder and then connect the DVD video camera recorder to the USB port of PC 2 Start ImageMixer 3 When ImageMixer 3 starts up the launcher shown below will appear Click Create DVD Video 3 Click Create New DVD 4 Setting up project Set up a project You can set up the designate...

Page 129: ... block After a short while the images on the disc will appear Perform the same procedure to import the images When the images on DVD RW VF mode DVD R RW are imported the recording date time will not appear Note To import all chapters in the title at once click Select all in the editing menu at the top of screen and then click Import To import multiple chapters click the desired chapters while hold...

Page 130: ...ck the OK button Once the contents on disc have been deleted the cover of disc insertion block on DVD video camera recorder will open Close the cover following the message instruction If the disc contains a video file that does not conform to DVD Video format the video will be re encoded resulting in deterioration of image quality If you execute File Save project the halfway operation status can b...

Page 131: ...108 before it is played back on Macintosh 1 Connect this DVD video camera recorder to the USB port of Macintosh To save images recorded on a disc first insert the disc you wish to save into the DVD video camera recorder and then connect the DVD video camera recorder to the USB port of Macintosh 2 Start ImageMixer 3 for DVDCAM 3 Choose Hitachi DVDCAM Click Hitachi DVDCAM displayed on the left of sc...

Page 132: ...be played back and then click Import at the bottom of screen Importing the scene will start Click Library at the top left of screen The video files imported into Macintosh using ImageMixer 3 will appear in a list as shown below Select a video file on this library screen and click the Playback button at the bottom of screen The video file can be played back Also clicking the Movie Edit icon will al...

Page 133: ...o Macintosh using ImageMixer 3 Select the video files from which you wish to create a DVD Video and then click DVD List at the bottom of screen The screen for selecting the DVD menu design size of DVD disc to be created 8 cm 12 cm and picture quality will appear Choose the desired settings and click OK The created DVD list will be added The DVD list has been registered Untitled Double click Untitl...

Page 134: ... to DVD will start If you wish to create multiple DVDs of the same contents choose Yes for the message Do you want to create another disc that will be displayed after a DVD is created Note If you load a written DVD RW in the write drive a dialog Are you sure you want to delete the contents of disc will appear Deleting the content of disc will erase all data on the disc Carefully check the content ...

Page 135: ...ies ImageMixer 3 for DVDCAM User Library Application Support ImageMixer 3 for DVDCAM User Library Preferences com PIXELA ImageMixer 3 DVDCAM plist Library Receipts ImageMixer 3 for DVDCAM pkg Note User will depend on the login user name Administrator authority is required for uninstallation Contact The Following Inquiries on software provided with this DVD video camera recorder should be directed ...

Page 136: ... scene recorded on HDD into PC During this time make sure that the temperature of this DVD video camera recorder does not get too high Contents edited on the DVD video camera recorder will not be reflected in the provided software If the DVD video camera recorder is connected via USB hub or to a USB port on PC front panel or keyboard the DVD video camera recorder may not be recognized by PC If thi...

Page 137: ...p 52 POWER SUPPLY Battery DZ BP7SW Battery DZ BP14SW When using camera accessories be sure to read the instruction manuals for each accessory You will need the optional step up ring when attaching these lenses Refer to the catalog for details The models and specifications of the optional accessories shown on this page are subject to change and their production may be discontinued ...

Page 138: ...a battery can be used for repair if the remaining battery level indicator shows more than half level Repair will normally be complete in several minutes but it may take longer up to one hour Data may not be repaired depending on the timing when power was turned off Data may not be repaired normally if data recorded on another recorder is mixed in The repaired data may be different from the origina...

Page 139: ... crack both sides contrary inserted correctly Error occurred while the disc was being recognized Make sure that there is no scratch or dirt on disc that the surface back of disc is not reversed and that the disc is firmly pushed against the turntable See 3 and 4 on page 144 for troubleshooting 11 38 CANNOT RECORD PHOTOS This message will appear when the PHOTO SELECT button is pressed with the powe...

Page 140: ...ct and make sure that the disc is not write protected 25 106 CHECK HDD The HDD may have been destroyed Also check to see whether the HDD is write protected 106 Control Information Error Mismatch may occur between the recorded image and scene information Update the control information 107 Use another disc See 3 and 4 on page 144 COPY PROTECTED The video signal input to this DVD video camera recorde...

Page 141: ...retry later The temperature inside the DVD video camera recorder is too high and writing to disc or reading from disc may not be performed normally Turn the DVD video camera recorder off and wait for a while The temperature will be effectively decreased if the DVD video camera recorder is placed in a well ventilated spot 31 DVD R cannot dub the scene recorded in STD mode and 16 9 With a DVD RW VF ...

Page 142: ...ot execute Delete unwanted scenes 85 HDD DVD has no data This message will appear when an attempt is made to execute dubbing playback or editing on Disc Navigation when no scene has been recorded HDD DVD has no PlayList Switching of play list was selected with no play list stored 99 HDD DVD includes protected scenes Delete scenes The disc may be software protected from a device other than this DVD...

Page 143: ...he scene to be dubbed is larger than the free space on one disc approx 1 4 GB approx 30 minutes in FINE mode Divide the scene and then dub it 80 Scenes over limit Cannot add scenes The number of scenes entered in play list has reached the limit that can be entered Delete several scenes 98 102 Scenes over limit Cannot divide scene The number of entered scenes has reached the limit that can be enter...

Page 144: ...DVD recorder The disc may be unusable This DVD cannot be used Please replace DVD A disc that cannot be used on this DVD video camera recorder has been loaded Check the type of disc 25 This DVD is finalized Finalize is not required This message will appear if you press the FINALIZE button with a finalized DVD RW DVD R RW loaded in this DVD video camera recorder Finalizing the disc is not necessary ...

Page 145: ... new battery 30 The CHARGE indicator on AC adapter charger is blinking Is the ambient temperature too low or too high Charge the battery in environment where the temperature is 50 86ºF 10 30ºC The battery has possibly discharged excessively Continue charging After a while the battery will be charged to the specified voltage and the CHARGE indicator will light Then the battery charge will be comple...

Page 146: ...nt adhere to it Clean the disc If there is still no improvement replace the disc 11 Is some other AV device directly connected to the video audio input output jack of this DVD video camera recorder If the AV device is connected via several other devices such as AV selector the video signal may not be transmitted incorrectly In such a case reduce the number of devices through which the video signal...

Page 147: ... image This is not a fault Adjust the angle of the DVD video camera recorder so that sunlight etc does not enter Putting a protective hand over the lens may improve the ghosts Symptom Cause and Correction Reference page Recognition of disc is not complete Is disc dirty Use the provided disc cleaning cloth to clean it 11 Pressing the playback button will not start playback Has the image been record...

Page 148: ...ith pixels from 80 horizontal 60 vertical to 4000 horizontal 3000 vertical If the pixel data is outside this range blue thumbnails will appear thumbnails in the figure meaning the image is unplayable Even when the number of pixels is within the above range playback may not be possible depending on the recording status of the digital cameras used DCF Design rule for Camera File system is an integra...

Page 149: ... 9 0c 119 Movies are not recognized by application in PC Make sure the power switch of this DVD video camera recorder is set to HDD or DVD 31 The DISC EJECT button is not valid when the DVD video camera recorder is connected to PC While the DVD video camera recorder is connected to PC use Explorer to right click the DVD video camera recorder drive icon and execute Eject 124 No sound is heard when ...

Page 150: ...sleep restart standby status Is the proper disc or card loaded Does the HDD disc or card have remaining free space Is the DVD video camera recorder now playing back Is Disc Navigation screen displayed 43 No scene can be deleted Is the cursor placed on the scene to be deleted If the selected scene framed in red exists that scene will be deleted even if you use yellow cursor to select any scene Chec...

Page 151: ...atches dirt or fingerprints is inserted When disc is subject to severe vibrations When the battery or DC power cord was disconnected instead of following the correct procedure using power switch to turn the DVD video camera recorder off 8 38 No image in viewfinder Is LCD monitor open No image will appear in viewfinder unless the LCD monitor is closed and securely locked to DVD video camera recorde...

Page 152: ...ote Do not press the reset button with undue force Before pressing the RESET button be sure to remove the disc from the DVD video camera recorder Pressing the RESET button with a disc loaded may erase the scenes recorded on the disc List of setting items Item Default Setting method Camera Functions Setup Program AE Auto p 57 White Bal Auto p 58 ElS On p 60 Dig Zoom 120 p 51 MIC Filter Off p 60 Rec...

Page 153: ...de Viewfinder 0 2 inch color equivalent to approx 200 000 pixels LCD monitor 2 7 inch color TFT approx 120 000 pixels Electronic image stabilizer Electronic type Shutter speed 1 4 1 4000 seconds movie Self timer recording Still recording only Capacity of built in HDD Approx 30 GB Recording mode Movie with sound Still with SD memory card Maximum recordable time HDD Approx 7 hours XTRA Approx 11 hou...

Page 154: ...Round DVD Holder or cartridge Recordable card SD memory card Jacks Video audio input output 1 PC connection terminal connected to PC USB port 1 Battery system Lithium ion Power consumption When recording with LCD monitor off DVD RAM used approx 3 2W in FINE mode Dimensions W H D Approx 2 23 32 3 9 16 5 3 16 69 91 132 mm excluding hand strap Operating temperature humidity 32 104ºF 0 40ºC less than ...

Page 155: ...ll automatically stop recording After approx one minute it will automatically restart recording no scene will be recorded during this recording pause As a result multiple thumbnails will appear for the scene recorded continuously for more than 9 hours even with one time recording of that scene 2 Variable bit recording recording of more than 7 hours on HDD or more than 18 minutes on disc may be pos...

Page 156: ...0 Approx 500 Approx 1 000 Approx 2 000 Approx 4 000 Approx 8 000 ECO Approx 370 Approx 750 Approx 1 500 Approx 3 000 Approx 6 000 Approx 12 000 Recording quality Capacity 32 MB 64 MB 128MB 256 MB 512 MB 1 GB FINE Approx 180 Approx 380 Approx 750 Approx 1 500 Approx 3 000 Approx 6 000 NORM Approx 240 Approx 500 Approx 1 000 Approx 2 000 Approx 4 000 Approx 8 000 ECO Approx 370 Approx 750 Approx 1 5...

Page 157: ...e following telephone number Service Direct 1 800 HITACHI 1 800 448 2244 HITACHI CANADA LTD DIGITAL MEDIA DIVISION 1 2495 Meadowpine Blvd Mississauga Ontario L5N 6C3 Service Direct 1 800 HITACHI 1 800 448 2244 during business hours Monday Friday EST 9 00am 7 00pm Saturday EST 9 00am 5 00pm Choisissez les articles qui vous conviennent et passez commande Service Direct 1 800 HITACHI 1 800 448 2244 H...

Page 158: ...101 Detail scene 94 Dig Zoom 51 Diopter control 32 Disc Available 24 Finalize 108 Format 105 Handling 10 Protection 106 Update Control Info 107 DISC EJECT button 38 Display Information LCD 44 Scenes information 94 Viewfinder 32 Divide 86 Dubbing Dubbed mark 81 Dubbing from HDD to disc 83 Dubbing from to other video devices 115 Dubbing Menu 81 DUBBING button 80 DVD player 114 DVD R 24 DVD RAM 24 DV...

Page 159: ... Q Quality Card 64 Quick Menu 49 QUICK MENU button 49 R Record button 41 Recording indicator 35 Repeat Play 111 Reset settings 35 system 152 RESET button 152 RW 24 S Sand Snow Program AE 57 Scene 68 Combine 87 Delete 85 Detail 94 Divide 86 Fade 88 Move 87 103 Select 93 Skip 89 Searching for image 71 Select play list 99 Select program 95 Select Scene 75 Self Timer 65 Shoulder Strap 21 Skip Scene 89...

Page 160: ...le computers on network you must obtain the right of use for each computer from Pixela Corporation You may not let any third party use this program by granting reuse transfer lease lending etc You may not modify alter decompile or deassemble all or any part of this program or its accessories And you may not allow any third party do so Termination of Agreement If you duplicate this program and its ...

Page 161: ...w products purchased or service performed outside of the continental United States or its possessions F Product used for a commercial or industrial purpose NO PERSON AGENT DISTRIBUTOR DEALER SERVICE FACILITY OR COMPANY IS AUTHORIZED TO CHANGE MODIFY OR AMEND THE TERMS OF THIS LIMITED WARRANTY IN ANY MANNER OR FASHION WHATSOEVER EXCEPT AND TO THE EXTENT PROVIDED IN THIS LIMITED WARRANTY HITACHI MAK...

Page 162: ...ase by the original owner If this product is found to be defective Hitachi will repair or replace defective parts at no charge to the original owner Parts used for replacement are warranted for the remainder of the original Limited Warranty period For 90 days from the date of original purchase Hitachi will provide labor for the repair or replacement of defective parts without charge subject to the...

Page 163: ... Dealer name Dealer address City State Zip In order to allow Hitachi to better serve customer needs please complete this card and return it to Hitachi America Ltd Ubiquitous Platform Systems Completion of this card is not required in order to validate your Hitachi limited warranty but would assist us in developing better services and programs for our customers Please print or type ...

Page 164: ...ister your product on line at hitachi com tv or mail this portion to the following address Attn Warranty Department Hitachi America Ltd Ubiquitous Platform Systems 900 Hitachi Way Chula Vista CA 91914 3556 ...

Page 165: ......

Page 166: ...ssissauga Ontario L5N 6C3 CANADA IMPORTANT NOTICE This warranty will not apply to product purchased outside of Canada OR sold by any organization other than HITACHI CANADA LTD AVIS IMPORTANT Notre garantie ne couvre pas les produits achetés à l extérieur du Canada OU vendus par toute organisation autre que HITACHI CANADA LTD ...

Page 167: ...s services et programmes offerts à nos clients En caractères d imprimerie S V P Model No N de modèle Serial No N de série Date of purchase Date d achat Customer s first and last name Prénom et nom du client Customer s address PO Box No Adresse ou casier postal du client City Ville Province Postal Code Code postal Telephone No N de téléphone Dealer s name Nom du marchand Dealer s address Adresse du...

Page 168: ...itachi ca or mail to the address on this card Enregistrez votre produit en ligne à Hitachi ca ou par la poste à l adresse indiquée sur cette carte ATT WARRANTY DEPARTMENT HITACHI CANADA LTD 1 2495 MEADOWPINE Blvd MISSISSAUGA ON L5N 6C3 ...

Page 169: ... This manual was printed with soy based ink DVDCAM PC Software Support Center URL http dvdcam pc support hitachi ca Hitachi Ltd Japan Support Center phone numbers for software provided Números de teléfono del Centro de soporte para el software suministrado Numéros de téléphone de l Assistance Clientèle pour le logiciel fourni PIXELA CORPORATION 1 800 458 4029 Toll free 1 213 341 0163 URL http www ...

Reviews: