Hitachi DZ-BD70A - Camcorder, Service Manual
The Hitachi DZ-BD70A Camcorder is a versatile device packed with powerful features for capturing and preserving your precious memories. With its high-definition recording capabilities and user-friendly interface, this camcorder ensures exceptional video quality. To fully explore its potential, access a comprehensive Service Manual at manualshive.com, available for free download.
Share
Download


Reviews:
No comments
Related manuals for DZ-BD70A - Camcorder

POVCAM AG-HCK10G
Brand: Panasonic Pages: 14

WP-F9000
Brand: Wiseup Pages: 15
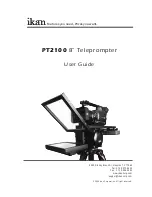
PT2100
Brand: Ikan Pages: 12

FCBEX20D
Brand: Sony Pages: 52

Handycam HDR-SR10
Brand: Sony Pages: 2

Handycam HDR-PJ810E
Brand: Sony Pages: 6

Handycam HDR-PJ30V
Brand: Sony Pages: 2

Handycam HDR-PJ10E
Brand: Sony Pages: 2

Handycam HDR-HC7
Brand: Sony Pages: 2

Handycam HDR-HC7E
Brand: Sony Pages: 4

Handycam HDR-PJ810
Brand: Sony Pages: 47

Handycam HDR-FX7
Brand: Sony Pages: 2

Handycam HDR-FX1000
Brand: Sony Pages: 7

Handycam HDR-HC7
Brand: Sony Pages: 34

Handycam HDR-PJ810
Brand: Sony Pages: 74

Handycam HDR-PJ50
Brand: Sony Pages: 57

Handycam HDR-J380E
Brand: Sony Pages: 52

Handycam HDR-PJ260
Brand: Sony Pages: 58


