background image

– 1 –

EN

2C15

English

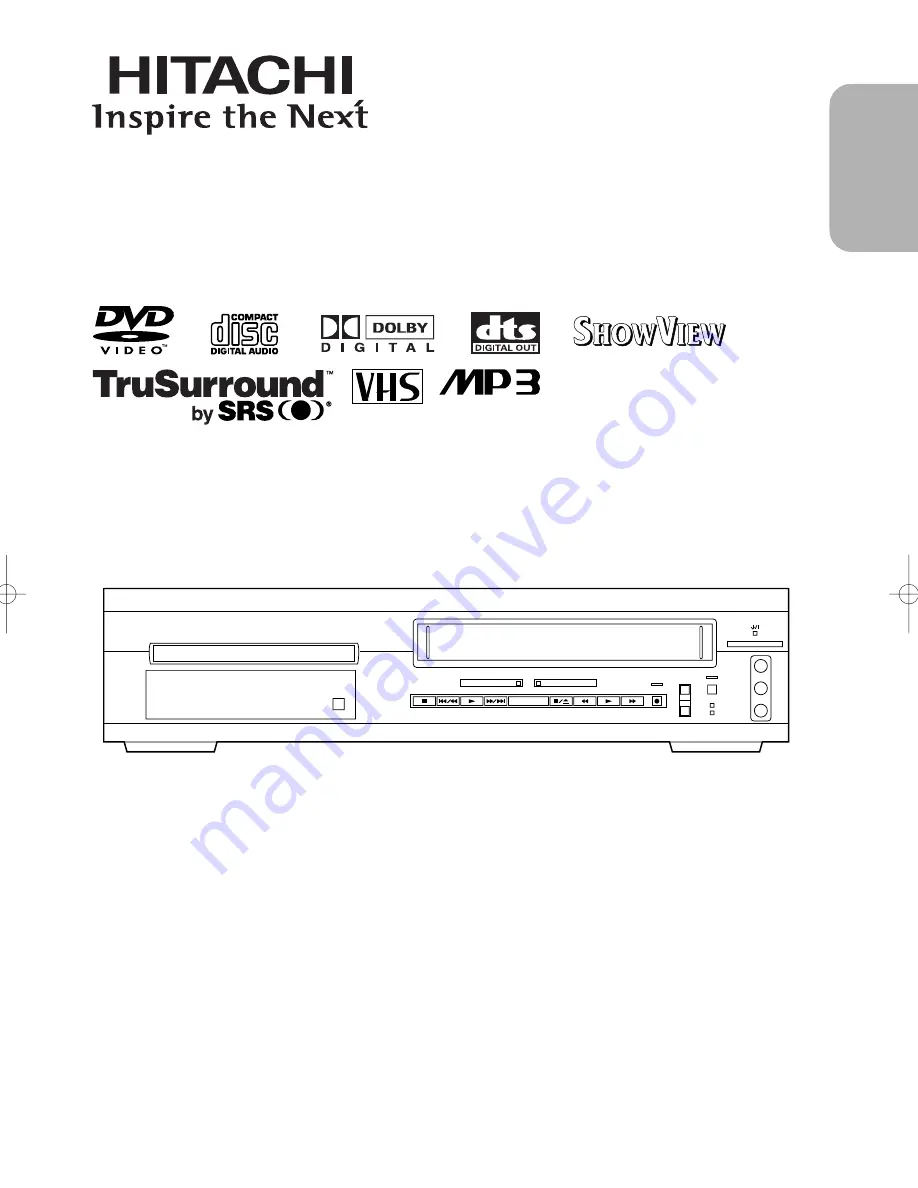
DVD/VCR Combo (DVD PLAYER with VIDEO CASSETTE RECORDER)

INSTRUCTION MANUAL

Instruction manual

To obtain the best performance and ensure years of trouble-
free use, please read this instruction manual completely.

MODEL

DVPF2E

OPEN/

CLOSE

DVD

VCR

TIMER SET

STANDBY

CST.IN

OUTPUT

CHANNEL

VIDEO IN

L

(mono)

R

AUDIO IN

VI and PlusCode are 
registered trademarks of Gemstar
Development Corporation. The
VI system is manufactured
under license from Gemstar
Development Corporation.

PAL

Summary of Contents for DVPF2E

Page 1: ...ure years of trouble free use please read this instruction manual completely MODEL DVPF2E OPEN CLOSE DVD VCR TIMER SET STANDBY CST IN OUTPUT CHANNEL VIDEO IN L mono R AUDIO IN VIDEOPlus and PlusCode are registered trademarks of Gemstar Development Corporation The VIDEOPlus system is manufactured under license from Gemstar Development Corporation PAL ...

Page 2: ...it is necessary to change the fuse in a non rewireable plug the fuse cover must be refitted If the fuse cover is lost or damaged the plug must not be used until a replacement available from the appliance manufacturer is obtained It is important that the colour of the replacement fuse cover corresponds with the rating marking on the base of the plug If the plug has to be changed because it is not s...

Page 3: ...se opening must not be blocked or covered Avoid enclosed spaces such as book cases unless proper ventilation is provided 3 Keep the unit away from the radiator heat sources 4 Avoid using near strong magnetic fields 5 Do not push objects of any kind into this through the cabinet slot as they could touch current carrying parts or short circuit parts resulting in a fire or electric shock 6 Never spil...

Page 4: ...ertain U S patents and other intellectual property rights owned by Macrovision Corporation and other rights owners Use of this copyright protection technology must be authorized by Macrovision Corporation and is intended for home and other limited viewing uses only unless otherwise authorized by Macrovision Corporation Reverse engineering or disassembly is prohibited SYMBOLS USED IN THIS MANUAL Th...

Page 5: ... Programme Delivery Control 29 AUTO RETURN 30 QUICK FIND 30 TIME SEARCH 30 INDEX SEARCH 30 COPYING A VIDEO TAPE 31 A STATUS DISPLAY 32 VIDEO CASSETTE TAPE 32 TV COLOUR SYSTEM 32 PLAYING A DISC 33 PLAYING A DVD VIDEO OR AN AUDIO CD 33 USING THE DVD MENUS 33 USING THE TITLE MENU 34 PAUSING PLAYBACK OR DISPLAYING A STILL PICTURE 34 RESUMING PLAYBACK FROM THE POINT WHERE PLAYBACK STOPPED 34 STEPPING T...

Page 6: ...r Button during playback or in stop mode On screen display Information about the current operation can be displayed on a TV screen allowing you to confirm the currently active functions such as programme playback on the TV screen using the remote control DTS Digital Theater System Sound system different from Dolby Digital sound system Search Chapter search Search for the chapter designated by user...

Page 7: ...ion holes on the sides of the DVD VCR Avoid locations subject to strong vibration or strong magnetic fields AVOID THE HAZARDS OF ELECTRICAL SHOCK AND FIRE Do not handle the power cord with wet hands Do not pull on the power cord when disconnecting it from AC wall outlet Grasp it by the plug If by accident water is spilled on your DVD VCR unplug the power cord immediately and take the unit to our A...

Page 8: ...prox 80 min single sided 8 cm Logo Maximum Playback Time Contents Disc Type Sound and Pictures Disc Size 74 min Approx 8 h double sided Approx 160 min double sided 12 cm 20 min 8 cm singles Audio CD Sound TM DVD Data on a DVD is divided into sections called titles and then into subsections called chapters each of which is given a title or chapter number Playback conditions are preset on some DVD v...

Page 9: ...on the front panel 4 CASSETTE COMPARTMENT 5 REC OTR Light Lights up during recording 6 TIMER SET Light This light glows when the DVD VCR is in standby mode or off for a timer recording or during a One Touch Recording It flashes if the TIMER SET Button is pressed for a timer recording but there is no tape in the DVD VCR It flashes when all timer recordings or One Touch Recording are finished 7 Stan...

Page 10: ... 29 REPEAT Button Repeats playback of the current disc title chapter or track 30 MODE Button Activates programme playback or random playback mode when playing CDs or MP3 Sets Black level or SRS TruSurround 31 ZOOM Button Enlarges part of a DVD reproduced image 32 CLEAR C RESET Button lDVD mode Press to reset the setting lVCR mode Press to reset the counter 33 ANGLE Button Press to change the camer...

Page 11: ... DVD VCR either by pressing the OUTPUT Button on the front panel or by pressing the DVD or the VCR Button on the remote control However pressing only the OUTPUT Button on the front panel does not switch the output mode of the remote control If you want to use the remote control you always need to select the correct output mode on the remote control too 51 SETUP Button Press to enter the setup mode...

Page 12: ...urrent disc mode Displays the current disc mode Displays the current time tape counter channel To search chapter or time To rapidly return to a location of disc Το Search markers OPEN CLOSE Button To search track or time To rapidly return to a location of disc SEARCH MODE QUICK FIND Button Number Buttons CLEAR C RESET Button To open or close the disc tray To open or close the disc tray To select c...

Page 13: ...rsor and determines its position Brings up the DVD player s Setup menu To skip Tracks To perform INDEX or TIME SEARCH Allows you to search forward backward through a disc 16 To stop playback Pause disc play Pause disc play Pause tape play or record Begin disc play To stop playback or record To change channels To select an item in the VCR Menu To select an item in the VCR Menu Begin tape play DVD B...

Page 14: ...at function is on Stays on when the repeat function is on Displays how long a current title or track has been played back When a chapter or track has switched the number of a new title chapter or track is displayed Power on No disc inserted Tray open Tray closed Loading the Disc Power off 1 Open the battery compartment cover 2 Insert two AA batteries with each one oriented cor rectly 3 Close the c...

Page 15: ... TIMER SET STANDBY CST IN OUTPUT CHANNEL VIDEO IN L mono R AUDIO IN DVD VCR DVD VCR DVD Button VCR Button OUTPUT Button DVD OUTPUT Light VCR OUTPUT Light CLEAR C RESET Press the VCR Button on the remote control Verify that the VCR OUTPUT Light is lit SWITCHING TO VCR MODE Notes Pressing only the OUTPUT Button on the front panel does not switch the mode of the remote control You always need to sele...

Page 16: ... Connect 21 Pin scart cable here and to the 21 Pin scart jack of a TV 6 ANALOG AUDIO OUT Jacks DVD only Connect the supplied audio cables here and to the Audio In jacks of a television or other audio equipment 7 S VIDEO OUT Jack DVD only Connect an optional S Video cable here and to the S Video In jack of a television 8 DIGITAL COAXIAL AUDIO OUT Jack DVD only Connect an optional coaxial digital au...

Page 17: ... you may connect to other external devices with Scart sock ets We recommend this connection to ensure a better audio and picture quality NICAM stereo sound is only achieved when using a SCART lead Euro Scart cables are obtainable at your dealer AV1 TV CONNECTION TO TV If your TV has Scart sockets you may connect your DVD VCR s AV1 TV scart socket to the Scart socket on the back of your TV Please s...

Page 18: ...erate noise distortion and may also damage the speakers See page 45 The audio source on a disc in a 5 1 channel Dolby Digital surround format cannot be recorded as digital sound by an MD or DAT deck Set Dolby Digital and DTS to off for audio output in the setup mode for method 1 only Playing a DVD using incorrect settings may generate noise distortion and may also damage the speakers Refer to page...

Page 19: ...to connect this DVD VCR player to your TV s 75 ohm coaxial antenna terminal using a commercially available Stereo Audio Video RF Modulator not includ ed Connect the audio and video outputs of the DVD VCR player to the audio and video inputs on the RF Modulator and then connect the coaxial output of the RF Modulator usually marked TO TV to the 75 ohm coaxial antenna terminal on your TV Follow the i...

Page 20: ...re 1 Insert a pre recorded tape into the DVD VCR The DVD VCR will turn on and start playback automatically If playback does not start press the BButton 2 Select and adjust your TV to channel 35 If the playback picture appears on the TV screen continue with step 8 If channel 35 is employed for broadcasting or interference lines appear on the picture the RF converter must be set to a different chann...

Page 21: ...s Channel Presetting must be set before the Auto Clock is set The DVD VCR refers to the channel which was memorised into position 01 The PDC channel must therefore be set to position 01 The clock cannot be set automatically if you are not receiving a channel that carries a time signal in your area In this case set the clock manually Once the auto clock setting is performed the DVD VCR will correct...

Page 22: ...e To confirm that a channel has been added press the CH Buttons o p 22 EN 2C15 You can programme the tuner to scan only the chan nels that you can receive in your area Use the remote control for this procedure 1 Turn on the TV and select the TV channel to the video channel on the TV 2 Press the MENU button 3 Press the B or C Button to select INI TIAL then press the g Button 4 Press the B or C Butt...

Page 23: ...2 Press the B or C Button to select INI TIAL then press the g Button 3 Press the B or C Button to select CH TUN ING then press the g Button 4 Press the B or C Button repeatedly to select MOVE then press the g Button 5 Press the B or C Button repeatedly to select the position number you want to change the channel then press the g Button You cannot select a position number where appears next to the ...

Page 24: ...e sound during slow motion You can control the speed by pressing the g faster or h slower Button Press the B Button to return to normal playback If it is left in the Slow mode for more than five min utes the DVD VCR will automatically switch to the Stop mode VCR 1 Turn on the TV and select the video channel on the TV 2 Insert a prerecorded tape The DVD VCR will turn on automatically If the erase p...

Page 25: ...e recorded 3 Press the SPEED Button to select the tape speed SP LP 4 Press the REC Button to begin recording The REC indicator on the display comes on 5 Press the C Button when recording is com pleted 1 Press the F Button when you want to tem porarily halt recording You can check the remaining pause time with marks on the TV screen Each mark represents one minute After five minutes the DVD VCR wil...

Page 26: ...ished the TIMER SET Light blinks To use the DVD VCR again press the TIMER SET Button on the DVD VCR VCR OTR ONE TOUCH RECORDING AUTO REPEAT PLAYBACK 2 Press the B or C Button to select SET UP then press the gButton 3 Press the B or C Button to select AUTO REPEAT 4 Press the g Button so that ON appears next to AUTO REPEAT on the TV screen When in Stop mode Auto Repeat mode will start automatically ...

Page 27: ...until the desired pro gramme number appears Then press the g Button 4 Select once daily everyday or weekly recording For once only recording Press the B or C Button repeatedly until the relevant month appears For daily recording To record a TV programme at the same time on the same channel from Monday through Friday While the month digit is flashing press the B or C Button repeatedly to select MO ...

Page 28: ... Button 3 Press the MENU Button to exit AVOID OVERLAP OF TIMER PROGRAMMES A timer programme does not work while another pro gramme is under execution 9 00 10 00 11 00 Programme 1 Programme 2 Programme 3 HINTS FOR TIMER RECORDING If there is a power failure or the DVD VCR is unplugged for more than 1 minute the clock setting and all timer settings will be lost If a tape ends during TIMER RECORDING ...

Page 29: ... press the B or C Button repeatedly until your desired channel num ber appears Then press the g Button When you select the channel number using the B or C Button it memorises in DVD VCR s memory 5 Press the B or C Button repeatedly until the desired tape speed appears 6 Press the B or C Button to choose ON or OFF The Programme Delivery Control PDC is a very convenient system which assures that the...

Page 30: ...e followed up within 30 seconds from steps 2 to 3 Otherwise the Index Search mode will be cancelled To exit the Index Search mode press the MENU Button in step 2 Or press the C Button after step 3 VCR If a tape includes both programmes recorded in the PAL system and ones recorded in the NTSC system this function may not be operated correctly Use the remote control for this procedure 1 Press the TI...

Page 31: ... DVD VCR See Other Connections on page 17 5 Press the REC Button on the recording DVD VCR 6 Begin playback of the tape in the playback VCR Turn on the TV and select the video channel on the TV Source Playing VCR Monaural another VCR TV set Use for monitoring AERIAL RF OUT R L COAXIAL OPTICAL S VIDEO OUT DVD ANALOG AUDIO OUT DIGITAL AUDIO OUT AV1 TV AV2 DECODER DVD VCR VCR to 21 Pin Scart Jack to R...

Page 32: ...ng back such tapes the picture may roll up or down shrink vertically and black bars may appear both at the top and bottom of the screen Adjust the vertical hold control on your TV if the TV features this con trol VCR Before recording select the tape speed SP mode Standard Play or LP mode Long Play The table below shows the maximum recording play back time using E 60 E 120 E 180 or E 240 tapes in e...

Page 33: ... play CD DVD Notes While the setup menu is shown you can not open or close the tray A prohibited icon may appear at the top right on the TV screen during operation warning that a prohibited operation has been encountered by the DVD VCR or the disc If a disc is dirty or has scratches the pictures may appear distorted and the playback operation may stop In such cases clean the disc and unplug the po...

Page 34: ...s DVD PAUSING PLAYBACK OR DISPLAYING A STILL PICTURE 1 Press the F Button during playback Playback will pause with sound muted 2 Press the B Button to resume playback MP3 CD DVD F B STEPPING THROUGH FRAMES 1 Press the F Button while playback is paused The next picture frame is dis played with sound muted each time the Button is pressed 2 Press the B Button to resume playback DVD F B RESUMING PLAYB...

Page 35: ...NTER Button to go to the desired track CD STARTING FROM A DESIRED TITLE OR CHAPTER TR __ 14 There are 2 ways you can jump to a desired title or a chapter By using the SEARCH MODE Button 1 Press the SEARCH MODE Button Title Chapter search display will show up 2 Press the Number Buttons to enter a desired title or chapter number 3 Enter the desired title or chapter number with the Number Buttons If ...

Page 36: ...layback will then start Note Programme playback is not available during random play back CD Call back the marker Using the Arrow Buttons s B position the cur sor on to the marker number to be called back and press the ENTER Button Clear the marker Using the Arrow Buttons s B position the cur sor on to the marker number to be cleared and press the C RESET Button To all markers place the cursor on A...

Page 37: ... Button during playback The starting point A will then be selected 2 Press the A B REPEAT Button again at the end point B of the desired section The selected section will be played back repeatedly 3 To exit A B repeat playback press the A B REPEAT Button and set it to OFF CD DVD A B REPEAT REPEAT A REPEAT A B REPEAT OFF PROGRAMME Audio CD 1 Press the MODE Button in stop mode The programme screen w...

Page 38: ...ing and 6 steps each when 4 time zooming Current position will be displayed on the right bot tom of the screen Press the ENTER Button and the display disappears Note Zooming function does not work while disc menu is shown PLAYING AN MP3 DISC 1 Insert an MP3 file recorded disc The MP3 menu screen shows up appears at the head of the album name The player can recognise 255 ALBUMS and TRACKS altogethe...

Page 39: ...earch mode is cancelled Playback cannot be started from a desired time count 1 Press the SEARCH MODE Button during playback The SEARCH menu shows up The TRACK currently in play or under RESUME ON will be highlighted In the case of RESUME OFF the first track of the disc will be highlighted Press the RETURN Button and the SEARCH menu disappears 2 Using the Arrow Buttons K L select a track to be play...

Page 40: ...k on some DVDs with multiple audio languages e g DVDs which allow audio language setting on the disc menu Operation varies between discs so refer to the manual accompanying the disc Current audio language and sound mode will be dis played when you press the AUDIO Button at first If a desired language is not shown after pressing the AUDIO Button several times the disc does not have an audio source ...

Page 41: ...anged if the subtitles are recorded in a single language on the DVD being played Pressing the SUBTITLE Button cycles the subtitle language from SUBTITLE 1 SUBTITLE 2 and all the languages recorded Current subtitle mode will be displayed when you press the SUBTITLE Button at first Press the SUBTITLE Button and then press the Arrow Buttons s B to set it to on or off DVD Subtitle 1 Subtitle 2 OFF SUB...

Page 42: ...E Button twice The setup screen will appear 2 Press the SURROUND Button to turn it on or off or 2 Press the ENTER Button ON SRS TruSurround on OFF SRS TruSurround off Default OFF Press the RETURN Button to exit the display SRS TruSurround is available only when the DVD VCR is connected to a TV or stereo using the red and white AUDIO OUT jacks on the DVD VCR DVD TRUSURROUND SETTINGS Use the Number ...

Page 43: ... on pages 40 and 41 You can also select the item by pressing the numbers which are displayed with the item When you change the setup items press the C Button if you are in playback mode While the setup menu is shown you can not open or close the tray CHANGING THE SETUP ITEMS LANGUAGE SETTINGS 1 LANGUAGE OPTIONS 2 DISPLAY OPTIONS 3 AUDIO OPTIONS 4 PARENTAL SETUP MENU EXIT SETUP CANCEL RETURN SELECT...

Page 44: ...s the Arrow Buttons K L to select a desired item and then press the ENTER Button 5 Press the SETUP Button The setup mode will be cancelled and the ordinary screen will appear Notes Be sure to press the SETUP Button or the setting will not work You can also choose the item by pressing the Number Buttons While the setup menu is shown you can not open or close the tray 1 TV ASPECT 4 3 L BOX 2 FRONT D...

Page 45: ...ible not only to suppress the output of loud sound at night and but also to raise the volume of low sound This function is effective only for the sound record ed by Dolby Digital recording Dolby Digital default BITSTREAM BITSTREAM Output by Dolby Digital Set to BITSTREAM when the unit is connected to Dolby Digital Decoder To turn off Dolby Digital set at PCM DVD AUDIO SETTINGS 1 DRC OFF 2 DOLBY DI...

Page 46: ...eed the above steps 3 5 again 1 Press the SETUP Button in STOP mode The setup screen will appear 2 Press the Arrow Buttons K L to select PARENTAL and then press the ENTER Button 3 Press the Number Buttons to enter a 4 digit password you can use any 4 digits except for 4737 and then press the ENTER Button This number will be used as the password from the second time onward By entering the password ...

Page 47: ... 76 77 78 79 80 81 82 83 84 85 86 87 88 89 90 91 92 93 94 95 96 97 98 99 100 101 102 103 104 105 106 107 108 109 110 111 112 113 114 115 116 117 118 119 120 121 122 123 124 125 126 127 128 129 130 131 132 133 134 135 136 No Language Country code Latvian Lettish Malagasy Maori Macedonian Malayalam Mongolian Moldavian Marathi Malay Maltese Burmese Nauru Nepali Dutch DUT Norwegian NOR Occitan Afan Or...

Page 48: ...on the remote control PROBLEM CORRECTIVE ACTION Timer recording is not pos sible Make sure the timer recording is set correctly Make sure the power is off Make sure the DVD VCR clock is set correctly Recording mode cannot be engaged Make sure the erase prevention tab on the tape is intact If removed cover the hole after the tab with adhesive tape No picture or poor picture on playback No picture b...

Page 49: ... Some discs may not be played back right away after a SEARCH Copy protection is active Immediately after playing press fast forward or in reverse The 1st layer is switching to the 2nd layer when playing a two layered disc Connect the audio cables firmly Turn the power of the audio component on Correct the audio output settings Correct the input settings on the audio component No malfunction Distor...

Page 50: ...nd discolouration to the exposed surfaces AUTO HEAD CLEANING Automatically cleans video heads as you insert or remove a cassette so you can see a clear picture Playback picture may become blurred or interrupted while the TV programme reception is clear Dirt accumulated on the video heads after long periods of use or the usage of rental or worn tapes can cause this problem If a streaky or snowy pic...

Page 51: ...o Audio CD Video Cassette tape Converter output UHF Channel 22 69 Power source 220 240V 10 50Hz 0 5 Power consumption 30 W standby 5 7 W Operating temperature 5 C to 40 C Dimensions W 17 1 8 435 mm H 4 99 mm D 10 1 2 266 mm Weight 8 8 lbs 4 kg Designs and specifications are subject to change without notice ...

Page 52: ... 52 EN 2C15 MEMO ...

Page 53: ... 53 EN 2C15 English MEMO ...

Page 54: ... short circuit resulting in leakage or in extreme cases fire or even an explosion Remove dead batteries from equipment and all batteries from equipment you know you are not going to use for a long time Otherwise the batteries may leak and cause damage Never dispose of batteries in fire as this can cause them to explode Please put dead batteries in with the normal household waste NEVER ALWAYS NEVER...

Page 55: ...witched on when it is unattended unless it is specifically stated that it is designed for unattended operation or has a standby mode Switch off using the switch on the equipment and make sure that your family know how to do this Special arrangements may need to be made for infirm or handicapped people DON T use equipment such as personal stereos or radios so that you are distracted from the requir...

Page 56: ...r 3 The product serial number is not removed or altered This guarantee does not apply to products acquired second hand or for commercial or communal use This guarantee does not extend to user control adjustments battery replacement and aerial adjustment Any parts replaced under guarantee shall become the property of HITACHI EUROPE LTD Please note that evidence of the date of purchase will be requi...

Page 57: ... ITALY Tel 39 02 487861 Tel 39 02 38073415 Servizio Clienti Fax 39 02 48786381 2 Email customerservice italy hitachi eu com HITACHI Europe AB Box 77 S 164 94 Kista SWEDEN Tel 46 0 8 562 711 00 Fax 46 0 8 562 711 13 Email csgswe hitachi eu com HITACHI EUROPE S A S Lyon Office B P 45 69671 BRON CEDEX FRANCE Tel 04 72 14 29 70 Fax 04 72 14 29 99 Email france consommateur hitachi eu com HITACHI EUROPE...

Reviews: