background image

1

Liquid Crystal Projector
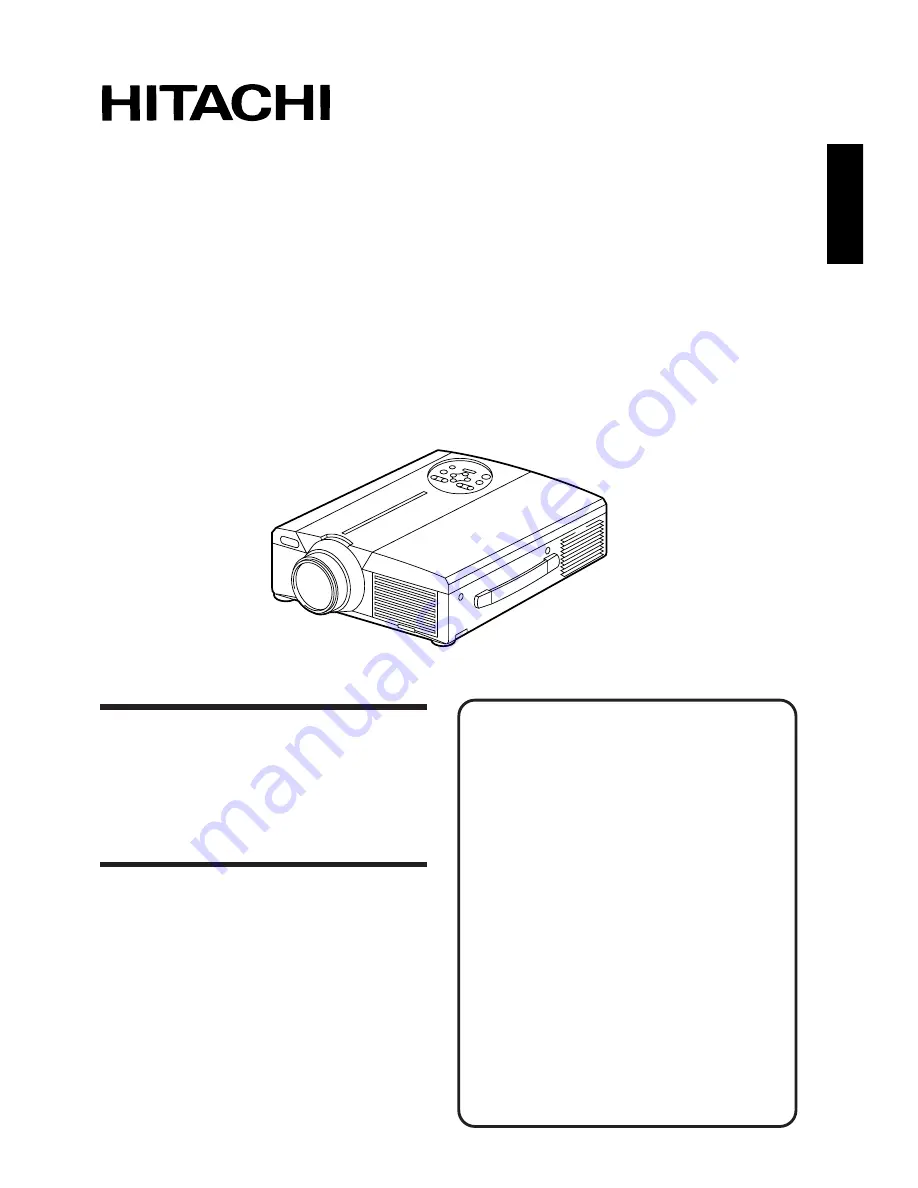
Model

CP-X960W/E

USER’S GUIDE

Thank you for purchasing the Hitachi liquid crystal projector. Please read this user’s manual
thoroughly to ensure correct usage through understanding. After reading, store this instruction
manual in a safe place for future reference.

Outline

This liquid crystal projector is used to project
various computer signals as well as
NTSC/PAL/SECAM video signals onto a
screen. Little space is required for installation
and large images can easily be realized.

Features

(1) Outstanding brightness

The UHB lamp and high-efficiency optical
system assure a high level of brightness.

(2) Partial magnification function

Interesting parts of images can be magnified for
closer viewing. 

(3) Distortion correction function

Distortion-free images are quickly available.

(4) Power zoom and power focus.
(5) P in P function
(6) USB jack

Before Use

. . . . . . . . . . . . . . . . . . . . . . . . 

3

Checking the package Contents

. . . . . . . . 

8

Names and functions of each part

. . . . . . 

8

Installation

. . . . . . . . . . . . . . . . . . . . . . . 

12

Basic operations

. . . . . . . . . . . . . . . . . . . 

13

Adjustments and functions

. . . . . . . . . . . 

17

Connection to the vido signal

terminals

. . . . . . . . . . . . . . . . 

22

Connection to the RGB signal 

terminal

. . . . . . . . . . . . . . . . . 

22

Connecting to the USB

. . . . . . . . . . . . . . 

25

Connection to the CONTROL signal 

terminal

. . . . . . . . . . . . . . . . . 

26

Example of system setup

. . . . . . . . . . . . 

31

Cleaning the air filter

. . . . . . . . . . . . . . . . 

31

Lamp

. . . . . . . . . . . . . . . . . . . . . . . 

32

Message table

. . . . . . . . . . . . . . . . . . . . . 

32

When you think something wrong

. . . . . . 

33

Specifications

. . . . . . . . . . . . . . . . . . . . . 

34

About the warranty and 

after-service

. . . . . . . . . . . . . 

35

Contents

Page

Summary of Contents for CP-X960E

Page 1: ...ency optical system assure a high level of brightness 2 Partial magnification function Interesting parts of images can be magnified for closer viewing 3 Distortion correction function Distortion free images are quickly available 4 Power zoom and power focus 5 P in P function 6 USB jack Before Use 3 Checking the package Contents 8 Names and functions of each part 8 Installation 12 Basic operations ...

Page 2: ......

Page 3: ...ndicates information that if ignored could result possibly in personal injury or physical damage due to incorrect handling Typical Symbols This symbol indicates an additional warning including cautions An illustration is provided to clarify the contents the illustration to the left indicates danger of electrical shock This symbol indicates a prohibited action The contents will be clearly indicated...

Page 4: ...fire or electrical shock Do not insert foreign objects Do not insert metal objects through the ventilation openings etc of this projector or drop such objects inside because this could result in fire or electrical shock If a foreign object should enter this projector immediately turn off the power switch disconnect the power plug from the power outlet and contact your dealer Continued use could re...

Page 5: ...g and insert a knife blade to make sure that there is no looseness Do not allow the laser beam to enter the eyes This remote control is equipped with a laser pointer and a laser beam is emitted from the laser outlet Do not look directly into the laser beam outlet or direct the laser beam at other people Vision can be impaired if the laser beam enters the eyes Use special caution in households wher...

Page 6: ...Incorrect loading could result in personal injury or contamination of the surroundings due to battery cracking or leakage Clean the projector interior once every two years Request your dealer to clean the interior of the projector approximately every two years Accumulations of dust inside the projector can result in fire or malfunction if not cleaned for an extended period This cleaning is more ef...

Page 7: ...xcessively soiled dilute a neutral detergent in water wet and wring out the cloth and afterward wipe with a dry cloth Do not apply undiluted detergent directly to the projector Extended usage When using this projector for an extended period stop periodically to rest the eyes to prevent eye fatigue Caution When the projector is not to be used for an extended period For safety purposes when the proj...

Page 8: ...tor rises and when the fan malfunctions Refer to page 33 for details Remote control photoreceptor Lens Lens cap Speaker Cooling fan intake side Cooling fan exhaust side Handle a b c d VIDEO STANDBY ON RGB POSITION LASER MENU RESET MAGNIFY FREEZE OFF VOLUME Projector unit 3 Conductor video Audio cable RGB cable 15 15 pin M M Mac adapter with dip switch Mouse cable 3 Power Cord 110V US 220 UK Europe...

Page 9: ...onnect the accessory power cord RGB IN jack D sub 15 pin shrink 1 2 CONTROL jack D sub 15 pin shrink AUDIO OUT jack RGB VIDEO Stereo mini jack AUDIO IN jack RGB Stereo mini jack Connecting to the AC IN jack Make sure the accesory power cord is plugged into the AC IN jack as far as it will go Incomplete connection can result in fire or electrical shock Remote control photoreceptor Caution RGB OUT j...

Page 10: ...justs the volume of the sound Press to increase the volume and to decrease the volume When there is no video signal input operation is not possible when the input video signal is outside the sync range LASER button Turns the laser beam on and off Refer to page 11 cocnerning usage and observe the cautions RESET MOUSE RIGHT button 1 Operates as the RESET button when the menu is displayed Press this ...

Page 11: ...n the projector Incorrect orientation could cause battery cracking or leakage which could result in personal injury or pollution of the surrounding environment Caution Remote control usage cautions Do not drop the remote control or apply impact Do not wet the remote control or place it on any wet object Such actions could result in malfunction When not to be used for an extended period remove the ...

Page 12: ...e locks unless the projector is being held otherwise the projector could overturn or the fingers could get caught and cause personal injury Do not force the adjusters to rotate This could damage the adjusters or cause the lock to fail Lock the adjusters firmly If the lock is difficult to operate change the angle slightly and try again Use the adjusters on the bottom to adjust the projection angle ...

Page 13: ...djust the screen size 5 Use the FOCUS button to adjust the focus 1 The display shown to the right will appear when the FOCUS button is pressed 2 Use the FOCUS button to adjust the focus until the image is sharp 3 The message Focus will disappear if any other button is pressed When there is no input signal the Focus characters are not displayed when the input signal is outside the sync range 6 Turn...

Page 14: ... STANDBY ON button is pressed is too short 2 Turn off the main power switch of the projector OFF 3 Attach the lens cap The fan will continue running for approximately 1 min after the STANDBY ON button is pressed Do not turn off the main power switch while the lamp is on because this will shorten the service life of the lamp Caution Use the RGB cable included with this projector when using plug pla...

Page 15: ...d to freeze the image being displayed refer to page 10 Cancelling the FREEZE function When there is no input signal the Freeze function is not effective when the input signal is outside the sync range Pressing the FREEZE button alternately turns the freeze function on and off The FREEZE function will be cancelled when the input select button is pressed or the display mode of the PC being used for ...

Page 16: ...DBY ON RGB POSITION LASER MENU RESET MAGNIFY FREEZE OFF VOLUME P in P MUTE AUTO BLANK TIMER Magnify function Changing the magnification ratio Moving the display area Returning to normal display 1 2 3 5 4 6 Part of an image can be displayed magnified refer to page 10 Basic operations continued When there is no video signal input Magnify is not effective when the video signal input is outside the sy...

Page 17: ...ppear refer to page 18 21 for details 2 Press the MENU buttons of the projector or the DISK PAD button of the remote control to select the menu item to be adjusted The selected menu item will be displayed in orange 3 Adjust the selected menu item with the MENU buttons of the projector or the DISK PAD button of the remote control The selected menu item will be displayed in orange Select the adjustm...

Page 18: ...e cancelled after the operation Menu Displaying the menu cancels magnify and freeze operations Caution SET UP Images and display positions can be adjusted from the SETUP menu Adjustment item VOLUME BRIGHT BRIGHTNESS CONTRAST SHARPNESS COLOR TINT V POSIT V POSITION H POSIT H POSITION H PHASE H SIZE COLOR BAL R COLOR BALANCE Red COLOR BAL B COLOR BALANCE Blue Adjustment description Volume decreases ...

Page 19: ... T U P I N P U T O P T I M A G E RGB VIDEO AUTO NTSC PAL SECAM NTSC4 43 M PAL N PAL S E T U P I N P U T O P T I M A G E Adjustment item RGB VIDEO Adjustment description Displays the following RGB inputs fH horizontal sync frequency fV vertical sync frequency Sets the video signal system When the screen is unstble no color or rolls select the mode that matches the input signal ...

Page 20: ...ens and closes the initial settings screen during signal input at start up Selects the P in P sub screen display position IMAGE Projection image inversion etc can be selected from the IMAGE menu KEYSTONE MIRROR BLANK START UP P IN P S E T U P I N P U T O P T I M A G E KEYSTONE MIRROR BLANK START UP P IN P NORMAL H INVERT V INVERT H V INVERT S E T U P I N P U T O P T I M A G E KEYSTONE MIRROR BLANK...

Page 21: ...he SYNC ON G feature on off COM SPEED COM BITS TIMER LANGUAGE AUTO OFF SYNC ON G S E T U P I N P U T O P T I M A G E 7N1 8N1 S E T U P I N P U T O P T I M A G E COM SPEED COM BITS TIMER LANGUAGE AUTO OFF SYNC ON G ENGLISH FRANÇAIS DEUTSCH ESPAÑOL ITALIANO NORSK NEDERLANDS JAPANESE S E T U P I N P U T O P T I M A G E COM SPEED COM BITS TIMER LANGUAGE AUTO OFF SYNC ON G S E T U P I N P U T O P T I M...

Page 22: ...polarity Horizontal sync signal TTL level positive negative polarity Vertical sync signal TTL level positive negative polarity Compound sync signal TTL level Audio signal Input 200mV rms 20k Ω or less max 3 0V p p Output 0 200mVrms 1k Ω 1 Video input red 9 N C 2 Video input green 10 Ground 3 Video input blue 11 N C 4 N C 12 DDC jack Display Data Channel 5 N C 13 Horizontal sync signal compound syn...

Page 23: ... Mac13 mode Zoom in 640 480 37 9 72 8 VESA VGA 3 72Hz Zoom in 640 480 37 5 75 0 VESA VGA 3 75Hz Zoom in 640 480 43 3 85 0 VESA VGA 3 85Hz Zoom in 800 600 35 2 56 3 VESA SVGA 56Hz 800 600 37 9 60 3 VESA SVGA 60Hz 800 600 48 1 72 2 VESA SVGA 72Hz 800 600 46 9 75 0 VESA SVGA 75Hz 800 600 53 7 85 1 VESA SVGA 85Hz 832 624 49 7 74 5 Mac16 mode Zoom in 1024 768 48 4 60 0 VESA XGA 60Hz Zoom out 1024 768 5...

Page 24: ...2 0 6 Mac 16 mode 1 1 3 9 14 5 0 6 XGA 60Hz 2 1 2 5 15 8 0 4 XGA 70Hz 1 8 1 9 13 7 0 3 XGA 75Hz 1 2 2 2 13 0 0 2 SXGA 1152 X 864 75Hz 1 2 2 4 10 7 0 6 SXGA 1280 X 960 60Hz 1 0 2 9 11 9 0 9 SXGA 1280 X 1024 60Hz 1 0 2 9 11 9 0 9 SXGA 1280 X 1024 75Hz 1 1 1 8 9 5 0 1 Computer Signal Vertical signal timimg lines a b c d VGA 1 85Hz 3 60 350 32 VGA 2 85Hz 3 41 400 1 PC 9800 8 25 400 7 TEXT 3 42 480 1 V...

Page 25: ...ctive with USB only when the mouse is used Do not use with any device other than a personal computer When using with Windows 95 it is necessary to set so that USB can be used with version OSR 2 1 or higher Depending on the kind or the virsion of the host controller operation may not be possible in some cases In the case of notebook type computers with a built in pointing device such as a track bal...

Page 26: ...system setup so that an external mouse can be selected After changing the BIOS setting perform the operations described in 1 3 above Refer to the computer hardware manual concerning the BIOS setting Also some computers may not have a utility program to operate a mouse Refer to the computer hardware manual Caution 1 Mouse functions 1 Turn off the main power switches of the projector and computer an...

Page 27: ...n Mouse cable ADB option Serial mouse 1 2 3 4 5 6 7 8 9 10 11 12 13 14 15 GND TD 1 2 3 4 5 6 7 8 9 CD RD TD DTR GND DSR RTS CTS RI 1 2 3 4 5 6 7 8 9 SELO RTS Projector Computer Mouse jack D sub 9 pin Mouse cable serial option Pin no RS 232C Mouse PS 2 ADB Serial BUS 1 YB 2 CLK 3 DATA DATA 4 XA 5 XB 6 SELO SELO SELO SELO 7 RTS RTS RTS RTS RTS 8 YA 9 5V 5V 5V 10 GND GND GND GND GND 11 SW L 12 SEL 1 ...

Page 28: ...COMMUNICATE 11h 06h 1 20h 06h 31h 06h 1 40h 06h POWER 11h 11h 1 20h 11h 31h 11h 1 ZOOM 11h 12h 1 31h 12h 1 FOCUS 11h 13h 1 31h 13h 1 MIRROR 11h 14h 1 20h 14h 31h 14h 1 40h 14h INPUT 11h 21h 1 20h 21h 31h 21h 1 40h 21h VIDEO SYSTEM 12h 22h 2 20h 22h 32h 22h 2 40h 22h VOLUME 11h 23h 1 20h 23h 31h 23h 1 40h 23h MUTE 11h 24h 1 20h 24h 31h 24h 1 40h 24h BRIGHT 13h 31h 3 20h 31h 33h 31h 3 40h 31h CONTRA...

Page 29: ...vert INPUT 11h VIDEO 21h RGB1 22h RGB2 SYSTEM VIDEO 00h 00h Auto 00h 01h NTSC 00h 04h NTSC4 43 00h 02h PAL 00h 03h SECAM 00h 05h M PAL 00h 06h N PAL VOLUME 00h low volume 24h high volume MUTE 00h mute off 01h mute on BRIGHT 00h 00h 00h dark 00h 00h 24h bright CONTRAST 00h 00h 00h low 00h 00h 24h strong COLOR 00h 00h 00h pale 00h 00h 24h dense TINT 00h 00h 00h reddish 00h 00h 24h greenish SHARPNESS...

Page 30: ...4xH yyH data to the projector 2 When the command sent by the projector cannot be understood the the error code 0xH yyH data is returned When the data length is greater than indicated by the data length code the projector will ignore the excess data code Conversely when the data length is shorter than indicated by the data length code an error code will be returned to the projector When a frame err...

Page 31: ... to the instruction manual of each device before connecting Caution AC input Video tape recorder with S jack Video tape recorder Speaker with built in amp Display monitor Computer desktop type Computer notebook type Clean the air filter about every 100 hours 1 Turn off the MAIN POWER switch of the projector and pull out the power cord 2 Remove the front air filter Filter Model Air Filter MU00831 ...

Page 32: ...be replaced At such time it is necessary to replace the lamp with a new one For lamp replacement please contact your dealer or service company The following messages are displayed on the screen 1 This display will disappear after 3min but will reappear when the power is turned on again Screen displays CHANGE THE LAMP CALL A MAINTENANCE PERSON CHANGE THE LAMP CALL A MAINTENANCE PERSON THE POWER WIL...

Page 33: ...again When you think something wrong Before requesting repair check in accordance with the following chart If the situation cannot be corrected then contact your dealer A bright dot may be seen in the picture This is a phenomenon peculiar to the liquid crystal and is not a problem Symptom The power is not turned on No video or audio Video is present but no audio Audio is present but no video Color...

Page 34: ...rix Number of pixels 786 432 pixels 768 horizontal 1 024 vertical Lens Zoom lens F 1 7 2 3 f 49 64mm Lamp 190w UHB Speaker 1 2W 1 2W Stereo Power supply AC100 120V 3 7A AC220 240V 1 5A Power consumption 320W Operating temperature range 0 35 C Size 11 W 5 H 14 D Weight mass 13 lbs S VIDEO mini DIN 4 pin jack VIDEO signal input jacks VIDEO RCA jack AUDIO RCA jack RGB signal input output jacks RGB si...

Page 35: ...art provided in this instruction manual If the problem still persists contact your dealer or service company About repairs during the warranty period Repairs will be made as described in the warranty For details please read the warranty Repairs after the warranty period has elapsed Paid repairs will be made if desired in the event that the function can be restored by such repairs Parts will be mad...

Page 36: ...QR41981 Printed in Japan KY K S ...

Reviews: