background image

1

Liquid Crystal Projector

Model

CP-S860W/E

USER’S GUIDE

Thank you for purchasing the Hitachi liquid crystal projector. Please read this user’s manual
thoroughly to ensure correct usage through understanding. After reading, store this instruction
manual in a safe place for future reference.

Outline

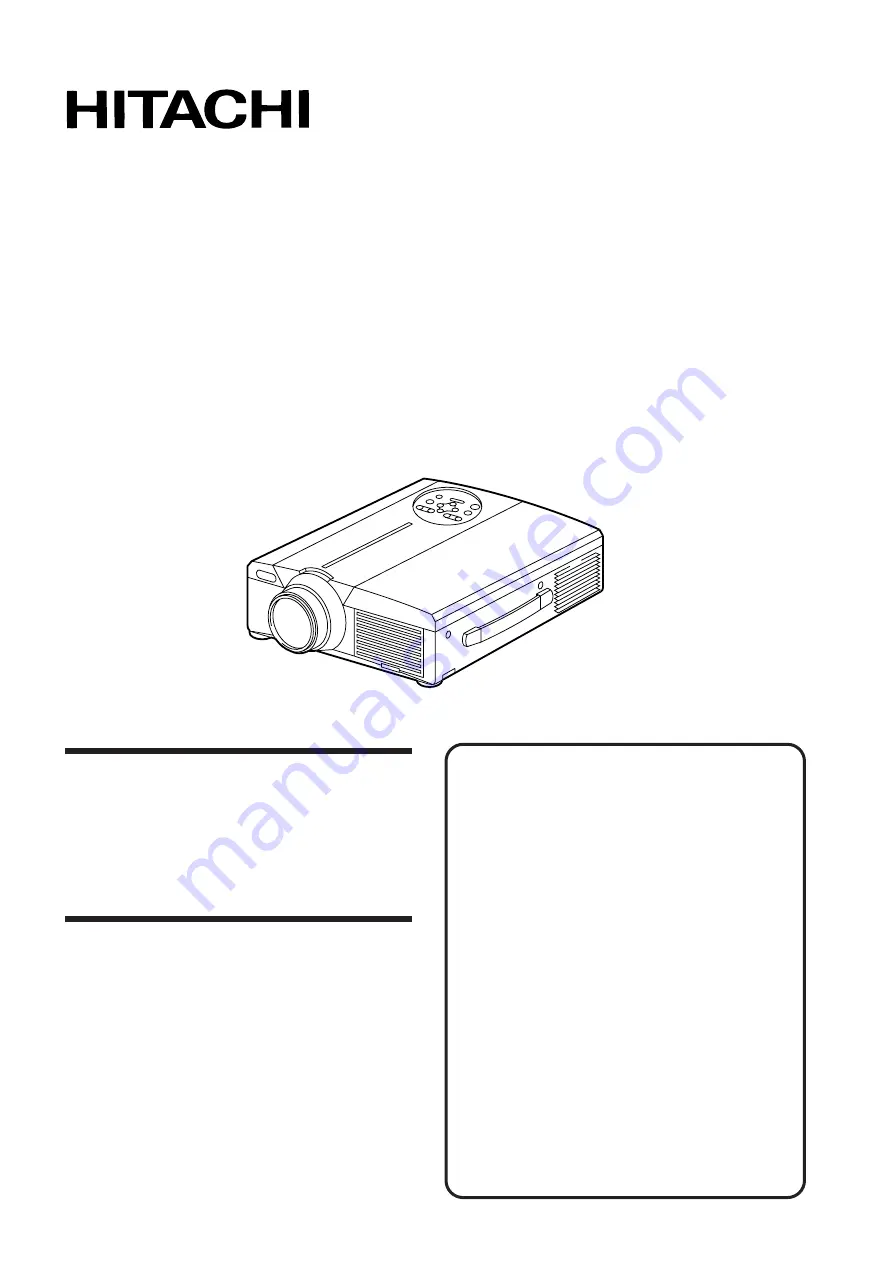
This liquid crystal projector is used to project
various computer signals as well as
NTSC/PAL/SECAM video signals onto a
screen. Little space is required for installation
and large images can easily be realized.

Features

(1) Outstanding brightness

The UHB lamp and high-efficiency optical
system assure a high level of brightness.

(2) Partial magnification function

Interesting parts of images can be magnified for
closer viewing. 

(3) Distortion correction function
Distortion-free images are quickly
available.
(4) Power zoom and power focus.
(5) P in P function
(6) USB jack

Before Use

…………………………………

3

Checking the package Contents

…………

8

Names and functions of each part

………

8

Installation

…………………………………

12

Basic operations

…………………………

13

Adjustments and functions

………………

17

Connection to the vido signal

terminals

………………………

22

Connection to the RGB signal 

terminal

………………………

22

Connecting to the USB

…………………

25

Connection to the CONTROL signal 

terminal

………………………

26

Example of system setup

………………

31

Cleaning the air filter

……………………

31

Lamp

…………………………………

32

Message table

……………………………

32

When you think something wrong

………

33

Specifications

……………………………

34

About the warranty and 

after-service

…………………

35

Contents

Page

Summary of Contents for CP-S860E

Page 1: ...ency optical system assure a high level of brightness 2 Partial magnification function Interesting parts of images can be magnified for closer viewing 3 Distortion correction function Distortion free images are quickly available 4 Power zoom and power focus 5 P in P function 6 USB jack Before Use 3 Checking the package Contents 8 Names and functions of each part 8 Installation 12 Basic operations ...

Page 2: ......

Page 3: ...ndicates information that if ignored could result possibly in personal injury or physical damage due to incorrect handling Typical Symbols This symbol indicates an additional warning including cautions An illustration is provided to clarify the contents the illustration to the left indicates danger of electrical shock This symbol indicates a prohibited action The contents will be clearly indicated...

Page 4: ... fire or electrical shock Do not insert foreign objects Do not insert metal objects through the ventilation openings etc of this projector or drop such objects inside because this could result in fire or electrical shock If a foreign object should enter this projector immediately turn off the power switch disconnect the power plug from the power outlet and contact your dealer Continued use could r...

Page 5: ... Make sure there is no dust etc on the power plug and insert a knife blade to make sure that there is no looseness Do not allow the laser beam to enter the eyes This remote control is equipped with a laser pointer and a laser beam is emitted from the laser outlet Do not look directly into the laser beam outlet or direct the laser beam at other people Vision can be impaired if the laser beam enters...

Page 6: ...Incorrect loading could result in personal injury or contamination of the surroundings due to battery cracking or leakage Clean the projector interior once every two years Request your dealer to clean the interior of the projector approximately every two years Accumulations of dust inside the projector can result in fire or malfunction if not cleaned for an extended period This cleaning is more ef...

Page 7: ...xcessively soiled dilute a neutral detergent in water wet and wring out the cloth and afterward wipe with a dry cloth Do not apply undiluted detergent directly to the projector Extended usage When using this projector for an extended period stop periodically to rest the eyes to prevent eye fatigue Caution When the projector is not to be used for an extended period For safety purposes when the proj...

Page 8: ...or rises and when the fan malfunctions Refer to page 33 for details Remote control photoreceptor Lens Lens cap Speaker Cooling fan intake side Cooling fan exhaust side Handle a b c d VIDEO STANDBY ON RGB POSITION LASER MENU RESET MAGNIFY FREEZE OFF VOLUME Projector unit 3 Conductor video Audio cable RGB cable 15 15 pin M M Mac adapter with dip switch Mouse cable 3 Power Cord 110V US 220 UK Europe ...

Page 9: ...onnect the accessory power cord RGB IN jack D sub 15 pin shrink 1 2 CONTROL jack D sub 15 pin shrink AUDIO OUT jack RGB VIDEO Stereo mini jack AUDIO IN jack RGB Stereo mini jack Connecting to the AC IN jack Make sure the accesory power cord is plugged into the AC IN jack as far as it will go Incomplete connection can result in fire or electrical shock Remote control photoreceptor Caution RGB OUT j...

Page 10: ...restores the sound when pressed again VOLUME button Adjusts the volume of the sound Press to increase the volume and to decrease the volume LASER button Turns the laser beam on and off Refer to page 11 cocnerning usage and observe the cautions RESET MOUSE RIGHT button 1 Operates as the RESET button when the menu is displayed Press this button to return to the initial settings 2 Used to click the r...

Page 11: ...dicated in the projector Incorrect orientation could cause battery cracking or leakage which could result in personal injury or pollution of the surrounding environment Caution Remote control usage cautions Do not drop the remote control or apply impact Do not wet the remote control or place it on any wet object Such actions could result in malfunction When not to be used for an extended period re...

Page 12: ...e locks unless the projector is being held otherwise the projector could overturn or the fingers could get caught and cause personal injury Do not force the adjusters to rotate This could damage the adjusters or cause the lock to fail Lock the adjusters firmly If the lock is difficult to operate change the angle slightly and try again Use the adjusters on the bottom to adjust the projection angle ...

Page 13: ...ay shown to the right will appear when the FOCUS button is pressed 2 Use the FOCUS button to adjust the focus until the image is sharp 3 The message Focus will disappear if any other button is pressed 6 Turn on the power to the connected equipment Refer to page 31 concerning the connection of other equipment 7 Press either the INPUT button of the projector or the VIDEO RGB button of the remote con...

Page 14: ...STANDBY ON button is pressed is too short 2 Turn off the main power switch of the projector OFF 3 Attach the lens cap The fan will continue running for approximately 1 min after the STANDBY ON button is pressed Do not turn off the main power switch while the lamp is on because this will shorten the service life of the lamp Caution Use the RGB cable included with this projector when using plug play...

Page 15: ...o freeze the image being displayed This function can be used together with the MAGNIFY function refer to page 10 Cancelling the FREEZE function Pressing the FREEZE button alternately turns the freeze function on and off The FREEZE function will be cancelled when the input select button is pressed or the display mode of the PC being used for display is changed The POSITION icon is not displayed whi...

Page 16: ...ith the button pressed 6 Press the MAGNIFY OFF button VIDEO STANDBY ON RGB POSITION LASER MENU RESET MAGNIFY FREEZE OFF VOLUME P in P MUTE AUTO BLANK TIMER Magnify function Changing the magnification ratio Moving the display area Returning to normal display 1 2 3 5 4 6 Part of an image can be displayed magnified This function can be used together with the FREEZE function refer to page 10 Basic ope...

Page 17: ...1 for details 2 Press the MENU buttons of the projector or the DISK PAD button of the remote control to select the menu item to be adjusted The selected menu item will be displayed in green 3 Press the MENU buttons of the projector or the DISK PAD button of the remote control to select the menu item to be adjusted The selected menu item will be displayed in green The menu will disappear after 5 10...

Page 18: ...fy or freeze operations Displaying the menu cancels magnify and freeze operations Caution SET UP Images and display positions can be adjusted from the SETUP menu Adjustment item VOLUME BRIGHT BRIGHTNESS CONTRAST SHARPNESS COLOR TINT V POSIT V POSITION H POSIT H POSITION H PHASE H SIZE COLOR BAL R COLOR BALANCE Red COLOR BAL B COLOR BALANCE Blue Adjustment description Volume decreases Volume increa...

Page 19: ... T U P I N P U T O P T I M A G E RGB VIDEO AUTO NTSC PAL SECAM NTSC4 43 M PAL N PAL S E T U P I N P U T O P T I M A G E Adjustment item RGB VIDEO Adjustment description Displays the following RGB inputs fH horizontal sync frequency fV vertical sync frequency Sets the video signal system When the screen is unstble no color or rolls select the mode that matches the input signal ...

Page 20: ...ens and closes the initial settings screen during signal input at start up Selects the P in P sub screen display position IMAGE Projection image inversion etc can be selected from the IMAGE menu KEYSTONE MIRROR BLANK START UP P IN P S E T U P I N P U T O P T I M A G E KEYSTONE MIRROR BLANK START UP P IN P NORMAL H INVERT V INVERT H V INVERT S E T U P I N P U T O P T I M A G E KEYSTONE MIRROR BLANK...

Page 21: ...he SYNC ON G feature on off COM SPEED COM BITS TIMER LANGUAGE AUTO OFF SYNC ON G S E T U P I N P U T O P T I M A G E 7N1 8N1 S E T U P I N P U T O P T I M A G E COM SPEED COM BITS TIMER LANGUAGE AUTO OFF SYNC ON G ENGLISH FRANÇAIS DEUTSCH ESPAÑOL ITALIANO NORSK NEDERLANDS JAPANESE S E T U P I N P U T O P T I M A G E COM SPEED COM BITS TIMER LANGUAGE AUTO OFF SYNC ON G S E T U P I N P U T O P T I M...

Page 22: ...polarity Horizontal sync signal TTL level positive negative polarity Vertical sync signal TTL level positive negative polarity Compound sync signal TTL level Audio signal Input 200mV rms 20k Ω or less max 3 0V p p Output 0 200mVrms 1k Ω 1 Video input red 9 N C 2 Video input green 10 Ground 3 Video input blue 11 N C 4 N C 12 DDC jack Display Data Channel 5 N C 13 Horizontal sync signal compound syn...

Page 23: ... 400 37 9 85 0 VESA TEXT Zoom in 640 480 31 5 59 9 VESA VGA 3 Zoom in 640 480 35 0 66 7 Mac13 mode Zoom in 640 480 37 9 72 8 VESA VGA 3 72Hz Zoom in 640 480 37 5 75 0 VESA VGA 3 75Hz Zoom in 640 480 43 3 85 0 VESA VGA 3 85Hz Zoom in 800 600 35 2 56 3 VESA SVGA 56Hz 800 600 37 9 60 3 VESA SVGA 60Hz 800 600 48 1 72 2 VESA SVGA 72Hz 800 600 46 9 75 0 VESA SVGA 75Hz 800 600 53 7 85 1 VESA SVGA 85Hz 83...

Page 24: ...2 2 2 20 0 1 0 Computer Signal Horizontal signal timing µs a b c d SVGA 72Hz 2 4 1 3 16 0 1 1 SVGA 75Hz 1 6 3 2 16 2 0 3 SVGA 85Hz 1 1 2 7 14 2 0 6 Mac 16 mode 1 1 3 9 14 5 0 6 XGA 60Hz 2 1 2 5 15 8 0 4 XGA 70Hz 1 8 1 9 13 7 0 3 XGA 75Hz 1 2 2 2 13 0 0 2 Computer Signal Vertical signal timimg lines a b c d VGA 1 85Hz 3 60 350 32 VGA 2 85Hz 3 41 400 1 PC 9800 8 25 400 7 TEXT 3 42 480 1 VGA 3 2 33 4...

Page 25: ...t Effective with USB only when the mouse is used Do not use with any device other than a personal computer When using with Windows 95 it is necessary to set so that USB can be used with version OSR 2 1 or higher Depending on the version of the host controller operation may not be possible in some cases In the case of notebook type computers with a built in pointing device such as a track ball in s...

Page 26: ...system setup so that an external mouse can be selected After changing the BIOS setting perform the operations described in 1 3 above Refer to the computer hardware manual concerning the BIOS setting Also some computers may not have a utility program to operate a mouse Refer to the computer hardware manual Caution 1 Mouse functions 1 Turn off the main power switches of the projector and computer an...

Page 27: ...n Mouse cable ADB option Serial mouse 1 2 3 4 5 6 7 8 9 10 11 12 13 14 15 GND TD 1 2 3 4 5 6 7 8 9 CD RD TD DTR GND DSR RTS CTS RI 1 2 3 4 5 6 7 8 9 SELO RTS Projector Computer Mouse jack D sub 9 pin Mouse cable serial option Pin no RS 232C Mouse PS 2 ADB Serial BUS 1 YB 2 CLK 3 DATA DATA 4 XA 5 XB 6 SELO SELO SELO SELO 7 RTS RTS RTS RTS RTS 8 YA 9 5V 5V 5V 10 GND GND GND GND GND 11 SW L 12 SEL 1 ...

Page 28: ...COMMUNICATE 11h 06h 1 20h 06h 31h 06h 1 40h 06h POWER 11h 11h 1 20h 11h 31h 11h 1 ZOOM 11h 12h 1 31h 12h 1 FOCUS 11h 13h 1 31h 13h 1 MIRROR 11h 14h 1 20h 14h 31h 14h 1 40h 14h INPUT 11h 21h 1 20h 21h 31h 21h 1 40h 21h VIDEO SYSTEM 12h 22h 2 20h 22h 32h 22h 2 40h 22h VOLUME 11h 23h 1 20h 23h 31h 23h 1 40h 23h MUTE 11h 24h 1 20h 24h 31h 24h 1 40h 24h BRIGHT 13h 31h 3 20h 31h 33h 31h 3 40h 31h CONTRA...

Page 29: ...MUTE 00h mute off 01h mute on BRIGHT 00h 00h 00h dark 00h 00h 24h bright CONTRAST 00h 00h 00h low 00h 00h 24h strong COLOR 00h 00h 00h pale 00h 00h 24h dense TINT 00h 00h 00h reddish 00h 00h 24h greenish SHARPNESS 00h 00h 00h soft 00h 00h 24h sharp H PHASE 00h 00h 00h 00h 00h 24h H POSIT 00h 00h 00h 01h Right moves one step 00h 00h 00h 7Fh Left moves one step H SIZE 00h 00h 00h 01h Large moves two...

Page 30: ...4xH yyH data to the projector 2 When the command sent by the projector cannot be understood the the error code 0xH yyH data is returned When the data length is greater than indicated by the data length code the projector will ignore the excess data code Conversely when the data length is shorter than indicated by the data length code an error code will be returned to the projector When a frame err...

Page 31: ... to the instruction manual of each device before connecting Caution AC input Video tape recorder with S jack Video tape recorder Speaker with built in amp Display monitor Computer desktop type Computer notebook type Clean the air filter about every 100 hours 1 Turn off the MAIN POWER switch of the projector and pull out the power cord 2 Remove the front air filter Filter Model Air Filter MU00831 ...

Page 32: ...be replaced At such time it is necessary to replace the lamp with a new one For lamp replacement please contact your dealer or service company The following messages are displayed on the screen 1 This display will disappear after 3min but will reappear when the power is turned on again Screen displays CHANGE THE LAMP CALL A MAINTENANCE PERSON CHANGE THE LAMP CALL A MAINTENANCE PERSON THE POWER WIL...

Page 33: ...ool for approx 20 min and then turn the power on again When you think something wrong Before requesting repair check in accordance with the following chart If the situation cannot be corrected then contact your dealer A bright dot may be seen in the picture This is a phenomenon peculiar to the liquid crystal and is not a problem Symptom The power is not turned on No video or audio Video is present...

Page 34: ... 1 3 type panel Drive system TFT active matrix Number of pixels 480 000 pixels 600 horizontal 800 vertical Lens Zoom lens F 1 7 2 3 f 49 64mm Lamp 190w UHB Speaker 1 2W 1 2W Stereo Power supply AC100 120V 3 7A AC220 240V 1 5A Power consumption 320W Operating temperature range 0 35 C Size 289 W 124 H 345 D Weight mass 13 lbs S VIDEO mini DIN 4 pin jack VIDEO signal input jacks VIDEO RCA jack AUDIO ...

Page 35: ...art provided in this instruction manual If the problem still persists contact your dealer or service company About repairs during the warranty period Repairs will be made as described in the warranty For details please read the warranty Repairs after the warranty period has elapsed paid repairs will be made if desired in the event that the function can be restored by such repairs Parts will be mad...

Page 36: ...QR41821 Printed in Japan KY K S ...

Page 37: ...B Lampe und die Hochleistungsoptik des Geräts sorgen zusammen für optimale Bildhelligkeit 2 Partielle Vergrößerungsfunktion Interessante Bildteile können für nähere Betrachtung vergrößert werden 3 Verzerrungskorrekturfunktion Verzerrungsfreie Bilder sind schnell verfügbar 4 Motorzoom und Powerfokus 5 Bild in Bild Funktion 6 USB Buchse Inhalt Seite Vor der Inbetriebnahme 3 Überprüfung des Lieferumf...

Page 38: ......

Page 39: ...können VORSICHT Dieses Symbol weist auf Vorsichtsmaßregeln hin deren Mißachtung bei falscher Bedienung zu Personenverletzungen oder Sachschäden führen können Typische Symbole Dieses Symbol weist auf eine zusätzliche Warnung einschließlich Vorsichtsmaßregeln hin wobei eine Abbildung den Textinhalt verdeutlicht Das linksstehende Symbol deutet auf Gefahr durch elektrische Schläge hin Dieses Symbol we...

Page 40: ...achhändler Nicht modifizieren Der Projektor darf nicht baulich verändert werden da hierbei die Gefahr elektrischer Schläge besteht Niemals im Badezimmer verwenden Verwenden Sie den Projektor niemals im Badezimmer da hierbei die Gefahr elektrischer Schläge besteht Keine Fremdkörper ins Gehäuse stecken Stecken Sie keine Metallobjekte in die Belüftungsöffnungen usw des Projektors und achten Sie darau...

Page 41: ...den da versehentlich schwere Gegenstände auf das verdeckte Kabel gestellt werden könnten Wenden Sie sich an Ihren Fachhändler falls das Netzkabel beschädigt ist freiliegende oder gebrochene Kabeladern usw da eine Weiterverwendung zu Bränden oder elektrischen Schlägen führen kann Darauf achten daß der Netzstecker nicht verstaubt ist und durch Einschieben einer Messerklinge auf Lockerung überprüfen ...

Page 42: ...r Batterien auf die korrekte Ausrichtung der Plus und Minuspole achten Falsches Einlegen der Batterien kann zu Verletzungen oder zur Verschmutzung der Umgebung durch giftige Batteriesäure führen Den Projektor alle zwei Jahre innen säubern lassen Lassen Sie den Projektor etwa alle zwei Jahre von einem Fachhändler innen säubern Im Projektor angesammelter Staub kann zu Bränden oder Betriebsstörungen ...

Page 43: ...schen Niemals unverdünnte Reinigungslösung direkt auf das Gehäuse auftragen Längerer Betrieb Bei längerem Betrieb sollten zwischendurch Pausen eingelegt werden um einer Ermüdung der Augen vorzubeugen Vorsicht Den Netzstecker niemals durch Ziehen am Kabel von der Steckdose trennen Brände oder elektrische Schläge ausgelöst werden Den Netzstecker deshalb stets am Stecker haltend aus der Steckdose zie...

Page 44: ...oder das Gebläse aussetzt Einzelheiten hierzu auf Seite 33 Empfangsfenster für Fernsteuerungssignale Objektiv Objektivdeckel Lautsprecher Gebläse Einlaßseite Gebläse Auslaßseite Tragegriff a b c d VIDEO STANDBY ON RGB POSITION LASER MENU RESET MAGNIFY FREEZE OFF VOLUME Projektor 3 Stecker Video Audio kabel RGB Kabel 15 15 pin M M Mac Adapter mit DIP Schalter Mauskabel 3 Netzkabel 110V USA 220V Gro...

Page 45: ...zkabels RGB Eingangsbuchse RGB IN 15polige D sub Halbformatbuchse 1 2 Steuerbuchse CONTROL 15polige D sub Halbformatbuchse Audioausgangsbuchse AUDIO OUT RGB VIDEO Stereo Minibuchse Audioeingangsbuchse AUDIO IN RGB Stereo Minibuchse RGB Ausgangsbuchse RGB OUT 15polige D sub Halbformatbuchse USB buchse Der Mauscursor kann über Fernbedienung durch Anschluß eines PCs gesteuert werden Anschluß an die N...

Page 46: ...ücken wieder eingeschaltet Lautstärketaste VOLUME Diese Taste dient zum Einstellen der Lautstärke des Tons Ein Drücken der Plusttaste erhöht und ein Drücken der Minustaste senkt die Lautstärke LASER Taste LASER Diese Taste dient zum Ein und Ausschalten des Laserstrahls Siehe Seite 11 über Verwendung und Vorsichtsmaßregeln Mausrückstell Rechtstaste MOUSE RESET RIGHT 1 Funktioniert bei angezeigtem M...

Page 47: ...us und Minuspole achten 3Den Batteriefachdeckel wieder anbringen Vorsichtsmaßregeln für den Batteriebetrieb Den Projektor ausschließlich mit Batterien des vorgeschriebenen Typs betreiben Niemals neue zusammen mit alten Batterien einlegen da Batterien hierdurch platzen und Brände auslösen oder Verletzungen durch auslaufende Batteriesäure verursachen können Beim Einlegen der Batterien auf die korrek...

Page 48: ...eben der Fußversteller festhalten andernfalls kann der Projektor umkippen oder auf die Hand fallen und die Finger abklemmen Die Fußversteller nicht gewaltsam drehen Die Versteller können hierdurch beschädigt werden oder die Sperre löst sich wieder Die Fußversteller fest sperren Falls sich die Versteller schwer sperren lassen den Projektionswinkel leicht ändern und noch einmal versuchen Den Projekt...

Page 49: ...5 Mit der FOCUS Taste die Fokussierung einstellen 1 Durch Drücken der FOCUS Taste erscheint die rechts dargestellte Anzeige im Display 2 Das Bild durch wiederholtes Drücken der FOCUS Taste scharfstellen 3 Bei Drücken einer anderen Taste erscheint die Meldung Focus 6 Das angeschlossene Gerät einschalten Siehe Seite 31 zum Anschluß externer Geräte 7 Die auf die Leinwand zu projizierende Bildeingangs...

Page 50: ...us um 2 Das Gerät mit dem Hauptnetzschalter am Projektor ausschalten OFF 3 Den Objektivdeckel anbringen Das Gebläse läuft nach dem Drücken der Taste STANDBY ON noch etwa 1 Minute lang weiter Das Gerät nicht mit dem Hauptnetzschalter am Projektor ausschalten während die Lampe noch brennt da die Betriebslebendauer der Birne hierdurch verkürzt wird Vorsicht Für Plug Play das mit dem Projektor geliefe...

Page 51: ...on wird zusammen mit der MAGNIFY Funktion verwendet siehe Seite 10 Aufheben der FREEZE Funktion Durch Drücken der FREEZE Taste wird die FREEZE Funktion abwechselnd ein und ausgeschaltet Die FREEZE Funktion wird aufgehoben wenn die Eingangswahltaste gedrückt wird oder wenn der zur Anzeige verwendete Displaymodus ds PC geändert wird Das Symbol POSITION ON wird nicht gezeigt während die FREEZE Funkti...

Page 52: ...TANDBY ON RGB POSITION LASER MENU RESET MAGNIFY FREEZE OFF VOLUME P in P MUTE AUTO BLANK TIMER Vergrößerungsfunktion Ändern des Vergrößerungsverhältnisses Verschieben des Anzeigebereichs Zurückstellen auf normale Anzeige 1 2 3 5 4 6 Ein Teil eines Bildes kann vergrößert gezeigt werden Diese Funktion kann zusammen mit der FREEZE Funktion verwendet werden siehe Seite 10 Grundlegende Bedienung Fortse...

Page 53: ...ählen des einzustellenden Menügegenstands die MENU Tasten am Projektor oder die Taste DISK PAD am Fernbedienungsteil drücken Der gewählte Menügegenstand erscheint jetzt grün 3 Zum Wählen des einzustellenden Menügegenstands die MENU Tasten am Projektor oder die Taste DISK PAD am Fernbedienungsteil drücken Der gewählte Menügegenstand erscheint jetzt grün Das Menü verschwindt nach ca 5 10 Sekunden Di...

Page 54: ...OSIT H PHASE H GR FARB BAL R FARB BAL B 100 100 800 E I S T L E I N G B O P T A B B L D LAUTST HELLE KONTRAST SCHÄRFE FARBE F TON FARB BAL R FARB BAL B E I S T L E I N G B A B B L D O P T Einstellgegenstand LAUTST HELLE HELLIGKEIT KONTRAST SCHÄRFE FARBE F TON V POSIT V POSITION H POSIT H POSITION H PHASE H GR FARB BAL R FARBBALANCE Rot FARB BAL B FARBBALANCE Blau Beschreibung der Einstellung Lauts...

Page 55: ... und VIDEO Signal RGB VIDEO E I S T L E I N G B A B B L D O P T fH 38kHz fV 60Hz RGB VIDEO E I S T L E I N G B A B B L D O P T AUTO NTSC PAL SECAM NTSC4 43 M PAL N PAL Einstellgegenstand RGB VIDEO Beschreibung der Einstellung Zeigt die folgenden RGB Eingänge fH horizontale Sync Frequenz fV vertikale Sync Frequenz Wählt VIDEO Eingang ...

Page 56: ... wenn ein Signal außerhalb des Sync Bereichs in eingeschaltetem Zustand und ohne Signal angelegt wird Wenn der Anfangs Einstellbildschirm geschlossen wird wird Rückzug in der obigen Stufe aktiviert Wm Sie die kleine Bildposition für Bild in Bild IMAGE Auf dem IMAGE Menü kann die Inversion des Projektionsbilds usw gewählt werden KEYSTONE SPIEGEL BLANK START P IN P E I S T L E I N G B O P T A B B L ...

Page 57: ...RACHE AUTOM AUS SYNC EIN G 10 min E I S T L E I N G B O P T A B B L D KOM GSCHW KOM BITS TIMER SPRACHE AUTOM AUS SYNC EIN G EIN AUS 10 min E I S T L E I N G B O P T A B B L D KOM GSCHW KOM BITS TIMER SPRACHE AUTOM AUS SYNC EIN G Einstellgegenstand KOM GSCHW KOM BITS TIMER SPRACHE AUTOM AUS SYNC EIN G Beschreibung der Einstellung Stellt die Geschwindigkeit für den Datenaustausch ein 5 Stufen Stellt...

Page 58: ...chlußstecker Farbsignal 0 286 Vs s Burstsignal 75 Ohm Abschlußstecker 1 0 Vs s 75 Ohm Abschlußstecker 200 mVeff 20 kOhm oder weniger max 3 0 Vs s 0 bis 200 mVeff 1 kOhm Video signal Analog 0 7 Vs s 75 Ohm Abschlußstecker Horizontales S Signal TTL Pegel positive negative Polarität Vertikales S Signal TTL Pegel positive negative Polarität Zusammengesetztes Sync Signal TTL Pegel Audio signal Eingang ...

Page 59: ...37 9 85 0 VESA TEXT Heranzoomen 640 480 31 5 59 9 VESA VGA 3 Heranzoomen 640 480 35 0 66 7 Mac13 mode Heranzoomen 640 480 37 9 72 8 VESA VGA 3 72Hz Heranzoomen 640 480 37 5 75 0 VESA VGA 3 75Hz Heranzoomen 640 480 43 3 85 0 VESA VGA 3 85Hz Heranzoomen 800 600 35 2 56 3 VESA SVGA 56Hz 800 600 37 9 60 3 VESA SVGA 60Hz 800 600 48 1 72 2 VESA SVGA 72Hz 800 600 46 9 75 0 VESA SVGA 75Hz 800 600 53 7 85 ...

Page 60: ...25 4 0 6 Mac 13 mode 2 1 3 2 21 2 2 1 VGA 3 72Hz 1 3 3 8 20 3 1 0 VGA 3 75Hz 2 0 3 8 20 3 0 5 VGA 3 85Hz 1 6 2 2 17 8 1 6 SVGA 56Hz 2 0 3 6 22 2 0 7 SVGA 60Hz 3 2 2 2 20 0 1 0 Computer Signal Horizontale Signalsteuerung µs a b c d SVGA 72Hz 2 4 1 3 16 0 1 1 SVGA 75Hz 1 6 3 2 16 2 0 3 SVGA 85Hz 1 1 2 7 14 2 0 6 Mac 16 mode 1 1 3 9 14 5 0 6 XGA 60Hz 2 1 2 5 15 8 0 4 XGA 70Hz 1 8 1 9 13 7 0 3 XGA 75H...

Page 61: ... mit Windows 95 ist es erforderlich daß USB mit Version OSR 2 1 oder höher verwendet werden kann Je nach Version des Host Controllers kann in bestimmten Fällen Betrieb nicht möglich sein Bei Notebook Computern die über eine eingebaute Zeigevorrichtung wie z B ein Trackball verfügen hat die eingebaute Zeigevorrichtung Priorität auch wenn eine Maus angeschlossen ist und die Maus kann eventuell nicht...

Page 62: ...g des Computers nachschlagen Darüber hinaus wird die Maus bei einigen Computern über ein Utility Programm gesteuert Einzelheiten hierzu enthält die Betriebsanleitung des Computers Vorsicht 1 Mausfunktionen 1 Computer und Projektor mit dem jeweiligen Netzschalter ausschalten und die beiden Geräte mit dem mitgelieferten Kabel oder einem im Fachhandel erhältlichen Kabel das hierzu geeignet ist anschl...

Page 63: ...DIN Mauskabel ADB Option Serienmaus 1 2 3 4 5 6 7 8 9 10 11 12 13 14 15 GND TD 1 2 3 4 5 6 7 8 9 CD RD TD DTR GND DSR RTS CTS RI 1 2 3 4 5 6 7 8 9 SELO RTS Projektor Computer 9polige Mausbuchse D sub Mauskabel Serienkabel Option Stift Nr RS 232C Maus PS 2 ADB Serial BUS 1 YB 2 CLK 3 DATA DATA 4 XA 5 XB 6 SELO SELO SELO SELO 7 RTS RTS RTS RTS RTS 8 YA 9 5V 5V 5V 10 GND GND GND GND GND 11 SW L 12 SE...

Page 64: ...MUNICATE 11h 06h 1 20h 06h 31h 06h 1 40h 06h POWER 11h 11h 1 20h 11h 31h 11h 1 ZOOM 11h 12h 1 31h 12h 1 FOCUS 11h 13h 1 31h 13h 1 SPIEGEL 11h 14h 1 20h 14h 31h 14h 1 40h 14h EINGB 11h 21h 1 20h 21h 31h 21h 1 40h 21h FORMAT 12h 22h 2 20h 22h 32h 22h 2 40h 22h LAUTST 11h 23h 1 20h 23h 31h 23h 1 40h 23h MUTE 11h 24h 1 20h 24h 31h 24h 1 40h 24h HELLE 13h 31h 3 20h 31h 33h 31h 3 40h 31h KONTRAST 13h 32...

Page 65: ...h 7Fh Abwärts Bewegung um einen Schritt FARBBAL R 00h 00h 00h Hellrot bis 00h 00h 24h Dunkelrot FARBBAL B 00h 00h 00h Hellblau bis 00h 00h 24h Dunkelblau AUTO EINSTELLUNG 00h Autom Einstellung Wiedergabe 07h Autom Einstellung Stopp BLANK 0Xh Austastung Aus 1Xh Austastung Ein X 8 Schwarz X 9 Blau X F Weiß Bit2 0 Rot Aus 1 Rot Ein Bit3 0 keine Farbänderung 1 Farbänderung VERGRÖSSERN 1 Anfragemodus R...

Page 66: ...rcode 00H yyH Daten an den Projektor zurück Wenn die Datenlänge den vom Datenlängencode angezeigten Wert überschreitet ignoriert der Projektor den zu langen Datencode Unterschreitet die Datenlänge jedoch den vom Datenlängencode angezeigten Wert schickt der Computer einen Fehlercode zurück Wenn in Datenübertragungsblockfehler auftritt Wiederholt 10 Mal pro Sekunde bis eine Reaktion auf den Fehlerco...

Page 67: ...ienungsanleitung des jeweiligen Geräts durchlesen Vorsicht Netzeingang Videorecorder mit S Buchse Videorecorder Lautsprecher mit eingebautem Verstärker Bildschirmgerät Computer Desktop Computer Notebook Den Luftfilter etwa alle 100 Betriebsstunden säubern 1 Den Projektor mit dem Hauptnetzschalter MAIN POWER ausschalten und den Netzstecker abziehen 2 Den vorderen Luftfilter entfernen Filter Modell ...

Page 68: ...ne neue ausgetauscht werden Der Austausch der Birne erfolgt nach einer bestimmten Methode bei der verschiedene Punkte zu beachten sind Wenden Sie sich hierzu bitte an Ihren Fachhändler oder an eine Kundendienststelle Die folgenden Meldungen erscheinen auf dem Bildschirm 1 Die Anzeige verschwindet nach ca 3 min erscheint jedoch beim Wiedereinschalten erneut Bildschirmanzeigen CHANGE THE LAMP CALL A...

Page 69: ...der folgenden Fehlersuchtabelle bevor Sie das Gerät zur Reparatur einreichen Falls sich das Problem hierdurch nicht beheben läßt wenden Sie sich bitte an Ihren Fachhändler Im Bild ist möglicherweise ein weißer Punkt zu sehen Hierbei handelt es sich um eine normale Erscheinung bei Flüssigkristall Displays und nicht um eine Störung Symptom Das Gerät ist nicht eingeschaltet Kein Video oder Audioempfa...

Page 70: ... Größe 3 3 cm Typ 1 3 allfeld Antriebsystem TFT Aktiv Matrix Bildpunktezahl 480 000 Bildpunkte 600 vertikal 800 horizontal Objektiv Zoomobjektiv 1 1 7 2 3 49 64 mm Lampe 190w UHB Lautsprecher 1 2 W 1 2 W Stereo Stromversorgung AC100 120V 3 7A AC220 240V 1 5A Leistungsaufnahme 320W Betriebstemperaturbereich 0 C bis 35 C Abmessungen 289 B 124 H 345 T Gewicht 5 9 kg S VIDEO Vierpolige DIN Minibuchse ...

Page 71: ...zur Reparatur einreichen Falls sich das Problem hierdurch nicht beheben läßt wenden Sie sich bitte an Ihren Fachhändler Reparaturen während der Garantiezeit Reparaturen werden entsprechend der Garantieerklärung ausgeführt Über Einzelheiten hierzu informiert die Garantiekarte Reparaturen nach Ablauf der Garantiezeit Vom Kunden bezahlte Reparaturen werden auf Wunsch ausgeführt sofern sich die Störun...

Page 72: ...QR41821 Printed in Japan KY K S ...

Reviews: