HDG Euro 30, Operation Manual
The HDG Euro 30 Operation Manual is a comprehensive guide that provides step-by-step instructions on how to efficiently operate your Euro 30 device. This essential manual is available for free download from our website, ensuring you have access to the necessary information at your convenience.
Share
Download


Reviews:
No comments
Related manuals for Euro 30

Burkay HW-300
Brand: A.O. Smith Pages: 56
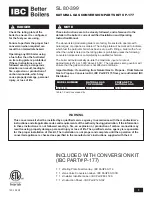
SL 80-399
Brand: IBC Pages: 4

CIAO GREEN R.S.I
Brand: Beretta Pages: 51

Vitodens 100 Series
Brand: Viessmann Pages: 112

U32A1D
Brand: Cygnet Pages: 2

Eminent Cu 100
Brand: Nibe Pages: 56

SARGON 18S
Brand: Heatline Pages: 54

SFH IV
Brand: Autica Boilers Pages: 28

BRAVA SLIM 30 BFR
Brand: Sime Pages: 60

8115350
Brand: Sime Pages: 100

FI-100NSP
Brand: TERMOFARC Pages: 58

Woodpell
Brand: Viadrus Pages: 40

CBL9012
Brand: Anvil Pages: 2

240BHS4T8
Brand: Bryan Boilers Pages: 4

BWBBAN000045
Brand: CAC / BDP Pages: 36

IDEAL SPRINT RS 75
Brand: IDEAL Pages: 4

CGT
Brand: Weil-McLain Pages: 2

CGs SERIES
Brand: Weil-McLain Pages: 3


