Hayward Viio Turbo AE5500, Owner'S Manual
The Hayward Viio Turbo AE5500 is a cutting-edge pool cleaner that effortlessly provides a spotlessly clean pool. Discover the full potential of your device by downloading the comprehensive Owner's Manual for free at manualshive.com. This manual is your essential guide to maximizing the performance and longevity of your Hayward Viio Turbo AE5500.
Share
Download


Reviews:
No comments
Related manuals for Viio Turbo AE5500
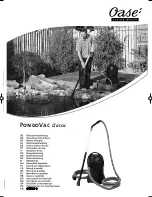
PondoVac Classic
Brand: Oase Pages: 76

Baracuda Pacer
Brand: Zodiac Pages: 58

NAVIGATOR POOLVAC V-Flex
Brand: Hayward Pages: 177

ubbink Ocea 430 - H120 cm
Brand: Outside Living Industries Pages: 88

TSS 1600 K
Brand: T.I.P. Pages: 48

RANOMI
Brand: Zoef Robot Pages: 61

POOLDENS 100T
Brand: COSMOGAS Pages: 96

AT230701
Brand: AquaTools Pages: 14

1 HP
Brand: AquaTools Pages: 12

Legend Platinum II
Brand: Pentair Pool Products Pages: 40

90401E
Brand: Coleman Pages: 8

Power Steel 90387E
Brand: Coleman Pages: 10

Power Steel
Brand: Coleman Pages: 8

7024515
Brand: Hydro-Pro Pages: 230

Micro Star-Clear
Brand: Hayward Pages: 4

ABOVE GROUND SWIMMING POOL
Brand: Vogue Pages: 20

LeafWizard
Brand: Davey Pages: 16

Xtherm 1505
Brand: Raypak Pages: 8


