Installation and Maintenance Manual
Compact Light Retractable (CLR)
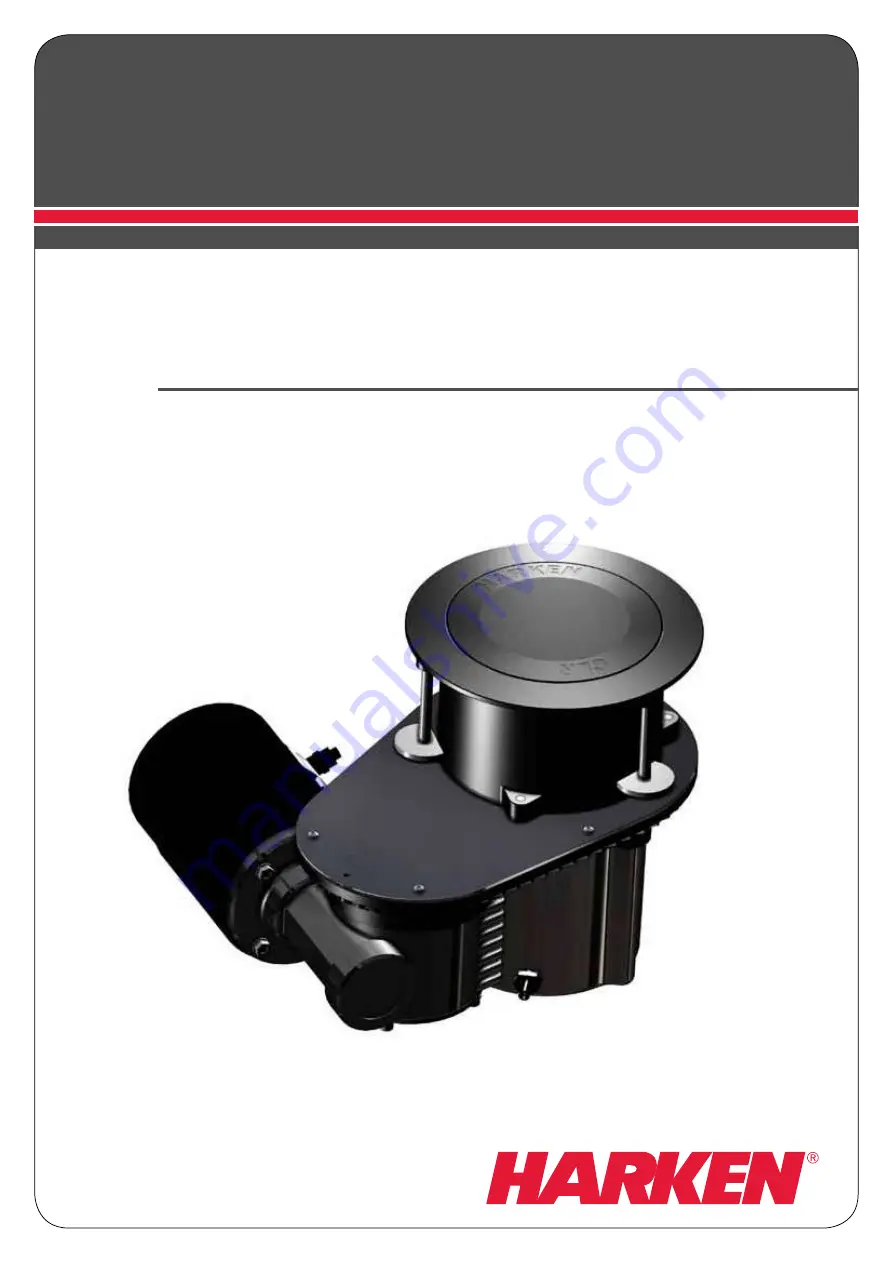
Mooring Winch 600 - 1200 - 2500
Mod.A
Page 1: ...Installation and Maintenance Manual Compact Light Retractable CLR Mooring Winch 600 1200 2500 Mod A...
Page 2: ...2 CLR Mooring Winch Installation and Maintenance Manual Mod A...
Page 3: ...ic wiring diagrams Dual Function Control Box DFCB 28 8 3 Functional test 31 8 4 Led lights installation 31 8 5 Led lights electric wiring diagrams 32 8 6 Hydraulic connections diagrams 32 9 Maintenanc...
Page 4: ...Maintenance Manual Mod A 18 Hydraulic motor CLR Mooring 1200 54 19 Exploded view CLR Mooring Winch 2500 55 20 Parts lists CLR Mooring Winch 2500 56 21 Electric motor CLR Mooring Winch 2500 58 22 Hydra...
Page 5: ...s the winch regularly Maximum working load MWL maximum value of the load the winch can bear in a dynamic working condition Maximum holding load MHL maximum value of the load the winch can bear in a st...
Page 6: ...t be suitable and the warranty will be invalidated Modifications carried out by the user without explicit written authorization from the manufacturer will invalidate the warranty and relieve the manuf...
Page 7: ...oned The Harken winch must not be used if unauthorized modifications or interventions have been carried out Do not use the winch to divert a line cross sheeting Do not apply to the winch loads greater...
Page 8: ...absorption measured at Maximum Working Load MWL CLR Mooring Winch 1200 electric horizontal motor 12 V 1500 W 24 V 2000 W line speed m min 23 25 current absortion A 350 200 Line speed is measured with...
Page 9: ...te The performance is evaluated measuring the pressure and flow on the motor ports The performance data are based on oil with a viscosity of 35mm2 s 165 SUS and temperature of 50 C 120 F Weights Kg lb...
Page 10: ...d the winch can bear with a line loaded in a static working condition Maximum loads Kg lb CLR size MHL MWL CLR 600 600 1322 8 400 881 8 CLR 1200 1200 2645 6 800 1763 7 CLR 2500 2500 5511 6 1200 2645 5...
Page 11: ...anual Mod A 323 383 144 200 106 7 75 Max deck thickness 100 250 5 114 Drain plug Winch CLR 600 EL NOTE All dimensions are in mm 7 Outline Winch CLR 600 HY Drain port size 1 4 GAS Inlet Outlet ports si...
Page 12: ...e Manual Mod A 351 8 347 4 55 Max deck thickness 107 5 174 120 7 128 237 250 Drain plug Winch CLR 1200 EL Winch CLR 1200 HY 55 Max deck thickness 107 5 174 120 7 128 237 250 Drain plug Drain port size...
Page 13: ...allation and Maintenance Manual Mod A 405 420 129 5 247 5 310 209 141 53 Drain plug Winch CLR 2500 EL Winch CLR 2500 HY 129 5 247 5 310 209 141 53 Drain plug 375 5 420 5 Drain port size 1 4 GAS Inlet...
Page 14: ...14 CLR Mooring Winch Installation and Maintenance Manual Mod A 7 1 Outline dimensions of the custom top version Winch CLR 600 Winch CLR 1200...
Page 15: ...ion to follow scrupulously the steps shown in the CLR installation procedure in the sequence written below DANGER Incorrect installation of the winch may cause severe injury or death Consult the yard...
Page 16: ...e the mounting template over the point chosen for installation NOTE Below is a reduced scale diagram The drilling cut out template is available on the Harken website www harken com Winch CLR 600 NOTE...
Page 17: ...Orientation of the winch must be chosen taking into account 2 factors The overall dimensions shown in the Outline section of this manual There is only one orientation available for the coupling of the...
Page 18: ...Mooring Winch Installation and Maintenance Manual Mod A Winch CLR 1200 View from above NOTE Below is a reduced scale diagram The drilling cut out template is available on the Harken website www harke...
Page 19: ...Orientation of the winch must be chosen taking into account 2 factors The overall dimensions shown in the Outline section of this manual There is only one orientation available for the coupling of the...
Page 20: ...Mooring Winch Installation and Maintenance Manual Mod A Winch CLR 2500 View from above NOTE Below is a reduced scale diagram The drilling cut out template is available on the Harken website www harke...
Page 21: ...Orientation of the winch must be chosen taking into account 2 factors The overall dimensions shown in the Outline section of this manual There is only one orientation available for the coupling of the...
Page 22: ...e underdeck side WARNING The mounting bolts must be isolated with anti corrosive lubricants It is mandatory to prevent any direct contact between the aluminium plates from other conductive materials s...
Page 23: ...sert the deck washers along the installation screws and close them up to the bottom surface of the deck with the proper nuts to fasten the support winch to the deck 7 Insert the winch from above pass...
Page 24: ...24 CLR Mooring Winch Installation and Maintenance Manual Mod A 11 Remove the cover from the gearmotor assembly view from the underdeck side 12 Unscrew nuts and remove washers...
Page 25: ...LR 600 for the motor installation refer to the blue index stickers placed on the top of the winch to have a positional reference from the below deck side refer to the white tracks marked on the drum a...
Page 26: ...llation and Maintenance Manual Mod A 14 The gearmotor assembly must be mounted from the underdeck side 15 Once having respected the motor orientation insert the squared end of the central screw into t...
Page 27: ...the nuts of the gearmotor 17 Remove the columns support 18 Before completing the mechanical installation of the winch proceed with the installation of the electric parts Dual Function Control Box for...
Page 28: ...espondence of the point shown in the wiring diagrams above 8 2 Electric wiring diagrams Dual Function Control Box DFCB To guarantee greater efficiency in terms of safety and long life for every winch...
Page 29: ...between winch and battery Current voltage Under16 4ft AWG Under5m mm2 16 4 32 8ft AWG 5m 10m mm2 32 8 49 2ft AWG 10m 15m mm2 49 2 65 6ft AGW 15m 20m mm2 12 V 2 32 0 50 00 70 000 95 24 V 5 16 3 25 2 35...
Page 30: ...d orientation NOTE Take special care not to turn the central spindles Be careful not to turn central spindles 6 Attach cable terminals to clamps between M8 nut and lock nut 5 Apply Harken grease on th...
Page 31: ...tric button until the come in stroke of the drum is completed NOTE For all info regarding the use of the winch refer to the User Manual available in paper form included into the packaging of the purch...
Page 32: ...7 Hydraulic connections diagrams The hydraulic motor must be connected to a hydraulic system using two high pressure tubes which serve for input or output according to the direction in which the moto...
Page 33: ...t screw the cover to the base plate 20 The installation procedure is completed by connecting the drain plug with a proper drain tube not provided by Harken WARNING Refer to the Hydraulic Power Unit an...
Page 34: ...her cleaners containing caustic solutions to come into contact with winches and especially anodised chrome plated or plastic parts Do not use solvents polishes or abrasive pastes on the logos or stick...
Page 35: ...the gears of the winch that are not sufficiently greased will undergo irreversible wear that is not covered by the warranty 2 Medium threadlocker Blue i e LOCTITE 243 Clean the parts and apply the pro...
Page 36: ...is strongly recommended to operate on a proper bench to avoid damages and to operate into the correct rooms dedicated for the tooling handling 1 Remove the fiber optics from the open drum configuratio...
Page 37: ...of the procedure specificed in the section 16 2 of this manual motor installation 3 1 Remove the sheaths from the motor poles to have a better handle during the disassembly procedure 4 Under deck ope...
Page 38: ...nual Mod A NOTE Only for CLR 1200 5 1 Bench operation Unscrew n 3x M5 socket head screws and the motor cap to inspect clean and lubricate the internal pinion 6 Under deck operation Unscrew n 5x M6 soc...
Page 39: ...careful to the hub the washer and the needle roller bearing not axially fixed after the disassembly of the friction clutch group 7 Bench operation Remove the needle roller bearing washer and unscrew...
Page 40: ...nd Maintenance Manual Mod A 8 Unscrew 4 nuts and remove 4 washers to remove the base from the deck opposite procedure of the section 10 of this manual 9 Flush deck operation Remove the drum support an...
Page 41: ...w the coloumns from the top 9 4 Assembly Assemble the winch in the reverse order of the sequence in the section of the disassembly NOTE Once the screwing of the columns is completed the distance betwe...
Page 42: ...0 Email customerservice harken com 10 Harken limited worldwide warranty Harken Winch is covered by a warranty if during the warranty period the winch proves defective or suffers breakages the manufact...
Page 43: ...43 CLR Mooring Winch Installation and Maintenance Manual Mod A 12 Exploded view CLR Mooring Winch 600...
Page 44: ...4 8 6 M0602903 Nut M8 UNI 5588 9 1 A97138200 Screw assembly Screw Tr 16x8 LH Plain washer DIN 440V 9x 22x3 square hole Elastic ring D6 UNI7434 DIN6799 A4 10 1 A77083400 Clutch assembly Nut Tr 16x8 LH...
Page 45: ...x90 7 3 S708320003 Washer 8 5x 40x4 8 6 M0602903 Nut M8 UNI 5588 9 1 A97138200 Screw assembly Screw Tr 16x8 LH Plain washer DIN 440V 9x 22x3 square hole Elastic ring D6 UNI7434 DIN6799 A4 10 1 A770834...
Page 46: ...hing 6 3 S708330003 Threaded bar M8x90 7 3 S708320003 Washer 8 5x 40x4 8 6 M0602903 Nut M8 UNI 5588 9 1 A97138200 Screw assembly Screw Tr 16x8 LH Plain washer DIN 440V 9x 22x3 square hole Elastic ring...
Page 47: ...303 Washer 6 10 1 A77137600 Black painted gear box 1 45 11 1 A96015400 KIT EL Motor 12V 0 7kW Motor 12V 0 7 kW Sticker motor 4 S312810002 Screw stud M6x26 4 M0621303 Washer 6 4 M0620803 Nut M6 UNI5588...
Page 48: ...7 OR 4081 11 11 M0621303 Washer 6 12 1 A77137600 Black painted gear box 1 45 13 4 S312810002 Screw stud M6x26 14 4 M0620803 Nut M6 UNI5588 15 1 S690200080 Flangia Pos Q ty Code Description 16 7 M06391...
Page 49: ...49 CLR Mooring Winch Installation and Maintenance Manual Mod A 15 Exploded view CLR Mooring Winch 1200...
Page 50: ...x 148 5x5 11 8 M0624203 Screw M6x30 12 4 S708330003 Threaded bar M8x90 13 4 S708320003 Washer 8 5x 40x4 14 4 M0602903 NUT M8 UNI 5588 A4 15 1 A97083500 Screw assembly Screw Tr 16x8 LH Plain washer DIN...
Page 51: ...3 Flange 10 2 S708420080 Washer 172x 148 5x5 11 8 M0624203 Screw M6x30 12 4 S708330003 Threaded bar M8x90 13 4 S708320003 Washer 8 5x 40x4 14 4 M0602903 NUT M8 UNI 5588 A4 15 1 A97083500 Screw assembl...
Page 52: ...003 Flange 10 2 S708420080 Washer 172x 148 5x5 11 8 M0624203 Screw M6x30 12 4 S708330003 Threaded bar M8x90 13 4 S708320003 Washer 8 5x 40x4 14 4 M0602903 NUT M8 UNI 5588 A4 15 1 A97083500 Screw assem...
Page 53: ...270002 Rod 10 L 100 10 1 A77082500 Cover assembly for CLR 1 S708250063 Cover 1 S362670082 Drain plug 11 1 S708260004 Gear Z 27 12 7 M0621303 Washer 6 Pos Q ty Code Description 13 1 A77137600 Black pai...
Page 54: ...plug winch 1120 11 1 M 06488 97 OR 4081 12 7 M0606803 Screw M6x14 UNI 5931 13 1 S708260004 Gear Z 27 14 11 M0621303 Washer 6 15 1 A76087200 Black painted gear box 1 36 Pos Q ty Code Description 16 4...
Page 55: ...55 CLR Mooring Winch Installation and Maintenance Manual Mod A 18 Exploded view CLR Mooring Winch 2500...
Page 56: ...x5 10 8 M0624203 Screw M6x30 11 6 S708330003 Threaded bar M8x90 12 6 S708320003 Washer 8 5x 40x4 13 9 M0602903 Nut M8 UNI 5588 A4 14 1 M6075903 Straight pin ISO 8735B 8x50 15 1 M0643402 Set screw M5x1...
Page 57: ...3 Screw M6x30 11 6 S708330003 Threaded bar M8x90 12 6 S708320003 Washer 8 5x 40x4 13 9 M0602903 Nut M8 UNI 5588 A4 14 1 M6075903 Straight pin ISO 8735B 8x50 15 1 M0643402 Set screw M5x10 UNI 5927 16 1...
Page 58: ...Washer 6 10 4 S312810002 Screw stud M6x26 11 4 M0620803 Nut M6 UNI5588 12 1 M 60142 06 Key DIN 6885 5x5x15 13 1 S690200080 Flangia 14 2 M 06404 03 Key 8x7x32 Pos Q ty Code Description 15 1 S712660063...
Page 59: ...50063 Cover 12 1 S310810080 Drain plug winch 1120 13 1 M 06488 97 OR 4081 14 7 M0606803 Screw M6x14 UNI 5931 15 1 S708260004 Gear Z 27 Pos Q ty Code Description 16 11 M0621303 Washer 6 17 1 A77137600...