background image

Garden Shed

Owner’s Manual 

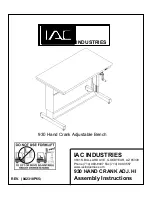
Assembly Instructions

 9820007

Overall Size:  (D) 2.9 ft. (35 in.) (89 cm) 


(W) 5 ft. (60.2 in.) (153 cm)


(H) 5.8 ft. (70.1 in.) (178 cm)

If you have any problems with this product, DO NOT RETURN IT TO THE STORE. 
CALL OUR CUSTOMER SERVICE HOT-LINE AT 1-877-397-5144.  

8AM-5PM (EST) Monday-Thursday, 8AM-4PM (EST) Friday


Requires two competent persons and at least 6 hours for assembly

6

Summary of Contents for 9820007

Page 1: ...cm W 5 ft 60 2 in 153 cm H 5 8 ft 70 1 in 178 cm If you have any problems with this product DO NOT RETURN IT TO THE STORE CALL OUR CUSTOMER SERVICE HOT LINE AT 1 877 397 5144 8AM 5PM EST Monday Thursd...

Page 2: ...situation which if not avoided could result in minor or moderate injury CAUTION Indicates a hazardous situation which if not avoided could result in property damage Notice Provides helpful tips and i...

Page 3: ...nances Apply for permission from local authorities if necessary Small sheds of less than 100 square feet usually do not require a permit Always check with local authorities to ensure your shed is up t...

Page 4: ...windbreak If concrete slab is used it is important that it slopes towards the edges to prevent water collection Plan in advance If concrete slab is used allow sufficient time for the concrete to dry b...

Page 5: ...them well lubricated MOISTURE With changing temperatures condensation will accumulate inside the shed Good ventilation will help in regulating and avoid moisture Open the door frequently to allow for...

Page 6: ...7R GE 17L GC 15 GC H 9 13 13 B1 9 B1 Q P4 P4 4L 29 B6 B6 B6 29 29 1 H2 32 40 41 31 30 29 1 29 H2 D1 D1 29 1 B6 34 B6 B6 29 29 1 30 40 41 30 33 GB P1 GJ P1 GJ P1 P4 P4 4R 1 J1 3 W1 1 J1 2 J1 J1 17R GE...

Page 7: ...4 B1 4 48 114 mm 2 13 30 15 766 mm 2 4L 63 99 1600 mm 1 4R 63 99 1600 mm 1 30 22 51 572 mm 4 31 62 3 1583 mm 1 32 62 3 1583 mm 1 33 62 3 1583 mm 1 34 62 3 1583 mm 1 20 34 5 876 mm 1 15 34 5 876 mm 2...

Page 8: ...mm D1 62 28 1582 mm 2 P5 29 92 760 mm 2 P6 29 92 760 mm 2 40 25 07 637 mm 2 41 25 07 637 mm 2 J1 4 H2 2 Notice Both drill driver and screwdriver are suitable for assembly Use of a drill driver is rec...

Page 9: ...Base Frame Assembly Lay 1 2 and 3 on a suitable base foundation not included Secure each corner with 2 screws F1 No Part Qty J1 4 F1 16 Base Frame Assembly Attach J1 to the corners of the base frame...

Page 10: ...the holes and insert the sleeve anchor not included Secure the base frame to the foundation with anchor bolts not included Anchoring to Wooden Base Mark the positions of the screw holes on the base fo...

Page 11: ...the base frame using 4 screws F1 and 4 washers S3 Secure the first rear panel P1 to P4 using 1 set of bolt nut F2 and 1 washer S3 Continue to assemble the remaining 2 rear panels P1 Checking the Base...

Page 12: ...F1 and 4 washers S3 Secure P4 to P1 using 1 set of bolt nut F2 and 1 washer S3 No Part Qty P4 1 F1 4 S3 5 F2 1 Front Left Panel Assembly Secure P4 to the base frame using 4 screws F1 and 4 washers S3...

Page 13: ...1 set of bolt nut F2 and 1 washer S3 P4 F2 S3 F1 S3 11 No Part Qty 4L 1 4R 1 F1 4 S3 4 F2 2 Door Posts Assembly Slide 4L along front panel P4 so that it fits into the base frame Secure 4L to the base...

Page 14: ...Slightly push the bottom plate of Q so that it can be slided into the slot under the upper beams Secure Q to each door post using 1 screw F1 and 1 washer S3 Q 9 F1 S3 12 No Part Qty 9 2 F1 14 S3 14 Up...

Page 15: ...nel Assembly Bend the tabs at the ends of Q towards the upper beams 9 Secure Q to each upper beam using 1 screw F1 and 1 washer S3 S3 F1 15 No Part Qty F1 4 Front Triangle Panel Assembly Secure Q to e...

Page 16: ...op of the side panels Slightly push the bottom plate of H so that it can be slided into the slot under the upper beams Secure H to the rear panels using 13 screws F1 and 13 washers S3 H F1 S3 16 No Pa...

Page 17: ...el Assembly Bend the tabs at the ends of H towards the upper beams 9 Secure H to each upper beam using 1 screw F1 and 1 washer S3 S3 F1 19 No Part Qty 13 2 F1 4 Roof Beam Assembly Connect 2 roof beams...

Page 18: ...No Part Qty B1 2 F1 12 S3 8 Roof Beam Assembly Attach one support B1 to each end of the assembled roof beam Move it towards the corresponding triangle panel so that the screw holes are aligned Secure...

Page 19: ...embly Secure another set of P5 and P6 each using 7 screws F1 and 7 washers S3 P5 P6 F1 S3 23 No Part Qty 20 1 17L 2 17R 2 F1 4 Ridge Caps Assembly Place ridge caps 20 17L and 17R on the roof panels Se...

Page 20: ...re 29 and 29 1 to 30 each using 4 screws F1 Repeat the same steps to assemble the other 3 door connectors GE F1 29 1 29 30 F1 x4 24 No Part Qty GC 4 15 2 F1 8 S3 4 Ridge Caps and Corner Ends Assembly...

Page 21: ...y Secure 2 door connectors to the left door panel each using 1 set of bolt nut F2 and 1 washer S3 D1 31 32 F2 S3 S3 F2 No Part Qty F1 12 Left Door Panel Assembly Further secure each door connector usi...

Page 22: ...Assembly Further secure each door connector using 6 screws F1 F2 S3 F1 31 32 No Part Qty 40 1 41 1 F1 16 Cross Brace Assembly Further secure each door connector using 4 screws F1 Secure 40 and 41 to t...

Page 23: ...0 1 41 1 F1 16 Cross Brace Assembly Further secure each door connector using 4 screws F1 Secure 40 and 41 to the right door panel each using 4 screws F1 F3 B6 40 41 F1 37 No Part Qty F3 12 Door Panels...

Page 24: ...screwdriver Secure the knob 1 to the right door panel using the washer 2 spring washer 3 and nut 4 Use an adjustable wrench to tighten GB 38 No Part Qty H2 2 F1 8 Door Latch Assembly Secure H2 to the...

Page 25: ...ng Screw Caps For protection cover each screw F1 and bolt F2 thread using screw caps S2 40 No Part Qty GB 1 Door Lock Assembly Install the latch 5 on the lock and secure using the screw 6 Test if the...

Page 26: ...26 ASSEMBLY 42 No Part Qty W1 1 Assembling the stabilizer bar For stabilizing the shed slide the stabilizer bar W1 into the slots on the two base bars 1 W1 1 2 3 1...

Page 27: ...V01 1021...

Reviews: