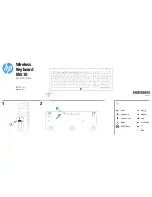
background image

*#1 

Model:

Owner’s Manual

Th

  ank you, and congratulations on your choice of the Hammond Draw-

bar Keyboard XK-1C.
Please take the time to read this manual completely to take full advantage 
of the many features of your XK-1C; and please retain it for future refer-
ence.

AMOUNT

VOLUME

RECORD

ENTER

VALUE

EXIT

MENU /

5

2

3

1

6

4

7

8

MANUAL

Summary of Contents for XK-1c

Page 1: ...hoice of the Hammond Draw bar Keyboard XK 1C Please take the time to read this manual completely to take full advantage of the many features of your XK 1C and please retain it for future refer ence AM...

Page 2: ...could cause permanent hearing loss Do not operate for a extended periods of time at a high volume level or at a level that is uncom fortable If you experience any hearing loss or ring ing in the ears...

Page 3: ...result in poor insulation and lead to fire Try to prevent cords and cables from becoming en tangled Also all cords and cables should be placed so they are out of the reach of children Never climb on t...

Page 4: ...sation has completely evaporated Do not allow rubber vinyl or similar materials to remain on the unit for long periods of time Such objects can dis color or otherwise harmfully a ect the nish Do not p...

Page 5: ...5 Introduction INTRODUCTION...

Page 6: ...PEDAL SUSTAIN 31 RECORD THE PATCH TO MEMORY 32 Example RECORD TO U3 2 32 SETTING UP 33 SOUND ENGINE STRUCTURE 34 ORGAN SECTION 35 MASTER EQUALIZER 35 ORGAN SECTION 36 ORGAN TYPE 36 TONE WHEELS BType1...

Page 7: ...Sequencer DAW 104 Sequencer playback 104 USING A MIDI SOUND MODULE 105 ZONES 106 WHAT IS DISPLAYED ON THE UPPER LEFT 106 INTERNAL ZONE 106 EXTERNAL ZONE 106 PANIC FUNCTION AND PARAMETER RE LOAD 107 M...

Page 8: ...1 Owner s Manual 8 CUSTOM TONE WHEELS LIST 133 MIDI IMPLEMENTATION CHART 134 MIDI CHANNELS AND MESSAGES 135 SPECIFICATIONS 136 SERVICE 139...

Page 9: ...he traditional Chorus Vibrato as used on the legendary B 3 The Chorus Vibrato may be selected for the Upper and Lower manuals independently A WIDE VARIETY OF EFFECTS Digital Multi e ects are available...

Page 10: ...lects which division or both receives the Vibrato Chorus E ect P 47 LESLIE BYPASS button De selects the Leslie e ect and directs the output to the Main outputs When the indicator light is ON the Bypas...

Page 11: ...r de nable items P 32 NUMBER DIRECTION buttons Recalls the corresponding Favorites P 24 In the menu mode and function mode moves the cursor or pages P 60 increases decreases the value P 62 MANUAL butt...

Page 12: ...of a external Leslie Speaker is detected the on board Leslie e ect is disabled to the PHONES jack 30 and the LINE OUT jacks 31 32 P 17 CONTROLLER TERMINALS FOOT SWITCH jack Connect the Foot Switch op...

Page 13: ...eyboard 61 waterfall keys velocity sensitive AC adaptor Supplies power to the instrument USE ONLY AD3 1250 DO NOT SUBSTITUTE AC cord set Attaches AC adapter to Wall outlet AMOUNT VOLUME RECORD ENTER V...

Page 14: ...1 Owner s Manual 14 NAMES AND FUNCTIONS continued...

Page 15: ...15 HOOK UP...

Page 16: ...lf Switch this keyboard and any external equipment OFF before connecting amps or headphones CAUTION Do not place this unit in direct sun light near heat sources or in a hot location USB FLASH DRIVE Th...

Page 17: ...peaker 2101 2101mk2 ne adjustment of the rotor speed or the rise time etc 1 Connect the MIDI OUT of this unit with the MIDI IN of the Leslie speaker with a MIDI cable 2 Set the keyboard channel UPPER...

Page 18: ...e XK 1C power ON Then recall the MIDI template 3KBD P 108 3 Set the Send channel of the added MIDI keyboard at 2 and that of the MIDI pedalboard at 3 Refer to the operation manual of the added MIDI ke...

Page 19: ...ard expansion See P 16 for the basic hook up of the power source audio etc 2 Switch ON the power of this unit Then recall the MIDI template Two Manual P 108 Refer to the operation manual of the added...

Page 20: ...ct the CU 1 to the FOOT SWITCH jack NOTE This illustration shows only the keyboard expansion See P 16 for the basic hook up of the power source audio etc 2 Set the CONTROL FOOT DEVICE at CU 1 P 72 EXP...

Page 21: ...21 GETTING READY TO PLAY...

Page 22: ...lt settings Pull some Draw bars or select any of the FAVORITE 1 to 8 buttons to test your volume 5 Adjust the volume of ampli er etc To turn OFF the power do the above steps in reverse Switch OFF the...

Page 23: ...s such as Leslie and reverb also change NOTE You can set which parameters will be recalled P 70 2 to 10 NOTE You can set the FAVORITE buttons to select a Patch with direct key in P 70 11 USER and PRES...

Page 24: ...ELECT THE BUTTON TO REGISTER Press the desired Favorite button while holding down the RE CORD button Recording Favorite is displayed for a moment and the selected Favorite button blinks momen tarily Y...

Page 25: ...pears if necessary Press the X buttons to select the PATCH option it will blink Press the ENTER button to select the patch function mode Press the S button twice The Favorite page appears Turn the VAL...

Page 26: ...ogrammed to various functions The de fault setting is LESLIE S F ALTERNATE Every press toggles the mode of the Leslie e ect between Fast and not NOTE You can change the foot switch assignment P 72 USE...

Page 27: ...rn them to the DEFAULT Status GO TO THE MENU MODE Select the MENU EXIT button The Menu mode appears If the display is di erent from the above illustration select the MENU EXIT button again LOCATE PAGE...

Page 28: ...e at tack to the Tone Wheel Drawbar sounds This percussion is not like a Drum or Cymbal but closer to an xylophone or ma rimba PERCUSSION is available only on the UPPER part To enable the percussion t...

Page 29: ...ed here in the Digital realm FAST button This button toggles the mode of the rotor to fast or not When the light is ON it is FAST and when OFF not STOP button This button sets the mode when the FAST b...

Page 30: ...ction press the M BASS button and the light will go ON The Pedal Bass sound is heard in conjunc tion with the lowest note being played on the manual keyboard till that time In order to not interfere w...

Page 31: ...niscent of a string bass PEDAL SUSTAIN To engage the pedal sustain press the P SUS button and the light will go ON When you release your foot from the pedalboard or release the key on the keyboard whe...

Page 32: ...turns to the previous mode The recorded patch is automatically selected NOTE User created patch data is not lost when the power is turned off and or disconnected RECORD THE PATCH TO MEMORY All the pre...

Page 33: ...33 SETTING UP...

Page 34: ...in Line Out Phones Leslie on Reverb Vibrato Chorus Overdrive TC Equalizer Master Equalizer Lower Upper Virtual Tonewheel Set Pedal Virtual Tonewheel Set Pedal Drawbars Lower Drawbars Upper Drawbars Pe...

Page 35: ...horus gives depth and richness to the organ sound by slightly varying the pitch Vibrato or doubling the voice by mixing the original sound with a duplicate slightly detuned one Chorus OVERDRIVE The Ov...

Page 36: ...not a Tone Wheel if strictly speaking It replicates the rst generation non mechanical Transistor Hammond Tone Generators like the GT 7 and Concord TRANSISTOR Vx Farf After the transistor became genera...

Page 37: ...ttons together The DRAWBAR function mode is displayed and the organ type BType1 etc of the manual keyboard presently selected blinks Select Pipe with the VALUE knob The pipe organ sounds when you play...

Page 38: ...nd ing length of pipes of a pipe organ The numbers 1 8 on the bar portion of each Drawbar indicate the volume of the sound to be produced as well as the guide to remember Drawbar settings Pull the fun...

Page 39: ...the fun damental These harmonics add complexity to the tone The two brown Drawbars on the far left give depth and richness to the sound The left 16 is one octave lower than the 8 and 5 is the third h...

Page 40: ...40 000 Diapason family check mark pattern Accomp Diapason 8 00 8874 210 Chorus Diapason 8 00 8686 310 Diapason 8 00 7785 321 Echo Diapason 8 00 4434 210 Harmonic Diapason 16 85 8524 100 Harmonic Diapa...

Page 41: ...op Rock and especially Gospel music Some timeless registrations become common APPLICATION OF PERCUSSION When Percussion is used the sound of the 1 Drawbar is cancelled As it was on the Vintage B 3 A t...

Page 42: ...t voice as in the vintage combo organ Each or both of the two right hand Draw bars must be pulled in some combination to hear sound in the Vx type If the organ type is set to Vx refer to the Vx row on...

Page 43: ...The names Flute Strings etc are general descriptions and do not re ect the tonalities or characteristics of the real in struments When using the Farf type organ refer to the Farf row on the other sid...

Page 44: ...PIPE organ type the stops are registered through the Drawbars and follow the classic organ layout left to right as follows Flue Mixture and Reed On the UPPER and LOWER parts each Drawbar corresponds w...

Page 45: ...The UPPER part is normally used and when you want to sound the LOWER PEDAL use the Split Manual Bass Function or connect a MIDI keyboard and or Pedalboard and assign each part One set of drawbars is...

Page 46: ...is OFF LED not lit the percussion tone will decay decrease in volume slowly like a bell When it is ON LED is lit the percussion tone will decay rapidly like a xylophone SOFT button This reduces the vo...

Page 47: ...V3 C3 deepest vibrato chorus NOTE While the power is on the Vibrato and or Chorus button LED s will always be on The ef fect will not be active unless the UPPER or LOWER switches are pressed LED on C...

Page 48: ...obtained from an unclipped warmth to a hard distortion OVERDRIVE AMOUNT knob Adjusts the amount of the Overdrive e ect Rotating the knob at the end of counter clockwise the e ect is O Rotating the kn...

Page 49: ...f Slow Off On On Fast Off On Off Stop On On On Fast Bypass On On Off Stop On Off On Fast On Off Off Slow STATUS CHART OF EACH BUTTON 800Hz Ampli fier Horn Driver Woofer Bass Rotor Horn Rotor Stationar...

Page 50: ...e the perfor mance REVERB ON button To engage the Reverb press this button and the light will go ON NOTE You can fine tune the depth time etc of the Reverb P 95 MULTI EFFECTS The XK 1C has various mul...

Page 51: ...keyboard attached as the LOWER keyboard the MANUAL BASS will appear there on the lowest notes The default range of the MANUAL BASS is up to the middle B NOTE You can change the highest note range of...

Page 52: ...board voices on the left side of the single keyboard The keyboard can be shifted up or down one octave to facilitate easier play SPLIT button Press to split the keyboard light ON NOTE You can set the...

Page 53: ...ian who prefers to register by hand instead of using patches PATCH LOAD Only the Drawbar registrations of each keyboard were recorded to the preset of the B 3 C 3 But many more parameters than the Dra...

Page 54: ...oves the cursor VALUE knob Selects letters The Characters available are the Capital and small English Al phabet symbols and digits The name input here is not captured until you record the patch as exp...

Page 55: ...ows for a few seconds Recording Patch When the recording is completed the display returns to the previous one NOTE The recorded patch data is retained if the power is switched off or disconnected 1 GI...

Page 56: ...1 Owner s Manual 56...

Page 57: ...57 USING THE CONTROL PANEL...

Page 58: ...not cov ered by the top panel knobs and switches are here The available modes are basically PLAY MENU and FUNCTION See how to read them and how to use the buttons on the next pages WHAT YOU CAN DO ON...

Page 59: ...f the Play mode is not displayed touch the PLAY button HOW TO READ THE DISPLAY Display of Registration Bars The two PLAY modes for displaying the Registration are toggled every time the PLAY button pr...

Page 60: ...p to four items Search for the item you wish to edit using the direction buttons then press the ENTER button and enter each Function mode HOW TO READ THE DISPLAY BUTTON OPERATION IN THIS MODE RECORD E...

Page 61: ...s P 77 4 LESLIE For adjusting the on board Leslie e ect and sets the external Leslie speaker settings P 78 PAGE C 1 PIPE Adjust the characteristics of the Pipe stops here P 84 2 O D EFF Adjust the Ove...

Page 62: ...5 2 3 1 6 4 7 8 MANUAL There is another page above or below this page PARAMETER ITEM NAME Shows there is another page on the right or the left of this page PAGE NAME VALUE CURSOR flashing VALUE Move...

Page 63: ...mmediately jump to the percussion function mode This is called SHORT CUT In the next chapter you will see which button is used for a particular SHORT CUT NOTE Changing the length of time until display...

Page 64: ...ME 1 LOCATE THE MENU MODE Press the MENU EXIT button The MENU mode is displayed 2 SELECT THE MENU PAGE Move the cursor to PERCUSS using the W X buttons 4 PRESS ENTER Press the ENTER button The display...

Page 65: ...ch record it as previously indicated PATCH PARAMETERS Patch Parameters are unique to the current patch and change with the programming of each patch Many of the knobs buttons on the top panel are Patc...

Page 66: ...ord the patch by using LOCKED 1 10 P 25 or you can associate the favorite buttons by using ASSOCIATE P 70 before locking the display Short Cut function P 63 is disabled DRAWBAR SELECT buttons P 45 are...

Page 67: ...67 SETTING THE PARAMETERS...

Page 68: ...1C The setting range is 1C to 2C FOLDBACK HIGH Sets the key from which the 1 Drawbar folds back repeat the same octave on the higher octaves The setting range is 4G to 5C NOTE The Fold back is possib...

Page 69: ...e value the longer the decay time There is no decay at C SUSTAIN LENGTH This allows you to set the Release Rate the decay time after key release when the P SUS button is ON 1 is the shortest and 5 is...

Page 70: ...speci c to the Leslie Vibrato Chorus e ects PATCH LOAD REVERB G The Reverb parameters NOTE Each Patch Load parameter is a Global Parameter It is record ed when the value is set Common for each patch...

Page 71: ...the on board sound engines iii To the External Zone iv When the MIDI pedalboard XPK 100 is connected transpose value will syn chronize with it NOTE Transpose is a temporary parameter and is not record...

Page 72: ...or Reverse it FAVORITE FWD REV Advance the Favorite Forward or Reverse it SPRING This generates the sound of the spring reverb being shaken DELAY TIME Sets the delay time P 86 95 of the Effects at the...

Page 73: ...type of the connected expression pedals the expression value may not change In such case adjust this parameter to obtain the desired response EXPRESSION CURVE S Adjusts change of expression value corr...

Page 74: ...SOUNDING POINT S Set the sounding point of the built in keyboard is played DEEP All the section sounds on the deep point in the stroke AUTO The organ sound at the shallow point when striking the keys...

Page 75: ...75 Setting the Parameters...

Page 76: ...s the same KEYBOARD KEY TRACK Attenuates the percussion volume by keyboard position ON The higher the note is the lesser the volume OFF No change in volume DRAWBAR 1 CANCEL Mutes the UPPER 1 Drawbar w...

Page 77: ...PTH V1 DEPTH V2 DEPTH V3 DEPTH C1 DEPTH C2 DEPTH C3 Sets the Depth of each Vibrato and Chorus e ect mode The setting range is 0 15 NOTE The parameters in these modes are Preset Parameters and are reco...

Page 78: ...parameters are not recorded until the Cabinet Macro is recorded into memory See the next paragraph AMP L This is for setting the type of the virtual Ampli er Solid Flat characteristic Amp Tube Tube s...

Page 79: ...BASS L Sets the time for the rotor to stop when switching from Fast to the Stop mode The setting range for the Horn Rotor is 0 2 to 5 0sec and the Bass Rotor is 0 5 to 12 5sec HORN CHARACTER L Sets th...

Page 80: ...el the Pipe voices and bypassed Drawbar and percussion sounds are from the stationary channel of the Main and Aux NOTE This is a system parameter It is recorded upon setting and is common with all pat...

Page 81: ...letters by the VALUE knob or button The name set here as well as the Tonewheel Parameters below will be discarded if not recorded procedure following WHEEL NUMBER Select the Number of the Wheel you w...

Page 82: ...If you decrease the value a motor hum noise is heard besides the original virtual Tonewheel sound The setting range is 0 127 NOTE If you increase the value too high above the original tonewheel pitch...

Page 83: ...e RECORD button in the setting mode of the Tone wheel Parameters The mode for selecting the Custom Number to be recorded will be displayed Select the Custom Number to be recorded by the VALUE knob It...

Page 84: ...ff noise slightly MID Sounds the chiff noise medium LOUD Sounds the chiff noise maximum NOTE Some pipes does not affect the chiff parameter i e Hautbois 8 CUT OFF FREQUENCY Pi Adjusts the tone quality...

Page 85: ...ys C C D E E F F G G A B B INV Like the INVerted pyramid sounds sides to center which according to the keys C C D E E F F G G A B B MISSING OR UNEVEN VOICE The pipe stops are spread in a stereo array...

Page 86: ...t increases decreases along with volume OD EX Overdrive effect remains constant only volume increases decreases OD ONLY Volume remains constant Expression pedal increases decreases overdrive effect IN...

Page 87: ...reo eld This is not applicable if a monophonic one channel amp is used or when the Leslie e ect Leslie speaker is used AUTO PAN WAVEFORM Sets which waveform to modulate the direction Tri Triangle wave...

Page 88: ...range is 0 to 127 The resonance increases as the value rises Wah Wah WAVEFORM When the SOURCE 7 is set at LFO the LFO wave form is set Tri Triangle wave The sound smoothly varies Sqr Square wave The f...

Page 89: ...s the value is raised the more e ect is added At 127 only the e ect comes out RING MODULATOR WAVEFORM When the SOURCE 7 is set at LFO the LFO waveform is set Tri Triangle wave The ring frequency numbe...

Page 90: ...NUAL Sets the middle frequency of the phase e ect The setting range is 0 to 127 The frequency becomes higher as the value increases PHASER MIX Adjusts the volume balance between the dry and the e ect...

Page 91: ...eyond normal recognition FLANGER DELAY Controls the delay of the e ect sound The setting range is 0 to 127 The delay increases as the value is increased FLANGER MIX Adjusts the volume balance between...

Page 92: ...nd The setting range is 0 to 127 The delay becomes greater as the value increases CHORUS MIX Adjusts the volume balance between the dry and the e ect sound The setting range is 0 to 127 At 0 only the...

Page 93: ...ct sound The setting range is 0 to 127 The repetition becomes greater as the value is increased DELAY MIX Adjusts the volume balance between the dry and the e ect sound The setting range is 0 to 127 A...

Page 94: ...ge is 20Hz 200Hz for BASS 250Hz 3 1kHz for MIDDLE 4 0kHz 8 0kHz for TREBLE The sound may distort if gains are raised too high Adjust accordingly NOTE The parameter with P indicated is a patch paramete...

Page 95: ...onger as the number value is increased NOTE You can set the delay time with the foot switch P 72 2 DELAY FEEDBACK When the Type 2 is at Delay PanDly RevDly it sets the amount of Feedback How many time...

Page 96: ...8 8 and ALL All user patches GLOBAL This is for initializing the Global Parameters such as the Master Tune or assignment of the Foot Switch LESLIE This is for initializing the contents of all internal...

Page 97: ...u can get the maximum stereophonic sound effects MONO Use when this keyboard is connected in mono Though it makes no stereophonic sound effects it avoids drop out by sounding opposite channel VERSION...

Page 98: ...1 Owner s Manual 98...

Page 99: ...99 MIDI...

Page 100: ...of parameters and global commands MIDI OUT JACK This is sends performance information to an external MIDI sound module or to record performances and controls to an external sequencer MIDI IN JACK Thi...

Page 101: ...t what speed Velocity and the strike release Note On O PROGRAM CHANGE Control Channel Switches the internal patches of this keyboard External Zone Channel Switches the external MIDI equipment s patche...

Page 102: ...arameters and it is pos sible to make di erent settings to each Patch There are 3 external zones in total Each can be allocated to the desired keyboards for example 3 zones for the Upper keyboard or 1...

Page 103: ...rgan Section Upper Keyboard Lower Keyboard MIDI in Pedal Keyboard On Off MIDI Channel Key Range Octave Shift int zone Octave Shift part Octave Shift ext zone ExZone 3 Pedal ExZone 1 ExZone 2 Upper Man...

Page 104: ...uencer DAW If only using UPPER set Sequencer DAW to record channel 1 If using all three parts Allow 3 channels in your sequencer DAW for recording Channel 1 for UP PER Channel 2 for LOWER Channel 3 fo...

Page 105: ...t MIDI templates depending whether the keyboard is expanded or not 3 Set each zone and if necessary record to the patches See the next paragraph ZONES for the setting details MIDI Keyboard MIDI Pedalb...

Page 106: ...rt This parameter works on expanded Lower keyboard EXTERNAL ZONE SWITCH Sets whether or not to send the MIDI message in this zone MIDI CHANNEL Sets the MIDI send channel 1 to 16 of this zone KEYBOARD...

Page 107: ...two The setting range is MIN at 0 to 63 MAX at 64 to 127 EXPRESSION CONTROL NUMBER Volume control di ers by type by type of MIDI equipment connected This parameter sets the proper CC to control the v...

Page 108: ...and the PEDAL 15 parts The SPLIT button is ignored Its keyboard works as LOWER LOCAL This switches the Local Control ON OFF When switched ON the keyboard s and the internal sound engine are connected...

Page 109: ...g upon se quencer playback ALL DUMP Sends the Full Memory Dump Pressing the ENTER button in this mode transmits all the settings through the MIDI OUT jack KEYBOARD CHANNELS Sets the MIDI channel to tr...

Page 110: ...1 Owner s Manual 110...

Page 111: ...111 SAVE THE SETUP...

Page 112: ...he correct direction matching the upper side of it to that of this keyboard 2 Do not remove the USB ash drive or switch OFF the power while accessing data while the Please wait is displayed Data may b...

Page 113: ...n The FORMAT initializing mode is displayed Press the ENTER button Con rmation message is displayed Press the ENTER button Initialization starts It takes about 3 seconds NOTE If you choose to not init...

Page 114: ...ted Select New File by pressing the S button or turning the VALUE knob a few times Pressing the ENTER button executes the Save A temporary name SETUPxx is automatically given to the saved setup le MEN...

Page 115: ...lphabets Press the ENTER button The setup name is changed WHAT CONTENTS ARE SAVED Setup Global parameter Patch parameter Le slie Cabinet Custom Tone Wheel Temporary except the Expression Source and De...

Page 116: ...correctly inserted Locate the SETUP mode Select the setup le to delete with the S T buttons or the VALUE knob Press the ENTER button Delete is displayed Now press the ENTER button again The setup is d...

Page 117: ...w times If you press the ENTER button it is saved WHAT DOES THIS MEAN Same name exists There is a le with same name already Change the patch name on the XK 1C or delete the le with same name in the US...

Page 118: ...the USB ash drive is correctly inserted Select the Patch le to delete with the S T buttons or the VALUE knob Press W button once ENT to Delete is displayed Press the ENTER button Delete is displayed...

Page 119: ...119 Troubleshooting...

Page 120: ...s Mode is set at CHRD detecting chord on the LOWER part Set the mode at LOW or POLY P 106 1 The volume expression does not change The Expression Source assignment is not correctly set Correctly set th...

Page 121: ...121 APPENDIX...

Page 122: ...2 2 disregarded omni Rx Pedal 3 3 3 disregarded o External Zone O On On Comments Use this template to play the LOWER and PEDAL key boards merging and connect ing to the MIDI IN jack Use this template...

Page 123: ...Preset P4 3 Vintage JAZZ P4 4 The LowerManual P4 5 Full Swing P4 6 Mighty Burner P4 7 Groove Richard P4 8 Five Spot Jazz B P5 1 Mr Hammonds Drm P5 2 Soap Opera P5 3 Walter s Summer P5 4 Sweet Ballad P...

Page 124: ...H Ch 1 16 vv Control Value 00H 7FH 0 127 0 63 Off 64 127 On This control change is only for receive NRPN MSB LSB CC 98 99 Status 2nd Byte 3rd Byte BnH 63H mmH BnH 62H llH n MIDI Channel Number 0H FH C...

Page 125: ...32H 50 3BH 59 44H 68 4DH 77 05H 5 0EH 14 6 06H 6 0FH 15 18H 24 21H 33 2AH 42 33H 51 3CH 60 45H 69 4EH 78 06H 6 0FH 15 7 07H 7 10H 16 19H 25 22H 34 2BH 43 34H 52 3DH 61 46H 70 4FH 79 07H 7 10H 16 8 08...

Page 126: ...Temp Dump 09H Global Dump 0AH System Dump F7 End Of Exclusive Mode Setting Exclusive Message Full Parameters Reset Rx only F0 System Exclusive 55 SUZUKI ID dd Device ID 42 Mode ID for DT1 12 Command...

Page 127: ...Mode 03 02 00 03 02 01 same as FS Tip mode 01 Leslie Fast alternate Damper Org Upper 03 03 00 03 03 01 00 01 O On 01 On Damper Org Lower 03 04 00 03 04 01 00 01 O On 01 On Damper Org Pedal 03 05 00 03...

Page 128: ...Key Octave Upper 2 07 0C 00 07 0C 01 3E 40 42 2 0 2 Key Octave Lower 2 07 0D 00 07 0D 01 3E 40 42 2 0 2 External Zone MIDI Channel 4n 00 00 4n 00 01 00 0F 1 16 EXT Switch 4n 01 00 4n 01 01 00 01 O On...

Page 129: ...03 01 00 0C C1 C2 Fold Back Hi 20 04 00 20 04 01 2B 30 G4 C5 Key Click LPF 20 05 00 20 05 01 00 7F 0 127 Custom TW B Type 1 20 06 00 20 06 01 00 04 1 5 Custom TW B Type 2 20 07 00 20 07 01 00 04 1 5 C...

Page 130: ...note number Pedal Registration 16 01 03 00 01 00 08 0 8 L P 8 01 03 01 01 00 08 0 8 Organ Effect Leslie Bypass 09 00 00 09 00 01 00 01 Enable Bypass ANI Leslie Fast 09 01 00 09 01 01 00 01 Slow Fast...

Page 131: ...0 7F Multi E ect Parameter 6 3p 0C 00 3p 0C 01 00 7F Multi E ect Parameter 7 3p 0D 00 3p 0D 01 00 7F EQ Bass Gain 3p 0E 00 3p 0E 01 00 09 12 9 0 9 EQ Bass Frequency 3p 0F 00 3p 0F 01 00 0A 20 200Hz EQ...

Page 132: ...Speed Horn 06 02 7F 02 00 06 02 01 Fast Speed Bass 06 03 7F 03 00 06 03 01 Rise Time Horn 06 04 7F 04 00 06 04 01 Rise Time Bass 06 05 7F 05 00 06 05 01 Fall Time Horn 06 06 7F 06 00 06 06 01 Fall Ti...

Page 133: ...still remains Noisy This is a custom replicating the entire sound output from the B 3 including the motor hum and leak age noise Noisy 60 Type based upon very prominent leakage noise Mellow Full Flats...

Page 134: ...SB 1 X X Modulation 6 38 O O Data Entry MSB LSB 7 O O Volume 10 O X Pan 11 O O Expression 12 20 80 O O Drawbar Reg Upper 21 29 81 O O Drawbar Reg Lower 33 35 82 O O Drawbar Reg Pedal 48 O O Spring Sho...

Page 135: ...4 O O O O Drawbar Reg X CC 80 12 20 Upper 21 29 Lower 33 35 Pedal CC 81 CC 82 Spring Shock Glide 48 49 X O X X Leslie Fast 92 X O X X RPN 100 101 X X X X NRPN 98 99 X O X X All Notes Off 123 O O O O A...

Page 136: ...Effects 8 programs Equalizer Bass Mid Treble Tone Internal Leslie Advanced Digital 2 Rotors Buttons Bypass Stop Fast Reverb Digital 11 programs Control On Depth Leslie On Reverb Master Equalizer Bass...

Page 137: ...0 Leslie On Reverb 95 Leslie Parameters 78 Leslie Speaker 17 Leslie Switch 20 L MONO 12 Load 70 116 118 Locking The Display 66 M MANUAL 27 Manual Bass 30 Master Tune 71 M BASS see Manual Bass Memory D...

Page 138: ...1 Owner s Manual 138 V Vibrato Chorus 29 47 77 Vx 36 42 W Wah Wah 88 Z Zones 106...

Page 139: ...ct HAMMOND SUZUKI USA Inc 743 Annoreno Dr Addison IL 60101 UNITED STATES In Europe contact HAMMOND SUZUKI EUROPE B V IR D S Tuynmanweg 4A 4131 PN Vianen THE NETHERLANDS All other countries contact HAM...

Page 140: ...Printed in China HAMMOND SUZUKI LTD Hamamatsu Japan 00457 40189 V1 00 130806...

Reviews: