background image

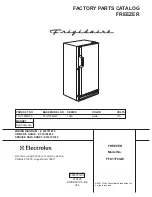
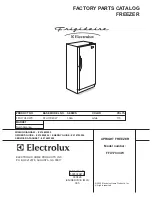
3.2 cu. ft. Upright Freezer

upright freezer

Curtis International Ltd.

HBFRF301-B

Summary of Contents for HBFRF301-B

Page 1: ...3 2 cu ft Upright Freezer upright freezer Curtis International Ltd HBFRF301 B ...

Page 2: ...ating instructions Temperature selection Leveling instructions Door reversal instructions Care Maintenance Cleaning Power failure Defrosting Vacation Moving Disposal Troubeshooting Troubleshooting Product specifications Warranty card Product specifications Warranty Card 1 2 3 4 5 5 6 7 7 7 7 8 8 8 9 10 ...

Page 3: ...h persons receive supervision or training to operate the appliance by a person responsible for their safety Do not store explosive substances such as aerosol cans with a flammable propellant in this appliance Do not use mechanical devices to defrost refrigerator Consult repair manual or owner s guide before attempting to service this product All safety precautions must be followed Disposal of this...

Page 4: ...Product Introduction Part names The below picture is for your reference There maybe some differences from your appliance 1 Thermostat 2 Door 3 Freezer Shelves 3 ...

Page 5: ...perature controlled garages porches vehicles etc Before connecting the appliance to a power source let it stand upright for approximately 6 hours This will reduce the possibility of a malfunction in the cooling system from handling during transportation This appliance is 52 6 cm 20 7 inches wide by 83 3 cm 32 8 inches high by 57 1 cm 22 48 inches deep Make sure that you leave the minimum amount of...

Page 6: ...ssor may run continuously It is the coldest mode Please do not adjust to the maximum setting frequently Internal temperature of the appliance can vary based on ambient temperature the quantity of items stored and how frequently the door is opened There is an adjustable foot on the bottom of the appliance that can be turned up or down to ensure that the appliance is level 1 Turn the leveling foot c...

Page 7: ...t side of the door See figure B Remove the solid foot from the bottom left side of the cabinet and remove the adjustable foot and lower hinge from the bottom right side of the cabinet Install the lower hinge and adjustable foot on the bottom left side of the cabinet and install the solid foot on the bottom right side of the C See figure C Place the door on the cabinet and install the upper hinge o...

Page 8: ...l can damage the appearance of the appliance Never use any commercial or abrasive cleaners or sharp objects on any part of the appliance To clean the inside of the appliance use a soft cloth and a solution of a tablespoon of baking soda to one quart of water or a mild soap solution or some mild detergent Clean the outside with a soft damp cloth and some mild detergent It is important to keep the a...

Page 9: ...unlight Ambient temperature or humidity is very high Moving Disposal This appliance may not be treated as regular household waste it should be taken to the appropriate waste collection point for recycling of electrical components For information on local waste collection points contact your local waste removal agency or government offi ce Disposal of this appliance should be in accordance with fed...

Page 10: ...1 2 12 24 CAPACITY OF FRIDGE IN CU FT SHELF MATERIAL TEMPERATURE CONTROL TYPE TEMPERATURE RANGE IN FAHRENHEIT AND CELSIUS DEPTH EXCLUDING HANDLES IN DEPTH INCLUDING HANDLES IN DEPTH LESS DOOR IN DEPTH WITH DOOR OPEN 90 DEGREES IN HEIGHT TO TOP OF DOOR HINGE IN HEIGHT TO TOP OF REFRIGERATOR IN PRODUCT DEPTH IN PRODUCT HEIGHT IN PRODUCT WIDTH IN ...

Page 11: ...4 10 Warranty card Curtis International Ltd ...

Page 12: ...3 2 cu ft Congélateur vertical Modèle No HBFRF301 B utilisé sous licence par Curtis International Ltd ...

Page 13: ...lection de la température Instructions de niveau Instructions d inversion de porte Soins et Entretien Nettoyage Dégivrage Panne de courant Vacances Déménager Élimination des déchets Dépannage Carte de garantie Dépannage Spécifications du produit Spécifications du produit Carte de garantie 1 2 3 4 5 5 6 7 7 7 7 8 8 8 9 10 ...

Page 14: ...VERTISSEMENT Garder les ouvertures de ventilation dans l enceinte de l appareil ou dans la structure intégrée sans obstruction AVERTISSEMENT N utilisez pas de dispositifs mécaniques ou d autres moyens pour accélérer le processus de dégivrage autres que ceux recommandés par le fabricant AVERTISSEMENT Ne pas endommager le circuit de réfrigérant AVERTISSEMENT N utilisez pas d appareils électriques à ...

Page 15: ... Nom des parts Le tableau ci dessous est pour votre référence il y aurait quelques différences de votre appareil 1 Cadran du thermostat Sur le mur arrière extérieur de l appareil 2 Étagères à congélateur 3 Joint magnétique 3 ...

Page 16: ...eau par exemple dans un sous sol humide ou près d un évier Cet appareil est destiné à un usage domestique seulement Cette unité n est pas conçue pour une installation extérieure y compris une installation où la température n est pas contrôlée garages porches carports etc Avant de brancher l appareil à une source d alimentation laissez le debout pendant environ 6 heures Ceci réduira la possibilité ...

Page 17: ... peut fonctionner en continu C est le mode le plus froid Veuillez ne pas ajuster fréquemment le paramètre maximum La température interne de l appareil peut varier en fonction de la température ambiante de la quantité d articles stockés et de la fréquence d ouverture de la porte Il y a un pied réglable au bas de l appareil qui peut être monté ou bas pour s assurer que l appareil est au niveau 1 Tou...

Page 18: ...nière situé en haut à droite de la porte Voir figure B Retirez le pied plein du côté inférieur gauche du cabinet et retirez le pied réglable et la charnière inférieure du côté inférieur droit du cabinet Installez la charnière inférieure et le pied réglable sur le côté inférieur gauche du cabinet et installez le pied plein sur le côté inférieur droit du cabinet Voir figure C Placez la porte sur le ...

Page 19: ...é et remettez tout son contenu une fois que l appareil a atteint la température désirée Important N utilisez pas d objets pointu ou pointu pour enlever le givre car cela pourrait endommager les conduites de réfrigérant Si ces lignes sont accidentellement percées cela rend le congélateur inutilisable et annulera la garantie du fabricant Pour nettoyer l intérieur de l appareil utilisez un chiffon do...

Page 20: ...haleur ou de la lumière directe du soleil La température ambiante ou l humidité est très élevée Déménager Élimination des déchets Ce produit ne doit pas être traité comme un déchet domestique ordinaire il doit être transporté au point de collecte approprié pour le recyclage des composants électriques Pour obtenir des renseignements sur les points de collecte des déchets locaux communiquez avec vot...

Page 21: ...APACITÉ DU RÉFRIGÉRATEUR EN CU FT TYPE DE CONTRÔLE DE TEMPÉRATURE PLAGE DE TEMPÉRATURE À FAHRENHEIT ET CELSIUS DPROFONDEUR HORS POIGNÉES PO PROFONDEUR INCLUANT LES POIGNÉES PO PROFONDEUR MOINS PORTE PO PROFONDEUR AVEC PORTE OUVERTE 90 DEGRÉS PO HAUTEUR AU HAUT DE LA CHARNIÈRE DE LA PORTE PO HAUTEUR AU HAUT DU RÉFRIGÉRATEUR PO PROFONDEUR DU PRODUIT PO HAUTEUR DU PRODUIT PO LARGEUR DU PRODUIT PO ...

Page 22: ...4 10 Carte de garantie utilisé sous licence par Curtis International Ltd ...

Reviews: