Haier HLP21N, Service Manual
The Haier HLP21N is a top-loading portable washer, perfect for small spaces. Get the most out of this compact solution by downloading the free user manual from our website. Learn how to operate, troubleshoot, and maintain your washer efficiently with our comprehensive and easy-to-follow manual.
Share
Download


Reviews:
No comments
Related manuals for HLP21N

HWM33-200F
Brand: Haier Pages: 10

HWM33-200E
Brand: Haier Pages: 10

HWM130-0523S
Brand: Haier Pages: 18

HWM110-0713P
Brand: Haier Pages: 18

HWM100-728
Brand: Haier Pages: 18

HWM-G42A
Brand: Haier Pages: 40

HWM-7.5
Brand: Haier Pages: 15

HWM-20.0
Brand: Haier Pages: 8

HW-F1281ME
Brand: Haier Pages: 18

HW-E1450TVE
Brand: Haier Pages: 20

HW-D1050TVE
Brand: Haier Pages: 10

HW-C1470TVE ME-U
Brand: Haier Pages: 19

HW-C1260TVE-F
Brand: Haier Pages: 20

HW-C1060TVE
Brand: Haier Pages: 20

HW-C1050TVE
Brand: Haier Pages: 19
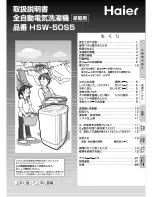
HSW-50S5
Brand: Haier Pages: 16

HNS1060TVE
Brand: Haier Pages: 18

HMS1000B
Brand: Haier Pages: 23


