habitat et jardin Mano 1293_100129, Manual
The Habitat et Jardin Mano 1293_100129 is a versatile outdoor furniture set designed to enhance your garden or patio. This Manual provides step-by-step instructions on how to assemble and maintain the product, ensuring its longevity and durability. Download your free Manual from manualshive.com to get started.
Share
Download


Reviews:
No comments
Related manuals for Mano 1293_100129
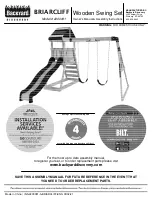
BRIARCLIFF
Brand: Backyard Discovery Pages: 51

Chouchou
Brand: habitat et jardin Pages: 15

Carnival Clubhouse
Brand: Rainbow Pages: 39

SHENANDOAH 65413B
Brand: Backyard Discovery Pages: 128

Oxford 6111
Brand: Backyard Discovery Pages: 87

SINGLE BENT OAK PORCH SWING
Brand: Nags Head Hammocks Pages: 2

10026904
Brand: Klarfit Pages: 36

PD248218D
Brand: Graco Pages: 20

1502 Series
Brand: Graco Pages: 6

422L
Brand: Sunset Swings Pages: 17

LK03
Brand: LifeSpan Pages: 8

63507
Brand: Moni Pages: 11

BABY JUMPER
Brand: Moni Pages: 40


