H3C MSR 800, Installation Manual
The H3C MSR 800 is a high-performance router designed for seamless connectivity. Ensure smooth operation with the Installation and Quick Start manual, available for free download on manualshive.com. Get to know your device inside out with in-depth instructions to maximize its capabilities.
Share
Download


Reviews:
No comments
Related manuals for MSR 800

DIR-850L
Brand: D-Link Pages: 4

DIR-830L
Brand: D-Link Pages: 12

DIR-803
Brand: D-Link Pages: 6

DIR-640L
Brand: D-Link Pages: 12

DIR-626L
Brand: D-Link Pages: 140

DIR-605L
Brand: D-Link Pages: 2

DIR-514
Brand: D-Link Pages: 48

DIR-510L
Brand: D-Link Pages: 16

DIR-506L
Brand: D-Link Pages: 16

DIR-1750
Brand: D-Link Pages: 2
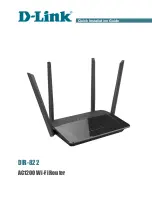
DIR-822
Brand: D-Link Pages: 35

DIR-2680
Brand: D-Link Pages: 178

ECP-C1
Brand: Zenitel Pages: 29

HM-434
Brand: HameTech Pages: 42

Xclaim Xi-2
Brand: Ruckus Wireless Pages: 3

EMG5523-T50B
Brand: ZyXEL Communications Pages: 2

WR54-01
Brand: Shiro Pages: 83

WNR3500 - RangeMax Next Wireless-N Gigabit Router Wireless
Brand: NETGEAR Pages: 124


