Grundig CDS2600iP, Instruction Manual
The Grundig CDS2600iP is a versatile audio system that delivers exceptional sound quality. To make the most out of this product, it is crucial to have the Instruction Manual handy. Download the manual for free from manualshive.com and explore all the features and functions this exceptional device has to offer.
Share
Download


Reviews:
No comments
Related manuals for CDS2600iP
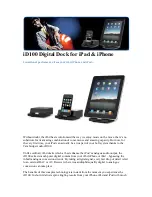
iD100
Brand: Cambridge Audio Pages: 6

MP3 Docking Station
Brand: Harman Kardon Pages: 8

WS-9049U-IT
Brand: La Crosse Pages: 4

WS-1912
Brand: La Crosse Pages: 9

S88907
Brand: La Crosse Pages: 12

JiMS-120
Brand: Jensen Pages: 11

ClimaTemp XXL
Brand: Bresser Pages: 24

DSH-410C3
Brand: Vantec Pages: 17

RF-DKS-580
Brand: Renkforce Pages: 8

DOCK419
Brand: Targus Pages: 8

308-1417BL
Brand: La Crosse Technology Pages: 16

JACKPORT
Brand: WHD Pages: 35

EWS-810
Brand: Hama Pages: 103

EWS-3100
Brand: Hama Pages: 67

1002UU01
Brand: Honeywell Pages: 9

Mini Dock 3 series
Brand: Lenovo Pages: 20

ThinkPad 40AF0135US
Brand: Lenovo Pages: 24

ThinkPad Hybrid USB-C with USB-A Dock
Brand: Lenovo Pages: 2


