background image

CUTTING PLOTTER

SERVICE MANUAL

FC7000-75/100/130/160

FC7000MK2-60/75/100/130/160

FC7000-UM-251-10-9370

Summary of Contents for FC7000-100

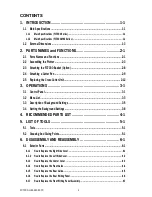
Page 1: ...CUTTING PLOTTER SERVICE MANUAL FC7000 75 100 130 160 FC7000MK2 60 75 100 130 160 FC7000 UM 251 10 9370...

Page 2: ......

Page 3: ...04 10 05 12 13 Part number for the pinch roller corrected 10 10 04 11 06 02 26 The distance adjustment pattern size changed 7 18 05 12 06 07 04 Part number for the Y drive pulley 38 assy corrected 10...

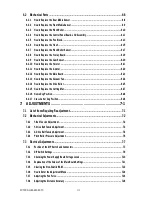
Page 4: ...OPERATIONS 3 1 3 1 Control Panel 3 1 3 2 Menu List 3 3 3 3 Description of Background Settings 3 5 3 4 Setting the Background Settings 3 8 4 RECOMMENDED PARTS LIST 4 1 5 LIST OF TOOLS 5 1 5 1 Tools 5 1...

Page 5: ...n 6 24 6 2 14 How to Replace the Drive Roller 6 25 6 2 15 How to Replace the Cutting Mat 6 27 6 2 16 Home Dog Position 6 28 6 2 17 Cross Cutter Dog Position 6 28 7 ADJUSTMENTS 7 1 7 1 List of Items Re...

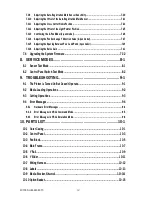
Page 6: ...ng the Servo Gain 7 31 7 4 Upgrading the System Firmware 7 32 8 SERVICE MODES 8 1 8 1 Sensor Test Mode 8 1 8 2 Control Panel Switch Test Mode 8 2 9 TROUBLESHOOTING 9 1 9 1 The Plotter is Turned On But...

Page 7: ...PU BLOCK 11 6 11 2 5 Main Board DC DRIVER 11 7 11 2 6 Main Board I F BLOCK 11 8 11 2 7 Main Board GRC SERVO BLOCK 11 9 11 2 8 Main Board MEMORY BLOCK 11 10 11 2 9 Main Board USB BLOCK 11 11 11 2 10 Co...

Page 8: ......

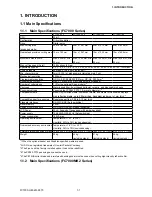
Page 9: ...g tool PPA33 TP12 1 2 mm pin diameter 4 Compatible media Mono vinyl chloride media fluorescent media and media for illuminated displays high reflective media up to 0 25mm thick Sandblast rubber up to...

Page 10: ...ing tool PPA33 TP12 1 2 mm pin diameter 4 Compatible media Mono vinyl chloride media fluorescent media and media for illuminated displays high reflective media up to 0 25mm thick Sandblast rubber up t...

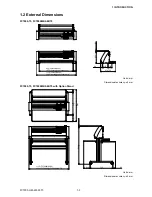
Page 11: ...60 1072 FC7000 75 FC7000MK2 75 62 170 476 763 383 21 123 94 1110 FC7000MK2 60 1260 FC7000 75 FC7000MK2 75 Units mm Dimensional accuracy 5 mm FC7000 75 FC7000MK2 60 75 with Option Stand 1110 FC7000MK2...

Page 12: ...FC7000 100 130 160 1560 FC7000 100 1860 FC7000 130 2120 FC7000 160 209 715 90 1190 20 209 715 1014 90 Units mm Dimensional accuracy 5 mm...

Page 13: ...s The front sensor is used to sense the leading edge of the media The rear sensor is used to sense the trailing edge of the media Pen carriage Moves the cutter pen or plotting pen across the media dur...

Page 14: ...inch roller forces strong and weak AC line inlet Inlet where the power cord is connected Media stocker Used to carry roll media and ensure its proper rotation Stock rollers A media roll is placed on t...

Page 15: ...en the media stocker brackets to the left and right inside surfaces of the plotter unit using two M4 binding head screws for each media stocker bracket 2 Insert an M4 screw in the second hole from the...

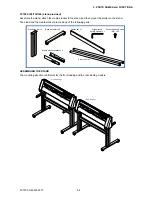
Page 16: ...on the stand The stand and the media stocker are made up of the following parts Base assembly x 2 Allen wrench for M5 screws x 1 Center bar x 1 Stand side bar x 2 Socket head cap screw M5 x 20 Stock r...

Page 17: ...t and right stand sides 2 Loosely fasten the center bar to the left and right stand sides with four socket head cap screws two on each side using the Allen wrench Socket head cap screws Socket head ca...

Page 18: ...nt for the front loading and the rear loading models Socket head cap screws Positioning pin Socket head cap screws Caster stoppers Positioning pin hole Front loading Rear loading 5 Tighten the socket...

Page 19: ...00 UM 251 9370 2 7 2 PARTS NAMES and FUNCTIONS Mounting the stock rollers Insert the stock rollers into the slots on the media stocker brackets Front Stock rollers Stock rollers Front loading Rear loa...

Page 20: ...ad cap screws using the Allen wrench Repeat this step with the other side Socket head cap screw Basket holder assembly Stand Socket head cap screw 2 Drape the middle section of the cloth basket over t...

Page 21: ...after the cutting plotter is turned on or whenever the pen is moving 1 Loosen the pen holder screw 2 While pushing the pen holder in the upward direction push the pen all the way into the holder until...

Page 22: ...While pushing the pen holder in the upward direction push the pen all the way into the holder until its ange contacts the upper part of the holder When you push the pen holder with your ngers the blad...

Page 23: ...2 Make sure that the bracket of the pen station is engaged in the upper groove of the pen 3 Close the pen hold mechanism on the pen station to hold the pen in place Do not leave a pen attached to the...

Page 24: ...down 2 Remove the screw holding the cross cutter unit in place and then remove the cross cutter unit Cross cutter unit 3 Remove the protective cover from the replacement cross cutter unit Be sure to r...

Page 25: ...the FC7000 is in MENU mode press the F3 key to select a function When the FC7000 is online press F3 to select the Condition numbers 3 and 7 After pressing the CONDITIONS key use F3 to adjust the cutt...

Page 26: ...E VIEW to move the pen carriage to the standby position Press it again to move the pen carriage to the origin point Press it one more time to return the pen carriage to its former position NEXT key Wh...

Page 27: ...en model only INTERFACE AREA PARAMETERS FUNCTION 1 FUNCTION 2 CROSS CUT PRE FEED MOVE STEP STEP SIZE GP GL only ORIGIN HP GL only ROTATE PERF LINE TYPE DATA SORTING RS 232C COMMAND AREA PAGE LENGTH EX...

Page 28: ...he power is turned on without any media loaded in the plotter the initial menu is displayed on the LCD The initial menu con guration is as follows Main menu Sub menu Initial menu STEP SIZE GP GL only...

Page 29: ...ect immediately prior to receipt of the W command When PEN UP is selected the pen is moved to the starting position for the drawing of arcs in the raised status This setting is only effective if a cut...

Page 30: ...els directly from the initially speci ed point to the last speci ed point Enabling Disabling the Media Sensors MEDIA SENSOR This function enables or disables the media sensors that detect the size of...

Page 31: ...Weak Normal media Normal Enabling Disabling the Beep Setting BEEP FOR KEY OPERATION This function selects whether to enable or disable the beep that is emitted whenever a control panel key is pressed...

Page 32: ...CH METRIC PEN UP MOVE ENABLED DISABLED MEDIA SENSOR ENABLED DISABLED PINCH ROLLER SENSOR ENABLED DISABLED CROSS CUT PRESSURE 30 CHECK PEN ENABLED DISABLED FAN POWER WEAK NORMAL BEEP FOR KEY OPERATION...

Page 33: ...and then press the ENTER key The asterisk indicates the currently selected setting If you do not wish to change the currently displayed setting press the NEXT key to move to the next menu 4 Turn off t...

Page 34: ......

Page 35: ...6710 Light Pointer Assembly 1 1 1 1 15 772126720 Registration Mark Sensor Board PR312207A 1 1 1 1 16 500052472 TDS 05B DC12V Fan 1 2 2 2 17 772126560 LCD Assembly 1 1 1 1 18 772126570 Control Panel Bo...

Page 36: ...500052472 TDS 05B DC12V Fan 1 1 2 2 2 14 772126560 LCD Assembly 1 1 1 1 1 15 772126570 Control Panel Board PR312208A 1 1 1 1 1 16 692126521 FFC312202A Control Panel Flexible Cable 1 1 1 1 1 17 772126...

Page 37: ...or Glue Point Grease or Glue name Application quantity 1 Cam Shinetu silicon grease G501 Suitable quantity 2 X drive motor pulley Shinetu silicon grease G501 Suitable quantity 3 Y drive motor pulley S...

Page 38: ......

Page 39: ...head screws from the right side cover 2 Remove the two M3L6 binding head screws from the right side plate M4L6 binding head screw M4L6 binding head screw M3L6 binding head screw M3L6 binding head scr...

Page 40: ...left side cover 2 Remove the two M3L6 binding head screws from the left side plate M4L6 binding head screw M4L6 binding head screw M3L6 binding head screw M3L6 binding head screw Right side cover Left...

Page 41: ...screw Right side cover Center cover assembly M3L6 binding head screw 2 Disconnect the cables from connector J2 and J3 on the main board Disconnect the cables from connector J2 and J3 on the main boar...

Page 42: ...ove the ve M3L6 binding head screws from the front guide for the FC7000 100 Remove the six M3L6 binding head screws from the front guide for the FC7000 130 Remove the seven M3L6 binding head screws fr...

Page 43: ...emove the ve M3L6 binding head screws from the rear guide for the FC7000 100 Remove the six M3L6 binding head screws from the rear guide for the FC7000 130 Remove the seven M3L6 binding head screws fr...

Page 44: ...for the FC7000 75 Remove the ve M3L6 binding head screws from the rear of the rear writing panel for the FC7000 100 Remove the six M3L6 binding head screws from the rear of the rear writing panel for...

Page 45: ...3L6 binding head screws from the front writing panel assembly for the FC7000 160 4 Loosen the ve M3L6 binding head screws at the top of the front writing panel assembly for the FC7000 75 Loosen the si...

Page 46: ...ear media sensor 1 Detach the rear guide see Subsection 6 1 5 2 Remove the M3L10 binding head screw attaching the rear media sensor 3 Disconnect the sensor from the connector Rear media sensor M3L10 b...

Page 47: ...ve the M3L6 binding head screw attaching the front media sensor bracket Front media sensor M3L6 binding head screw Front media sensor 3 Remove the M3L10 binding head screw attaching the front media se...

Page 48: ...er 1 Detach the right side of the E ring from the pinch roller shaft E ring Pinch roller shaft Pinch roller 2 Detach the pinch roller shaft from the pinch roller arm from the left side 3 Detach the pi...

Page 49: ...ding head screws attaching the control panel board from the top of the center cover M3L6 binding head screw 4 Remove the three M3L6 binding head screws holding the control panel bracket and the center...

Page 50: ...m the LCD assembly 9 Detach the control panel board from the control panel cover Control panel cover Control panel board 10 Detach the LCD assembly from the control panel cover LCD assembly Control pa...

Page 51: ...center cover see Subsection 6 1 3 3 Loosen the two M3L6 binding head screws attaching the pen block cover M3L6 binding head screw 4 Detach the pen block cover 5 Disconnect the cables from connector J5...

Page 52: ...he bottom of the pen block and the cutting mat Perform a visual check to make sure that the pen block is not mounted at an angle 10 mm 3 Reattach the other parts in the reverse order in which they wer...

Page 53: ...ubsection 6 1 2 2 Detach the center cover see Subsection 6 1 3 3 Detach the pen block see Subsection 6 2 5 4 Loosen the two M3L35 binding head screws adjusting the Y belt tension M3L35 binding head sc...

Page 54: ...ides of the pulley 3 Attach both ends of the Y belt to the Y slider so that four notches of the Y belt t into the Y slider then attach with the Y belt stopper plates removed in step 5 in the previous...

Page 55: ...Remove the M3L6 binding head screw attaching the pinch roller sensor bracket to the slider Y slider M3L6 binding head screw Pinch roller sensor bracket Pinch roller sensor board 6 Remove the two M3L6...

Page 56: ...ler sensor board 3 Attach the pinch roller sensor guard to the pinch roller sensor board bracket 4 Attach the pinch roller bracket to the Y slider Fit the top and left edges of the pinch roller bracke...

Page 57: ...c rivets attaching the exible cable holding plate Plastic rivet Flexible cable holding plate 3 Disconnect all the cables from the Y relay board 4 Remove the two M3L35 binding head screws attaching the...

Page 58: ...cam sensor 1 Detach the right side cover see Subsection 6 1 1 2 Disconnect the cable from the cam sensor M3L6 binding head screw Cam sensor 3 Remove the M3L6 binding head screw attaching the cam sens...

Page 59: ...he Y motor pulley then detach the Y motor How to reinstall the Y motor 1 Attach the Y motor to the Y motor bracket 2 Hang the Y drive belt on the Y motor pulley and the Y idler pulley 3 Attach the Y m...

Page 60: ...tall the X motor 1 Attach the X motor to the right side plate 2 Hang the X drive belt on the X drive pulley 3 Attach the X motor pulley to the X motor 4 Tighten the two M3L4WP set screws that hold the...

Page 61: ...onnect all the cables and exible cables from their connectors on the main board 3 Remove the four M3L6 binding head screws holding the main board to the chassis 4 Detach the main board from the chassi...

Page 62: ...see Subsection 6 1 4 2 Disconnect the vacuum fan from the relay connector Relay connector Vacuum fan 3 Use a long screwdriver to remove the two M3L35 binding head screws holding the vacuum fan as show...

Page 63: ...the X drive belt 5 Remove the two M3L4WP set screws holding the X drive pulley and detach the X drive pulley from the drive roller M3L6 binding head screw M3L4WP set screw X motor drive pulley X moto...

Page 64: ...ty of Loctite 222 on the two M3L4WP set screws holding the X drive pulley 3 Perform the X drive belt tension adjustment see Subsection 7 2 3 4 Spread a suitable quantity of the Shinetu silicon grease...

Page 65: ...mat 1 Peel off the cutting mat from the cutting mat base How to reinstall the cutting mat 1 Clean the surface of the cutting mat base with alcohol where the cutting mat was attached 2 Attach the new c...

Page 66: ...you remove or replace the dog as shown below If you have an error about the pinch roller position con rm position of this dog 115 mm Home position dog 6 2 17 Cross Cutter Dog Position Cross cutter do...

Page 67: ...r X Y Motor drive belt Auto registration mark sensor NOV RAM clear M Pen force adjustment M M Distance adjustment M M M Auto registration mark sensor adjustment N N N M Light pointer adjustment N M N...

Page 68: ...slider all the way to the right and pull the belt 20 mm towards the center using a force gauge Adjust the Y tension pulley adjustment screws evenly until the tension reads as follows Speci cation of t...

Page 69: ...our M3L6 binding head screws that hold the Y motor 3 Use the force gauge to pull the Y drive motor pulley ange with a 2 25 kg force 4 Tighten the four M3L6 binding head screws that hold the Y motor 5...

Page 70: ...screws that hold the X motor 3 Use the force gauge to push the X drive motor pulley ange with a 2 25 kg force as shown in the gure below M3L6 binding head screw 4 Tighten the mounting screws that hol...

Page 71: ...as shown in the gure below and catch the push pressure wire jig on the pinch roller shaft 5 Pull the wire of the push pressure wire jig in the direction of the arrow with the 10 kgf push pull gauge No...

Page 72: ...M 251 9370 7 6 7 ADJUSTMENT 7 If the measurement does not match this value adjust the pinch roller pressure adjustment screw and check again Pinch roller pressure adjustment screw 8 Reattach the cente...

Page 73: ...FC7000 UM 251 9370 7 7 7 ADJUSTMENT 7 3 Electrical Adjustments 7 3 1 Position of the DIP Switch and Connectors FC7000 J16 J13 J12 J24 J23 J2 J3 J1 J18 F1 J20 J17 J5 SW1 J4 J6 J7 J9 J8...

Page 74: ...FC7000 UM 251 9370 7 8 7 ADJUSTMENT FC7000MK2 J16 J13 J12 J61 J21 J2 J3 J1 J60 F1 F5 F4 J20 J17 J5 SW1 J4 J6 J7 J9 J8...

Page 75: ...n Model SW1 1 2 3 4 5 6 7 8 ON OFF SW1 1 2 3 4 5 6 7 8 ON OFF FC7000 160 MK2 160 FC7000 160 MK2 160 2 Pen Model SW1 1 2 3 4 5 6 7 8 ON OFF SW1 1 2 3 4 5 6 7 8 ON OFF NOV RAM Clear FC7000Mk2 60 FC7000M...

Page 76: ...tion 6 1 2 2 Turn on the power switch and then check the voltage levels CN1 CN2 Power supply board 3 The output voltage levels of the pins are shown in the table below Connector name Pin No Name Outpu...

Page 77: ...ample record are shown below 25 47 100 228 346 X 0 X 80 X Y 4 Y 50 Y Explanation of the values Pen force values 10 g 40g 120 g 300 g 450 g 400g Distance adjustment values Gain adjustment values Auto r...

Page 78: ...5 FC7000 75 MK2 75 2 Pen Model SW1 1 2 3 4 5 6 7 8 ON OFF SW1 1 2 3 4 5 6 7 8 ON OFF FC7000 100 MK2 100 FC7000 100 MK2 100 2 Pen Model SW1 1 2 3 4 5 6 7 8 ON OFF SW1 1 2 3 4 5 6 7 8 ON OFF FC7000 130...

Page 79: ...2 75 FC7000 75 MK2 75 2 Pen Model SW1 1 2 3 4 5 6 7 8 ON OFF SW1 1 2 3 4 5 6 7 8 ON OFF FC7000 100 MK2 100 FC7000 100 MK2 100 2 Pen Model SW1 1 2 3 4 5 6 7 8 ON OFF SW1 1 2 3 4 5 6 7 8 ON OFF FC7000 1...

Page 80: ...and ENTER keys Or After turning on the power press the TEST key and the ENTER key simultaneously within 2 seconds 2 Load a sheet of paper in the plotter 3 The plotter displays the menu shown below CO...

Page 81: ...MONITOR Y RMS SENSING SPEED RMS THRESHOLD Sensor test Key test Pen pressure adjustment Gain adjustment Not used 1 and 2 pen position adjustment for the 2 pen model Distance adjustment 2 pen exchange...

Page 82: ...assembly use the force gauge to measure the actual force If you have only replaced the main board input the adjustment values that were recorded Use the UP ARROW key or DOWN ARROW key to change the fo...

Page 83: ...do it quickly Delaying the pen force adjustment changes the temperature of the actuator and causes arti cially lower readings When this happens the actual pen force may be higher than the speci catio...

Page 84: ...paper color must be white and it is recommended that high quality paper made for ink jet printers be used 4 Mount a disposable ink pen 0 2 mm tip size in the pen holder 5 Set the plotting conditions t...

Page 85: ...or X axis adjustment value The formula of the input value is as follows Input value for X axis 300mm measured X distance x 10 Input value for Y axis 300mm measured Y distance x 10 For example If you...

Page 86: ...u shown below DISTANCE ADJUST RM SENSOR LEVEL ADJ 1 2 PEN POSITION ADJ DISTANCE ADJUST 2 PEN EXCHANGE ADJ RM SENSOR LEVEL ADJ 1 PEN MODEL 2 PEN MODEL 5 Press the F4 key to start the registration mark...

Page 87: ...aper made for ink jet printers be used 4 Mount a disposable ink pen 0 2 mm tip size in the pen holder 5 Set the plotting conditions to the following settings Force 12 Speed 40 Quality 1 Tool Pen 6 Low...

Page 88: ...k Adjustment lines 11 The plotter immediately adjusts the registration mark sensor position automatically and adds a vertical line and a horizontal line to the scanned plotted pattern 12 Measure the o...

Page 89: ...ze The menu shown below is displayed after the media set lever is raised CONDITION 12 40 READY 1 PEN 4 Press the MENU key to display the menu shown below SENSOR TEST KEY TEST PEN FORCE XY GAIN 5 Press...

Page 90: ...Press the UP or DOWN ARROW key to adjust the gap 1 unit 0 05 mm Cross cutter dog Cross cutter release plate 0 to 0 2 mm 12 Press the F4 key to con rm the gap If the cross cutter dog presses on the cu...

Page 91: ...Pen 6 Lower the media set lever to raise the pinch rollers and then raise the media set lever to detect the paper size The menu shown below is displayed after the media set lever is raised CONDITION 1...

Page 92: ...Y GAIN 4 Press the NEXT key until the menu shown below is displayed LED PEN POS ADJ 2 PEN TYPE MACHINE RM SENSOR LEVEL RM DEBUG 5 Press the F2 key to display the menu shown below 2 PEN SYSTEM ENABLED...

Page 93: ...the plotting conditions to the following settings Force 12 Speed 40 Quality 1 Tool Pen 7 Lower the media set lever to raise the pinch rollers and then raise the media set lever to detect the paper siz...

Page 94: ...holder and the 2nd pen station 2nd Pen Holder 2nd Pen Station Right Side Plate 1 mm 13 Adjust the gap to a value of 1 mm Press the LEFT or RIGHT ARROW key to change the PENSELE POS value 1 unit 0 05...

Page 95: ...size in both the pen 1 holder and the pen 2 holder 5 Set the plotting conditions to the following settings Force 12 Speed 40 Quality 1 Tool Pen 6 Lower the media set lever to raise the pinch rollers...

Page 96: ...en 2 Cross mark plotted by pen 1 Y X Y Y X X 15 Press the F4 key to display the menu shown below PEN 1 2 OFFSET ADJUST X 0 0 mm Y 0 0 mm 16 Set the offset value s Press the UP ARROW key or DOWN ARROW...

Page 97: ...ain board How to adjsut the servo gain 1 Mount a 0 9 mm diameter cutter pen in the pen holder 2 Load a sheet of paper in the plotter 3 Turn on the power while pressing the TEST and ENTER keys or after...

Page 98: ...ftware to your computer before upgrading the system rmware How to upgrade the system rmware 1 Connect the computer and the plotter via the USB interface 2 Load a sheet of paper in the plotter 3 Turn o...

Page 99: ...layed while data is being received KB RECEIVED 9 The plotter will start the initialization routine when all the data has been received The rmware version is displayed during the initialization routine...

Page 100: ......

Page 101: ...R TEST KEY TEST PEN FORCE XY GAIN 4 Press the NEXT key until the menu shown below is displayed SENSOR TEST KEY TEST PEN FORCE XY GAIN 5 Press the F1 key to display the menu shown below YL CH PL XL XL...

Page 102: ...KEY TEST PEN FORCE XY GAIN 5 Press the F2 key to display the menu shown below 00000000 00000000 6 Press each key on the control panel the status will change from 0 to 1 The status of each digit Key S...

Page 103: ...curely connected to the plotter s AC line inlet Yes Verify item 2 2 Is the FFC312202A exible cable securely connected to the main board and the control panel No Connect the exible cable securely Yes V...

Page 104: ...board and the sensor No Connect the cable securely Yes Replace the cam sensor board The plotter can t recognize the Y direction of the media size 1 Is there any dust on the pinch roller sensor Yes Cle...

Page 105: ...ify item 5 5 Is the pen arm shaky Yes Adjust the pen arm shaft slider tension The blade skips and does not completely cut lines that should be solid 1 The blade is extended too far Adjust the blade le...

Page 106: ...othly No Check and adjust the X or Y belt tension and X or Y motor belt tension Yes Verify item 2 2 Is the X or Y exible cable securely connected No Connect it securely Yes Replace the X or Y exible c...

Page 107: ...e plotter No Set the correct model name Con gure your software application menu to permit Graphtec plotter control Re specify the software application s interface conditions ERROR 4 PARAMETER OVERFLOW...

Page 108: ...recognizable command No Verify item 2 Yes Send correct data to plotter 2 Is there any noise on the line No Verify item 3 Yes Check the interface cable or move the plotter to another location 3 Has the...

Page 109: ...r output command was executed Check the ow of your programmed data ERROR 11 Invalid byte following ESC The ESC character was followed by an invalid byte Check the ESC commands in your program ERROR 12...

Page 110: ......

Page 111: ...Guide 100 1 FC7000 100 MK2 100 621281093 Rear Guide 130 1 FC7000 130 MK2 130 621291093 Rear Guide 160 1 FC7000 160 MK2 160 6 621390030 Front Writing Panel 60 1 FC7000MK2 60 621261034 Front Writing Pan...

Page 112: ...FC7000 UM 251 9370 10 2 10 PARTS LIST 1 2 3 4 5 6 7 8 10 9 Control Panel Assy 11 12...

Page 113: ...Assy 1 3 692126521 Cable FFC312202A 1 Control Panel Flexible Cable 4 692126170 Cable CA312217 1 Main Board to Control Panel 5 621264161 Bracket Top 1 6 621264143 Control Panel Sheet 1 621394140 Contr...

Page 114: ...FC7000 UM 251 9370 10 4 10 PARTS LIST Control Panel 5 4 3 6 9 8 7 1 1 2 3 5 10...

Page 115: ...er Base Bracket 1 12 310068320 Bearing Roller 2 683ZZMC3PS2S 13 621263212 Moving Coil Base 1 14 500050122 Encoder Sensor HEDS 9720 P50 1 15 772126720 Auto Registration Mark Sensor Assy 1 16 772126340...

Page 116: ...FC7000 UM 251 9370 10 6 10 PARTS LIST Pen Block 1 2 3 4 5 6 7 8 9 10 11 12 13 14 15 16 17 Pen Holder for 2 pen Model 22 21 18 20 19 23 23 19 20 21 22 25 24 26 Pen Station for 2 pen Model...

Page 117: ...00 100 MK2 100 621260011 Pillow Block 9 FC7000 130 MK2 130 621260011 Pillow Block 11 FC7000 160 MK2 160 16 310014820 Bearing MR148ZZMC3PS2S 5 FC7000 75 FC7000MK2 60 310014820 Bearing MR148ZZMC3PS2S 7...

Page 118: ...FC7000 UM 251 9370 10 8 10 PARTS LIST Main Frame 15 20 16 18 17 11 8 12 7 6 5 4 3 2 1 10 9 14 13 21 25 26 22 23 24 19 14 20...

Page 119: ...11 Pinch Roller Base 3 FC7000 MK2 100 130 621263011 Pinch Roller Base 4 FC7000 MK2 160 20 621230111 Cam 2 FC7000 MK2 75 FC7000MK2 60 621230111 Cam 3 FC7000 MK2 100 130 621230111 Cam 4 FC7000 MK2 160 2...

Page 120: ...elt 150S2M 1000 1 FC7000MK2 60 621261220 Y Belt 150S2M 1150 1 FC7000 MK2 75 621271220 Y Belt 300S2M 1450 1 FC7000 MK2 100 621281220 Y Belt 250S2M 1750 1 FC7000 MK2 130 621291220 Y Belt 300S2M 2010 1 F...

Page 121: ...72126650 Pinch Roller Sensor Board 1 3 621173150 Y Sensor Bracket B 1 4 095013010 Roller B13 8 5 621183403 Y Slider L FC51 1 6 621183410 Roller Tension Plate L 1 7 692123350 Spacer CL 310N 2 8 7721266...

Page 122: ...1 FC7000 100 692126111 CA312211A Fan to Main Board 1 FC7000 130 160 3 692126012 CA312201B Power Supply Switch to Main Board 1 FC7000 75 692126022 CA312202B Power Supply Switch to Main Board 1 FC7000 1...

Page 123: ...350 Emblem 100 1 FC7000 100 621284350 Emblem 130 1 FC7000 130 621294350 Emblem 160 1 FC7000 160 621312210 Emblem 960 1 960 621314210 Emblem 975 1 975 621315210 Emblem 9100 1 9100 621316210 Emblem 9130...

Page 124: ...Bar 100 1 FC7000 MK2 100 621281120 Center Bar 130 1 FC7000 MK2 130 621291120 Center Bar 160 1 FC7000 MK2 160 4 621391330 Stock Roller 60 2 FC7000MK2 60 621261332 Stock Roller 75 2 FC7000 MK2 75 62127...

Page 125: ...r Pipe 7060 1 FC7000MK2 60 621269440 Center Pipe 7075 1 FC7000MK2 75 621279440 Center Pipe 7100 1 FC7000MK2 100 621289440 Center Pipe 7130 1 FC7000MK2 130 621299440 Center Pipe 7160 1 FC7000MK2 160 5...

Page 126: ......

Page 127: ...OMBOSNS CATHODE 2 1 2 MC MC FG GND GND PENB 5V PENA 1 2 3 4 5 6 7 8 5V DF1B 4P B3B PH B6B PH K DF1B 4P 5566 02 5566 02 GND YENA YENB 5V GND XENA XENB 1 2 3 4 5V X SNS GND 5V 1 2 3 5V GND CAMZ 1 2 3 4...

Page 128: ...0 J701 5V LED DRV TOMBOSNS CATHODE 2 1 2 MC MC FG GND GND PENB 5V PENA 1 2 3 4 5 6 7 8 5V DF1B 4P B3B PH B6B PH K DF1B 4P 5566 02 5566 02 GND YENA YENB 5V GND XENA XENB 1 2 3 4 5V X SNS GND 5V 1 2 3 5...

Page 129: ...OMB RESET RDZ XCOMA MENUZ MENULED WRLZ YCOMB CS1Z SFRZ PNENA PNENB A 0 21 NVRAMCSZ IOCS11Z MENUINTZ HOLDINTZ KROMCSZ USB1CSZ MINE ENB IOCS12Z VIEWZ VIEWINTZ USB_OPT USB_OPT D 0 15 A 0 21 USB1CSZ WRLZ...

Page 130: ...A 1 2 3 4 U39B NJM3403A 5 6 7 4 1 1 U39A NJM3403A 3 2 1 4 1 1 JP14 RE H022TD 1130 JP10 RE H022TD 1130 C97 104 R113 1 5K JP11 RE H022TD 1130 R98 100K R102 10K R116 3 3K R103 47K R104 150K R96 100K D48...

Page 131: ...102U U3A NJM3404AM 3 2 1 8 4 R13 10K R76 0 FL9 N2012Z121T03 R2 470 2012 R85 0 FL4 EXCCET102U R20 C4 101 R5 470 2012 C9 472 FL6 EXCCET102U R82 15K R1 470 2012 D2 1SS352 TPH3 C6 104 R3 470 2012 J3 20FMZ...

Page 132: ...52 72 74 73 75 78 79 84 76 91 92 93 94 95 96 98 99 97 100 45 24 25 26 28 51 50 48 47 38 36 34 41 40 44 49 46 43 42 85 86 87 88 89 102 104 105 106 107 108 110 111 112 1 2 83 80 81 82 12 73 56 77 301 3...

Page 133: ...K D20 SFPW 56 C36 152 D14 SFPW 56 C35 153 D31 SFPW 56 F1 RXEF110 U8A NJM3404AM 3 2 1 8 4 C44 103 50V R42 1K R78 47 3W J9 B2B PH K 1 2 R29 33_1W J6 5566 02 1 2 D15 SFPW 56 U1F 74LS06 13 12 QA2 L6203 2...

Page 134: ...3 D4 D5 D6 D7 D8 U21 A3953SLB 12 13 4 5 2 1 6 7 8 16 3 10 15 9 14 11 M GND M GND D GND D GND REF BRAKE LOGIC VCC PHASE ENABLE LOAD SUPP RC OUTA OUTB LOAD SUPP MODE SENSE U35 74HC273 SO 1 11 2 5 6 9 12...

Page 135: ...7 14 32 16 33 17 23 18 24 19 20 21 47 46 49 50 DDV DDV TSNS2 DDV DDV CS4 SSV SSV TSNS1 SSV SSV ADTRG SSV SSV SFREE SSV SSV CS6 TSTIN WAIT CHALED2 OUTDIS TSTIN2 CHARTHOLD HISINLED TSTIN3 CHALED1 PENLED...

Page 136: ...DQ6 WE DQ7 A0 DQ8 OE DQ9 SSV DQ10 UCAS DQ11 A1 DQ12 RAS DQ13 A2 DQ14 DQ15 A3 A4 A5 A6 A7 A8 A9 NC NC C84 104 C82 10uF 16V U27 BR93L86RF W 3 4 7 1 2 6 8 5 DI DO NC CS SK TEST CCV DNG U24 MBM29F800BA 70...

Page 137: ...8 47uF 16V D29 HSM126S R73 1 5K D30 HSM126S R75 22 J20 USB OPTION TYPE B 1 2 3 4 Vcc D D GND C106 104 Y3 XPEEEC6 00MHz FL31 EXCCET103U R74 22 U30 ML60852A 44 43 42 41 38 37 36 35 22 21 20 19 16 15 14...

Page 138: ...6 7 8 9 10 11 12 SW817 HOLD C803 104 D1 1SR139 400 SW813 CONDITION SW810 NEXT SW805 COPY C802 104 SW818 MENU LED801 POWERLED J803 DF11 10DP 2DSA 1 2 3 4 5 6 7 8 9 10 SW806 TEST C801 104 SW802 F2 SW807...

Page 139: ...J502 08FE ST VK N 1 2 3 4 5 6 7 8 J601 52089 0410 1 2 3 4 U701 KR1228 4 3 1 2 U501 LG 207D PEN RELAY BOARD PR312205B REGISTRATION MARK SENSOR BOARD PR312207B PINCH ROLLER SENSOR BOARD PR312207B 2 1 3...

Page 140: ...FC7000 UM 251 9370 11 14 11 BLOCK DIAGRAMS AND CIRCUIT DIAGRAMS 11 3 Circuit Diagrams FC7000MK2 Main Board 11 3 1 Main Board CPU...

Page 141: ...FC7000 UM 251 9370 11 15 11 BLOCK DIAGRAMS AND CIRCUIT DIAGRAMS 11 3 2 Main Board CPU...

Page 142: ...FC7000 UM 251 9370 11 16 11 BLOCK DIAGRAMS AND CIRCUIT DIAGRAMS 11 3 3 Main Board FPGA...

Page 143: ...FC7000 UM 251 9370 11 17 11 BLOCK DIAGRAMS AND CIRCUIT DIAGRAMS 11 3 4 Main Board I F...

Page 144: ...FC7000 UM 251 9370 11 18 11 BLOCK DIAGRAMS AND CIRCUIT DIAGRAMS 11 3 5 Main Board Motor Drive...

Page 145: ...FC7000 UM 251 9370 11 19 11 BLOCK DIAGRAMS AND CIRCUIT DIAGRAMS 11 3 6 Main Board Memory...

Page 146: ...FC7000 UM 251 9370 11 20 11 BLOCK DIAGRAMS AND CIRCUIT DIAGRAMS 11 3 7 Main Board Power Supply...

Reviews: