GRANDSTATE 11122411, Инструкции по безопасности, установке, эксплуатации и техническому обслуживанию
"GRANDSTATE 11122411" - этот продукт поставляется с руководством по безопасности, инструкциями по установке, эксплуатации и обслуживанию. Вы можете бесплатно загрузить руководство с manualshive.com. Надежный и удобный в использовании, этот товар обеспечит вам надежность и безопасность в эксплуатации.
Поделиться
Скачать


Отзывы:
Нет отзывов
Похожие инструкции для 11122411

M0601
Бренд: Makita Страницы: 28

42125
Бренд: Landmann Страницы: 69

Evolve grill GFP84SP
Бренд: George Foreman Страницы: 2

Gourmet Health Grill TG400XL
Бренд: Breville Страницы: 18

0513-21
Бренд: Milwaukee Страницы: 24

Summit S-640
Бренд: Weber Страницы: 28

463210310
Бренд: Char-Broil Страницы: 32

Smokeless Grill Plus
Бренд: PowerXL Страницы: 2

G-SPORTFR
Бренд: TEC Страницы: 24
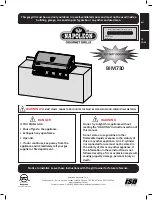
BIM730
Бренд: Napoleon Страницы: 60

CBC900W-C
Бренд: Uniflame Страницы: 16

KCY-35QE
Бренд: Cayken Страницы: 12

Grill Zone PG-4020200LA
Бренд: PERMASTEEL Страницы: 36

ARG400
Бренд: Bestron Страницы: 27

HAWK G539
Бренд: Alva Страницы: 19

30 Express
Бренд: Castle, Inc. Страницы: 20

G2082
Бренд: gascraft Страницы: 16

M605RBCSS-1 MIRAGE 605
Бренд: Napoleon Страницы: 24


