Gorilla Playsets 04-0019, Assembly Manual
The Gorilla Playsets 04-0019 Assembly Manual is an essential resource for anyone looking to set up their Gorilla Playsets 04-0019. This comprehensive manual provides step-by-step instructions and detailed diagrams to ensure a smooth and hassle-free assembly process. For your convenience, it's available for free download at manualshive.com, allowing you to access it anytime, anywhere.
Share
Download


Reviews:
No comments
Related manuals for 04-0019
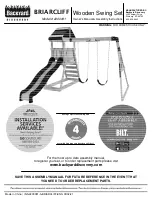
BRIARCLIFF
Brand: Backyard Discovery Pages: 51

CF2626
Brand: Lakeland Mills Pages: 4

Neospiel 07.01.030
Brand: playparc Pages: 10

PS48U
Brand: All Things Cedar Pages: 2

Taggies Cozy Posies 60257-ES
Brand: Kids II Pages: 28

Bench Swing DWSW1
Brand: Pawleys Island Pages: 2

Country Living CLGNS604
Brand: Polywood Pages: 2

SSS-0073
Brand: Swing Set Stuff Pages: 3

970501
Brand: Schildkröt Pages: 32

5.4 Jaguar Playcenter
Brand: Tree Frogs Pages: 117

TATOU
Brand: Trigano Pages: 6


