GoPresence SMART 4K, User Manual
Introducing the GoPresence SMART 4K user manual, your comprehensive guide to unlocking the full potential of this cutting-edge product. Get ready to enhance your experience with crystal-clear instructions, tips, and troubleshooting solutions - all available for free download from manualshive.com. Maximize your product's potential with our user manual today!
Share
Download


Reviews:
No comments
Related manuals for SMART 4K

RV2003H
Brand: Concertone Pages: 12

MC16-PAC-2-KIT
Brand: Roger Pages: 2

KAI-1P
Brand: D-Box Pages: 12

SC302T
Brand: SIMARINE Pages: 22

DUPLEX REX3
Brand: JETI model Pages: 64

Laiatech Laia t-Pod BT
Brand: LAIA Pages: 13

VRX746VD
Brand: Clarion Pages: 66

DOCKCONTROLLER DC-200
Brand: Motorola Pages: 16

HP 4062F
Brand: HP Pages: 174

7 620 320 024
Brand: Bosch Pages: 252

SFQ-03I
Brand: Sound Freaq Pages: 19

KH 2340
Brand: E-Bench Pages: 22

SkyLink
Brand: ARRI Pages: 20

DVD-E600MK2
Brand: Yamaha Pages: 33

LSX-170
Brand: Yamaha Pages: 44
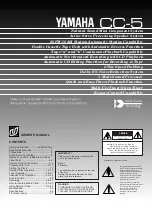
CC-5
Brand: Yamaha Pages: 40

GX-3
Brand: Yamaha Pages: 44

GX-500
Brand: Yamaha Pages: 46


