


Quick Start Guide
GV-Camera Reader
GV-CR420
© 2013 GeoVision Inc. All rights reserved.
Thank you for purchasing GV-Camera Reader. This guide is designed to assist
new users in getting started on the GV-Camera Reader. For detailed information
on how to use the GV-Camera Reader, please refer to
GV-Camera Reader User’s
Manual
on the supplied software DVD.
1
Introduction
Welcome to the
GV-Camera Reader Quick Start Guide
. The quick start
guide covers the basic installations and configurations of GV-Camera
Reader. For the detailed user’s manual, see the
GV-Camera Reader
User’s Manual
on the supplied software DVD.
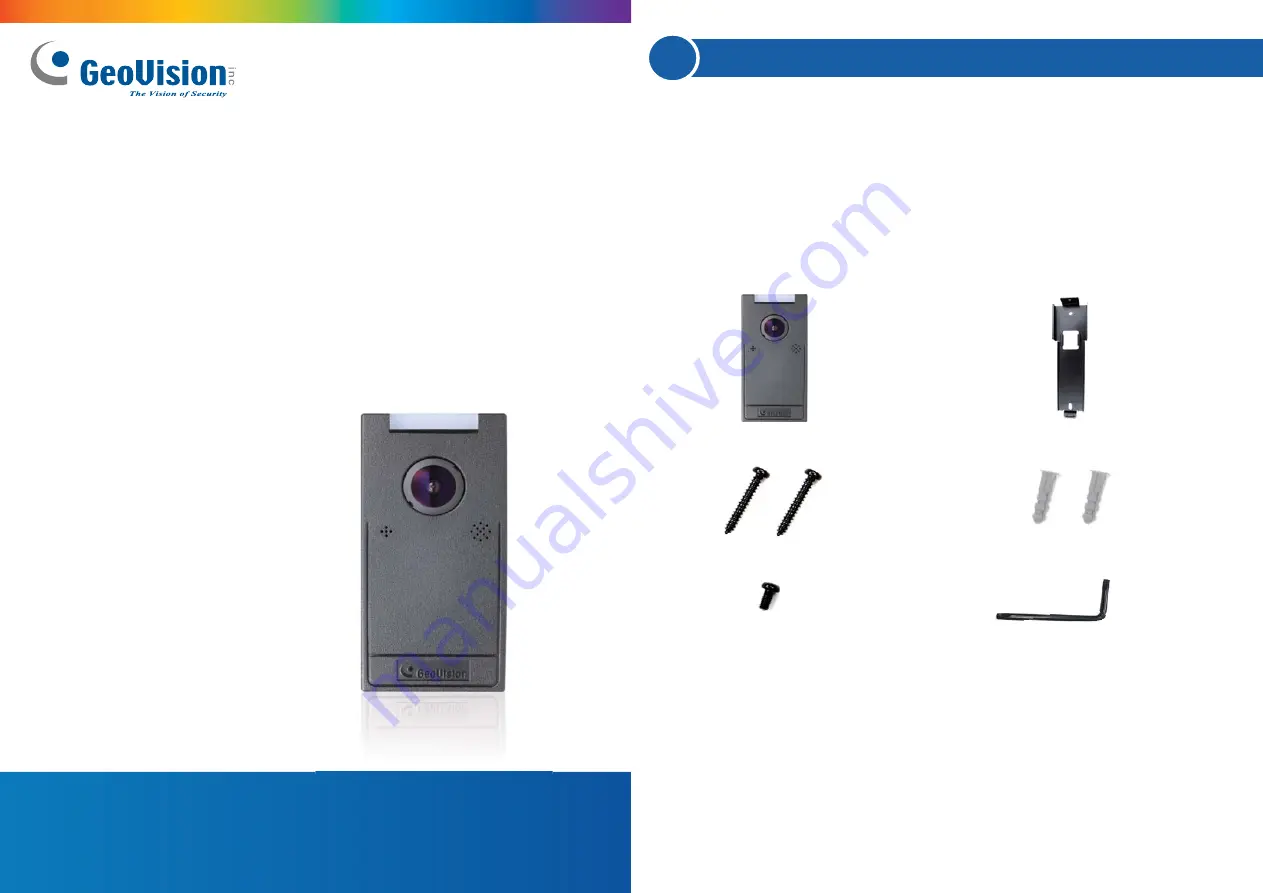
●
GV-CR420 x 1
●
Mounting Plate x 1
●
Standard Screw x 2
●
Plastic Screw Anchor x 2
●
Security Screw x 1
●
DC 12V Power Adapter x 1
●
GV-Camera Reader Quick Start Guide x 1
●
Software DVD x 1
●
Torx Wrench x 1
Packing List
2013/02
English
CR420V101-QG-A


