GE MONOGRAM ZCG3100 BB, Installation Instructions Manual
The GE Monogram ZCG3100 BB is a high-quality kitchen appliance featuring advanced technology and premium design. Ensure seamless installation by referring to the detailed and easily accessible Installation Instructions Manual, available for free download on our website. Experience the absolute best in cooking convenience and efficiency with this exceptional product.
Share
Download


Reviews:
No comments
Related manuals for MONOGRAM ZCG3100 BB
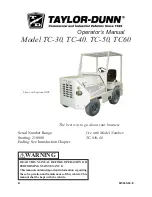
TC-30
Brand: Taylor-Dunn Pages: 60

Versu N Series
Brand: Valtra Pages: 518

I3030
Brand: LS tractor Pages: 104

Jivo 245 DI
Brand: Mahindra Pages: 87

Tractors
Brand: SAME Pages: 24

79114
Brand: Toro Pages: 2

08881 SAND PRO 5000
Brand: Toro Pages: 28

D155AX-6
Brand: Komatsu Pages: 6

D275A-5R
Brand: Komatsu Pages: 8

D155AX-8E0
Brand: Komatsu Pages: 420

TX1000
Brand: Iseki Pages: 64

TXG23
Brand: Iseki Pages: 81

SXE213H95
Brand: Iseki Pages: 80

TM3215
Brand: Iseki Pages: 103

10577RB
Brand: Hurricane Pages: 96


