background image

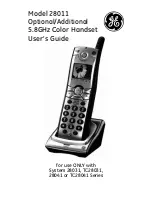
Model 28011

Optional/Additional  

5.8GHz Color Handset 

User’s Guide

for use ONLY with  

System 28031, TC28031,   

28041 or TC28041 Series

Summary of Contents for 28011EE1

Page 1: ...Model 28011 Optional Additional 5 8GHz Color Handset User s Guide for use ONLY with System 28031 TC28031 28041 or TC28041 Series...

Page 2: ...ur own telephone equipment if you are on a party line Check with your local telephone company US Number is located on the cabinet bottom REN Number is located on the cabinet bottom Notice must be give...

Page 3: ...lecommunications equipment and receiving antenna Connect the telecommunications equipment into an outlet on a circuit different from that to which the receiving antenna is connected If these measures...

Page 4: ...eening Calls from the Handset 17 Telephone Operation 18 charge in use indicator on the base 18 Visual Ring Indicator on the Handset 18 Standby Screen 18 Making a Call 18 Answering a Call 18 Volume 18...

Page 5: ...ional Headset 35 Connecting the Belt Clip 35 Connecting an Optional Headset to the Handset 35 Changing the Battery 35 Battery Safety Precautions 36 Display Messages 36 Handset Sound Signals 38 Trouble...

Page 6: ...e the power in your home goes out Before You Begin Parts Checklist for model 28011xx1 Make sure your package includes the items shown here Modular telephone line jack Wall plate Handset Belt clip Batt...

Page 7: ...ith interference please refer to the owner s manual for these devices on how to properly set channels to avoid interference Typical devices that may use the 5 8 GHz frequency for communication include...

Page 8: ...AUSE RINGER button INTERCOM button erase button FLASH DELETE button PHONEBOOK button REDIAL button EXIT button play button rev review button TALK CALL BACK button CALLER ID VOLUME button EARPIECE CALL...

Page 9: ...de the compartment NOTE It is important to maintain the polarity black and red wires to the jack inside the compartment To ensure proper battery installation the connector is keyed and can be inserted...

Page 10: ...ress 6 and 5 buttons to navigate to the desired menu option Press the SELECT button to activate a menu option For details on programming refer to the applicable section During programming you may pres...

Page 11: ...croll to LANGUAGE 2 Press the SELECT button to enter the menu 3 Use the 6 or 5 button to scroll to the desired language The default is ENGLISH 4 Press the SELECT button to save your selection You will...

Page 12: ...he 7 key 4 times for the letter S press the 6 key once for the letter M press the 4 key 3 times for the letter I Press the 8 key for the letter T press the 4 key twice for the letter H 4 Press the SEL...

Page 13: ...n Follow the steps below to deregister all handsets at the same time WARNING It is not recommended that a handset be deregistered unless absolutely necessary because once a handset is deregistered tha...

Page 14: ...s of picture download see the Picture Download section From the DISPLAY SETTING menu 1 Use the 6 or 5 button to scroll to WALLPAPER 2 Press the SELECT button to enter the menu 3 Use the 6 or 5 button...

Page 15: ...OUND SETTING 3 Press the SELECT button to enter the menu Ringer Volume From the SOUND SETTING menu 1 Use the 6 or 5 button to scroll to RINGER VOLUME 2 Press the SELECT button to enter the menu 3 Use...

Page 16: ...example to play messages 1 Press the MENU button and use 6 or 5 button to scroll to ANSWERER 2 Press the SELECT button and use 6 or 5 button to select REMOTE ACCESS 3 Press the SELECT button again ANS...

Page 17: ...ER the unit answers after the 3rd ring if there are NEW messages in the answering system OR the unit answers after the 5th ring if there are NO new messages Then when you access the answering system f...

Page 18: ...ess the TALK CALL BACK or SPEAKER button 2 When finished press the TALK CALL BACK or SPEAKER button or place the handset in the base cradle to hang up Answering a Call Check the display to see who is...

Page 19: ...quickly redial the last number you dialed 1 Press the TALK CALL BACK or SPEAKER button 2 Press the REDIAL button OR To quickly choose from any of the last three numbers you dialed 1 Press the REDIAL...

Page 20: ...t is paged and emits a tone 7 To cancel the page press the EXIT INT or TALK CALL BACK button on the originating handset OR Press the INT button on the receiving handset to enter intercom mode Mute To...

Page 21: ...rocedures can ONLY be done with Model 28011 and 28041 handsets 1 Make sure your handset and the handset to be monitored are not in talk mode 2 Press the MENU button and use the 6 or 5 button to scroll...

Page 22: ...handsets shows on the display Use the 6 or 5 button to scroll to the desired handset you want to page 5 Press the SELECT button 6 The receiving handset is paged and emits a tone 7 To cancel the page...

Page 23: ...the intercom conversation 6 When finished press the EXIT or INT button on either handset to end the intercom call 7 The originating handset returns to the talk mode and you can resume your original t...

Page 24: ...ler ID CID IMPORTANT In order to use this unit s Caller ID features you must subscribe to either the standard Name Number Caller ID Service or Call Waiting Caller ID Service To know who is calling whi...

Page 25: ...call is automatically deleted You may review the stored information at any time Calls received since your last review show as NEW CALL XX on the top line of the display Reviewing CID Records As calls...

Page 26: ...u may also store CID information in the Phone Book NOTE It is important that you format CID records correctly for dialing out BEFORE storing in the Phone Book as you cannot reformat CID records stored...

Page 27: ...TE ALL 5 Press the SELECT button to show DELETE ALL 6 Press the SELECT button again to confirm the deletion The display shows DELETED The display shows DELETED followed by NO CALLS NOTE Press the EXIT...

Page 28: ...nter the telephone number up to 20 digits including pauses 9 Press the SELECT button to save the number The display shows SET RINGER TONE 10 Use the 6 or 5 button to scroll to your desired ringer tone...

Page 29: ...tton on the handset to insert a delay in dialing sequence of a stored number when a pause is needed to wait for a dial tone for example after you dial 9 for an outside line or to wait for a computer a...

Page 30: ...ss the SELECT button again to show the option menu The display shows EDIT and DELETE 4 Use the 6 or 5 button to scroll to DELETE 5 Press the SELECT button and the display shows the details of the reco...

Page 31: ...age Editor Software you can view and convert your images Once you have selected your file and viewed your image in the software use the included USB cable to send the converted image directly into you...

Page 32: ...to close window Choosing the Downloaded Image as Wallpaper Refer to Section Telephone Setup Display Setting Wallpaper Assigning the Downloaded Image to Phone Book Record Refer to Section Phone Book Ad...

Page 33: ...n display NOTE If the memory is full the handset will prompt FULL when the SELECT button is pressed in step 7 Record with Included Audio Cable or an Optional Headset Audio Cable Before recording the r...

Page 34: ...e SELECT button to confirm and the display will show the count down display again 3 Follow the recording steps to record the ringer tone Record with the Handset Microphone From the REC RINGER TONE men...

Page 35: ...d with an optional headset for hands free operation 1 Connect the headset to the headset jack on the side of the handset The handset receiver and microphone are disabled when the headset is connected...

Page 36: ...n the battery used in your Thomson Inc product indicates that we are participating in a program to collect and recycle the rechargeable battery or batteries For more information go to the RBRC web sit...

Page 37: ...icates call or calls have not been reviewed NEW CALL XX XX represents the number of new CID records not reviewed NO CALLS Indicates there are no CID records in memory NO DATA No Caller ID information...

Page 38: ...might be your wiring or local service The handset may be out of range of the base Move closer to the base Ensure the battery is properly charged 16 hours Ensure the battery pack is installed correctl...

Page 39: ...t the battery and charge for 16 hours Handset displays SEARCHING or OUT OF RANGE and cannot link up with the base when the TALK CALL BACK button is pressed Handset may be out of range of the base Move...

Page 40: ...Foil backing on insulation Heating ducts and other metal construction that can shield radio signals You re too close to appliances such as microwaves stoves computers etc Atmospheric conditions such...

Page 41: ...Relations PO Box 1976 Indianapolis IN 46206 1976 Attach your sales receipt to the booklet for future reference or jot down the date this product was purchased or received as a gift This information w...

Page 42: ...and address and a description of the defect Send via standard UPS or its equivalent to Thomson Inc 11721 B Alameda Ave Socorro Texas 79927 Pay any charges billed to you by the Exchange Center for ser...

Page 43: ...ch of any express or implied warranty on this product This disclaimer of warranties and limited warranty are governed by the laws of the state of Indiana Except to the extent prohibited by applicable...

Page 44: ...Color Scheme 14 Connecting an Optional Headset to the Handset 35 Connecting the Belt Clip 35 D Default Setting 13 Deleting a CID Record 27 Deleting a Phone Book Record 30 Deleting All CID Records 27 D...

Page 45: ...3 Record Your Own Ringer Tones 32 Recording Ringer Tones 32 Registration 10 Remote Access from Cordless Handset 16 Remote Access Security Code 16 Reviewing CID Records 25 Reviewing Phone Book Records...

Page 46: ...Model 28011 00008008 Rev 1 Dom E S 06 27 Printed in China Thomson Inc 10330 North Meridian St Indianapolis IN 46290 1024 2006 Thomson Inc Trademark s Registered Marca s Registrada s...

Reviews: