

SETTING UP YOUR GATEWAY MONITOR
2
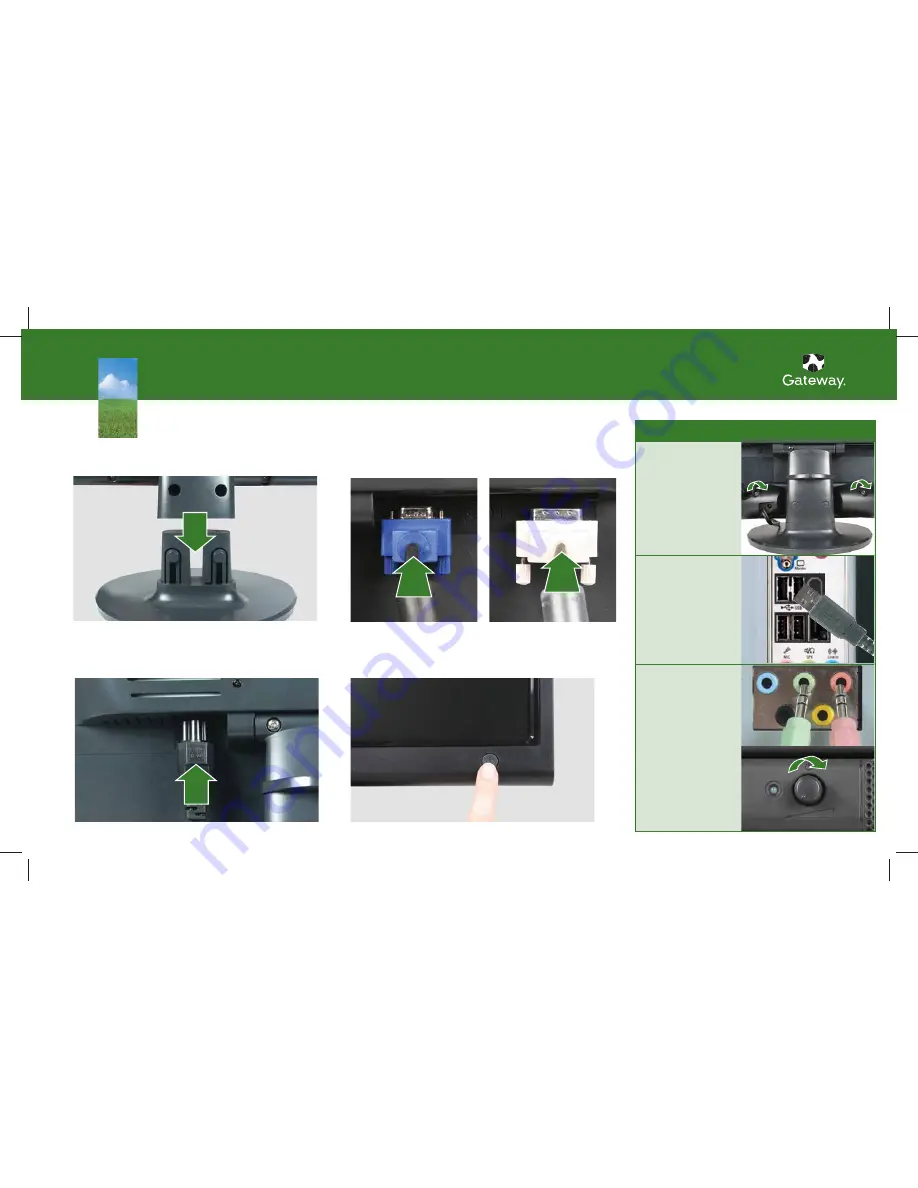
Connect your monitor to your computer
Follow the instructions that came with your computer.
2
Connect your monitor to your computer
Follow the instructions that came with your computer.
1
Connect the monitor base
Slide the neck onto the base until it snaps into place.
1
Connect the monitor base
Slide the neck onto the base until it snaps into place.
3
Plug in the monitor
To protect your monitor from power fluctuations, use a surge protector.
3
Plug in the monitor
To protect your monitor from power fluctuations, use a surge protector.
4
Turn on the monitor and install software.
Insert the Ez Tune™ CD into your computer and follow the on-screeen instructions.
4
Turn on the monitor and install software.
Insert the Ez Tune™ CD into your computer and follow the on-screeen instructions.
© 2006 Gateway, Inc. All rights reserved. Gateway is a trademark or registered trademark of Gateway, Inc. in the U.S. and other countries. Product specifications subject to change without notice. Actual product may vary from image shown.
2
Connect the USB
power cord to a USB
port on your computer.
1
Tilt the screen back,
center the speaker bar
below the screen, then
tighten the thumb
screws.
3
Connect the speaker
bar’s headphone and
microphone cables to
your computer, then
turn on the speaker.
Digital DVI
(optional*)
Analog VGA
(supplied)
Connecting Your Flat Panel LCD Speaker Bar (optional)*
* Available at www.gateway.com


