


RM-GG-950W
RM-GG-950W Portable Label Printer
Please read this carefully before using the printer and keep the manual in
a handy place for future reference.
USER'S GUIDE
RM-GG-950W Label Printer
User's guide, warranty card
USB cable
Thermal paper
(
One roll
)
One battery, which is
pre-installed in the printer
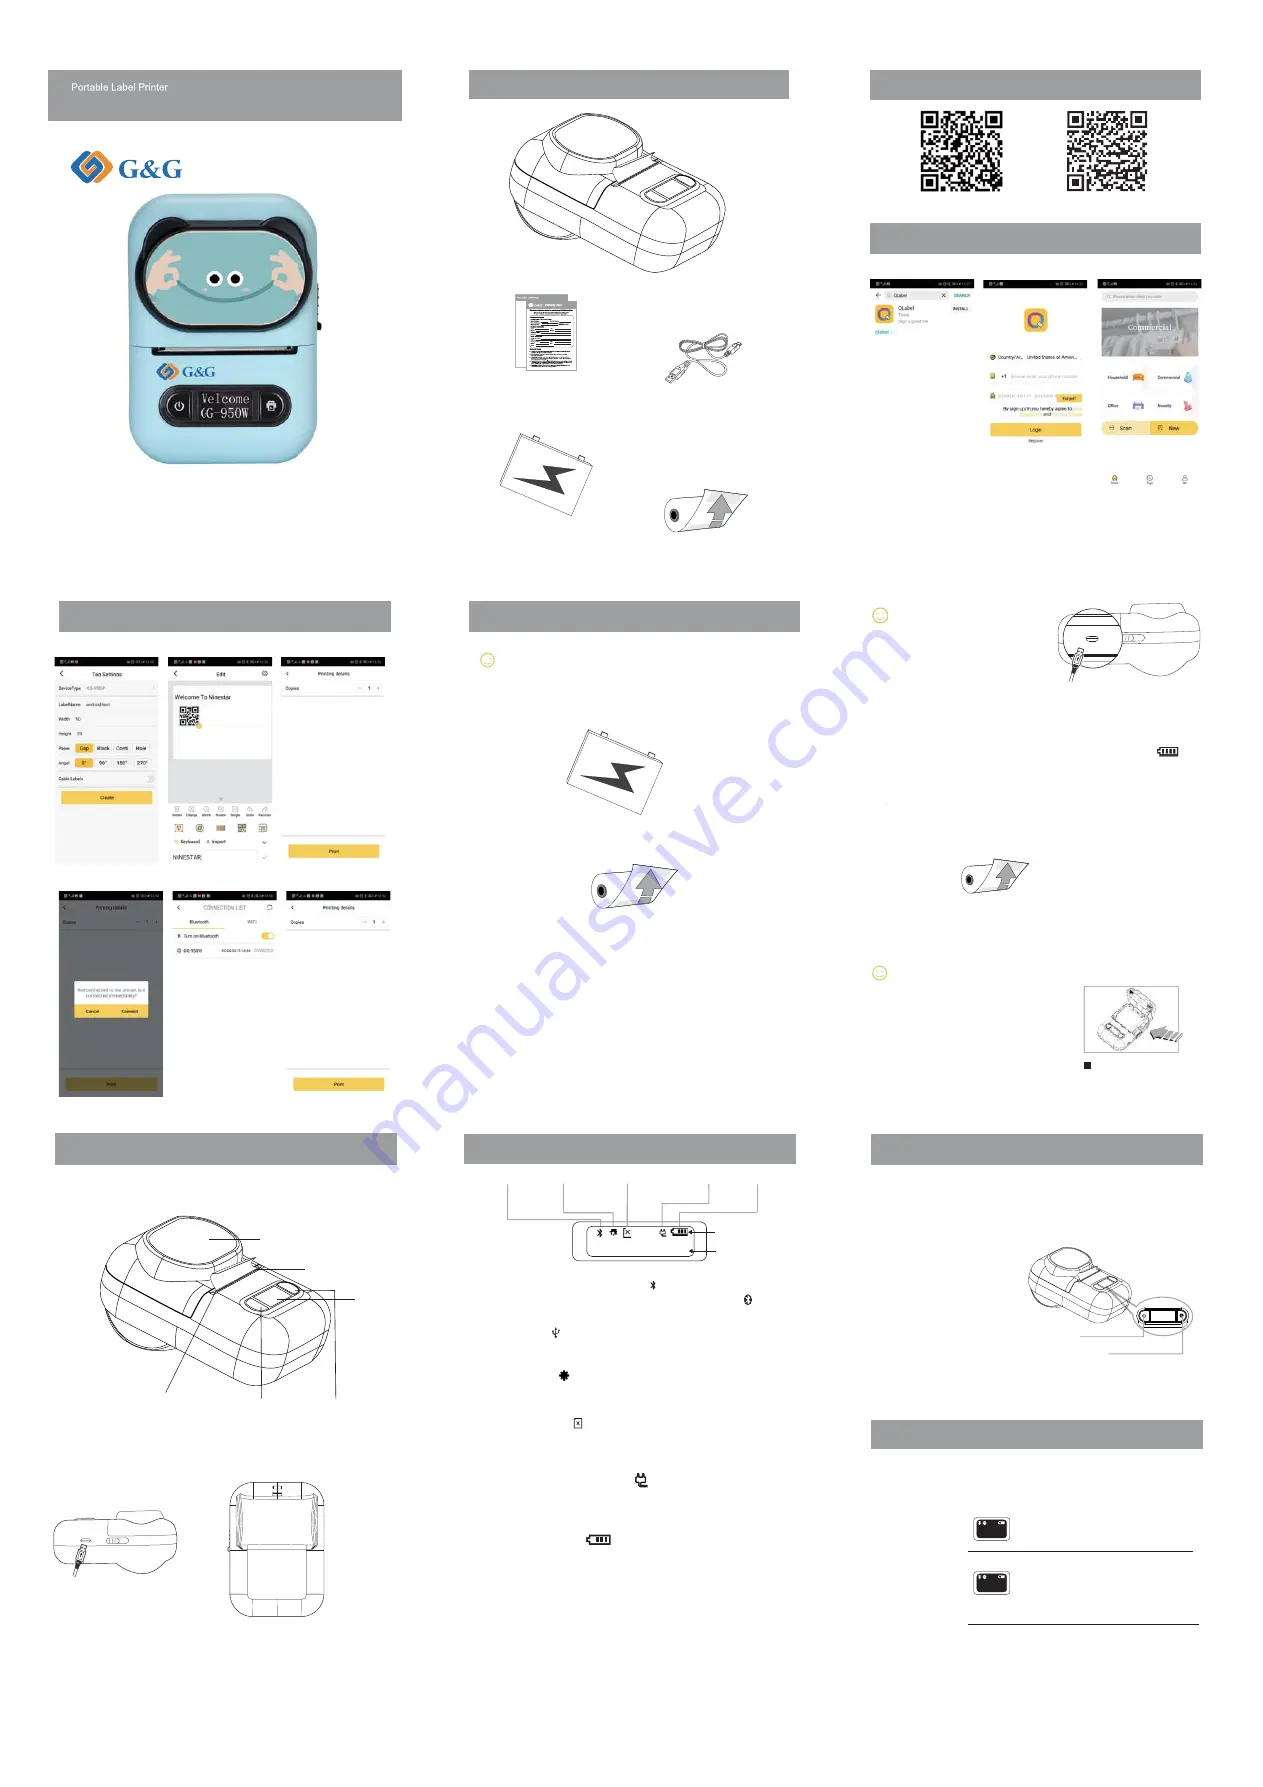
Confirm the packing list
Fully charge the battery before using it for the first time. After the
battery is stored for a long time, it must be fully charged first, and the
battery will achieve the best results.
Preparation
Remarks
Prepare the printer for use, including open the label cover, charge the
battery and install the paper rolls.
Battery
Thermal paper
Scan the QR code to download the APP
Download and register the printing software APP
1.Search QLabel in the
App store
2.Open and install the APP
3.Sign up for an account
IOS
Android
4.Click the NEW label to set the
label specification
6.Click Print after editing
5.Click Text to create a new
label content
Operating procedures of mobile APP software
7.Click Connect to turn on
Bluetooth
8.Connect to the printer via
Bluetooth
9.Return to the print screen to
print
Caution
Install rolls
Do not take out the battery
during charging.
It can print properly while charging.
USB/Power interface
Charging: The battery indicator will flash.
End of charging: The battery indicator icon will show full power and stop
flashing.
RM-GG-950W Label Printer uses the paper roll with a maximum diameter of
50mm and a maximum size of 57mm×50mm as the consumable.
Caution
First, make sure that the paper roll you
are using is a special paper roll for this
model supplied by G&G.
Make sure the paper roll is adjusted to
the proper width.
Cover the label cover after loading the
thermal paper.
Place the paper roll
as shown and Put the
print side face down.
Front View
Description of printer parts
Label Cover
USB/ Power interface
Label exit slot
Display
FEED Key/
Setup Key
Power Key/
Function Key
Paper Cutter
Rare View
Lateral View
Wireless Communication
USB Mode
Description of LCD display
After bluetooth pairing, the icon shows the connecting status .
Wireless
Communication
Setup Mode/USB
Lack Of Paper
External
Power Supply
Power Indicator
Text Description Area
Icon Area
Setup Mode
Lack Of Paper
External Power Supply
Power Indicator
Text Description Area
This icon indicates that the printer’s USB is connected.
This icon indicates that the printer has entered the Setup state.
This icon displays when the printer is out of paper or does not load the
paper roll properly. At the same time, the text description area shows:
No Paper Detected.
This icon indicates whether the external power is inserted. When the
correct external power is input, the icon will be displayed. When the
external power is pulled out, the icon will disappear.
This icon is used to indicate power. When charging, the icon flashes to
indicate charging status; When the battery is weak, please charge the
battery in time.
This area displays the relevant text information.
Start your printer
Press the power key of the printer for 2 seconds,
and the printer will start up
Language:
English/
Simple Chinese:
Press the Feed key to set
the language type of the
operation interface
Basic Function
Setting
Printer shut off
Press the power key of the printer
for 2 seconds when it’s started up,
and the printer will shut off
Press the FEED key:
Output a section of paper
Shutdown mode
Automatic shutdown can be set
when the printer is in standby state
Function Mode
Print Key/Setup Key
Basic Settings
Enter the setting interface after starting the printer
Power Key:
Switch language
Power Key:
Switch the printing color
Printing color:
(The most light concentration) 1-3
(Light concentration) 4-5
(Normal) 6-9
(Dark color) 10-14
(The darkest color) 15
Press the Feed key to set the
print definition
GG950W
GG950W
ተሮφ[00
ᶆ䍞φJਂ㜬㓮
RM GG 950W


