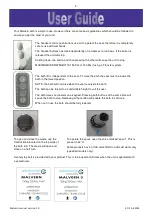
background image

Malvern manual  version 1.0                                                                                                                                                    S.D  25.4.2014 

Summary of Contents for MALVERN

Page 1: ...1 Malvern manual version 1 0 S D 25 4 2014...

Page 2: ...014 1 Cover 2 Contents 3 Pre installation 1 4 Pre installation 2 5 Pre installation water pressure 6 Installation 1 7 Installation 2 8 User Guide 1 9 User Guide 2 Transfer system 10 User Guide 3 11 Ma...

Page 3: ...tray and fill this using a concrete mix Alternatively timber joists can be anchor bolted to the concrete sub floor to provide the needed support The finish should come level with the surface floor b I...

Page 4: ...THIS Minimum distance between the walls and baths bath sides is 150mm When deciding on the position of the bath there are a number of points that should be considered 1 Hoist and wheel chair access 2...

Page 5: ...r pressure of 1 5 bars with a maximum pressure loss no greater than 10 1 between hot and cold feeds It is important to note that a pressure difference between hot and cold pipes will have a great effe...

Page 6: ...in this manner there is a ground current flowing indicating the possibility of electric shock Do not use this unit The unit should be corrected by a qualified representative before any further install...

Page 7: ...tion position H Manoeuvre the bath into its installation position I Remove the transportation wheels and cross tie bars J Set the base distances to 1473mm K Mark the position of the floor fixing holes...

Page 8: ...to be used at all times when the unit is operated with a seated user The bath lift is independent to the seat To raise the bath the seat must be inside the bath in the raised position NOTE the bath wi...

Page 9: ...eved by pressing and holding down the out of water button on the handset The arm will stop automatically when it is fully lowered Note that the bath must be fully lowered before the arm will traverse...

Page 10: ...empty any water still inside the hose and then place the handset back into it s mount User safety notes To reduce the risk of injury do not permit children or persons with infirmities to use this pro...

Page 11: ...ode 1 Lift actuator fault One long flash followed by 1 short flash Code 2 Traverse actuator fault One long flash followed by 2 short flashes Code 3 Leg Lift actuator fault One long flash followed by 3...

Page 12: ...ctly Where there are any mechanical or electrical parts any damage misuse or tampering with them will render the warranty invalid Any sealed electrical boxes must remain unopened or this will invalida...

Reviews: