background image

VCR

HDD/DVD

PLAY

RECORD

F.FWD

REW

STOP/EJECT

STANDBY-ON

STOP

PLAY

RECORD

HDD

DVD

S-VIDEO

VIDEO

AUDIO

L

R

OPEN / CLOSE

PROG.

DUBBING

VCR

HDD

DVD

VCR

DVD

HDD

DVD

PAL

Before using this unit you need to complete connections.
Refer to “Connections” on pages 15-17.

Accessories Supplied

• Remote control 

• RF cable

• Owner’s Manual

• Quick Setup Guide

with two R6 (AA) batteries

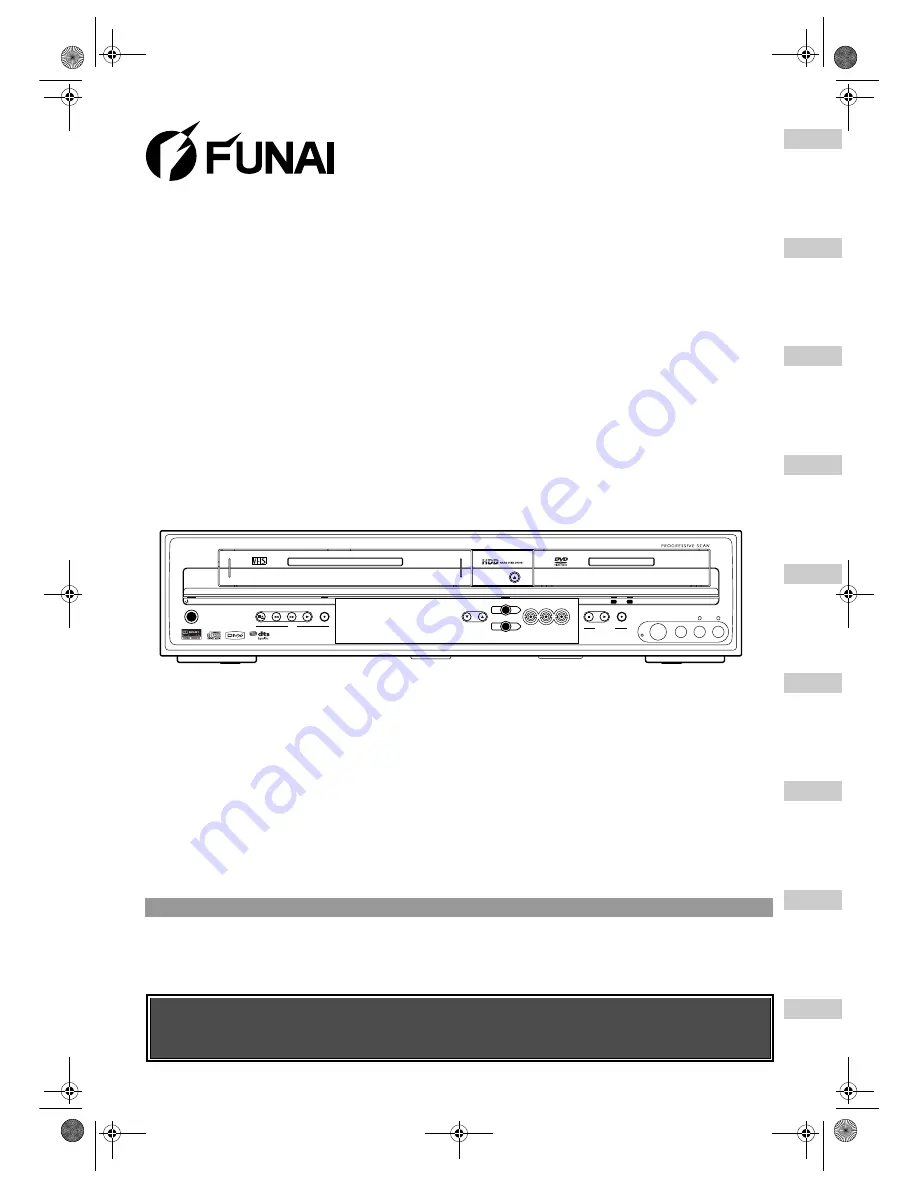
Owner’s Manual

DVD / Video Cassette Recorder

with HDD

T3B-N8182DB

 Bef

o

re

 Y

ou 

Sta
rt

C

o

n

n

e

ct

ion
s

In

iti

a

l S
e

tup
s

Recordi

ng /


Dubbi

n

g

P

layback

Editi

n

g

O

ther Setups

V

CR 

Fun

ct

ions

Ot
h

e

rs


E3B4nasi.book  Page 1  Wednesday, February 7, 2007  6:49 PM

Summary of Contents for T3B-N8182DB

Page 1: ...mplete connections Refer to Connections on pages 15 17 Accessories Supplied Remote control RF cable Owner s Manual Quick Setup Guide with two R6 AA batteries Owner s Manual DVD Video Cassette Recorder...

Page 2: ...ctric shock 6 Do not spill liquid on the unit If liquid is spilled and enters the unit consult qualified service personnel 7 Do not stand the unit vertically Use the unit in a horizontal flat position...

Page 3: ...If the plug has to be changed because it is not suitable for your socket or becomes damaged it should be cut off and an appropriate plug fitted following the wiring instructions below The plug remove...

Page 4: ...from the centre out Do not wipe in a circular motion Do not use solvents such as benzine thinner commercially available cleaners detergent abrasive cleaning agents or antistatic spray intended for an...

Page 5: ...g for External Connection AV3 47 Dubbing from the External Devices 47 Finalising a Disc 48 Setting Disc Protection 49 Playback 51 Information on Playback 51 Basic Playback 52 Special Playback 59 Repea...

Page 6: ...inalise Page 49 You can set the disc to be finalised automatically when the disc space runs out Relay Recording Page 35 When you Timer Record to DVD if the disc runs out of the space or if there is no...

Page 7: ...o playback You will need to finalise the discs recorded in Video mode to play back in other DVD players DVD Video Format Video mode is a new format for recording on DVD RW R discs that was approved by...

Page 8: ...ress to start One Touch Dubbing from VCR to DVD 19 PROG D U buttons HDD DVD Press to change the channel up or down VCR Press to change the channel up or down Press to adjust the tracking during playba...

Page 9: ...le 6 S VIDEO OUT jack HDD DVD Connect to the S Video input jack on your TV Use a commercially available S Video cable 7 COMPONENT VIDEO OUT jacks HDD DVD Connect to an optional component video cable t...

Page 10: ...et the playback will start from the resume point 12 button HDD DVD During playback press to play backward by one frame at a time 13 VCR button Press to activate the VCR See page 12 14 PAUSE p button P...

Page 11: ...w motion press to increase the speed in slow motion Press to fast forward the videotape in stop mode 32 STOP S button Press to stop playback or recording 33 button HDD DVD During playback press to adv...

Page 12: ...trol reduces HDD DVD VCR Modes Switching Because this unit is a combination of a VCR a HDD and a DVD recorder you must select first which component you wish to operate Press HDD on the remote control...

Page 13: ...ctions of the unit 1 Disc Management To set up the disc to manage 2 Editing To edit a recorded disc or HDD 3 Dubbing To dub a content among HDD DVD and VCR 4 Timer Programme To programme a Timer Recor...

Page 14: ...atus of the unit CD Appears when an Audio CD or a disc with MP3 JPEG DivX files is on the disc tray R Appears when a DVD R disc is loaded on the disc tray RW Appears when a DVD RW disc is loaded on th...

Page 15: ...UT jacks of the unit and set Video Out setting to Component Progressive in the setup menu see page 82 Next set your TV to the progressive scan mode If your TV is not compatible with progressive scan s...

Page 16: ...our digital audio equipment If the audio format of the digital output does not match the capabilities of your receiver the receiver will produce a strong distorted sound or no sound at all Note for a...

Page 17: ...cannot be recorded using an MD or DAT deck as a digital sound If not connected to a Dolby Digital decoder set Dolby Digital to PCM in Digital Audio Setting see page 83 Playing back a DVD using incorr...

Page 18: ...e available channels in your area with the following procedures 1 Press SETUP in stop mode Setup Menu will appear 2 Select Initial Setting using Cursor then press ENTER 3 Select Channel Setting using...

Page 19: ...s ENTER 5 Select the position number of which you want to change the setting using Cursor then press ENTER You can select position numbers 01 to 99 You can jump to the next or the previous page using...

Page 20: ...lect channels 1 to 99 About an external input You can select the external input mode AV1 AV2 or AV3 using INPUT SELECT or PROG You cannot change the channel when either HDD DVD or VCR is in any record...

Page 21: ...g Cursor then press ENTER 3 Select Clock Setting using Cursor then press ENTER 4 Select Auto Clock Setting using Cursor then press ENTER 01 01 07 Mon 19 34 Move Pos Channel Decoder Skip Station P02 45...

Page 22: ...current time by receiving PDC broadcasts whenever the unit is in standby mode The unit will correct the current time automatically at 8 00 if the unit is in standby mode From 23 00 to 1 00 the Auto Cl...

Page 23: ...en press ENTER The selected setting will be checked and activated The default setting is 4 3 Letter Box 5 Press SETUP to exit Mode Audio output Display on the TV screen Main Main audio from both speak...

Page 24: ...aspect ratio of the image will be distorted and parts of the image will be cropped 7 This setting is for 4 3 TV If you have 16 9 TV and select this setting black bars will appear on the top and botto...

Page 25: ...players Unless finalised you can record additional materials or edit discs recorded in Video mode with this unit VR Video Recording mode is a basic recording format for DVD RW discs You can record and...

Page 26: ...nged each time you press it with the following order The recording time is an estimate and actual recording time may differ Audio and video quality of the content being recorded may degrade if the rec...

Page 27: ...ou can only record Copy once only video using a DVD RW disc in VR mode with Content Protection for Recordable Media CPRM When recording a TV broadcast or an external input you can display copy control...

Page 28: ...grinding or other sounds may be heard or blocky noise may appear on the image If you continue to use as it is deterioration may continue and eventually the HDD may not be used at all If you notice th...

Page 29: ...setting is VR Mode 5 Select Yes using Cursor then press ENTER Formatting will start Example VR Format The screen returns to normal after formatting is completed This operation may take awhile to be c...

Page 30: ...Display DVD Disc Control 01 01 07 Mon 19 34 Disc Management DVD Format HDD Initialise DVD Disc Control 01 01 07 Mon 19 34 Disc Management DVD Format HDD Initialise All Erase Part Erase DVD Disc Contr...

Page 31: ...ording onto a VR mode disc both Main and Sub will be recorded regardless of your setting here And when you play back you can choose either audio format or a combination of both as your playback audio...

Page 32: ...o digital sound without compressing audio data When the recording mode is set at other than XP the unit records Dolby Digital audio automatically even if you selected LPCM With HDD or VR mode DVD RW d...

Page 33: ...like to use for the playback by pressing HDD DVD or VCR button during HDD DVD VCR recording And then follow the normal playback procedure One touch Timer Recording OTR This is a simple way to start a...

Page 34: ...t a recordable disc if you are recording to a DVD Use only the HDD or CPRM compatible VR mode DVD RW discs for recording copy once programmes See page 27 1 Press TIMER PROG Timer Programme List will a...

Page 35: ...n 1 minute To stop recording in progress press STOP S Confirmation message will appear Select Yes using Cursor Relay Recording When you Timer Record to DVD the unit automatically changes the recording...

Page 36: ...3 59 on a given day the PDC function will operate from 0 00 on the given day to 4 00 on the next day This means that if the relevant programme is broadcasted within this period it is recorded correctl...

Page 37: ...d and activated The default setting is Stereo 5 Press SETUP to exit Hint If you try to record bilingual audio onto a Video mode DVD RW R disc and when Bilingual is selected only either one of main or...

Page 38: ...To cancel the Satellite Link function while in the Satellite Link standby mode Press STANDBY ON or SATELLITE LINK to turn on the unit To cancel the Satellite Link function while the Satellite Link Rec...

Page 39: ...nd Playlist finish up the dubbing of one list first and then make dubbing of the other list NTSC dubbing is prohibited in this unit During Fast Dubbing of copy once programmes the following operations...

Page 40: ...D DVD to a videotape cannot be dubbed further from the videotape to the HDD DVD Be noted that with videotape to DVD dubbing the unit recognise DVD s remaining time as the dubbing duration although the...

Page 41: ...bbing Videotape to DVD dubbing When dubbing starts the video image may be distorted because of the Digital Tracking function This is not a malfunction Play the videotape until the image clears up and...

Page 42: ...ct Add to Title using Cursor then press ENTER To switch Original and Playlist press SYSTEM before you press ENTER If you have registered any dubbing before they will be listed in the Dubbing Title Lis...

Page 43: ...ubbing direction or the recording format type the available Rec Mode will vary 9 Select Yes using Cursor then press ENTER Dubbing will start It may take awhile to prepare for the dubbing To stop the d...

Page 44: ...ted in the Dubbing Title List To sort the titles 1 Press ENTER anywhere in the Title List 2 Select Title Sorting 3 Select the desired sort type and press ENTER 5 Select a desired title using Cursor th...

Page 45: ...ed Just Dubbing Basically the Rec Mode is set to Fast but it will be changed automatically under the conditions listed below HDD to DVD dubbing the Rec Mode will automatically be adjusted so the title...

Page 46: ...Dubbing using Cursor then press ENTER For DVD dubbing Select VCR DVD Dubbing using Cursor then press ENTER Example VCR HDD 4 Select a desired Rec Mode using Cursor then press ENTER Confirmation windo...

Page 47: ...T You also can use PROG If you are using the jacks on the front set the channel to AV3 If you are using the jacks on the rear set the channel to AV1 and AV2 4 Select a Rec Mode by pressing REC MODE Re...

Page 48: ...press ENTER 5 Select Yes using Cursor then press ENTER If the disc has already been finalised Undo Finalise will be listed in the menu instead of Finalise DVD RW To Undo the finalisation of the disc...

Page 49: ...Protect will be listed in the menu instead of Disc Protect DVD RW DVD RW VR DVD RW DVD RW Video DVD R DVD R Setup Menu 01 01 07 Mon 19 34 Disc Management Editing Editing Dubbing Dubbing Timer Program...

Page 50: ...ss SETUP to exit Note Disc Protect is available for VR mode DVD RW discs HDD Initialise DVD Format 01 01 07 Mon 19 34 Disc Management Finalise DVD Disc Control Auto Finalise Disc Protect Protect the d...

Page 51: ...such as NTSC Region Codes This unit has been designed to play back DVDs for Region Two 2 It is only possible to play back DVDs in this unit that are labelled for Region 2 or for ALL regions You canno...

Page 52: ...STOP S to pause or stop the operation Playback from the Title List Menu Not available for the DVD Videos the finalised Video mode DVDs or the Video mode discs made on other unit If you are playing the...

Page 53: ...instead of the Title List DVD Menus are created automatically when you finalise a Video mode disc With such discs Title List is no longer available Follow the steps below to play back a disc using th...

Page 54: ...g an MD or DAT deck Files with extensions other than mp3 MP3 will not be listed in the File List Some folders or files listed in the File List may be unplayable due to their recording status The File...

Page 55: ...D services Refer to DivX VOD on page 57 Some DivX VOD files are restricted with the limited playable times you cannot play them back beyond the limit If your DivX VOD file has such limit confirmation...

Page 56: ...t other files that can be played back DivX Subtitle The subtitle created by the user can be displayed during DivX playback 1 After the DivX file is selected the Subtitle List will appear 2 Select the...

Page 57: ...r one DivX VOD file You must first download the file from the Internet and play it back on this unit before you are able to get another code You must follow this step every time you purchase or rent a...

Page 58: ...certain discs 3 Press DISC MENU to exit the disc menu Depending on discs pressing DISC MENU may not exit the disc menu Note Menus vary among discs Refer to the information accompanying the disc for d...

Page 59: ...e playback will start from the beginning of the track last played Press STOP S twice at step 1 if you do not want to set a resume point In this case next time you press PLAY P the playback will start...

Page 60: ...rn to normal playback press PLAY P Note For some DivX files Slow forward may not function Only slow forward is available when playing back discs with DivX files Time Shift Playback You can play back a...

Page 61: ...t EP mode 90 seconds before the current recording point SLP mode 105 seconds before the current recording point Simultaneous Playback and Recording You can play back a title on HDD while making a reco...

Page 62: ...available x1 0 x1 2 x1 5 and x2 0 The zoom area is displayed 4 While the picture is enlarged press Cursor to move the zoomed image up down left or right The grey box with an inner orange box that sho...

Page 63: ...e Playback You can programme the disc to play back in your desired order 1 Press SETUP in stop mode Setup Menu will appear 2 Select Playback using Cursor then press ENTER 3 Select CD Playback Mode usi...

Page 64: ...p to the next title except HDD or chapter track during playback To go back to the previous title except HDD or chapter track press SKIP B twice in quick successions Using the SEARCH button By using th...

Page 65: ...DVD playback press AUDIO repeatedly to select one of the available languages Audio display appears at the left top of the TV screen and the new audio will be heard The display will disappear after abo...

Page 66: ...ER 3 Select Off Type 1 or Type 2 using Cursor then press ENTER Off no effect Type 1 Natural effect Type 2 Emphasised effect Note Select Virtual Surround to Off if the sound is distorted The setting wi...

Page 67: ...on 19 34 Editing PlaylistEditing PlaylistEditing Original Playlist HDD Playlist New HDD Playlist New HDD PL Scene Delete HDD PL Scene Delete HDD PL Title Combine HDD PL Title Combine HDD PL Title Divi...

Page 68: ...rks work as chapter marks when you search for a chapter but cannot be deleted like chapter marks Also when a title with chapter marks are dubbed from DVD to the HDD those marks become edit marks once...

Page 69: ...HDD HDD HDD Playlist DVD RW DVD RW DVD RW VR Playlist Setup Menu 01 01 07 Mon 19 34 Disc Management Editing Editing Dubbing Dubbing Timer Programme Timer Programme Title List Title List Initial Setti...

Page 70: ...e Name 4 11 04 07 Wed P01 12 22 1 04 40 XP 11 04 07 Wed P01 12 22 1 04 40 XP New New HDD Remain 72h00m SP 001 016 HDD PL New Title Name Recording Date P01 11 19 0 00 06 SP 11 04 07 Wed P01 11 22 0 14...

Page 71: ...Playlist DVD RW DVD RW Video DVD R DVD R HDD HDD Remain 72h00m SP Page 1 4 Remain 76 13 SP 001 016 Title Name Recording Date P01 11 19 0 00 06 SP 11 04 07 Wed P01 11 22 0 14 13 XP 10 04 07 Tue P02 09...

Page 72: ...D Remain 72h00m SP Page 1 4 Remain 76 13 SP 002 016 Title Name Recording Date P01 11 19 0 00 06 SP 11 04 07 Wed P01 11 22 0 14 13 XP 10 04 07 Tue P02 09 19 0 22 40 SP 09 04 07 Mon P01 12 22 1 04 40 XP...

Page 73: ...AUSE p to find the end point easily 01 01 07 Mon 19 34 Editing PlaylistEditing PlaylistEditing Original Playlist HDD PL Scene Delete HDD PL Title Combine HDD PL Title Combine HDD PL Title Divide DVD P...

Page 74: ...r will be highlighted HDD PL Scene Delete 1 1 1 04 40 P01 01 01 07 Mon 12 22 T C 12 22 1 04 40 XP End 0 35 00 Start 0 31 00 Duration after editing 1 04 36 total time after deleting chapter mark seam a...

Page 75: ...Undo Protect and press ENTER The protect icon will disappear 4 Press RETURN R or SETUP twice to exit To protect the VR mode DVD RW discs themselves refer to Setting Disc Protection on page 49 HDD HDD...

Page 76: ...PL Scene Delete DVD PL Title Combine DVD PL Title Divide HDD PL New HDD Remain 72h00m SP 001 016 HDD PL Title Combine Playlist Creation Date 1 04 40 P01 11 19 0 00 06 SP 11 04 07 Wed P01 11 22 0 14 13...

Page 77: ...t Editing using Cursor then press ENTER 3 Select Playlist or Original using Cursor then press ENTER 4 Select HDD PL Title Divide or DVD PL Title Divide using Cursor then press ENTER Example Playlist H...

Page 78: ...e the titles if the total number of chapters has already reached 999 HDD Remain 72h00m SP 001 016 HDD PL Title Divide Playlist Creation Date P01 11 19 0 00 06 SP 11 04 07 Wed P01 11 22 0 14 13 XP 10 0...

Page 79: ...nk Set a picture size according to aspect ratio of your TV Select Video Page 47 S Video In Set the video input type for the external input Video Out Page 82 Component Progressive Component Interlace S...

Page 80: ...V Replay Skip Speed Page 87 Variable Skip 15 seconds 1 minute Set the amount of skip time when you press VARIABLE SKIP Variable Replay 30 seconds 1 minute Set the amount of rewind time when you press...

Page 81: ...lingual recording audio for fast dubbing External Input Audio Page 37 Bilingual Set the external input audio type for recording Recording Audio Select XP Page 32 LPCM Set the recording audio type Only...

Page 82: ...atible with progressive scanning select Component Progressive Component Interlace If your TV has component jacks select Component Interlace 5 When you finish with the setting press SETUP to exit Setup...

Page 83: ...puts Dolby Digital signals If your amplifier decoder is compatible with Dolby Digital set to Bit Stream PCM Converts the Dolby Digital into PCM 2 channel If your amplifier decoder is NOT compatible wi...

Page 84: ...k 1 Press SETUP in stop mode Setup Menu will appear 2 Select Playback using Cursor then press ENTER 3 Select a desired item using Cursor then press ENTER 4 Refer to 1 to 10 on pages 84 to 87 and set t...

Page 85: ...u Language Default English Set the Disc Menu language Follow steps 1 to 2 on page 84 Select Language using Cursor then press ENTER Language Menu will appear Select Disc Menu Language using Cursor then...

Page 86: ...during entering the password After that the numbers will change to When the password has been set already the password will be displayed as for your security If the password you have entered is wrong...

Page 87: ...be viewed on an NTSC system TV With discs recorded using the NTSC system an NTSC signal is output for viewing on an NTSC or Multi system TV With discs recorded using the NTSC system select PAL to view...

Page 88: ...g HDD to DVD Video Mode Follow steps 1 to 2 on the left Select Fast Dubbing Audio Video Mode using Cursor then press ENTER Option window will appear Select the desired setting using Cursor then press...

Page 89: ...f Does not show the operating display 3 Background Colour Default On Set the background colour When there is no signal for the picture signal input the screen changes to blue background Follow steps 1...

Page 90: ...PAUSE p After the unit has been in pause mode for 5 minutes it will stop automatically to protect the tape and the video head from damage 4 Press STOP S when the recording is completed Accidental era...

Page 91: ...ording will start without cancelling the VCR recording and the recording will be made on both VCR and the HDD DVD Search Index Search An index mark will be assigned at the beginning of each recording...

Page 92: ...press PLAY P Hi Fi Stereo Sound System This unit will record and playback Hi Fi stereo sound In addition it has an AV2 and NICAM stereo sound decoder This unit will receive stereo and bilingual broad...

Page 93: ...space in the HDD because the Fast Dubbing from DVD to HDD and the HDD recording are proceeding simultaneously Check the dubbing title or the recording media The operation is currently unavailable You...

Page 94: ...number in the DVD is already at its limit Delete unnecessary chapters in the DVD See page 68 Edit Marks cannot be deleted Insufficient disc space The space in the recording media is not enough Make su...

Page 95: ...s 18 to 21 Only specific channels do not appear The channels may be set to be skipped See page 19 The external input channels such as AV1 AV2 or AV3 cannot be skipped This unit does not skip the exter...

Page 96: ...aranteed on this unit The disc may be dirty or flawed Clean the disc Check if all the connections are made correctly Check the Parental Lock Setting See page 86 There is no sound or no subtitle Check...

Page 97: ...n page 48 The capacity of the disc doesn t increase even if the recorded programme is deleted With Video mode DVD RW discs the disc space will increase only when the last title in the Original is dele...

Page 98: ...ean 5761 Kurdish 5767 Laothian 5861 Latin 5847 Latvian Lettish 5868 Lingala 5860 Language Code Lithuanian 5866 Macedonian 5957 Malagasy 5953 Malay 5965 Malayalam 5958 Maltese 5966 Maori 5955 Marathi 5...

Page 99: ...R discs with this unit JPEG Joint Photographic Experts Group JPEG is a method of compressing still image files You can copy JPEG files on CD RW R discs from a computer and play back the files on this...

Page 100: ...mensions width x height x depth 435 x 99 5 x 380 mm Operating temperature 5 C to 40 C Operating humidity Less than 80 no condensation TV format PAL I Recording Recording format Video Recording format...

Page 101: ...101 EN E3B41BD_EN_ nasi book Page 101 Wednesday February 7 2007 6 49 PM...

Page 102: ...102 EN E3B41BD_EN_ nasi book Page 102 Wednesday February 7 2007 6 49 PM...

Page 103: ...103 EN E3B41BD_EN_ nasi book Page 103 Wednesday February 7 2007 6 49 PM...

Page 104: ...el T3B N8182DB Trade Name Funai is in compliance with following Regulations EN55013 2001 A1 2003 EN55020 2002 A1 2003 A2 2005 EN61000 3 2 2003 A2 2005 EN61000 3 3 1995 A1 2001 EN60065 2002 EN60825 1 E...

Reviews: