background image

Explains how to configure settings in the 
Software Operation Panel.

Explains about troubleshooting.

Explains how to replace the consumables.

Explains how to clean the scanner.

Explains about various ways of scanning.

Explains how to use the Operator Panel.

Explains how to load documents on the
scanner.

Explains the names and functions of parts
and basic scanner operation.
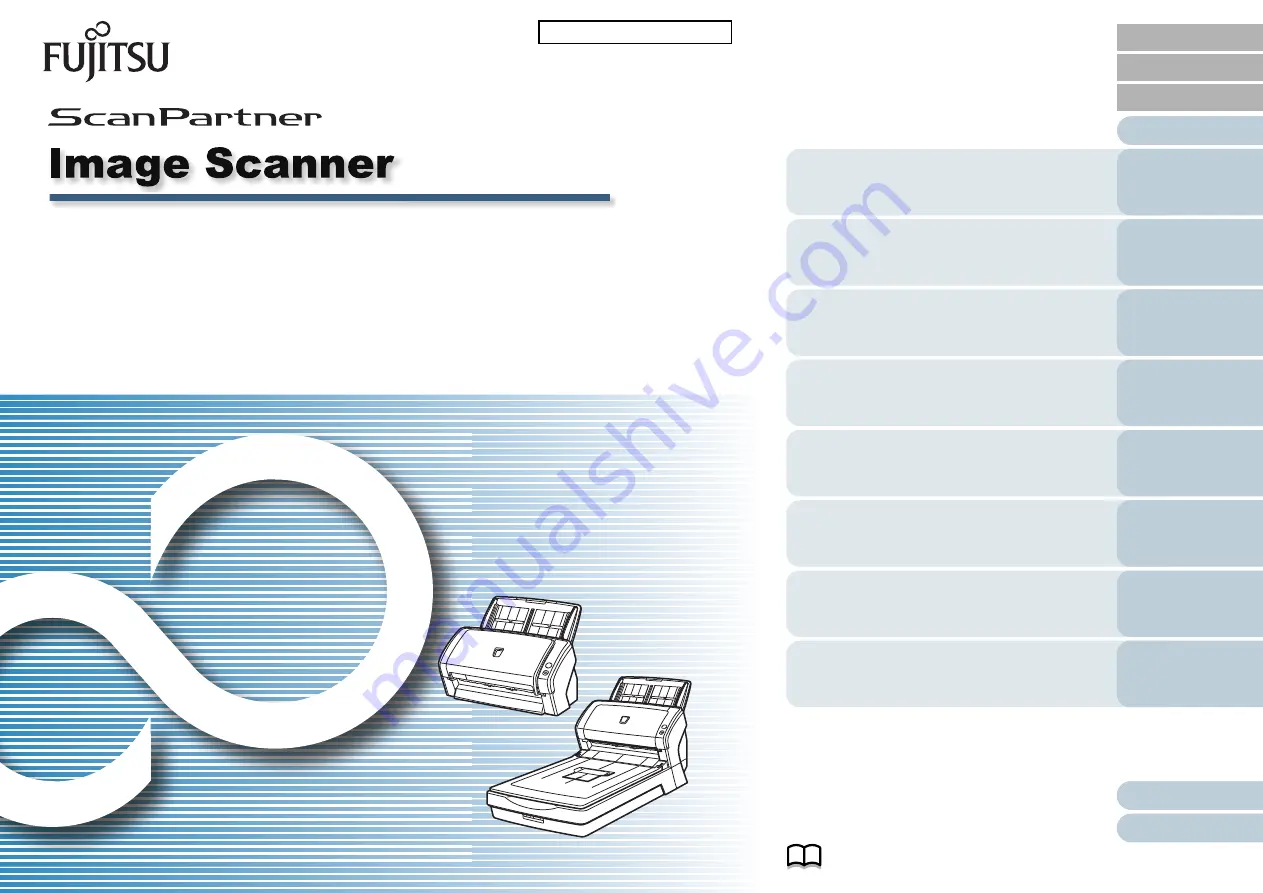
SP25/SP30/SP30F 

Appendix

Glossary

Contents

TOP

How to Load 
Documents

How to Use the 
Operator Panel

Various Ways to 
Scan

Daily Care

Troubleshooting

Operational 
Settings

Replacing the 
Consumables

P3PC-4772-02ENZ0

Scanner 
Overview

How to Use This Manual

Index

Introduction

Operator's Guide

Thank you for purchasing our Color Image Scanner ScanPartner.
This manual explains about the basic operations and handling of the scanner.
For details about scanner installation and connections, refer to the Quick Installation Sheet.

Summary of Contents for ScanPartner SP25

Page 1: ...d basic scanner operation SP25 SP30 SP30F Appendix Glossary Contents TOP How to Load Documents How to Use the Operator Panel Various Ways to Scan Daily Care Troubleshooting Operational Settings Replacing the Consumables P3PC 4772 02ENZ0 Scanner Overview How to Use This Manual Index Introduction Operator s Guide Thank you for purchasing our Color Image Scanner ScanPartner This manual explains about...

Page 2: ...dobe Acrobat or Adobe Reader For details refer to the Adobe Acrobat or Adobe Reader Help z Use the Page Up key to return to the previous page and the Page Down key to go to the next page z Click a blue character string tab or contents index title where the mouse cursor changes into a shape such as to jump to the link Common for all pages Contents page Index page Jumps to the first page of each cha...

Page 3: ...tner SP25 Yes 25 ppm 50 ipm ScanPartner SP30 Yes 30 ppm 60 ipm ScanPartner SP30F Yes Yes 30 ppm 60 ipm Manual Description Safety Precautions paper PDF Contains important information about the safe use of this product Make sure to read this manual before using the scanner The PDF version is included in the Setup DVD ROM Quick Installation Sheet Explains how to install and configure the scanner Oper...

Page 4: ...or other countries Intel Pentium and Intel Core are registered trademarks or trademarks of Intel Corporation in the United States and other countries ABBYY FineReader 9 0 Sprint 2013 ABBYY All rights reserved ABBYY and FineReader are trademarks of ABBYY Software Ltd which may be registered in some jurisdictions Presto PageManager 9 2002 2013 NewSoft Technology Corp All Rights Reserved NewSoft Pres...

Page 5: ...ttp www abbyy com For Presto PageManager refer to the following web page http www newsoftinc com support index php http uk newsoft eu com support index php For other inquiries regarding the scanner refer to the following web page http imagescanner fujitsu com scanpartner html If the solution to your problem cannot be found on the above web page refer to the contact information for your Fujitsu off...

Page 6: ...ations Used in This Manual The operating systems and products in this manual are indicated as follows This indication alerts operators to an operation that if not strictly observed may result in severe injury or death This indication alerts operators to an operation that if not strictly observed may result in safety hazards to personnel or damage to the product Name Indication Windows XP Home Edit...

Page 7: ...ample Click Start menu J Control Panel Windows Server 2012 Standard 64 bit Windows Server 2012 1 Windows Server 2012 R2 Standard 64 bit Windows Server 2012 R2 1 Windows 8 32 bit 64 bit Windows 8 1 Windows 8 Pro 32 bit 64 bit Windows 8 Enterprise 32 bit 64 bit Windows 8 1 32 bit 64 bit Windows 8 1 1 Windows 8 1 Pro 32 bit 64 bit Windows 8 1 Enterprise 32 bit 64 bit Microsoft Word Word Microsoft Off...

Page 8: ...product improvement If the actual displayed screen differs from the screen examples in this manual operate by following the actual displayed screen while referring to the user s manual of the scanner application that you are using The screen examples used in this manual are of the PaperStream IP driver The screenshots used in this manual are of Windows 7 The actual windows and operations may diffe...

Page 9: ...ions 17 ScanPartner SP25 ScanPartner SP30 17 ScanPartner SP30F 20 1 3 Turning the Power ON OFF 24 How to Turn the Power ON 24 How to Turn the Power OFF 24 1 4 Opening Closing the ADF 25 How to Open the ADF 25 How to Close the ADF 25 1 5 Opening Closing the Document Cover ScanPartner SP30F 26 How to Open the Document Cover 26 How to Close the Document Cover 26 1 6 Setting Up the ADF Paper Chute fee...

Page 10: ... Documents 40 2 2 Loading Documents on the Flatbed ScanPartner SP30F 41 2 3 Documents for Scanning 42 Paper Size 42 Conditions 42 Loading Capacity 45 Area Not to be Perforated 46 Conditions for Multifeed Detection 46 Conditions for Mixed Batch Scanning 48 Conditions for Automatic Page Size Detection 50 Conditions for Using the Carrier Sheet 51 Chapter 3 How to Use the Operator Panel 52 3 1 Operato...

Page 11: ...DF 67 4 4 Customizing the Scanner Settings 68 Using a Button on the Scanner to Start Scanning 68 Chapter 5 Daily Care 70 5 1 Cleaning Materials and Locations that Require Cleaning 71 Cleaning Materials 71 Location and Frequency 72 5 2 Cleaning the Outside 73 For ScanPartner SP25 ScanPartner SP30 73 For ScanPartner SP30F 73 5 3 Cleaning the Inside 74 Cleaning the ADF with Cleaning Paper 74 Cleaning...

Page 12: ...y 98 Images are distorted or not clear 99 Vertical streaks appear on the scanned image 100 When the scanner is turned on the Check indicator on the operator panel turns on or flashes 101 Multifeed error occurs frequently 102 Situation in which the document is not fed into the ADF occurs frequently 104 Paper jams pick errors occur frequently 105 Scanned images turn out elongated 106 A shadow appear...

Page 13: ... the Sheet Counters 129 Replacement Cycle of Consumables Life Counter Alarm Setting 131 8 5 Settings Related to Scanning 132 Adjusting the Position to Start the Scan Offset Vertical magnification Adjustment 132 Removing Shadows Streaks that Appear around the Scanned Image Page Edge Filler ADF Page Edge Filler FB ScanPartner SP30F 133 Removing a Color from the Scanned Image Dropout color 135 Shorte...

Page 14: ...roubleshooting Waiting Time to Enter Power Saving Mode Power saving 144 8 8 Settings Related to Power ON OFF 145 Method of Turning the Scanner ON OFF Power SW Control 145 Appendix 146 A 1 Basic Specification 147 A 2 Installation Specifications 149 A 3 Outer Dimensions 150 ScanPartner SP25 ScanPartner SP30 150 ScanPartner SP30F 150 A 4 Scanner Options 151 A 5 Uninstalling the Software 152 Glossary ...

Page 15: ...apter explains about the names and functions of the scanner components as well as the methods for basic operations 1 1 Main Features 16 1 2 Parts and Functions 17 1 3 Turning the Power ON OFF 24 1 4 Opening Closing the ADF 25 1 5 Opening Closing the Document Cover ScanPartner SP30F 26 1 6 Setting Up the ADF Paper Chute feeder 27 1 7 Setting Up the Stacker 28 1 8 Power Saving Mode 32 1 9 Basic Flow...

Page 16: ... scanning which allows you to scan documents with different paper weights and sizes at once simplifying the process of sorting the documents before scanning Reduced work loss caused by multifeeds The scanner mounts an ultrasonic multifeed sensor that accurately detects multifeed errors where two or more sheets are fed through the scanner at once This multifeed detection is reliable even when scann...

Page 17: ...er to Chapter 3 How to Use the Operator Panel page 52 ADF Automatic Document Feeder Pulls and feeds the documents one sheet at a time from the ADF paper chute feeder Open to replace consumables or clean the inside of the scanner Side guide Guides the documents in the width direction as they are fed into the scanner Chute extension 2 Pull out to adjust to the document length ADF paper chute feeder ...

Page 18: ...erational Settings Replacing the Consumables Scanner Overview Back USB connector Used to connect a USB cable Security cable slot Used to connect an anti theft security cable commercially available Ventilation port Holes for ventilating hot air from inside the scanner Power connector Used to connect the power cable Power cable refers to the AC cable and AC adaptor connected together ...

Page 19: ...tion Index Contents TOP 19 How to Load Documents How to Use the Operator Panel Various Ways to Scan Daily Care Troubleshooting Operational Settings Replacing the Consumables Scanner Overview Removable Parts Pick roller ADF paper chute feeder Brake roller ...

Page 20: ...ulls and feeds the documents one sheet at a time from the ADF paper chute feeder Open to replace consumables or clean the inside of the scanner Side guide Guides the documents in the width direction as they are fed into the scanner Chute extension 2 Pull out to adjust to the document length ADF paper chute feeder Holds the documents to be scanned ADF release tab Pull this tab to open the ADF Flatb...

Page 21: ... Use the Operator Panel Various Ways to Scan Daily Care Troubleshooting Operational Settings Replacing the Consumables Scanner Overview Inside Document bed Place a document on the glass section Document pad Holds the document down against the document bed Document cover Close it to hold the document in place ...

Page 22: ...erational Settings Replacing the Consumables Scanner Overview Back USB connector Used to connect a USB cable Security cable slot Used to connect an anti theft security cable commercially available Ventilation port Holes for ventilating hot air from inside the scanner Power connector Used to connect the power cable Power cable refers to the AC cable and AC adaptor connected together ...

Page 23: ...dex Contents TOP 23 How to Load Documents How to Use the Operator Panel Various Ways to Scan Daily Care Troubleshooting Operational Settings Replacing the Consumables Scanner Overview Removable Parts Pick roller ADF paper chute feeder Brake roller Document cover ...

Page 24: ...1 Press the Power button on the operator panel for more than 2 seconds D The scanner is turned off and the Power indicator turns off 1 3 Turning the Power ON OFF HINT You can select a method by which the scanner is powered on off from one of the following z Press the Power button on the operator panel z Use an AC power strip that handles the power supply for peripherals such as a scanner when the ...

Page 25: ... and close the ADF How to Open the ADF 1 Remove all documents from the ADF paper chute feeder 2 Pull the ADF release tab towards you to open the ADF How to Close the ADF 1 Close the ADF Push the center of the ADF until it locks in place 1 4 Opening Closing the ADF Be careful not to have your fingers caught when the ADF closes ADF release tab Be careful not to have your fingers caught when the ADF ...

Page 26: ...an Daily Care Troubleshooting Operational Settings Replacing the Consumables Scanner Overview This section describes how to open and close the document cover How to Open the Document Cover 1 Open the document cover How to Close the Document Cover 1 Gently close the document cover 1 5 Opening Closing the Document Cover ScanPartner SP30F Document cover ...

Page 27: ...cuments loaded in the ADF paper chute feeder are fed into the ADF one by one Using the chute extensions will keep the documents straight and feed them smoothly 1 Pull out chute extension 1 2 Pull out chute extension 2 1 6 Setting Up the ADF Paper Chute feeder HINT Make sure to hold the scanner while you pull out the chute extension 1 Chute extension 1 HINT Make sure to hold the scanner while you p...

Page 28: ...Consumables Scanner Overview Documents loaded in the ADF paper chute feeder are ejected onto the stacker one by one Using the stacker and stacker extensions will keep the documents straight and stack them neatly ScanPartner SP25 ScanPartner SP30 A6 landscape or larger 1 Bring down the stacker from the top towards you 2 Slide out stacker extension 1 towards you 1 7 Setting Up the Stacker Stacker St...

Page 29: ...ocuments How to Use the Operator Panel Various Ways to Scan Daily Care Troubleshooting Operational Settings Replacing the Consumables Scanner Overview 3 Lift up stacker extension 2 towards you A7 landscape or smaller 1 Bring down the stacker from the top towards you Stacker extension 2 Stacker ...

Page 30: ...el Various Ways to Scan Daily Care Troubleshooting Operational Settings Replacing the Consumables Scanner Overview 2 Lift up stacker extension 3 ScanPartner SP30F A5 portrait or larger 1 Lift up the stacker towards you ATTENTION Do not bend stacker extension 3 more than 90 degrees because it may break Stacker extension 3 Stacker ...

Page 31: ...o Use the Operator Panel Various Ways to Scan Daily Care Troubleshooting Operational Settings Replacing the Consumables Scanner Overview A6 portrait A5 landscape or smaller 1 Lift up the stacker extension ATTENTION Do not bend the stacker extension more than 90 degrees because it may break Stacker extension ...

Page 32: ...utomatically to reduce power consumption while the scanner is in standby To disable this function clear the Power off after a certain period of time check box in Device Setting of the Software Operation Panel For details refer to Waiting Time to Enter Power Saving Mode Power saving page 144 To turn the scanner back on after it has turned off automatically press the Power button on the operator pan...

Page 33: ...ing procedures and operations will vary slightly according to the image scanning application For details refer to the manual of the image scanning application The following describes the normal procedure for scanning 1 Turn on the scanner For details refer to 1 3 Turning the Power ON OFF page 24 2 Load a document in the ADF paper chute feeder Load a document face down in the ADF paper chute feeder...

Page 34: ...tor Panel Various Ways to Scan Daily Care Troubleshooting Operational Settings Replacing the Consumables Scanner Overview 6 Scan the document with the image scanning application ATTENTION Do not unplug the USB cable or log off the user account when the scanner and the computer are communicating for instance during scanning ...

Page 35: ...d For details refer to the PaperStream IP driver Help z Software Operation Panel This application allows you to configure various settings such as the operation of the scanner and managing the consumables It is installed together with the PaperStream IP driver For details refer to Chapter 8 Operational Settings page 115 z Error Recovery Guide Details the status of the scanner and explains how to r...

Page 36: ...ss 32 bit 64 bit Service Pack 1 or later z Windows Vista Enterprise 32 bit 64 bit Service Pack 1 or later z Windows Vista Ultimate 32 bit 64 bit Service Pack 1 or later z Windows Server 2008 Standard 32 bit 64 bit 1 z Windows Server 2008 R2 Standard 64 bit 1 z Windows 7 Home Premium 32 bit 64 bit z Windows 7 Professional 32 bit 64 bit z Windows 7 Enterprise 32 bit 64 bit z Windows 7 Ultimate 32 bi...

Page 37: ...r Sprint z Manual 1 Turn on the computer and log on to Windows as a user with Administrator privileges 2 Insert the Setup DVD ROM into the DVD drive D The ScanPartner Setup dialog box is displayed 3 Click the Install software button D The software information window appears 4 Check the information and click the Next button 5 Click the button for the software you want to install 6 Follow the instru...

Page 38: ...roubleshooting Operational Settings Replacing the Consumables Scanner Overview How to Load Documents Chapter 2 How to Load Documents This chapter explains how to load documents on the scanner 2 1 Loading Documents in the ADF 39 2 2 Loading Documents on the Flatbed ScanPartner SP30F 41 2 3 Documents for Scanning 42 ...

Page 39: ... for Mixed Batch Scanning page 48 or Documents with Different Widths page 57 2 Check the number of sheets Up to 50 sheets can be loaded with paper weight of 80 g m2 20 lb and thickness of the document stack under 5 mm For details refer to Loading Capacity page 45 2 Fan the documents 1 Grab a stack of documents which should be 5 mm or less 2 Hold both ends of the documents and fan them a few times ...

Page 40: ...stacker and stacker extension according to the length of the document For details refer to 1 7 Setting Up the Stacker page 28 3 Load a document in the ADF paper chute feeder Load a document face down in the ADF paper chute feeder 4 Adjust the side guides to the width of the document Do not leave space between the side guides and the document Otherwise the document may be fed skewed 5 Scan the docu...

Page 41: ...ning Closing the Document Cover ScanPartner SP30F page 26 2 Load a document on the document bed Place the document face down to align its top left hand corner with the reference point 3 Close the document cover For details refer to 1 5 Opening Closing the Document Cover ScanPartner SP30F page 26 4 Scan the document with the image scanning application For details refer to the manual of the image sc...

Page 42: ...to 200 dpi or lower Conditions Paper type The following paper types are recommended z Wood free paper z Wood containing paper z PPC paper recycled z Plastic card When using paper types other than the above make sure to test with the same type of paper first to check if the document can be scanned Paper weight thickness The following paper weights can be used z 41 to 209 g m2 11 to 56 lb z 127 to 2...

Page 43: ...he ink is still wet z Documents smaller than A8 size portrait z Documents wider than 216 mm 8 5 in z Documents other than paper plastic card such as fabric metal foil and OHP film z Important documents that must not be damaged or smeared ATTENTION z Since carbonless papers contain chemical substances that may harm the rollers e g pick roller take note of the following Cleaning If paper jams occur ...

Page 44: ...dirty with grease marks e g fingerprints and such perform scanning after wiping the dirt off Scanning thick documents such as plastic cards will be falsely detected as multifeed In that case disable multifeed detection B ac k HINT z When scanning semi transparent documents increase the brightness for scanning to avoid bleed through z When you scan documents written in lead pencil make sure to clea...

Page 45: ... Documents Loading Capacity The number of sheets that can be loaded in the ADF paper chute feeder is determined by the paper size and paper weight See the graph below 50 35 29 60 60 50 40 30 20 10 0 52 41 64 Paper weight g m 2 80 104 127 Capacity sheets 50 41 29 24 25 157 20 A4 Letter or smaller Legal 19 209 15 Unit Conversion g m2 41 52 64 75 80 90 104 127 157 209 lb 11 14 17 20 21 24 28 34 42 56...

Page 46: ...9 g m2 11 to 56 lb z Do not punch holes within 35 mm 1 38 in over the center of the document See Fig 1 z Do not attach other documents within 35 mm 1 38 in over the center of the document See Fig 1 Detection by length z Load documents of the same paper length in the ADF paper chute feeder z Variance in document lengths 1 or less z Do not punch holes within 35 mm 1 38 in over the center of the docu...

Page 47: ...h z When you use detection by overlapping scanning thick documents such as plastic cards will be falsely detected as multifeed In that case disable multifeed detection Unit mm Top Reference point Front side Feed direction Bottom 35 Center HINT z Accuracy of multifeed detection may drop with some documents Multifeed cannot be detected for the top 30 mm of a document z For the shaded area in Fig 1 y...

Page 48: ...nds are mixed it affects the feeding performance as the difference in the friction coefficient increases The following friction coefficients are recommended 0 35 to 0 60 reference value for paper friction coefficient Document position Use paper sizes that fit the 39 mm width of the pick roller in the center Paper size When you scan a mixed batch with different sizes not feeding the documents strai...

Page 49: ... note that not feeding the documents straight may cause paper jams or part of the image to appear missing It is recommended to check the documents thoroughly before scanning and also check the image if the document was skewed LTR Letter size P Portrait L Landscape Maximum size LTR P Carrier Sheet A4 P A5 L B5 P B6 L A5 P A6 L B6 P B7 L A6 P A7 L B7 P B8 L A7 P A8 L B8 P A8 P Width mm 1 216 210 182...

Page 50: ...h between the side guides Conditions for Automatic Page Size Detection Automatic Page Size Detection does not work with the following types of documents z Non rectangular documents In addition Automatic Page Size Detection may not work with the following types of documents z Documents lighter than 52g m2 14lb z White documents with glossy edges z Documents with slightly dark gray edges ATTENTION B...

Page 51: ... double page spread document with the Carrier Sheet in high resolution In that case specify a lower resolution and try scanning again z Do not write on color stain or cut the end with a black and white pattern on the Carrier Sheet z Do not place the Carrier Sheet upside down Otherwise a paper jam may occur and damage the Carrier Sheet and the document inside z Do not leave your document inside the...

Page 52: ...ocuments How to Use the Operator Panel Various Ways to Scan Daily Care Troubleshooting Operational Settings Replacing the Consumables Scanner Overview Chapter 3 How to Use the Operator Panel This chapter explains how to use the operator panel 3 1 Operator Panel 53 ...

Page 53: ...tor Lights or flashes in orange when an error occurs Scan Stop button 1 Launches the linked application software Clears the displayed error indication Cancels the scan Power button Turns the power on off 1 For details about how to scan by pressing the Scan Stop button refer to the scanner driver Help included in the Setup DVD ROM or Using a Button on the Scanner to Start Scanning page 68 Power ind...

Page 54: ...and the Power indicator turns on The indicators operate in the same way when the scanner is in power saving mode Turns on Turns on Indicates that a temporary error occurred during scanning The Check indicator turns on For details about errors refer to Temporary Errors page 91 The indicators return to the ready status if the Scan Stop button is pressed Flashes Turns on or flashes Indicates that a d...

Page 55: ...acing the Consumables Scanner Overview Various Ways to Scan Chapter 4 Various Ways to Scan This chapter explains how to configure scanner settings and scan different types of documents with the image scanning application 4 1 Summary 56 4 2 Scanning Documents of Different Types and Sizes 57 4 3 Advanced Scanning 67 4 4 Customizing the Scanner Settings 68 ...

Page 56: ...types and sizes z Documents with Different Widths page 57 z Documents Larger than A4 Letter Size page 58 z Scanning Photographs and Clippings page 60 z Long Page Scanning page 62 z Scanning a Book ScanPartner SP30F page 63 z Scanning a Large Document on the Flatbed ScanPartner SP30F page 65 Advanced scanning z Feeding Documents Manually in the ADF page 67 Customizing the scanner settings z Using a...

Page 57: ...atch For details refer to Chapter 2 How to Load Documents page 38 4 2 Scanning Documents of Different Types and Sizes ATTENTION When you scan a mixed batch with different widths some of the smaller documents may be skewed or not fed into the ADF In that case separate the documents by their widths and scan them in different batches HINT For more details about scanning a mixed batch of documents ref...

Page 58: ...can documents larger than A4 Letter size such as A3 and B4 By folding the document in half and scanning in duplex mode the two sides are merged into a single image 1 Place the document inside the Carrier Sheet 1 Fold the document in half so that the sides to be scanned are facing out Fold it tightly and smooth out any creases Otherwise it may cause the document to skew during feeding ATTENTION Par...

Page 59: ...ier Sheet face down in the ADF paper chute feeder Secure the Carrier Sheet with the side guides to avoid skewing 3 In the scanner driver configure the scan settings for using the Carrier Sheet For details refer to the scanner driver s Help For some image scanning applications the scanner driver s setup dialog box may not appear 4 Scan the document with the image scanning application For details re...

Page 60: ...improved when you perform the following Fold the document tightly Align the edges of the document neatly with the edges of the Carrier Sheet Turn over the Carrier Sheet to the other reverse side z When Automatic detection is specified for Paper Size the closest standard size A3 A4 or Double Letter is selected from the same drop down list Note that the size of the image may become smaller than the ...

Page 61: ...cified in Paper Size z When Automatic detection is specified for Paper Size the closest standard size is selected from the same drop down list Note that the size of the image may become smaller than the original document depending on the document scanned or part of the image may appear missing Example When an A5 size image is printed in the center of an A4 size document DThe image is output in A5 ...

Page 62: ...re the scan settings to scan the paper size of the long page For details refer to the scanner driver s Help For some image scanning applications the scanner driver s setup dialog box may not appear ATTENTION z Long page documents should be loaded one sheet at a time in the ADF paper chute feeder z When you scan long pages take note of the following Loading Hold the document with your hand so it do...

Page 63: ...w Various Ways to Scan How to Use the Operator Panel 3 Scan the document with the image scanning application For details refer to the manual of the image scanning application Scanning a Book ScanPartner SP30F 1 Open the document cover For details refer to 1 5 Opening Closing the Document Cover ScanPartner SP30F page 26 2 Remove the document cover by pulling it out in the direction of the arrow ...

Page 64: ...left hand corner with the reference point 4 In the scanner driver configure the scan settings for using the flatbed For details refer to the scanner driver s Help 5 Scan the document with the image scanning application For details refer to the manual of the image scanning application 6 Attach the document cover 7 Close the document cover For details refer to 1 5 Opening Closing the Document Cover ...

Page 65: ...ner SP30F page 26 2 Remove the document cover by pulling it out in the direction of the arrow 3 Load the document on the document bed Place the document face down to align its top left hand corner with the reference point 4 In the scanner driver configure the scan settings for using the flatbed For details refer to the scanner driver s Help 5 Scan the document with the image scanning application F...

Page 66: ...P 66 How to Load Documents Daily Care Troubleshooting Operational Settings Replacing the Consumables Scanner Overview Various Ways to Scan How to Use the Operator Panel 7 Close the document cover For details refer to 1 5 Opening Closing the Document Cover ScanPartner SP30F page 26 ...

Page 67: ...ch as magazine newspaper clippings that cannot be loaded together 1 Enable manual feeding in the Software Operation Panel For details refer to Waiting Time in Manual Feed Mode Manual feed timeout page 143 2 Load a document in the ADF paper chute feeder For details refer to Chapter 2 How to Load Documents page 38 3 Scan the document with the image scanning application For details refer to the manua...

Page 68: ...er to 1 3 Turning the Power ON OFF page 24 2 Display the Control Panel dialog box z Windows XP Windows Vista Windows Server 2008 Windows 7 Click Start menu J Control Panel z Windows Server 2012 Windows 8 Right click the Start screen and select All apps on the app bar J Control Panel under Windows System z Windows Server 2012 R2 Windows 8 1 Select on the lower left side of the Start screen J Contro...

Page 69: ...n to be launched by the scanner button event Click Start this program under Actions and select an application from the drop down list on the right 7 Click the OK button The setup of the computer is completed Proceed to configure the scanner settings Scanner setup No particular setting is required DThe specified application is launched when you press the Scan Stop button HINT For details refer to C...

Page 70: ...tside 73 5 3 Cleaning the Inside 74 5 4 Cleaning the Carrier Sheet 79 Do not use aerosol spray or spray that contains alcohol to clean the scanner Dust blown up by strong air from the spray may enter inside the scanner which may cause the scanner to fail or malfunction Also note that sparks generated by static electricity may cause a fire The glasses inside the ADF become very hot when the scanner...

Page 71: ...Name Part No Notes Cleaner F1 PA03950 0352 100 ml Moisten a cloth or Cleaning Paper with this liquid to wipe the scanner clean It may take a long time to dry if an excessive amount is used Use it in small quantity Wipe off the cleaner completely to leave no residue on the cleaned parts Cleaning Paper CA99501 0012 10 sheets Use this non woven sheet with Cleaner F1 Cleaning Wipe PA03950 0419 24 pack...

Page 72: ... Eject roller Flatbed ScanPartner SP30F Document pad Document bed Plastic frame ATTENTION Cleaning cycles may vary depending on the condition of the documents Also cleaning must be performed more frequently when the following types of documents are scanned z Smooth faced documents such as coated paper z Documents with printed text graphics that almost cover the entire surface z Chemically treated ...

Page 73: ...tergent or a sheet of Cleaning Wipe For ScanPartner SP25 ScanPartner SP30 For ScanPartner SP30F 5 2 Cleaning the Outside ATTENTION z To avoid deformation and discoloration never use paint thinner or any other organic solvents z Be careful not to let any moisture or water inside the scanner during cleaning z It may take a long time to dry if an excessive amount of Cleaner F1 mild detergent is used ...

Page 74: ...ner is not sufficiently fused 1 Turn on the scanner For details refer to 1 3 Turning the Power ON OFF page 24 2 Spray the Cleaning Paper with Cleaner F1 3 Pull out the chute extensions according to the length of the Cleaning Paper For details refer to 1 6 Setting Up the ADF Paper Chute feeder page 27 4 Lift the stacker and stacker extension according to the length of the Cleaning Paper For details...

Page 75: ...is not sufficiently fused 1 Turn off the scanner and wait for at least 15 minutes For details refer to 1 3 Turning the Power ON OFF page 24 2 Open the ADF For details refer to 1 4 Opening Closing the ADF page 25 3 Clean the following locations with a cloth moistened with Cleaner F1 or a sheet of Cleaning Wipe The glasses inside the ADF become very hot when the scanner is being used Before you star...

Page 76: ...grooves as you rotate the roller manually taking care not to damage the roller surface Make sure that it is cleaned properly because residue on the roller will affect the feeding performance Plastic idler roller 4 Gently wipe the surface of the rollers Make sure that it is cleaned properly because residue on the roller will affect the feeding performance Also be careful not to damage the sponge wh...

Page 77: ... the ADF page 25 3 When you press the Scan Stop button on the operator panel the feed eject rollers rotate a certain amount 4 Put a piece of cloth moistened with Cleaner F1 or a sheet of Cleaning Wipe against the roller surface and wipe horizontally Wipe the whole surface by pressing the Scan Stop button to rotate the rollers Make sure that it is cleaned properly because residue on the roller will...

Page 78: ...1 Open the document cover For details refer to 1 5 Opening Closing the Document Cover ScanPartner SP30F page 26 2 Clean the following locations with a cloth moistened with Cleaner F1 or a sheet of Cleaning Wipe 3 Wait for the cleaned parts to dry 4 Close the document cover For details refer to 1 5 Opening Closing the Document Cover ScanPartner SP30F page 26 Be careful not to have your fingers caug...

Page 79: ...et dirt and dust will accumulate on the surface and the inside Clean it regularly because it may result in scanning errors 5 4 Cleaning the Carrier Sheet ATTENTION z Be careful to avoid creasing the Carrier Sheet z To avoid deformation and discoloration never use paint thinner or any other organic solvents z Do not use force to rub against the Carrier Sheet because it may be damaged or deformed z ...

Page 80: ...eplacing the Consumables This chapter describes how to replace the consumables for the scanner 6 1 Consumables and Replacement Cycles 81 6 2 Replacing the Brake Roller 82 6 3 Replacing the Pick Roller 84 The glasses inside the ADF become very hot when the scanner is being used Before you replace the consumables make sure to turn off the power unplug the power cable and wait at least 15 minutes for...

Page 81: ...eplacing the consumables brake roller pick roller which allows you to check the status on each consumable For details refer to 8 4 Settings Related to Sheet Counters page 129 Note that the suggested replacement cycles are guidelines for using A4 80 g m2 20 lb wood free or wood containing paper as these cycles vary depending on the type of documents scanned and how often the scanner is used and cle...

Page 82: ... the ADF For details refer to 1 4 Opening Closing the ADF page 25 3 Remove the brake roller 1 Hold both ends of the cover and open it in the direction of the arrow 2 Lift the right side of the roller first then pull out the shaft from the slot on the left 4 Remove the brake roller from its shaft 5 Attach a new brake roller on the shaft Insert the protrusion on the shaft into the slot 6 2 Replacing...

Page 83: ...ft into the hole and then attach the right side of the shaft 2 Close the cover 7 Close the ADF For details refer to 1 4 Opening Closing the ADF page 25 8 Reset the consumable counter Start up the Software Operation Panel and reset the counter For details refer to Resetting the sheet counters page 130 ATTENTION Confirm that the brake roller is installed properly Otherwise it may cause feeding error...

Page 84: ... all documents from the ADF paper chute feeder 2 Remove the ADF paper chute feeder Hold both ends of the ADF paper chute feeder and lift then pull it out in the direction of the arrow 3 Open the ADF For details refer to 1 4 Opening Closing the ADF page 25 4 Remove the pick roller 1 Open the sheet guide by lifting the tab 2 Rotate the bushing on the shaft 6 3 Replacing the Pick Roller Be careful no...

Page 85: ...ch a new pick roller on the shaft Insert the protrusion on the shaft into the slot ATTENTION Be careful not to touch the gear near the bushing on the shaft as it contains grease Bushing Shaft Shaft Retaining clip Pick roller ATTENTION Lifting the retaining clip with your fingernail may hurt or damage your fingernail Use a paper clip or something alike if you have trouble lifting it up ATTENTION Co...

Page 86: ...t guide are locked firmly 8 Close the ADF For details refer to 1 4 Opening Closing the ADF page 25 9 Attach the ADF paper chute feeder Insert the tabs into the slots on the back of the scanner and tilt the ADF paper chute feeder backwards until it locks in place 10Reset the consumable counter Start up the Software Operation Panel and reset the counter For details refer to Resetting the sheet count...

Page 87: ... countermeasures against paper jams and other troubles items to check before contacting your scanner service provider and how to read the product labels on the scanner 7 1 Paper Jam 88 7 2 Error Indications on Operator Panel 90 7 3 Troubleshooting 94 7 4 Before You Contact the Scanner Service Provider 112 7 5 Checking the Product Labels 114 ATTENTION For details about errors troubles not mentioned...

Page 88: ... document 7 1 Paper Jam z Do not use force to pull out the jammed document and make sure to open the ADF first z Be careful not to touch any sharp parts upon removing jammed documents Doing so could result in injury z Be careful not to get your accessories e g ties necklaces or hair caught inside the scanner z The glass surface may become extremely hot during operation Be careful not to have your ...

Page 89: ...hooting 4 Close the ADF For details refer to 1 4 Opening Closing the ADF page 25 Be careful not to have your fingers caught when the ADF closes ATTENTION z Confirm that the ADF is closed properly Otherwise the document may not be fed into the ADF z Occasionally when scanning is complete or canceled documents may remain in the ADF without any error message displayed In that case remove the document...

Page 90: ... engineer to perform recovery The indicators return to the ready status if the Scan Stop button is pressed during a temporary error alert Note that a paper jam message disappears after a certain period of time elapses if there are no documents ready status in the scanner If the Error Recovery Guide is installed in your computer the Error Recovery Guide window appears when the Windows operating sys...

Page 91: ...occurs the Check indicator turns on Paper feeding errors Other errors Item Resolution Paper jam 1 Remove the jammed document For details refer to 7 1 Paper Jam page 88 2 Check if the document is suitable for scanning by ADF For details refer to 2 3 Documents for Scanning page 42 Multifeed When you press the Scan Stop button on the operator panel the documents are ejected Item Resolution Transport ...

Page 92: ...status of the indicators and contact your FUJITSU scanner dealer or an authorized FUJITSU scanner service provider Flashes 3 times Turns on Optical error ADF Back Flashes 4 times Turns on Flatbed motor malfunction ScanPartner SP30F 1 Confirm that the transport lock switch is not locked 2 Turn the scanner off then back on If the problem persists write down the status of the indicators and contact y...

Page 93: ...r an authorized FUJITSU scanner service provider Check indicator Power indicator Item Resolution Flashes 2 times Flashes 2 times Lamp circuit error Turn the scanner off then back on If the problem persists write down the status of the indicators and contact your FUJITSU scanner dealer or an authorized FUJITSU scanner service provider Flashes 6 times Flashes 6 times Motor circuit error Check indica...

Page 94: ...toms Scanner cannot be powered ON page 95 Scanning does not start page 96 Image quality is poor when scanning pictures photos in black white page 97 Quality of scanned text or lines is unsatisfactory page 98 Images are distorted or not clear page 99 Vertical streaks appear on the scanned image page 100 When the scanner is turned on the Check indicator on the operator panel turns on or flashes page...

Page 95: ...leshooting Scanner cannot be powered ON Is the power cable connected properly No Connect the power cable properly Yes Did you press the Power button on the scanner s operator panel No Press the Power button on the operator panel Yes If the problem persists check the items in 7 4 Before You Contact the Scanner Service Provider page 112 first then contact your FUJITSU scanner dealer or an authorized...

Page 96: ...F paper chute feeder correctly No Reload the document in the ADF paper chute feeder Yes Is the ADF closed properly No Close the ADF firmly If the document is caught in the ADF remove the document and close the ADF Yes Is the USB cable connected properly No Connect the USB cable properly For details refer to the Quick Installation Sheet Yes Is the connector on the USB cable broken or damaged Yes Us...

Page 97: ...onfigure grayscale or other scan settings that do not simply binarize output in black white and then perform a scan Are the scan settings configured to not simply binarize output in black white such as grayscale No Use a scanner driver to configure grayscale or other scan settings that do not simply binarize output in black white and then perform a scan 1 Yes Are the glasses inside the ADF clean N...

Page 98: ...ad clean No Clean the inside of the ADF For details refer to Chapter 5 Daily Care page 70 Yes Is the resolution appropriate No Specify a higher resolution in the scanner driver Yes Did you select the scan settings that simply binarize output in black white No In the scanner driver select the scan settings that simply binarize output in black white 1 Yes Is there any foreign matter e g dust paper d...

Page 99: ...n during scanning Is there a heavy object on top of the ADF Yes Do not push down the top of the ADF or place any heavy objects on the ADF during scanning No Is anything causing the scanner to vibrate during scanning Yes Do not allow the scanner to vibrate during scanning No Is the scanner placed on a flat level surface Are the rubber pads attached on the bottom of the scanner No Either place the s...

Page 100: ...rtner SP30F For details refer to Chapter 5 Daily Care page 70 No Does the vertical streak disappear when you set a lower resolution Yes Specify a lower resolution No Is there any foreign matter e g dust paper dust on the document Yes Remove any foreign matter off the document It may be carried onto the glass inside the ADF or the document bed of the flatbed ScanPartner SP30F and cause vertical str...

Page 101: ...ashes Did you unlock the transport lock switch ScanPartner SP30F No Turn off the scanner and unlock the transport lock switch For details refer to the Quick Installation Sheet Yes Does the Check indicator on the operator panel indicate an error after the power is turned off then on again No The scanner is operating correctly Yes If the problem persists check the items in 7 4 Before You Contact the...

Page 102: ...curate detection No Fulfill the conditions for an accurate multifeed detection For details refer to Conditions for Multifeed Detection page 46 Also specify the multifeed detection area if necessary The specified application is launched when you press the Scan Stop button page 69 Yes Did you scan a plastic card or any other thick document Yes To scan documents successfully disable the multifeed det...

Page 103: ...ultifeed may not be detected Yes continued Are the consumables 1 worn out Yes Check the consumable counters Replace consumables as necessary For details refer to Chapter 6 Replacing the Consumables page 80 No Are you using the scanner at an altitude of 2 000 m or higher Yes Enable high altitude mode in the Software Operation Panel For details refer to Scanning at High Altitude High Altitude Mode p...

Page 104: ...id you fan the documents before loading them in the ADF paper chute feeder No Fan the documents before loading or reduce the amount of documents Yes Are the consumables 1 installed correctly No Install the consumables 1 correctly For details refer to Chapter 6 Replacing the Consumables page 80 Yes Are the consumables 1 clean No Clean the consumables 1 For details refer to Chapter 5 Daily Care page...

Page 105: ...ign matter inside the ADF Yes Clean or remove any foreign matter from the ADF For details refer to Chapter 5 Daily Care page 70 No Are the consumables 1 installed correctly No Install the consumables 1 correctly For details refer to Chapter 6 Replacing the Consumables page 80 Yes Are the consumables 1 clean No Clean the consumables 1 For details refer to Chapter 5 Daily Care page 70 Yes Are the co...

Page 106: ...ents that meet the requirements For details refer to 2 3 Documents for Scanning page 42 Yes Are the consumables 1 worn out Yes Check the consumable counters and replace them if necessary For details refer to Chapter 6 Replacing the Consumables page 80 No Have you adjusted the offset vertical magnification No In Device Setting of the Software Operation Panel adjust the offset in feed direction vert...

Page 107: ... Adjusting the Position to Start the Scan Offset Vertical magnification Adjustment page 132 Yes Did you use the Page Edge Filler function to fill out the shadow around the edge No In the scanner driver or in Device Setting 2 of the Software Operation Panel use the Page Edge Filler function to fill out the shadow around the edge For details refer to Removing Shadows Streaks that Appear around the S...

Page 108: ...cuments written in lead pencil make sure to clean the rollers frequently Otherwise the rollers will be contaminated which may leave black traces on the document or cause feeding errors For details refer to Chapter 5 Daily Care page 70 No Are the glass and rollers inside the ADF clean No Clean the inside of the ADF For details refer to Chapter 5 Daily Care page 70 Yes If the problem persists check ...

Page 109: ...information on purchasing the Carrier Sheet contact your FUJITSU scanner dealer or an authorized FUJITSU scanner service provider Yes Did you start the scan after loading the Carrier Sheet in the ADF paper chute feeder No Start the scan after loading the Carrier Sheet in the ADF paper chute feeder For details refer to Documents Larger than A4 Letter Size page 58 or Scanning Photographs and Clippin...

Page 110: ...e roller and the pick roller No continued Did you place a thick document inside the Carrier Sheet Yes Some papers may be too thick to place inside the Carrier Sheet Use documents that meet the requirements For details refer to Conditions for Using the Carrier Sheet page 51 No If the problem persists check the items in 7 4 Before You Contact the Scanner Service Provider page 112 first then contact ...

Page 111: ...photos postcards in the Carrier Sheet for scanning Yes Place only one document at a time in the Carrier Sheet No Does the fold line of the document hang off the Carrier Sheet Yes Part of the image around where the document is folded may appear missing Place the document so its fold line is set about 1 mm inside from the edge of the Carrier Sheet No If the problem persists check the items in 7 4 Be...

Page 112: ...scanner service provider General 7 4 Before You Contact the Scanner Service Provider Item Findings Scanner model name Example ScanPartner SP30F For details refer to 7 5 Checking the Product Labels page 114 Serial No Example XXXX000001 For details refer to 7 5 Checking the Product Labels page 114 Date of manufacture Example 2013 09 September 2013 For details refer to 7 5 Checking the Product Labels...

Page 113: ...system Windows Error message Interface Example USB interface Interface controller Item Findings Paper type Main purpose of use Date of last cleaning Date of consumable replacement Operator panel status Item Findings Scanner driver and version Interface controller Operating system Windows Application Example Presto PageManager Scanning side s Example front back both Resolution Example 600 dpi 75 dp...

Page 114: ... How to Use the Operator Panel Various Ways to Scan Daily Care Operational Settings Replacing the Consumables Troubleshooting This section explains about the product labels on the scanner Location The location of the label is shown below Label example Shows the scanner information 7 5 Checking the Product Labels Label ...

Page 115: ...perational Settings This chapter explains how to use the Software Operation Panel to configure the scanner settings 8 1 Starting Up the Software Operation Panel 116 8 2 Password Setting 118 8 3 Configuration Items 124 8 4 Settings Related to Sheet Counters 129 8 5 Settings Related to Scanning 132 8 6 Settings Related to Multifeed Detection 138 8 7 Settings Related to Waiting Time 143 8 8 Settings ...

Page 116: ...r refer to 1 3 Turning the Power ON OFF page 24 2 Display the Software Operation Panel z Windows XP Windows Vista Windows Server 2008 Windows 7 Select Start menu J All Programs J ScanPartner J Software Operation Panel z Windows Server 2012 Windows 8 Right click the Start screen and select All apps on the app bar J Software Operation Panel under ScanPartner z Windows Server 2012 R2 Windows 8 1 Sele...

Page 117: ...The Software Operation Panel icon is displayed in the menu that appears when you click in the notification area To have the Software Operation Panel icon always displayed in the notification area drag the icon and drop it onto the notification area The notification area is located at the far right of the taskbar Procedures from here will be explained under the assumption that the Software Operatio...

Page 118: ...assword is set In order to prevent unnecessary changes to the settings a password can be used to restrict user operations Setting a Password Set a password in the following procedure 1 Right click the Software Operation Panel icon in the notification area and select Password Setting from the menu D The Password setting dialog box appears 2 Enter a new password then again to confirm and click the O...

Page 119: ... Software Operation Panel to View Only mode in the following procedure 1 Set a password For details refer to Setting a Password page 118 2 Right click the Software Operation Panel icon in the notification area and select View Only mode from the menu D The Software Operation Panel enters the View Only mode HINT In View Only mode a check mark appears next to View Only mode in the menu that is displa...

Page 120: ...n the following procedure 1 Right click the Software Operation Panel icon in the notification area and select View Only mode from the menu D The Password setting dialog box appears 2 Enter the current password and click the OK button D View Only mode is cleared and the scanner settings can now be changed HINT When you exit View Only mode the check mark next to View Only mode disappears from the me...

Page 121: ... 1 Right click the Software Operation Panel icon in the notification area and select Password Setting from the menu D The Password setting dialog box appears 2 Enter the current password and click the OK button D The Password setting dialog box appears 3 Enter a new password then again to confirm and click the OK button Up to 32 characters can be used for the password Note that only alphanumeric c...

Page 122: ...Clearing the Password Clear the password in the following procedure 1 Right click the Software Operation Panel icon in the notification area and select Password Setting from the menu D The Password setting dialog box appears 2 Enter the current password and click the OK button D The Password setting dialog box appears 3 Leave both fields blank and click the OK button D A confirmation message appea...

Page 123: ...dure 1 Right click the Software Operation Panel icon in the notification area and select Password Setting from the menu D The Password setting dialog box appears 2 Enter the default password which is scanpartner and click the OK button D The Password setting dialog box appears 3 Enter a new password then again to confirm and click the OK button Up to 32 characters can be used for the password Note...

Page 124: ...ational Settings The Software Operation Panel allows the configuration of the following settings for the scanner that is connected to the computer Device Setting 1 Start up the Software Operation Panel For details refer to 8 1 Starting Up the Software Operation Panel page 116 2 From the listing on the left select Device Setting Items that can be configured in the above dialog box are shown in the ...

Page 125: ... of 5 15 min Power off after a certain period of time Select to set the scanner to turn the power off automatically if the scanner is left on for a certain period of time without being used Specify the timeout period for the scanner to be automatically turned off Power off after a certain period of time check box Selected 1 Hour 2 Hours 4 Hours 8 Hours When the Power off after a certain period of ...

Page 126: ...oftware Operation Panel settings can be restored to the factory default To restore the settings to the factory default click the Default button After a message is displayed click the OK button Note that the settings you have configured will be cleared z The Software Operation Panel settings can be backed up To back up the settings click the Save button then specify the file name and click the Save...

Page 127: ...page 133 Specify a width for the margin around the edge of the scanned image to fill in white or black The specified area is filled in white or black according to the background color This setting can also be configured in the scanner driver In that case Page Edge Filler of the scanner driver is used on the output image ADF Top Left Right 0 to 15 mm Bottom 7 to 7 mm in increments of 1 FB ScanPartn...

Page 128: ...nt 0 to 510 mm in increments of 2 0 mm Number of paper feeding retries page 137 Configure this setting to change the number of feeding retries when a pick error occurs 1 to 12 times 7 times Life Counter Alarm Setting page 131 Specify the replacement cycle for the consumables Pick Rollers Brake Rollers 10 000 to 2 550 000 sheets in increments of 10 000 Pick Rollers 200 000 sheets Brake Rollers 200 ...

Page 129: ...Panel For details refer to 8 1 Starting Up the Software Operation Panel page 116 2 From the listing on the left select Device Setting In this dialog box you can check the following items 8 4 Settings Related to Sheet Counters Item Description Total Count ADF Approximate total number of sheets scanned through the ADF Total Count FB ScanPartner SP30F Approximate total number of sheets scanned on the...

Page 130: ... in the Software Operation Panel D A confirmation message appears 3 Click the OK button D The settings are saved Message for replacing the consumables The following message may appear while using the scanner Check the message and replace the consumable accordingly If you click the Ignore button the message disappears and the scan can be continued However it is recommended that you replace the cons...

Page 131: ...ound color of the counter in Device Setting changes to light yellow when the page count after replacing the consumable reaches 95 of the value specified here and turns yellow when it reaches 100 A message that prompts consumable replacement page 130 also appears 1 Start up the Software Operation Panel For details refer to 8 1 Starting Up the Software Operation Panel page 116 2 From the listing on ...

Page 132: ...up the Software Operation Panel For details refer to 8 1 Starting Up the Software Operation Panel page 116 2 From the listing on the left select Device Setting and click the Offset button 3 Adjust the level of offset vertical magnification as needed 8 5 Settings Related to Scanning ATTENTION Normally you should not have to make any adjustments as the factory default settings are configured at appr...

Page 133: ...ack streaks In that case you can improve the image quality around the edges of the document by using the Page Edge Filler function to fill in the edges 1 Start up the Software Operation Panel For details refer to 8 1 Starting Up the Software Operation Panel page 116 2 From the listing on the left select Device Setting 2 J Page Edge Filler ADF or Page Edge Filler FB ScanPartner SP30F Vertical magni...

Page 134: ...ppear missing L R T B ADF T top 0 to 15 mm B bottom 7 to 7 mm R right 0 to 15 mm L left 0 to 15 mm FB ScanPartner SP30F T top 0 to 15 mm B bottom 0 to 15 mm R right 0 to 15 mm L left 0 to 15 mm in 1 mm increments Image area HINT z Depending on the value you specify the bottom edge is filled in as follows 1 to 7 mm Fills the margin in white from the detected page bottom 1 to 7 mm Outputs the image ...

Page 135: ...out color 1 Start up the Software Operation Panel For details refer to 8 1 Starting Up the Software Operation Panel page 116 2 From the listing on the left select Device Setting 2 J Dropout color 3 Select a color to drop out Red Green Blue The selected color is dropped out None No color is dropped out ATTENTION Dropout works the best with light low intensity colors and dark colors may not drop out...

Page 136: ...nning before the next scan Enabling Pre Pick shortens the interval between scanning each document 1 Start up the Software Operation Panel For details refer to 8 1 Starting Up the Software Operation Panel page 116 2 From the listing on the left select Device Setting 2 J Pre Pick 3 Select Yes or No HINT z If you cancel in the middle of scanning while pre pick is enabled you will have to remove the p...

Page 137: ...select Device Setting 2 J Number of paper feeding retries 3 Specify the number of paper feeding retries The value can range from 1 to 12 times Scanning at High Altitude High Altitude Mode Select whether to enable or disable high altitude mode Low atmospheric pressure at high altitudes may cause the accuracy of the multifeed detection for the ultrasonic sensor to be reduced Enabling high altitude m...

Page 138: ...When this function is enabled an error message is displayed as soon as it detects a multifeed and stops the scan Note that multifeed cannot be detected within 30 mm from the leading edge of the document 1 Start up the Software Operation Panel For details refer to 8 1 Starting Up the Software Operation Panel page 116 2 From the listing on the left select Device Setting 2 J Multifeed 3 Select a dete...

Page 139: ...the detection range by the length from the top of the document Proceed to Specifying the Area to Detect Multifeed Document check area specification for Multifeed Detection page 140 Length Select a length difference from 10 15 20 mm Any length under the specified value will not be detected as multifeed Method Description ATTENTION z To scan documents with different lengths specify Check Overlapping...

Page 140: ...the detection range Range Description Selected range Select the check box to specify the detection range colored in light blue in the picture below Select the check box to enable the setting in this dialog box Clear the check box to disable the setting Clearing this check box sets both start and end positions to 0 making the whole document to be detected for multifeeds The above condition applies ...

Page 141: ...regardless of whether it is enabled or disabled z To disable multifeed detection for the whole document select Disable and set the start position to 0 and the end position to equal the document length or longer z If you set a value larger than the document length for the start position selecting Disable detects the whole length of the document and selecting Enable disables the multifeed detection ...

Page 142: ...ange Enable Start 0 mm End 0 mm Multifeeds are detected for the area in light blue Example 3 Bad example Position Middle Selected range Enable Start 100 mm End 102 mm Since the detection range length is less than 5 mm multifeeds cannot be detected accurately HINT When you use detection by overlapping accuracy of multifeed detection may drop if the documents are glued tightly or attached together b...

Page 143: ...ontinuous scanning as long as you load a document within the set time If not the scan is finished automatically and manual feeding will be canceled 1 Start up the Software Operation Panel For details refer to 8 1 Starting Up the Software Operation Panel page 116 2 From the listing on the left select Device Setting 2 J Manual feed timeout 3 Specify whether to enable or disable Manual feed timeout I...

Page 144: ... the Software Operation Panel For details refer to 8 1 Starting Up the Software Operation Panel page 116 2 From the listing on the left select Device Setting 3 Use the slider to specify the waiting time before entering power saving mode The value can range from 5 to 235 minutes in increments of 5 HINT Selecting the Power off after a certain period of time check box turns the power off automaticall...

Page 145: ...fer to 8 1 Starting Up the Software Operation Panel page 116 2 From the listing on the left select Device Setting 2 J Power SW Control 3 Select one of the following 8 8 Settings Related to Power ON OFF Enable power switch Press the Power button on the operator panel Disable power switch Use an AC power strip that handles the power supply for peripherals such as a scanner when the computer is power...

Page 146: ...g the Consumables Scanner Overview Appendix Glossary Introduction Index Contents TOP Operational Settings Appendix This appendix provides the following information A 1 Basic Specification 147 A 2 Installation Specifications 149 A 3 Outer Dimensions 150 A 4 Scanner Options 151 A 5 Uninstalling the Software 152 ...

Page 147: ...ht source White cold cathode fluorescent lamp 2 front back White cold cathode fluorescent lamp 2 front back White cold cathode fluorescent lamp 3 front back flatbed Available paper size Minimum ADF 52 74 mm 2 05 2 91 in Maximum ADF 216 355 6 mm 8 5 14 in 1 Flatbed 216 297 mm 8 5 11 69 in Paper weight thickness 41 to 209 g m2 11 to 56 lb 127 to 209 g m2 34 to 56 lb for A8 size 1 4 mm or less for pl...

Page 148: ...g 4 The capacity varies depending on the paper weight For details refer to 2 3 Documents for Scanning page 42 5 Use the included USB cable When connecting to a USB hub be sure to use a USB hub that is connected to a USB port on the computer Connection with USB 2 0 requires the USB port and the hub to support USB 2 0 Also note that the scanning speed slows down when using USB 1 1 Connect the USB ca...

Page 149: ...7 72 in 301 567 229 mm 15 75 31 5 17 72 in Installation space W D H 2 400 700 380 mm 15 75 27 56 14 96 in 400 700 380 mm 15 75 27 56 14 96 in 400 800 450 mm 15 75 31 5 17 72 in Weight 4 2 kg 9 26 lb 4 2 kg 9 26 lb 8 8 kg 19 4 lb Input power Voltage range AC 100 to 240 10 Phase Single phase Frequency range 50 60 3Hz Power consumption Operation 38 W or less 45 W or less Power saving 2 2 W or less Po...

Page 150: ... Panel Various Ways to Scan Daily Care Troubleshooting Replacing the Consumables Operational Settings The outer dimensions are as follows ScanPartner SP25 ScanPartner SP30 Unit mm in ScanPartner SP30F Unit mm in A 3 Outer Dimensions 301 11 85 160 6 3 158 6 22 220 8 66 327 12 8 301 11 85 567 22 32 229 9 02 291 11 46 633 24 92 ...

Page 151: ...iption ScanSnap Carrier Sheets PA03360 0013 ScanPartner SP25 ScanPartner SP30 ScanPartner SP30F Use this option to scan documents larger than A4 Letter size as well as non standard size documents such as photographs and clippings A Carrier Sheet allows you to scan documents that are larger than A4 size e g A3 B4 as well as photographs that you wish to protect from damage and document clippings Whe...

Page 152: ...rt screen J Control Panel under Windows System To display move the mouse cursor 4 Select Uninstall a Program D The Programs and Features dialog box appears with a list of the currently installed software 5 Select a software to uninstall z PaperStream IP driver PaperStream IP TWAIN for ScanPartner PaperStream IP TWAIN x64 for ScanPartner PaperStream IP ISIS for ScanPartner z Software Operation Pane...

Page 153: ...Density Device Errors Dither Document sensor Double Letter size dpi dots per inch Duplex scanning mode Driver Dropout color Edge Extract Edge Processing Eject roller Error diffusion Feed roller Filter Flatbed Gamma Grayscale Halftone Image processing Interface Inversion ISIS Landscape Letter size Moire patterns Multi Image Multifeed Noise removal OCR Optical Character Recognition Operating environ...

Page 154: ...h is 74 105 mm 2 91 4 13 in A8 size A standard paper size which is 52 74 mm 2 05 2 91 in ADF Automatic Document Feeder A paper feeding mechanism which allows multiple sheets of documents to be scanned one sheet at a time Automatic size skew detection End of Page Detection Detects the end of the page and scans the length of the document Automatic Page Size Detection Detects the paper size and outpu...

Page 155: ...nverts it into digital form CCD technology is the basis of high quality image acquisition in scanners cameras and other devices D Default setting Hardware Preset values from the factory Software Values set upon installation of software Density Refers to the deepness of a color in an image Device Errors Errors that require troubleshooting by a service engineer Dither The process by which a group of...

Page 156: ...from a scanned image E Edge Extract A function that traces the boundaries between white and black areas to extract contours Edge Processing A function which decreases the density of bright colors except for white around black areas Increasing the value for this function removes dotted image noise and also produces softened images Eject roller Rollers that feed documents from the ADF onto the stack...

Page 157: ...ied color Flatbed An input device of the scanner Used to scan documents that cannot be scanned in the ADF such as books and magazines G Gamma A unit which indicates the changes in the brightness of an image It is expressed as a function of the electric input power to devices e g scanner display and the brightness of the image If the gamma rate is larger than 1 the brightness of an image increases ...

Page 158: ...anner Interface Specification is an API Application Program Interface standard for imaging devices e g scanners digital cameras which was developed by Captiva a division of EMC Corporation the former Pixel Translations in 1990 In order to use devices that comply with this standard it is necessary to install a driver software that supports ISIS standard L Landscape Orientation in which the short si...

Page 159: ...at recognizes the text on documents and converts them into text data that can be edited The shape of the characters are recognized by the differences in the light reflected off the documents Operating environment Conditions e g temperature humidity required to operate or store the scanner Operator panel A panel that consists of a display and buttons It is used for scanner operations such as select...

Page 160: ... the position to start scanning It shortens the interval between setting the document and feeding the document to the starting position R Resolution A measurement to indicate the quality fineness or an image Resolution is displayed by the number of pixels within an inch Since image data is a collection of small dots pixels if the same image contains different amount of pixels the one with more pix...

Page 161: ...this standard it is necessary to install a driver software that supports TWAIN standard U Ultrasonic sensor A sensor that detects multifeed errors by ultrasonic soundwave It detects multifeeds by monitoring the difference in the amount of ultrasonic waves transmitted through the documents USB USB Universal Serial Bus is a standard for interfaces used to connect devices such as keyboards and scanne...

Page 162: ...75 Carrier Sheet 79 flatbed 78 inside 74 outside 73 cleaning inside 74 cleaning materials 71 cleaning outside 73 consumables 81 conventions 6 customizing the scanner settings 68 D daily care 70 documents for scanning 42 E error indications 90 F flatbed cleaning 78 loading documents 41 H how to close the ADF 25 how to close the document cover 26 how to open the ADF 25 how to open the document cover...

Page 163: ...aper jam 88 parts and functions 17 pick roller 84 power on off 145 power saving mode 32 product label 114 R replacement cycles 81 replacing consumables 80 S Scan Stop button 68 scanner options 151 scanner overview 15 scanning 132 advanced scanning 67 documents of different types and sizes 57 ways of scanning 56 sheet counters 129 Software Operation Panel 116 configuration items 124 Page Edge Fille...

Page 164: ...F Image Scanner Operator s Guide P3PC 4772 02ENZ0 Issue Date January 2014 Issued by PFU LIMITED z The contents of this manual are subject to change without notice z PFU LIMITED assumes no liability for incidental or consequential damages arising from the use of this product and any claims by a third party z Copying of the contents of this manual in whole or in part as well as the scanner applicati...

Reviews: