background image


KSP75-FP-005468(2)

INSTRUCTION


MANUAL 

Mass Fiber Splice Type


Read this instruction manual carefully 

before operating the equipment. 


Adhere to all safety instructions and 

warnings contained in this manual. 


Keep this manual in a safe place. 

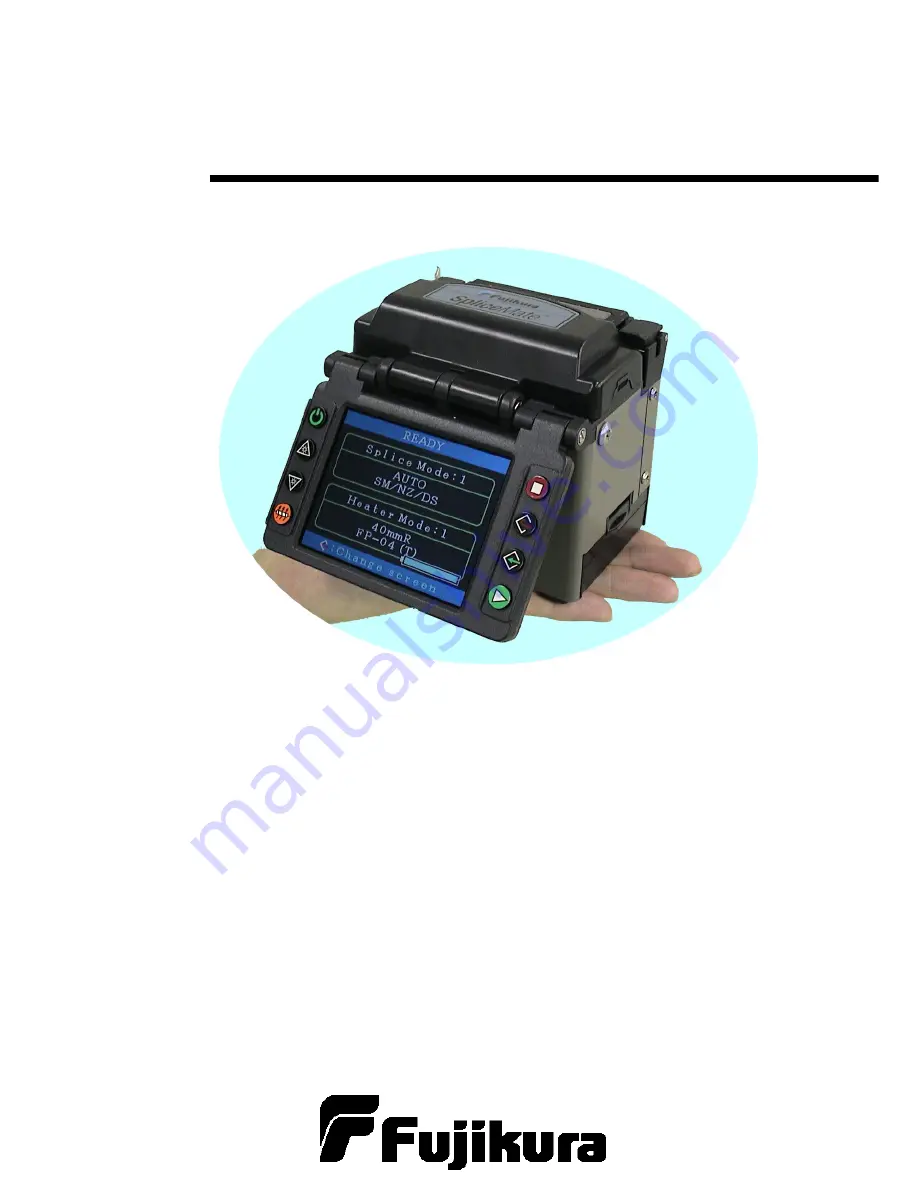
ARC FUSION SPLICER


Splice

Mate

TM

Summary of Contents for KSP75-FP-005468

Page 1: ...NUAL Mass Fiber Splice Type Read this instruction manual carefully before operating the equipment Adhere to all safety instructions and warnings contained in this manual Keep this manual in a safe place ARC FUSION SPLICER SpliceMateTM ...

Page 2: ......

Page 3: ...protection sleeve over fiber ribbon 15 5 When using fiber ribbon 15 6 When using single fiber 17 7 Fiber Cleaving 18 8 Loading fibers into the splicer 19 9 Splicing procedure 20 10 Removing spliced fiber 25 11 Heating protection sleeve 25 Maintenance of Splicing Quality 26 1 Cleaning and Checking before Splicing 26 2 Periodic Checking and Cleaning 28 Splice Menu 30 1 Splice Mode 30 2 Heater Mode 3...

Page 4: ...alue 58 6 Diagnostic Test Function 59 7 Dust Check 60 8 Motor Drive 60 9 Arc Discharge 61 10 Maintenance Info 61 Error Message List 62 Questions and Troubleshooting 68 1 Power Supply 68 2 Splicing Operation 68 3 Tube heater Operation 70 4 Supervising 70 5 Other Functions 71 Guarantee and Contact Address 72 1 Guarantee 72 2 Contact Address 73 ...

Page 5: ...l in a safe place Follow all safety instructions Discontinue use if malfunctioning Instruction Manual The following alert symbols are used in this instruction manual and machine to indicate warnings and caution for safe use Understand the meanings of these symbols WARNING There is a possibility of death or serious injury resulting from improper use by ignoring this indication CAUTION There is a po...

Page 6: ...death or fire Make sure the generator is regularly checked and serviced Use the supplied AC power cord Do not place heavy objects on the AC power cord Use of an improper cord or a damaged cord may cause fuming electric shock or equipment damage and may result in injury death or fire Do not disassemble or modify the splicer AC adapter battery or DC adapter In particular do not remove or bypass any ...

Page 7: ...onments in dusty humid atmospheres or when water condensation is present on the splicer This may result in electric shock splicer malfunction or poor splicing performance When using optional battery BTR 07 follow the instructions below Failure to follow these may result in explosion or injury Do not charge battery with methods other than instructed Do not discard battery into an incinerator or fir...

Page 8: ...he splicer from damage moisture vibration and shock during storage and transportation Follow the below listed instructions for handling electrodes Use only specified electrodes Set the new electrodes in the correct position Replace the electrodes as a pair Failure to follow the above instructions may cause abnormal arc discharge resulting in equipment damage or degradation in splicing performance ...

Page 9: ...5 Warning and Caution BLANK PAGE ...

Page 10: ...e available for single fiber and up to 4 fiber ribbons When using an AUTO mode the splicer counts the number of fibers and selects the adequate splice condition automatically Moreover the automatic arc calibration function is enabled when using AUTO mode The standard modes consists of SM for SMF ITU T G652 NZ for NZDSF ITU T G655 DS for DSF ITU T G653 and MM for MMF ITU T G651 Automatic arc calibr...

Page 11: ... SpliceMateTM is equipped with a LCD monitor manufactured in a quality controlled factory environment However some black dots may appear or red blue green dots may remain on the screen The screen brightness may not appear uniform depending on viewing angle Note that these symptoms are not defects but are natural on LCDs Recycling To recycle this product disassemble it first sort each part separate...

Page 12: ...ies Battery Pack BTR 07 DC Adapter DCA 02 OPTION Other Attached Items Carrying Case CC 17 Instruction Manual Arc Fusion Splicer FSM 11R Spare Electrodes 1 pair ELCT2 12 Battery Charger DCA 02 AC Adapter ADC 10 AC Power Cord Fiber Holder FH 50 OPTION ...

Page 13: ... UV 250um Single fiber Ny 900um Fiber protection sleeves 40mm up to 8 fibers FP 04 T 60mm 40mm FP 03 FP 03 L 40 Fiber holders FH 50 2 4 FH 50 250 FH 50 900 Fiber stripping tools Hot Jacket Stripper HJS 02 HJS 03 Primary coat stripper PS 02 Jacket stripper JS 01 Fiber cleaving tool Fiber Cleaver CT 30A Fiber cleaning tools Alcohol dispenser with Lint free tissue or gauze alcohol purity 99 or gauze ...

Page 14: ... used for upgrading the software Disconnect the USB cable before starting the splice operation Wind protector Tube heater LCD monitor USB port Power unit dock Release Knob V groove Holder guide Electrode Electrode cover Electrode Wind protector LEDs Objective lens Fiber Clamp Guide pin ...

Page 15: ...he motors Heat To start the heating process by the tube heater An LED icon is displayed during heating Reset To quit from any state except the heating process by tube heater After pressing this key the splicer will return to the ready state with a beep sound Cancel To change the X Y view image and display the data at the Ready Pause Finish state To quit from input data at the MENU state Enter To o...

Page 16: ... DC adapter 1 3 Battery operation Insert the battery into the power unit dock Check and make sure the remaining battery capacity is 20 or greater before operation If the battery capacity is less than 20 only a few splices can be made before the battery will be drained How to check remaining battery capacity Turn the splicer ON The battery is automatically identified as the power source and the rem...

Page 17: ...three hours or CHARGE LED does not turn ON the battery AC adapter or both need replacement Ask your service agent for further instruction 1 Connect the AC adapter ADC 10 to the battery charger BTC 04 The POWER LED turns ON green 2 Insert a battery pack in each slot The charge LED turns ON Red LED and battery charging begins 3 CHARGE LED turns off when the battery is fully charged Insert Insert ...

Page 18: ...oblem depending on environmental conditions To change the monitor brightness press or to change the value and press to confirm Splice Mode Select the appropriate splicing mode for the specific fiber combination The current mode is displayed on the READY screen Heat Mode Select the appropriate heating mode for the specific protection sleeve used The current mode is displayed on the READY screen The...

Page 19: ... in fiber holder If there is some bend in the section about 100 mm from the ribbon end straighten that section by rubbing the ribbon with fingers There are two types of fiber holders one for the left side and one for the right side It is necessary to place each holder so that the hinge of the fiber holder is towards the heater Open the lids of fiber holders and place the No 1 typically blue fiber ...

Page 20: ...coating Clean the fiber thoroughly with alcohol impregnated gauze or lint free tissue Use a fresh gauze or wipe for each ribbon Do not use gauze or wipe twice Use a high quality alcohol greater than 99 pure There may be cases in which adjoining fibers are arranged over each other due to adhesion of alcohol to their surfaces Gently flick the fiber ends to align the fibers Holder Base Top Clamp Fibe...

Page 21: ... thoroughly with alcohol impregnated gauze or lint free tissue Use a fresh gauze or wipe for each fiber Do not use gauze or wipe twice 6 2 Setting fiber in the fiber holder Set the fiber in the fiber holder aligning its stripped end with the top of the protruding portion of the fiber holder Use a high quality alcohol greater than 99 pure Stripping Cleaning Stripped end ...

Page 22: ...he fiber scrap container box automatically when the cutting lever is raised 8 When the cleaver is to be put up for the day press the cutting lever down until the stopper can slide into place to lock the anvil lever Cutting lever Stopper Do not put fingers in the driving area of the slide button as personal injury may result After pressing it half way down releasing the pressure on the cutting leve...

Page 23: ...tector Be careful to not touch the prepared fiber tips to maintain fiber end face quality Note the proper positioning of the fiber holders on the sticker next to the fiber guide Using Monitor Rear type do not change the setting direction of the fiber holder in Change of Operating Direction Page 49 Close Ribbon Fiber Electrode Fiber Holder Guide Pins ...

Page 24: ...han its set point or fiber chipping is detected the buzzer will sound and an error message will warn the operator The splicing procedure pauses The end face conditions below are used for visual inspection If observed remove the fiber from the splicer and repeat fiber preparation These visual defects may cause a faulty splice 2 After fiber inspection the splicer pauses and the offset gap distance a...

Page 25: ...the monitor it is strongly recommended to repeat the splice from the beginning Splice loss may be improved in some cases by additional arc discharges Press for an additional arc discharge re arc Splice loss estimate and splice check are performed again The splice point sometimes looks a bit fatter than other parts This is considered a normal splice and does not affect splice loss To change the thr...

Page 26: ... arc Clean fiber thoroughly or increase Cleaning Arc Time Bad fiber end face quality Check cleaver condition Bubbles Prefuse power too low or prefuse time too short Increase Prefuse Power and or Prefuse Time Fiber stuffing too small Increase Overlap Separation Prefuse power too high or prefuse time too long Decrease Prefuse Power and or Prefuse Time Fat Fiber stuffing too much Decrease Overlap Arc...

Page 27: ...Press at the Finish screen upon completion of the splice to display Memory Storage Menu Move cursor to Storage Comment Input and press to display Input Comment screen then input comment Press or open the wind protector at the Finish screen to store splicing results with comments Memory Storage Cancel Press at the Finish screen upon completion of the splice to display Memory Storage Menu Move curso...

Page 28: ...sic Operation or Cover opened FINISH State Automatic storage with same comment Storage with comment input Storage cancel Data storage No data storage Select Storage Comment Input Select Memory Storage Cancel ...

Page 29: ...be heater The HEAT mark is displayed during heating The buzzer beeps and the mark turns off when the heating cycle finishes 4 Open the tube heater lids and remove the protected fiber from the tube heater Apply tension to the fiber while removing it from the tube heater 5 Visually inspect the finished sleeve to verify that no bubbles or debris dust are present in the sleeve Keep holding fiber until...

Page 30: ...d and periodically cleaned during normal operation To clean the V grooves do the following 1 Open the wind protector 2 Clean the bottom of the V groove with an alcohol impregnated thin cotton swab Remove excess alcohol from the V groove with a clean dry swab 3 If the contaminants in the V groove cannot be removed with an alcohol impregnated thin cotton swab use a cleaved fiber end face to dislodge...

Page 31: ...protector 2 Clean the surface of the clamp chip with an alcohol impregnated thin cotton swab Remove excess alcohol from the clamp chip with a clean dry swab 1 4 Cleaning Fiber Cleaver If the circular blade or elastomer clamp pads of the fiber cleaver become contaminated the cleaving quality could degrade This may lead to fiber surface or end face contamination resulting in higher splice loss Clean...

Page 32: ...ses X axis and Y axis with an alcohol impregnated thin cotton swab Using the cotton swab start at the center of the lens and move the swab in a circular motion until you spiral out to the edge of the lens Remove excess alcohol from the lens surface with a clean dry swab 3 The lens surface should be clean and free of streaks or smudges 4 Turn on the power and make sure no smudges or streaks are vis...

Page 33: ... 1 5mm hex wrench remove the fiber scrap collector or the side cover 2 Using a 1 5mm hex wrench loosen the blade lock screw 3 Using a 1 5mm hex wrench loosen the adjuster lock screw 4 Using a 1 5mm hex wrench turn the adjuster clockwise so that the reference dot aligns with the next position mark Never attempt to rotate the adjuster more than 2 position marks 5 Tighten the adjuster lock screw 6 Ti...

Page 34: ...grade fibers including SMF ITU T G 652 NZDSF ITU T G 655 and DSF ITU T G 653 The amount of heat applied to the fiber is calibrated in real time by analyzing the cladding illumination during arc discharge and adjusting the arc current accordingly This splice mode does not require the operator to perform an arc calibration SM AUTO This splice mode counts the number of fibers and automatically select...

Page 35: ...form an arc calibration MM AUTO This splice mode counts the number of fibers and automatically selects the suitable splice mode then the fibers are automatically spliced This splice mode can splice standard MM fiber ITU T G 651 The amount of heat applied to the fiber is calibrated in real time by analyzing the cladding illumination during arc discharge then adjusting the arc current accordingly Th...

Page 36: ...for the type of fiber to be spliced 1 Press at READY PAUSE or FINISH state to open Splice Menu Select Splice Mode Menu and the Select Splice Mode menu is displayed 2 Move the cursor by pressing and press to select Splice mode Selected Splice Menu Select splice mode menu READY ...

Page 37: ...te Press to verify the fiber type is named in the specific splice mode How to erase a splice mode Splice modes can be erased Follow the steps below to erase the splice mode 1 Select the specific splice mode and press to go to Edit Splice Mode menu Select Fiber Type by pressing 2 Select BLANK and press twice to execute Mode No 1 cannot be erased Mode No 1 is automatically selected after erasing a s...

Page 38: ... Press to select parameter Press to change its values Press to accept changed values Below is a figure showing the Arc discharge conditions relationship between Arc power and Motor motion The conditions can be edited by changing the splicing parameters listed below Depending on the splice mode certain parameters cannot be changed A Prefuse Power B Arc Power C Cleaning Arc D Prefuse Time E Overlap ...

Page 39: ... error message is displayed if the fiber offset exceeds the selected threshold offset limit Cleave Limit An error message is displayed if the cleave angle of either the left or right fiber ends exceeds the selected threshold cleave limit Gap Dif Limit An error message is displayed if the gap between the left and right fiber ends exceeds the selected threshold gap limit Loss Limit An error message ...

Page 40: ...angle of either the left or right fiber ends exceeds the selected threshold cleave limit Gap Dif Limit An error message is displayed if the gap between the left and right fiber ends exceeds the selected threshold gap limit Loss Limit An error message is displayed if the estimated splice loss exceeds selected threshold loss limit Cleaning Arc Acleaning arc burns out micro dust on the surface of the...

Page 41: ... with optimized arc conditions To make the actual splice loss concur with the estimated splice loss set the minimum value to the minimum optimized actual splice loss MFD Sets MFD of the fibers This MFD value is taken into account for estimating splice loss Est Coef This amount influences the splice loss estimation When there is a difference between actual splice loss and estimated loss adjust this...

Page 42: ...selected character If an incorrect character is entered move the cursor to and press to highlight the character then input the proper character over it 2 Move cursor to FINISH and press on completion of entering characters In the case of Password input the next screen image is displayed if the correct password is entered If the input password is incorrect the previous screen image is displayed ...

Page 43: ... the database area for reference Copy the appropriate mode and paste it to the user programmable area The operator can edit the user programmable modes Data Base Parameter Description 40mmR For 40mm protection sleeves for ribbon fiber up to 4 such as Fujikura FP 04 T protection sleeve 40mmS For 40mm protection sleeves for single fiber such as Fujikura FP 03 L 40 60mmS For 60mm protection sleeves f...

Page 44: ... 2 2 Editing Heater Mode Tube heating conditions stored in heater mode can be edited or changed 1 Move cursor and select a mode to be edited in Select Heat Mode menu Press to display Edit Heat Mode menu 2 Press to move cursor to a parameter to be changed then press button to enter 3 Change value by pressing then press to enter Selected Select Heater Mode Menu Select the Select Heater Mode in the S...

Page 45: ...or 40mm protection sleeve for single fiber Heat Time Sets heating time from the beginning to the end cool down completion Heating time is automatically adjusted with atmospheric conditions such as ambient temperature Heating time may be longer or shorter than the Heat time set Heat Temp Sets heating temperature If Nylon coated fiber is used with 8mm cleave length the Nylon coating may melt if Heat...

Page 46: ...rocedure 1 Select Arc Calibration in Splice Menu to display Arc Calibration screen 2 Set prepared fibers in the splicer 3 The following is performed after pressing 1 Cleaning arc discharge The left and right fibers move forward The splicer performs the cleaning arc discharge 2 Gap setting The left and right fibers move closer and stop at the specified gap setting position 3 Arc discharge The splic...

Page 47: ...it even though arc calibration is not complete In some cases multiple iterations of arc calibration are needed until the calibration process is successfully completed and the Test Finished message is displayed Arc calibration can be considered almost complete if multiple iterations are completed without receiving the message A specific numeric threshold can be set so that Test Finished message is ...

Page 48: ... be prepared and placed into the splicer in advance Pause If Pause is set to ON splicing operation pauses when fibers are forwarded to the gap set position Cleave angles gap and offset are displayed during the pause Press key twice to display results table Fiber Image on Screen PAUSE FINISHED Setting the fiber image on the screen in Pause Finish statement X DATA Composite display X axis and result...

Page 49: ...erature Setting to OFF turns off arc power compensation due to pressure and temperature changes Fiber Image on Screen Auto Fiber Forward If Auto Fiber Forward is set to ON fibers are automatically moved closer to gapset as soon as wind protector is closed Cleave Shape Error Error message is displayed if the cleaved end face of either left or right fiber exceeds the selected threshold cleave shape ...

Page 50: ...plice Menu 5 Splice Result This splicer stores up to 1400 splicing results See Splicing procedure Page 20 for detail Contents of data stored are different depending on splicing mode AUTO mode Standard mode ...

Page 51: ...methods stated below One method is to move cursor to a specific memory number and press The other method is to press to display the Jump to screen Input a specific memory number and press Press to display the data 4 The selected splicing result is displayed For adding or editing comments press to display Input Comment screen Data stored in the splicer memory can be download by USB to a PC Consult ...

Page 52: ... to display All Memory Clear 3 Press to clear all splicing results in memory Clear selected splicing results in memory 2 Move cursor to Clear Partial Memory and press to display Partial Memory Clear 3 Input specific number begin number and end number of the splice result s to be cleared by pressing and to enter The selected splicing result s are cleared Cleared results are replaced with the remain...

Page 53: ...sults in memory Select the Clear Splice Memory in the Splice Memory Select the Clear All Memory Select the Clear Partial Memory Press to clear all splicing results in memory to enter The selected splicing result s are cleared Cleared results are replaced with the remaining splicing results Input specific number begin number and end number of the splice result s to be cleared by pressing and to ent...

Page 54: ...s for front monitor operation Rear is for rear monitor operation Refer to following Change of Operating Direction for details Power Save Sets the power saving mode Power On Option Sets the start up screen image and function This menu is secured by password Menu Lock Used for an administrator to limit functions available for the operator to select or change This menu is secured by password Other Op...

Page 55: ...tor Front operation This can be changed to Monitor Rear operation When Monitor Position is changed the direction of the arrow keys is reversed Changing monitor position 1 Select a monitor position in Monitor Position menu and turn off splicer and change the monitor angle 2 Turn splicer Power on Monitor Front Monitor Rear ...

Page 56: ...pe The type of power supply Monitor Shut Down Setting this function turns off the power supply to the LCD monitor if the splicer does not perform an action within a certain period of time Always set this function to a specific shutdown time when using the battery pack When the power supply to the LCD monitor turns off F mark is displayed at intervals of 5 seconds on the monitor Pressing any key tu...

Page 57: ...ts unauthorized editing and selecting of heater modes Splice Option Page2 to 5 Pages 2 to 5 in Splice Option Menu cannot be edited if this is set to Disable Splice Memory Clear Setting to Disable prevents unauthorized erasing of splice result data on the memory Cancel Data Storage Setting to Disable prevents unauthorized canceling of storage of splice result data on the FINISH screen Power Save Ed...

Page 58: ...rned on Max number of characters 15 Opening Title1 15 Opening Title2 To edit Title refer to Page 38 Title on how to input title Dust Check Setting to ON executes the Dust Check function when the power is turned on Password Lock from Beginning at the selected date a password is required at boot up in order to operate the splicer Password is the same as the Password for Other Option Page 55 ...

Page 59: ... 000 splices have been made the caution message prompting for electrode replacement is displayed when the power is turned on When the number of splices exceeds 2 000 the caution message changes to the warning message The number of arc discharges at which to start these messages is set in this field Maintenance Last Maintenance Next Maintenance The date of last maintenance and the scheduled date fo...

Page 60: ...c discharges When the number of arc discharges reaches a count of 1 000 a message prompting replacement of the electrodes is displayed immediately after turning on the power Continuing to use the electrodes will result in greater splice loss and reduced splice strength Replacement Procedure 1 Execute Replace Electrode in Maintenance Menu 1 2 Instruction messages will appear on the screen to turn o...

Page 61: ...e fiber set the fiber holder onto the splicer across both left and right V grooves Then press After executing the arc calibration the splicer will repeat the arc discharge 30 times in succession to stabilize the electrodes 6 Upon completion of repeated arc discharge the splicer executes an arc calibration again The operator should repeat arc calibration until the Test Finished message appears For ...

Page 62: ...licer begins to stabilize the electrodes 3 After completing stabilization always perform an additional Arc Calibration 3 Clearing Arc Count This function enables the stored number of arc discharges to be reset 1 Select the Arc Count Clear 2 As the confirmation screen Is it OK to clear appears press to clear 4 Set Calendar This function sets the date and time of the calendar in the splicer Operatio...

Page 63: ...ibration Automatically calibrates the motor speed 5 Arc Calibration Automatically calibrates the arc power factor and fiber splicing position 6 I O Port Check Checks for normal operation of the input and output terminals of the internal circuit 7 Memory Check Checks the memory of the internal circuit 2 Upon completion of all checks and adjustments a list of results is displayed If the splicer fail...

Page 64: ... Splicing Quality Page 26 for cleaning instructions 8 Motor Drive The two motors in the splicer can be manually operated individually During splicing the motors can also be operated by calling this menu in the PAUSE or FINISH state 1 Pressing changes motor selection The name of the selected motor is displayed in the upper section of the screen 2 Press Forward Backward to drive the motor in the des...

Page 65: ...scription Serial Num Displays the serial number of the splicer ROM Version Displays the version number of the software Arc Count Displays the number of arc discharges since electrode replacement Performing the function Replace Electrodes or Arc Count Clear resets this parameter to zero Total Count Displays the total number of arc discharges Last Maintenance Displays the date of last maintenance Ne...

Page 66: ...Error code if shown Situation when the error occurs Error Code Error Message Reason Solution 01 L Too Long Fiber The fiber end face is placed on the electrode centerline or beyond it Press and set the fiber end face between the electrode centerline and the V groove edge 10 R Too Long Fiber The cleave length bare fiber is too long Confirm the setting position of the stripped fiber end on the fiber ...

Page 67: ...not reach the splice point Press re position the fiber again with the end face closer to the electrodes 02 ZL Motor Overrun Forward The fiber is not set correctly at the bottom of the V groove The fiber is not located in the Camera s field of view Press and set the fiber again to seat it correctly at the bottom of the V groove 04 20 ZR Motor Overrun Forward The cleave length bare fiber is too shor...

Page 68: ...ectrode Replace function If this does not eliminate the problem consult your nearest sales agency The fiber stuff amount is insufficient If using the standard mode check the Overlap setting in the splice mode 10 Fiber Separation The pre fuse power or pre fuse time is set too high Check the Prefuse Power and Prefuse Time settings in the splice mode The fiber is not set correctly at the bottom of th...

Page 69: ...o Arc Discharge Arc Discharge did not occur Assure the electrodes are in proper position Replace the electrodes Consult your nearest sales agency 01 X Camera Trouble 10 Y Camera Trouble 13 11 XY Camera Trouble The Camera may be damaged Consult your nearest sales agency ...

Page 70: ...ean the fiber after cleaving to prevent dust on the fiber end face Avoid any contact with the fiber end face Bad fiber end face Check the condition of fiber cleaver If the blade is worn rotate the blade to a new position Confirm the Cleave Limit setting 5 0 or less is recommended Dust or dirt is on the V groove or the clamp chip Dust or dirt on the V groove or clamp chip causes poor fiber movement...

Page 71: ...is fixed and cannot be adjusted Too Tapering Fiber Too much fiber taper If using the taper splice function the error message may appear meaning the fiber is tapered too much Bad fiber end face Check the condition of fiber cleaver When the blade is worn rotate the blade Bubble Prefuse power or time is set too low If using a standard mode adjust or initialize Prefuse Power or Prefuse Time settings F...

Page 72: ...ery Charger blinks during battery recharge Atmospheric temperature is too high more than 40 C or the battery pack is charged under exposure to sunlight The battery pack has a fault or has reached the end of its service life Install a new battery pack If the LED blinks again after install contact your nearest sales agency 4 Method to change the power saving function settings Refer to Power Save fun...

Page 73: ... return to the normal state To change the length of time before the splicer switches to the power saving state refer to Power Save Page 52 5 Splicer power suddenly turned off without Low Battery message The power saving function is automatically enabled when using a battery pack The splicer turns the splicer power off after an extended period of splicer inactivity Press to turn on the splicer agai...

Page 74: ...ymbol to blink The tube heater is turned off if the HEAT key is pressed again If 2 seconds have gone by without pressing the HEAT key again the symbol stays on continuously and the heater returns to its normal state The symbol will disappear when the heat cycle is completed If the heating temperature does not reach its desired setting the symbol blinks and the alarm sounds If this happens contact ...

Page 75: ...t of calibrations it indicates Test Finished However this does not mean it is completely calibrated 4 Test Finished is never indicated after many repetitions in Arc Calibration Execute Stabilizing Electrodes function in Maintenance Menu If the splicer still does not indicate Test Finished replace the electrodes Refer to Replace Electrode section 5 No arc power change after Arc Calibration An inter...

Page 76: ... AC adapter is damaged during the warranty period Fujikura Ltd will not replace it free of charge 2 Before shipping the splicer Please consult your nearest sales agency first 3 Necessary information needed for repair Include documentation with the splicer informing us of the details listed below 1 Your full name section division company address phone number fax number and e mail address 2 Model na...

Page 77: ...coa Fujikura Ltd 260 Parkway East Duncan SOUTH CAROLINA 29334 U S A Tel 1 800 AFL FIBER Service 1 800 866 3602 Fax 1 864 433 5560 Service 1 800 433 5452 P O Box 3127 Spartanburg SC 29304 3127 URL http www aflfiber com Fujikura Asia Ltd 460 Alexandra Road 22 01 PSA Building Singapore 119963 Tel 65 6 2711312 Fax 65 6 2780965 URL http www fujikura com sg Fujikura Ltd Optical Fiber Equipment Departmen...

Reviews: