Fire dept GD6 Series, Руководство по установке Инструкции по эксплуатации Гарантия
"Fire dept GD6 Series" - Высококачественный продукт для пожарного департамента. Установочное руководство, инструкции по эксплуатации и гарантийные условия доступны для загрузки бесплатно на нашем веб-сайте. Скачайте руководство с manualshive.com и ознакомьтесь с необходимой информацией.
Поделиться
Скачать


Отзывы:
Нет отзывов
Похожие инструкции для GD6 Series

TBG 1100 ME
Бренд: baltur Страницы: 56

S2F70E
Бренд: Gastrodomus Страницы: 8

F20921B
Бренд: Viking Страницы: 10

17020010
Бренд: baltur Страницы: 64

WDB600
Бренд: Waring Страницы: 8

S.S. MINNOW BURNER
Бренд: BETHLEHEM Страницы: 2

ESF.2.B.G16
Бренд: EcoSmart Страницы: 28

OF Wide
Бренд: Vauni Страницы: 40

BGN 40 DSPGN-ME
Бренд: baltur Страницы: 72

BT 40 DSN 4T
Бренд: baltur Страницы: 124
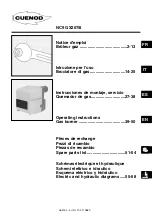
NC9 GX207/8
Бренд: Cuenod Страницы: 60

62434
Бренд: Weber Страницы: 44

XL Burner
Бренд: brasa Страницы: 14

Unigas RX90
Бренд: CIB UNIGAS Страницы: 48


