manualshive.com logo in svg
background image


49

 inch LED TV

49UT3E310B-T

Owner’s manual

Содержание 49UT3E310B-T

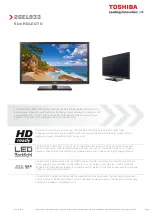
Страница 1: ...49 inch LED TV 49UT3E310B T Owner s manual ...

Страница 2: ...www finlux co uk 50327030 ...

Страница 3: ...ng Recorded Programmes 9 Recording Configuration 9 Media Browser Menu 10 FollowMe TV 10 CEC and CEC RC Passthrough 10 E Manual 10 TV Menu Contents 11 General TV Operation 15 Using the Channel List 15 Configuring Parental Settings 15 Electronic Programme Guide EPG 15 Teletext Services 16 Software Upgrade 16 Troubleshooting Tips 16 PC Input Typical Display Modes 18 AV and HDMI Signal Compatibility 1...

Страница 4: ...by qualified personnel before operating it any further Do not expose the TV to direct sunlight open flames or place it near intense heat sources such as electric heaters Listening in excessive volumes from earphones and headphones may cause hearing loss Ensure that no open flame sources such as lit candles are placed on top of the TV To prevent injuries this TV must be securely attached to a wall ...

Страница 5: ... Backlight located under the Energy Saving setting manually using Left or Right buttons on the remote Set as Off to turn this setting off Note Available Energy Saving options may differ depending on the selected Mode in the System Picture menu The Energy Saving settings can be found in the System Picture menu Note that some picture settings will be unavailable to be changed If pressed Right button...

Страница 6: ... long time Press OK to continue TV Control Buttons Operation P CH TV AV 1 Standby On button 2 Source button 3 Programme buttons 4 Volume buttons Press the Volume buttons simultaneously to view main menu and use Programme buttons to navigate and Volume buttons to change value Note The position of the control buttons may differ depending on the model Operation with the Remote Control Press the Menu ...

Страница 7: ...ights Reserved For DTS patents see http patents dts com Manufactured under license from DTS Licensing Limited DTS DTS HD the Symbol DTS or DTS HD and the Symbol together are registered trademarks of DTS Inc DTS Inc All Rights Reserved Information for Users on Disposal of Old Equipment and Batteries European Union only Equipment bearing these symbols should not be disposed as general household wast...

Страница 8: ... the electronic programme guide 22 Mute Completely turns off the volume of the TV 23 Info Displays information about on screen content 24 Exit Closes and exits from displayed menus or returns to previous screen 25 OK Confirms user selections holds the page in TXT mode views channel list DTV mode 26 Programme 27 Directional buttons Helps navigate menus content etc and displays the subpages in TXT m...

Страница 9: ...nels Mpeg4 H 264 or while in Media Browser mode output will not be available via the scart socket When using the wall mounting kit available from third party in the market if not supplied we recommend that you plug all your cables into the back of the TV before mounting on the wall Insert or remove the CI module only when the TV is SWITCHED OFF You should refer to the module instruction manual for...

Страница 10: ...emote control to continue and the Network Internet Settings menu will be displayed Please refer to Connectivity section to configure a wired or a wireless connection After the settings are completed press OK button to continue To skip to the next step without doing anything press the Rapid advance button on the remote After the initial settings are completed TV will start to search for available b...

Страница 11: ...use Media Browser functions such as viewing pictures playing video and music files and even play back the ongoing recording Timeshift Recording Press Pause button while watching a broadcast to activate timeshifting mode In timeshifting mode the programme is paused and simultaneously recorded to the connected USB disk Press Play button again to resume the paused programme from where you stopped Pre...

Страница 12: ...st menu When new CEC source device is connected it will be listed in source menu with its own name instead of the connected HDMI ports name such as DVD Player Recorder 1 etc The TV remote is automatically able to perform the main functions after the connected HDMI source has been selected To terminate this operation and control the TV via the remote again press Quick Menu button on the remote high...

Страница 13: ...f the picture by pressing Left or Right buttons Picture Zoom Sets the desired image size format Film Mode Films are recorded at a different number of frames per second to normal television programmes Turn this feature on when you are watching films to see the fast motion scenes clearly Skin Tone Skin tone can be changed between 5 and 5 Colour Shift Adjust the desired colour tone HDMI Full Range Wh...

Страница 14: ...een you can discover and connect the sound devices to your TV wirelessly via Bluetooth AVL Automatic Volume Limiting Sets the sound to obtain fixed output level between programmes Headphone Lineout When you connect an external amplifier to your TV using the headphone jack you can select this option as Lineout If you have connected headphones to the TV set this option as Headphone Please ensure bef...

Страница 15: ...essibility Displays accessibility options of the TV Hard of Hearing Enables any special feature sent from the broadcaster Audio Description A narration track will be played for the blind or visually impaired audience Press OK to see all available Audio Description menu options This feature is available only if the broadcaster supports it Netflix If this feature is supported by your TV you can view...

Страница 16: ...t Remote Press OK to open the Smart Remote menu screen Using this screen you can discover and connect the remote controller devices to your TV wirelessly via Bluetooth Installation Menu Contents Automatic channel scan Retune Displays automatic tuning options Digital Aerial Searches and stores aerial DVB stations Digital Cable Searches and stores cable DVB stations Analogue Searches and stores anal...

Страница 17: ... PIN number Default CICAM PIN This option will appear as greyed out if no CI module is inserted into the CI slot of the TV You can change the default PIN of the CI CAM using this option Note Default PIN can be set to 0000 or 1234 If you have defined the PIN is requested depending on the country selection during the First Time Installation use the PIN that you have defined Some options may not be a...

Страница 18: ...again to activate mix mode which allows you to see the teletext page and the TV broadcast at the same time Press once more to exit If available sections in the teletext pages will become colour coded and can be selected by pressing the coloured buttons Follow the instructions displayed on the screen Software Upgrade Your TV is capable of finding and updating the firmware automatically via the broa...

Страница 19: ...ed to the connected device Recording unavailable To record a programme you should first connect a USB disk to your TV while the TV is switched off You should then switch on the TV to enable recording feature If you cannot record try switching off the TV and then re inserting the USB device USB is too slow If a USB disk writing speed too slow to record message is displayed on the screen while start...

Страница 20: ...DVD Set top box etc If you do experience such a problem please contact your dealer and also the manufacturer of the source equipment PC Input Typical Display Modes The following table is an illustration of some of the typical video display modes Your TV may not support all resolutions Index Resolution Frequency 1 640x350 85Hz 2 640x480 60Hz 3 640x480 72Hz 4 640x480 75Hz 5 800x600 56Hz 6 800x600 60...

Страница 21: ...P 3gpp 3gp AVI avi MKV mkv H 264 3840x2160 30fps 1080P 60fps 135Mbps FLV flv MP4 mp4 mov 3GPP 3gpp 3gp MPEG transport stream ts trp tp ASF asf AVI avi MKV mkv Motion JPEG 720P 30fps 10Mbps AVI avi 3GPP 3gpp 3gp MP4 mp4 mov MKV mkv ASF asf VP8 1080P 30fps 20Mbps MKV mkv WebM webm HEVC 4K2K 60fps 160Mbps MP4 mp4 mov MKV mkv MPEG transport stream ts trp tp VP9 4K2K 30fps 100Mbps MKV mkv WebM webm Sup...

Страница 22: ...KHz 44 1KHz 48KHz 32Kbps 640Kbps AC3 ac3 AVI avi Matroska mkv mka 3GPP 3gpp 3gp MP4 mp4 mov m4a MPEG transport stream ts trp tp MPEG program stream DAT VOB MPG MPEG EAC3 32KHz 44 1KHz 48KHz 32Kbps 6 Mbps EAC3 ec3 3GPP 3gpp 3gp MP4 mp4 mov m4a MPEG transport stream ts trp tp MPEG program stream DAT VOB MPG MPEG AAC HEAAC 8KHz 48KHz AAC aac AVI avi Matroska mkv mka 3GPP 3gpp 3gp MP4 mp4 mov m4a MPEG...

Страница 23: ...nnectors by using DVI converter cable DVI to HDMI cable not supplied you can refer to the following resolution information 56Hz 60Hz 66Hz 70Hz 72Hz 75Hz 640x480 þ þ 800x600 þ þ þ 1024x768 þ þ þ 1280x768 þ þ 1280x960 þ 1360x768 þ 1366x768 þ 1280x1024 þ þ þ 1400x1050 þ 1600x900 þ ...

Страница 24: ...It is possible that some viewers may experience a seizure or epilepsy when exposed to certain conditions including flashing lights or images in TV or video games Sometimes certain symptoms can occur in unspecified conditions even if you do not have any previous history In such a case if you experience any of the following symptoms immediately stop watching the 3D TV and consult a doctor altered vi...

Страница 25: ... on the remote if available to open 3D Settings menu quickly Select Left Right Swap option using the Up or Down buttons Press Left or Right buttons to set as Left Right or Right Left 3D Settings 3D Mode You can customize the 3D mode settings to provide the best viewing experience Select one of the following modes to experience 3D image viewing Auto Automatically switches to 3D mode if 3D informati...

Страница 26: ...og TV Source FC Frame Compatible FP Frame Packed Connectivity Wired Connectivity To Connect to a Wired Network You must have a modem router connected to an active broadband connection Ensure that Nero Media Home software is installed to your PC for Audio Video Sharing function See Nero Media Home Installation section Connect your PC to your modem router This can be a wired or wireless connection C...

Страница 27: ...us 2 4 and 5 GHz bands is designed to increase bandwidth These are optimized for smoother and faster HD video streaming file transfers and wireless gaming Use a LAN connection for quicker file sharing between other devices like computers Thefrequencyandchanneldifferdependingonthearea The transmission speed differs depending on the distance and number of obstructions between the transmission produc...

Страница 28: ... to Wireless Display source A screen appears stating that the TV is ready for connection Open the sharing application on your mobile device These applications are named differently for each brand please refer to the instruction manual of your mobile device for detailed information Scan for devices After you select your TV and connect the screen of your device will be displayed on your TV Note This...

Страница 29: ...twork This standard allows you to view and play photos music and videos stored in the media server connected to your home network 1 Nero Media Home Installation The Audio Video Sharing feature cannot be used if the server programme is not installed onto your PC Please prepare your PC with the Nero Media Home programme For more information about the installation please refer to the Nero Media Home ...

Страница 30: ...tion of the internet portal Portal feature adds your TV a feature that allows you to connect a server on the Internet and view the content provided by this server over your Internet connection Portal feature allows you to view the music video clip or web content with defined short cuts Whether you can view this content without interruption depends on the connection speed provided by your internet ...

Страница 31: ...press the Back Return button The browser bar will appear Highlight the Speed Dial button and press the OK button Then select Add to Speed Dial option and press the OK button Fill in the blanks for Name and Address highlight OK and press the OK button to add Whilst you are on the site you wish to add to the Speed Dial list highlight the Opera button and press the OK button Then highlight Add to Spe...

Страница 32: ... of selected channel lists through this tab You can also navigate through channels by pressing on the selected channel on the EPG grid Please note that updating refreshing the EPG information may take a while depending on your network and web service quality Note Internet connection is required for WEB based EPG informations PORTAL This tab displays the Portal applications in scrollable view Unles...

Страница 33: ...rtal page by tapping on the Portal Launcher widget Note Internet connection is required This function will not work if a portal page is not in use Smart Remote Feature You can use your mobile device as a remote control for your TV once it has connected to the TV To use smart remote s full features tap on the Up arrow on the bottom left side of the screen Voice Recognation You can tap on the Microp...

Страница 34: ...al which is marked with the letter E or by the earth symbol or coloured green or green and yellow The wire which is coloured blue or black must be connected to the terminal which is marked with the letter N or coloured Black The wire which is coloured brown or red must be connected to the terminal which is marked with the letter L or coloured Red For continued protection against risk of fire repla...

Страница 35: ...English 33 ...
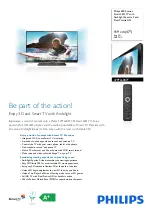
Отзывы: