Faro ls 420 he, User Manual
Looking for a user manual for the Faro LS 420 HE? Look no further! Download the comprehensive and detailed manual for free from our website. Gain essential knowledge about operating and maintaining this product effortlessly. manualshive.com is your go-to destination for hassle-free manual downloads.
Share
Download


Reviews:
No comments
Related manuals for ls 420 he

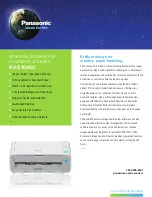
KV-S1046C
Brand: Panasonic Pages: 4
KV-S1026C
Brand: Panasonic Pages: 2

KV-S1025C-S
Brand: Panasonic Pages: 1

KV S2026C - Document Scanner
Brand: Panasonic Pages: 2

KV-N1058X
Brand: Panasonic Pages: 6

KV-S1045C
Brand: Panasonic Pages: 20

KV-S1027 M2
Brand: Panasonic Pages: 24

KV-S1045C
Brand: Panasonic Pages: 51

KV S2026C - Document Scanner
Brand: Panasonic Pages: 44

KV-S1026C J2
Brand: Panasonic Pages: 61

KV-S1015C
Brand: Panasonic Pages: 64

KV-1015C
Brand: Panasonic Pages: 67

KV-S1027C
Brand: Panasonic Pages: 75

KV-S1037X
Brand: Panasonic Pages: 114

KV-S1027C B2
Brand: Panasonic Pages: 123

KV-S1020C SERIES
Brand: Panasonic Pages: 117

KV-N1028X
Brand: Panasonic Pages: 160

KV-S1027C
Brand: Panasonic Pages: 255


