background image


NEXHO-NT – Internet Module 

Fitting and Operating Instructions 
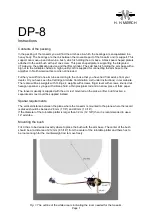


NOTICE


Please read these instructions carefully and keep them for future consultation. 

NEXHO range equipment must be installed by an accredited, qualified electrician 

and must observe Low Voltage Regulations. The installation as a whole should 

meet the provisions of aforesaid regulation. Any claim presented will be deemed 

invalid if the prevailing regulations have not been met. 

Summary of Contents for NEXHO-NT

Page 1: ...them for future consultation NEXHO range equipment must be installed by an accredited qualified electrician and must observe Low Voltage Regulations The installation as a whole should meet the provisions of aforesaid regulation Any claim presented will be deemed invalid if the prevailing regulations have not been met ...

Page 2: ...ature in the different rooms 19 How to activate the programs in the XP heaters 20 How to deactivate the programs in your XP heaters 20 How to personalize or modify the programs of your XP heaters 21 How to install a radiator in a repeater mode 21 WORKING WITH THERMOSTATS 24 How to install a thermostat module in the automation 24 How to change a name of a thermostat zone 25 How to change the temper...

Page 3: ...y in any given zone room from the nexho application 37 How to activate the programs in a light module 38 How to deactivate the programs in a light module 38 How to personalize the programs of your light modules 39 WORKING WITH BLIND MODULES 40 How to install a blind module in the automation network 40 How to delete a blind module from the list 41 How to open and close a blind 42 How to activate th...

Page 4: ...ene 50 How to activate one scene 51 How to change a general or a security scene 51 How to delete a general or a security scene 52 WORKING WITH ASSOCIATIONS 53 Why associate 53 How can we associate 53 How to make work during certain hours a day an association of light modules 54 TROUBLESHOOTING 56 It has been impossible to connect with X of the X modules installed in X56 Impossible to connect with ...

Page 5: ...s you can find in the internet Once the application is downloaded and configured together with the Internet Module NEXHO NT you will be able to surf through the different existing menus and control in an intuitive and user friendly manner controlling everything in your system modifying room temperatures turning the system on off changing the intensity of the lights in any given room programming th...

Page 6: ... NEXHO application from the respective applications shop Android Market Apple Store etc in your device Consult the instructions manual in your Smartphone if you are not familiarized with the downloading of applications from virtual shops You can also consult in our web page if you want to know the different compatibilities and existing versions for the NEXHO application Screw the radio frequency t...

Page 7: ...lation message does not appear please reset the application following the steps described in section HOW TO RESET THE NEXHO APPLICATION IN MY TERMINAL in this manual Using a small screw driver or any other alternative tool push the push button switch in the back of the Internet Module NEXHO NT After doing so a message will show in your device screen indicating the status of the synchronization of ...

Page 8: ...enu select Configuration If you haven t deactivated the password request this will be by default nexho Push notifications require internet connection Press now the Notifications The NEXHO system needs an start up installation in order to link the application in the device with the Internet Module NEXHO NT Moreover the NEXHO application protects with a password all the menus related with security a...

Page 9: ...es In order to configure a second installation or more please follow the next steps Synchronization with the NEXHO NT module is a critical process for the equipment to work correctly after the installation Please follow the next steps in the same order as described in order to avoid any type of problem during the initial installation Download the NEXHO application from the respective applications ...

Page 10: ... ready to start with the configuration of your installation with the NEXHO product range It is possible that in some of the mobile devices when starting up the NEXHO application it is not necessary to press the installation push button switch mainly some devices working with Android If you observe that when pressing the switch the application does not connect itself wait for a few seconds More tha...

Page 11: ...nd data to another application Now both applications will show the same names as the zones assigned originally Select the Configuration menu in the opening screen In some versions of this application this menu will appear as an icon in the shape of a tool at the top left part of the screen If this icon does not appear press the Menu button on your terminal In the submenu select Configuration If yo...

Page 12: ...r press the Menu button of your terminal In the submenu select Configuration If you haven t deactivated the password request button this will be by default nexho Now press the Password button and select the option Change configuration password Introduce the old password and accept Introduce the new password and accept Repeat the new password and accept again The password has now been changed How t...

Page 13: ...e by default nexho Now press the password button from the menu and deactivate the options you want from the password request menu Once you have configured all the system from the local network generated by the router you will then be able to configure your system in order to control it from outside your house from the internet The first thing we will need is to have internet access from this route...

Page 14: ... manual to find them Once you have accessed the configuration menu in your router look for a menu named PORT FORWARDING or FORWARDING or VIRTUAL SERVERS or NAT or APPLICATIONS AND GAMES or GAMIN This will depend on the make and model of your router Once in that menu please configure the following data Name Use name you want You can use the word nexho if you want to remember this configuration Port...

Page 15: ...14 ...

Page 16: ...15 The configuration of the router is now finished ...

Page 17: ...s will be by default nexho Now press the Communications button and activate the option Send data to an external server Please keep in mind that it can take a few minutes to finalize this configuration while all the installation data is being configured in the external server In order to reset the Internet Module NEXHO NT take the following steps Disconnect the network cable RJ45 that connects your...

Page 18: ...s can take up to a couple of minutes The reset will be finished when both green and red lights are permanently on Disconnect the power cable from your Internet Module Connect the data cable RJ45 to the Internet Module NEXHO NT and to your router Insert the feeder plug into the corresponding connector at the back of the Internet Module NEXHO NT and connect the feeder to the house mains Connect the ...

Page 19: ... Modules When the screen shows the message Waiting for the module select the following options from your XANA PLUS radiator Menu Configuration Install If all this has been done correctly in your applications screen you should see that the number of modules installed has changed from 0 to 1 The heater is now ready to be controlled from your NEXHO application WORKING WITH HEATERS How to install radi...

Page 20: ...ation In the NEXHO application go into the Heating menu and press the Configuration option If your request for password is not deactivated the configuration password will be by default nexho Press over Edit Zone and select the zone you want to rename Click on the blank space where the previous name appears and introduce the new name In the NEXHO application click on the Heating button Select the r...

Page 21: ... part of the screen where it gives you several options One Zone Various Zones and or All Zones Now select the option Activate Programs In the NEXHO application click on the Heating button and click the option Programs Select the zone room where you want to deactivate the programs Please keep in mind that you can select more than one room zone in the upper part of the screen where it gives you seve...

Page 22: ...en you want the program to begin the time when you want the program to stop and the temperature in the first timeframe of the programming menu Add the time frames you need with the buttons until you are covered with the 24 period per day you can program up to 6 time frames In the lower part of the screen you will be able to see a graphic bar in several colors each color being the different timefra...

Page 23: ...ront of Configuration 3 Press the OK button 4 Press the button 3 times thus positioning the indicator in front of Repeater 5 Press the OK button 6 Now the indicator will be positioned in front of Activate Press the OK button Now the radiator is working on repeater mode Note If when arriving to this step the indicator is positioned in front of the Deactivate Word this would mean that the repeater m...

Page 24: ...ate word this would mean that the repeater mode has already been deactivated Only activate this function when necessary and on the smallest number of radiators possible An excessive number of repeaters in the installation can give rise to substantial delays in the system s communications ...

Page 25: ...e that the number of modules installed has changed from 0 to 1 The thermostat is now ready to be controlled from your NEXHO application If you want to install another thermostat in an existing zone Select Edit Zone Select the zone that you have previously created where you want to install a new thermostat WORKING WITH THERMOSTATS How to install a thermostat module in the automation It is necessary...

Page 26: ...l be by default nexho Press over Edit Zone and select the zone you want to rename Click on the blank space where the previous name appears and introduce the new name In the NEXHO application click on the Heating button Select the room zone where you want to change the temperature Please keep in mind that you can select more than one room zone in the upper part where it gives you several options On...

Page 27: ...p in mind that you can select more than one room zone in the upper part where it gives you several options One Zone Various Zones and or All Zones Now select the option Deactivate Programs In the NEXHO application click on the Heating button and press the Programs option Select the zones rooms where you want to personalize the programs Please keep in mind that you can select more than one room zon...

Page 28: ... that you want the program to begin the time when you want the program to stop and the temperature in the first timeframe of the programming menu Add the time frames you need with the buttons until you have covered the 24 period per day In the lower part of the screen you will be able to see a graphic bar in several colors each color being the different timeframes you have programmed Press the but...

Page 29: ...tion Create Zone and name it When the screen shows the Waiting for the module message press the installation button in the thermostat you want to install The sensor will now be ready to work in your automation system WORKING WITH PRESENCE DETECTORS How to install a presence detector in the automation network It is necessary to go through this process in order to be able to control your presence de...

Page 30: ...ion Create Zone and name it When the screen shows the Waiting for the module message press the installation button in the detector you want to install The sensor will now be ready to work in your automation system WORKING WITH FLOODING DETECTORS How to install a flooding detector in the automation network It is necessary to go through this process in order to be able to control your flooding detec...

Page 31: ...e select the option Create Zone and name it When the screen shows the Waiting for the module message press the installation button in the detector The sensor will now be ready to work in your automation system WORKING WITH FIRE DETECTORS How to install a fire detector in the automation network It is necessary to go through this process in order to be able to control your fire detectors from your i...

Page 32: ...aiting for the module message press the OK button in the module you want to install to turn it on and press it again until you hear a bip and in the application screen you will see that it has been correctly installed The numeric module will now be ready to work in your automation system WORKING WITH NUMERIC MODULES How to install a numeric module in the automation network This operation will only...

Page 33: ...the option Add Modules While the screen shows the message Waiting for the module press the installation button from your power control module If all this has been done correctly in your applications screen you can see that the number of modules installed has changed from 0 to 1 The power control module is now ready to be controlled from your NEXHO application WORKING WITH POWER CONTROL MODULES How...

Page 34: ...Other Equipment menu and press the Configuration option If your request for password is not deactivated the configuration password by default will be nexho Press over Edit Zone and select the module you want to rename Click on the blank space where the previous name appears and introduce the new name In the NEXHO application select the menu Other Equipments and press the Configuration button If yo...

Page 35: ... programs Remember that you can select more than one zone with the options Various Zones All in the upper part of the menu Now select the option Activate Programs In the NEXHO application click on the button Other Equipment button and press the option Programs Select the zone where you want to deactivate the programs Remember that you can select more than one zone with the options Various Zones Al...

Page 36: ...an pick more than one day in the options Various days or All in the menu you will find in the upper part of the screen Insert the time when you want the program to begin the time when you want the program to stop and the command you want in the first timeframe of the programming menu Add the time frames you need with the buttons In the lower part of the screen you will be able to see a graphic bar...

Page 37: ...dules When the screen shows the message Waiting for the module press the installation button from your Light Module If all this has been done correctly in your applications screen you can see that the number of modules installed has changed from 0 to 1 The light module is now ready to be controlled from your NEXHO application WORKING WITH LIGHT MODULES How to install a light module in the automati...

Page 38: ...NEXHO application select the menu Lights and press the Configuration button If your request for password is not deactivated the configuration password by default will be nexho Press the Delete Zone button and select the module you want to delete In the NEXHO application select the menu Lights Select the zone room where you want to modify the light intensity Remember you can select more than one ro...

Page 39: ...one in the upper part where it gives you several options One Zone Various Zones and or All Zones Now select the option Activate Programs In the NEXHO application click on the Lights button and click the option Programs Select the zone room where you want to deactivate the programs Please keep in mind that you can select more than one room zone in the upper part where it gives you several options O...

Page 40: ...Remember you can pick more than one day in the options Various days or All in the menu you will find in the upper part of the screen Insert the time when you want the program to begin the time when you want the program to stop and the command for the first timeframe of the programming menu Add the time frames you need with the buttons In the lower part of the screen you will be able to see a graph...

Page 41: ... message Waiting for the module press the installation button from your Blind Module If all this has been done correctly in your applications screen you can see that the number of modules installed has changed from 0 to 1 Press the manual button to close the blinds and keep it pressed until the blinds are totally up and reach the end of the reel previously installed Then let go of the button WORKI...

Page 42: ...n you can see that the number of modules installed has increased in one unit Press the manual button to close the blinds and keep it pressed until the blinds are totally up and reach the end of the reel previously installed Then let go of the button The new blind module is now ready to be controlled from your NEXHO application In the NEXHO application select the menu Blinds and press the Configura...

Page 43: ...f blind opening In the NEXHO application click on the Blinds button and click the option Programs Select the zone room where you want to activate the programs Please keep in mind that you can select more than one room zone in the upper part where it gives you several options One Zone Various Zones and or All Zones Now select the option Activate Programs In the NEXHO application click on the Blinds...

Page 44: ...ms Select the days you want to personalize the programs Remember you can pick more than one day in the options Various days or All in the menu you will find in the upper part of the screen Establish the time and command of the first timeframe in the applications program menu Insert the time when you want the program to begin the time when you want the program to stop and the command for the first ...

Page 45: ...nd press again accept The security password has been modified Thanks to the Internet Module NEXHO NT you can receive security messages in your mobile phone free of charge through PUSH notifications To receive these notifications you must fulfill the following criteria You should own a device with the Apple IOS system or an ANDROID device with an active data account Please check with your phone com...

Page 46: ...e of this application versions it may appear as a tool icon at the top left part of the screen If this icon does not appear press the Menu button in your terminal A submenu will come out now select Configuration If your password request is not deactivated the configuration password by default is nexho Press now the Notifications button and then press Activate Push Notifications The system is now r...

Page 47: ...o the Security Systems menu Select the zone with intrusion sensors where you want to activate deactivate the security mode You can also select the option Activate sensors in every zone Press the intrusion alarm activate deactivate button in the selected zone If you have not deactivated it the security password by default is 0000 Remember when activating the security system you will have around 45 ...

Page 48: ...Select the option Configure New Scenes and in the new menu select Flooding If your password request is not deactivated the password configuration by default is 0000 Select the modules Lights Blinds and Other Equipment if you want them to activate when a flooding alarm occurs Example You could select Other Equipment an Electrovalve for cutting water supply and On The system would activate the power...

Page 49: ...tion select the Scenes menu and press the option Configuration If your password request is not deactivated the configuration password by default is nexho Select the option Configure New Scenes and in the new menu select Fire If your password request is not deactivated the configuration password by default is 0000 Select the modules Lights Blinds and Other Equipment if you want them to activate whe...

Page 50: ...HO application go to the Security Systems menu Select the zone with Fire or smoke detectors where you want to activate deactivate the security mode Press the flooding detectors activate deactivate button in the selected zone If you have not deactivated it the security password by default is 0000 How to activate deactivate the security mode against fires ...

Page 51: ... the menu Scenes and press the Configuration button If your password request is not deactivated the configuration password by default is nexho Select the option Configure New Scenes and in the next menu select General Click the white box in order to introduce the name you want to give to this scene Select the modules Lights Blinds and Other Equipment that you want to activate when you want to exec...

Page 52: ...d press the option Configure If your password request is not deactivated the configuration password by default is nexho Select the option Edit configured scenes and in the next menu select the scene you would like to change Select now the actions you have already configured and that you wish to eliminate and confirm its elimination If you want to add new actions to this scene just do it normally a...

Page 53: ...ation button If your request for password is not deactivated the configuration password by default is nexho Press the Delete Configured Scenes button In the next menu select the scene you want to delete con confirm its elimination How to delete a general or a security scene ...

Page 54: ... associate the functioning of one device after the signal of other device within the system select the equipment module you want to associate Lights Blinds Sockets Scenes or Heating Press the Configuration button If your request for password is not deactivated the configuration password by default is nexho Press the Edit Zone button and select the zone you want to associate The application will re...

Page 55: ...hosen activates Depending on the module you have chosen as starter of the association you can then choose one two four or nine actions to associate If the equipment you have chosen has various switches you will be able to pick those you want to associate with this action You can add several different associations to each equipment in the same switch or in other ones you have not used Depending on ...

Page 56: ...top part of the menu Now select the days you want to note the times of associations Remember that you can select more than one day in the options Various days or All in the top part of the menu Introduce the starting time ending time and the command for the first timeframe of the application program Add as many timeframes as you consider with the and buttons In the lower part of the screen you wil...

Page 57: ...select the zone that is giving you problems and check that the number of installed modules is the same as the real number of modules installed in that area If the number does not match delete the zone and reinstall the modules that belong to that zone Some of the modules could be too far away from the Internet module Try if possible to locate the Internet module in a central part of the house so t...

Page 58: ...es not have internet connection and the device with the NEXHO application is not connected to the local Wi Fi The router has internet connection but the device with the NEXHO application is not connected to the local Wi Fi and does not have internet access The device does have internet connection and the same goes for the router but it s trying to connect to your house through internet and you hav...

Page 59: ...rating consumption 1A The NEXHO NT does not need any special maintenance care Only a few small instructions need to be followed as regards is preservation Clean the Remote s casing with a slightly damp cloth Do not use abrasive chemical products when cleaning the NEXHO NT TECHNICAL DETAILS Care and maintenance ...

Page 60: ... its own discretion to the customer at no charge Warranty is limited to the repair or substitution of the product FARHO warranty does not cover 1 Improper installation connection operation maintenance and or storage 2 Minor defects not interfering with the operation of the product possible indemnities misuse or improper usage 3 Abnormal or unusual operating conditions or application outside the sp...

Page 61: ...of the applicable national law nor to exclude its liability for matters that under those rules may not be excluded The buyer waives the guarantee provided for in this Article in the case of failing to meet at least one of their contractual obligations particularly with respect to payment terms Any warranty repairs in or out of warranty must be claimed in writing by the purchaser to the company FAR...

Page 62: ...ANY PROBLEM WITH YOUR NEXHO PRODUCT WILL ONLY BE ATTENDED BY THE DISTRIBUTOR IN YOUR COUNTRY ALTERNATIVELY YOU CAN CONTACT OUR FACTORY IN SPAIN ventas farho com ...

Page 63: ......

Page 64: ... 985 514 605 Fax 34 985 514 164 33438 Tabaza Asturias www FARHO com NEXHO SYSTEM FOR HOME COMFORT NEXHO NT Distributed by Purchase date of 20 FITTER Name Town City Home address Telephone USER Name Town City Home address Telephone In service No Fitter s stamp To be completed by the fitter ...

Reviews: