fantastic furniture SUNBURY, Assembly Instructions Manual
Introducing the Assembly Instructions Manual for fantastic furniture SUNBURY! This comprehensive manual provides step-by-step guidance for assembling your SUNBURY product effortlessly. Download the manual for free from manualshive.com, ensuring a hassle-free assembly experience. Get ready to transform your space with this durable and stylish furniture piece!
Share
Download


Reviews:
No comments
Related manuals for SUNBURY
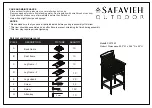
PAT7043
Brand: Safavieh Outdoor Pages: 2

BELA
Brand: Bomimi Pages: 23

355-120
Brand: RH Baby&child Pages: 12

JCB Junior Bed
Brand: Happybeds Pages: 4

2106050110
Brand: Maxi-Cosi Pages: 164

TRAMA Cometa
Brand: Bebecar Pages: 20

TRAMA ARC
Brand: Bebecar Pages: 28

FLOATING CLOUD SEAT
Brand: Hangpod Pages: 2

PurAir
Brand: purflo Pages: 11

Take-A-Seat
Brand: Chicco Pages: 15

TC52-6337
Brand: Bell'O Pages: 24

Petit children's chair 114
Brand: TON Pages: 16

ADDISON SWING SC-160-2NGS
Brand: Jaclyn Smith Pages: 9

BSK120
Brand: Treasure Garden Pages: 4

UM810 Series
Brand: Treasure Garden Pages: 8

Country Living AZB00205
Brand: Country Living Pages: 2

162 8471
Brand: PAIDI Pages: 4

Hudson 3 Drawer Changer
Brand: Babyletto Pages: 19


