

Unified Security Gateway Quick Start Guide
© 2001—2008, FaceTime
®
Communications, Inc.
1
2
Unified Security Gateway Quick Start Guide
© 2001—2008, FaceTime
®
Communications, Inc.
Unified Security Gateway Quick Start Guide
© 2001—2008, FaceTime
®
Communications, Inc.
3
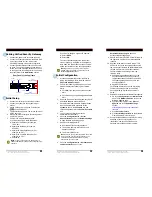
Cabling Unified Security Gateway
1. Connect the power cord to the power source.
2. Connect an Ethernet cable from the SPAN/TAP
port of your switch to Line1, which is the
monitoring interface of the security appliance.
3. Connect another Ethernet cable from the LAN
to Line2. The security appliance uses this port
for the proxy and management tasks. You need
to configure network settings for this port using
the steps listed in the
Initial Setup
section
.
Power
Socket
Mouse
Keyboard
Video
LINE 1
(Monitor Interface)
LINE 2
(Management/Proxy Port)
Initial Setup
1. Connect a monitor to the video input socket.
2. Connect a keyboard to the keyboard input
socket.
3. Switch on the power using the Power button
on the front panel.
The Boot screen appears. The screen times-out
after 3 seconds.
4. When prompted to configure the management
port (eth1), press
Y
.
5. Perform one of the following actions:
If you want to assign a static IP address:
a.
Specify an IP address (for example,
10.0.2.201).
b.
Specify the Netmask (for example,
255.0.0.0).
c.
Specify the default gateway (IP) (for
example, 10.0.0.1).
d.
Specify the Primary DNS server (for
example, 10.0.2.1).
e.
Select
OK
.
If you want to assign a dynamic IP address:
a.
Select
DHCP
.
b.
Select
OK
.
The Linux terminal displays the IP address—
static or dynamic—assigned to the appliance.
Note down this IP address to access the Web-
based user interface of the security appliance.
Initial Configuration
1. Access the administrative user interface by
typing the following URL in the Web browser:
https://<IP Address>:8443/
2. Perform the following actions when your web
browser displays the following SSL-related
alerts:
Click
OK
if you see the Secure Connection
alert.
Click
Yes
when you get the digital certificate
alert.
3. Read the End User License Agreement (EULA)
and click
Accept
to accept the EULA.
4. On the System Administrative Password page,
type the administrative password for the
sysadmin
user in the
Password
box and
confirm the password in the
Confirm Password
box.
5. Log on to the user interface with the
administrative credentials.
6. Go to the
Configuration
tab »
Server
Administration
panel » click
Network Settings
to open the Network Settings page.
7. Specify the following details:
Host Name of the security appliance.
The domain name to which the security
appliance belongs.
The Primary DNS server.
8. Go to the
Configuration
tab »
Authentication
and Authorization
panel » click
Authentication Settings
to open the
Authentication Settings page.
9. Specify the Primary Domain Controller to which
the appliance must send user authentication
requests.
10. Upgrade to the latest Firmware image. This
allows you to run the security appliance using
the most recent release with the latest Malware,
IM, and P2P protocols, and report updates.
To obtain firmware updates, perform the
following steps:
a.
Download the update package on to the
security appliance. You can schedule a
regular download of updates or download
the update package manually on to the
security appliance.
b.
Upgrade the firmware.
For detailed instructions, see the ‘Obtaining
Firmware Updates’ section in the
Unified
Security Gateway System Administrator’s
Guide
.
11. Download the latest Anti-Malware filter updates:
a.
Go to the
Configuration
tab »
Maintenance
panel. Click
Malware Updates
to open the
Malware Updates page.
b.
Type the following URL in the
URL for
Updates
box in the
Update Settings
section:
http://usg.facetime.net/usg/urlupdates/
ftupdate
c.
Click
Get Latest Filters
.
d.
Click
Install & Restart Now
on the Malware
Filters Updates: Get Latest
page.
12. Exempt trusted destination servers from being
analyzed by the security appliance. For
instructions, see to the
Unified Security
Gateway System Administrator’s Guide
.
Rear Panel of the Appliance
Note:
If you do not specify an IP address, the IP
address
192.168.1.3
is automatically assigned to the
appliance.
Note:
Ignore the Login prompt in the terminal
window and proceed with the instructions in the
Initial Configuration
section.
Note:
After you specify the Primary DNS server and
the domain name for the security appliance, the
FaceTime webfiltering database starts getting
downloaded on to the system.


