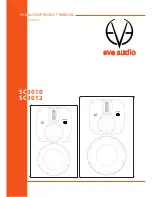
background image

EVE

 AUDIO PRODUCT MANUAL

SC

3012

SC

3010

NOV 2015

Summary of Contents for sc3010

Page 1: ...EVE AUDIO PRODUCT MANUAL SC3012 SC3010 NOV 2015 ...

Page 2: ...t into your outlet consult an electrician for replacement of the obsolete outlet 10 PROTECT the power cord from being walked on or pinched particularly at plugs convenience receptacles and the point where they exit from the apparatus 11 ONLY USE attachments accessories specified by the manufacturer 12 USE ONLY with the cart stand tripod bracket or table specified by the manufacturer or sold with t...

Page 3: ...e environment or human health from uncontrolled waste disposal recycle it responsibly to promote the sustainable reuse of material resources To return your used device please use the return and collection systems or contact the retailer where the product was purchased They can take this product for environmental safe recycling 22 The lightning flash with arrowhead symbol within an equilateral tria...

Page 4: ...o the product and void the products warranty The use of AC Plug Adapters is cautioned because it can allow the product to be plugged into voltages in which the product was not designed to operate If the product is equipped with a detachable power cord use only the type provided with your product or by your local distributor and or retailer If you are unsure of the correct operational voltage pleas...

Page 5: ...olume Mode 10 3 6 Settings Menu 11 3 7 Filters 12 3 8 Low Filter 12 3 9 High Filter 12 3 10 Desk Filter 13 3 11 LED Mode 14 3 12 Saving Your Settings 14 3 13 Power Switch 14 3 14 DIP Switches 15 3 15 Mains Voltage Selector 15 3 16 Power Connector IEC 15 4 POSITIONING 16 4 1 Speaker Positioning Rubber Feet 16 4 2 Height and Distance 17 4 3 Stereo Setup 18 4 4 Mixer Workplace Reflections 19 4 5 Room...

Page 6: ...reproduction Both SilverCone drivers are equipped with our very low distortion copper cap magnet system Especially developed for our main monitors the Air Motion Transformer AMT RS6 is 2 5 times bigger than the RS1 RS2 and RS3 units and it is a crucial part of the system as it helps to couple the middle and high frequencies with great precision Our team was able to engineer the RS6 to set its cros...

Page 7: ...e as low as possible 2 3 Powering On Engage the Power switch on the rear side of the loudspeaker to turn it on or off The LEDs around the Volume control on the front panel will light up clockwise If the LED on the right end is dimly lit this indicates that the loudspeaker is in Standby mode Press the Volume control to turn the loudspeaker on If you turn the Volume control counter clockwise until t...

Page 8: ...anced sources with XLR connectors or unbalanced sources with RCA connectors Pin assignment XLR 1 Shield 2 hot 3 cold Pin assignment RCA Center conductor Signal Ring Shield Both analog inputs can be used simultaneously whereby the signals are summed Depending on the setting of the Max Input DIP switch on the rear panel the maximum level of the source signal should not exceed 7 dBu or 22 dBu see 3 1...

Page 9: ...yourself after the monitors have been installed follow these steps Remove the four screws of the mid high plate Turn the whole tweeter mid driver section 90º The direction does not really matter Hold the tweeter mid driver section by the screws when handling it Fasten the tweeter mid driver section again with the screws Tighten the screws only a bit tighter than you would by hand 1 3 2 The whole p...

Page 10: ...ent The maximum input level for balanced XLR and unbalanced signals RCA is 7 dBu or 22 dBu depending on the position of the Max Input switch on the rear panel see 3 14 DIP Switches on page 15 Higher levels produce distortion due to the overloading of the analog to digital converter Given that some professional studio devices can produce in excess of 22 dBu the LED ring will start blinking whenever...

Page 11: ...d volume 3 6 Settings Menu Press the control once to enter the Settings menu Here you can set three different filters Low Desk High as well as the LED ring s behavior The LED of the currently active function will blink Turn the control to choose the filter or LED mode desired The blinking LED indicates the function selected while the steady on LED indicates the value assigned to that function Pres...

Page 12: ...ilters as little as possible 3 8 Low Filter 0 5 3 5 3 100 1k 10k dB Hz The Low Shelf Filter allows you to boost or attenuate frequencies below 300 Hz in 0 5 dB steps Use this filter whenever the acoustics of your room cause problems in the low frequency range If the low frequencies are boosted by the room you can attenuate them with the Low Shelf Filter The reasons for this boost could be the room...

Page 13: ...ngposition is too close to the loudspeakers or the room has reflective surfaces it is reasonable to attenuate the high frequencies 3 10 Desk Filter 0 5 3 5 3 100 1k 10k dB Hz The Desk Filter has two functions When turned down it acts as a narrow band EQ set to 160 Hz SC3010 and SC3012 The reflections of mixers and similar surfaces usually result in the boosting of low mids With the Desk Filter you...

Page 14: ...rresponding to the selected volume level light up dimly The louder the signal the further up the dimly lit up point moves Intermediate steps are indicated by the lighting of two adjacent LEDs The level ranges from 60 dB to 10 dB taking 0 dB as reference point 3 12 Saving Your Settings All settings on the front and rear panels are automatically saved The loudspeakers can be disconnected anytime wit...

Page 15: ...t used No Function Max Input This DIP Switch determines the input sensitivity of the SC3010 and SC3012 In a studio environment the reference level 0 dB ought to be 4 dBu In such environments leave the setting at 7 dBu However some studio gear allow much higher output levels If it were impossible to reduce the output level of such devices set the switch to 22 dBu The 7 dBu setting ought to be suita...

Page 16: ...VE Audio monitors can also be flush mounted in a wall in which case there should be enough air flow This is important to keep the electronic components cool but also to allow for the best performance of the bass reflex ports We recommend to keep at least 3 cm 1 in to the sides and top The SC3010 and SC3012 monitors were designed to be placed vertically or horizontally The best position in each cas...

Page 17: ...sible tilt the monitors so that the tweeter is directed to your ears The ideal distance between the monitors and the listening position is 2 3 5 m 7 11 ft for both SC3010 and SC3012 These values are only meant as a reference and depend a lot on the characteristics of the room In live rooms you will be forced to reduce the distance while in dead rooms the distance to the loudspeakers can be larger ...

Page 18: ...d form an equilateral triangle Try the following 60 Establish the ideal distance to the listening position see 4 2 Height and Distance on page 17 Place the monitors in such a way that the distance from each other and to the listening position is the same Turn both monitors so that their front panels are pointed towards the listening position all angles of the stereo triangle should be 60º ...

Page 19: ...ng studio with a mixing desk and meter bridge or in a desktop environment hard surfaces can produce annoying reflections that alter the natural reproduction of the loudspeakers Especially in the low mid frequency range If this is the case with your setup use the Desk Filter of your EVE Audio monitors to reduce the impact of the reflections from the desk or mixer ...

Page 20: ...om acoustics is a science in itself and it is unfortunately out of the scope of this manual However we have put together a short bibliography for you Recording Studio Design by Philip Newell ISBN 0 240 51917 5 Home Recording Studio Build it like the Pros by Rod Gervais ISBN 1 59863 034 2 Studio Akustik in German by Andreas Friesecke ISBN 978 3 932275 81 4 Praktische Raumakustik in German by Thomas...

Page 21: ...118dB Number of Amplifiers 3 3 Output Power woofer 800W 800W Output Power mid driver 250W 250W Output Power tweeter 250W 250W Protection limiter Yes Yes Setting Options Volume inf 6dB inf 6dB High Shelf Filter 5db 3dB 3kHz 3kHz Desk Filter Boost 0db 3dB 80Hz 80Hz Desk Filter Cut 5db 0dB 160Hz 160Hz Low Shelf Filter 5db 3dB 300Hz 300Hz LED brightness setting Yes Tes Volume Lock DIP switch Yes Yes F...

Page 22: ...5 of the FCC Rules These limits are designed to provide reasonable protection against harmful interference in a residential installation This equipment generates uses and can radiate radio frequency energy and if not installed and used in accordance with the instructions may cause harmful interference to radio communications However there is no guarantee that interference will not occur in a parti...

Page 23: ... Stenz Managing Director EVE Audio 7 WARRANTY The manufacturer warranty is valid for a period of two 2 years after the date of purchase The warranty covers repair costs labor and spare parts product replacement if applicable and return transport within the country where the product was bought The warranty will be void if any of the following applies Damages have been caused by incorrect installati...

Page 24: ...reserves the right to make changes in or additions to the information provided at any time EVE AUDIO GmbH Ernst Augustin Str 1a 12489 Berlin Germany 4 9 3 0 6 7 0 4 4 1 8 0 4 9 3 0 6 7 0 4 4 1 8 8 info eve audio com www eve audio com facebook com EveAudio twitter com EveAudio ...

Reviews: